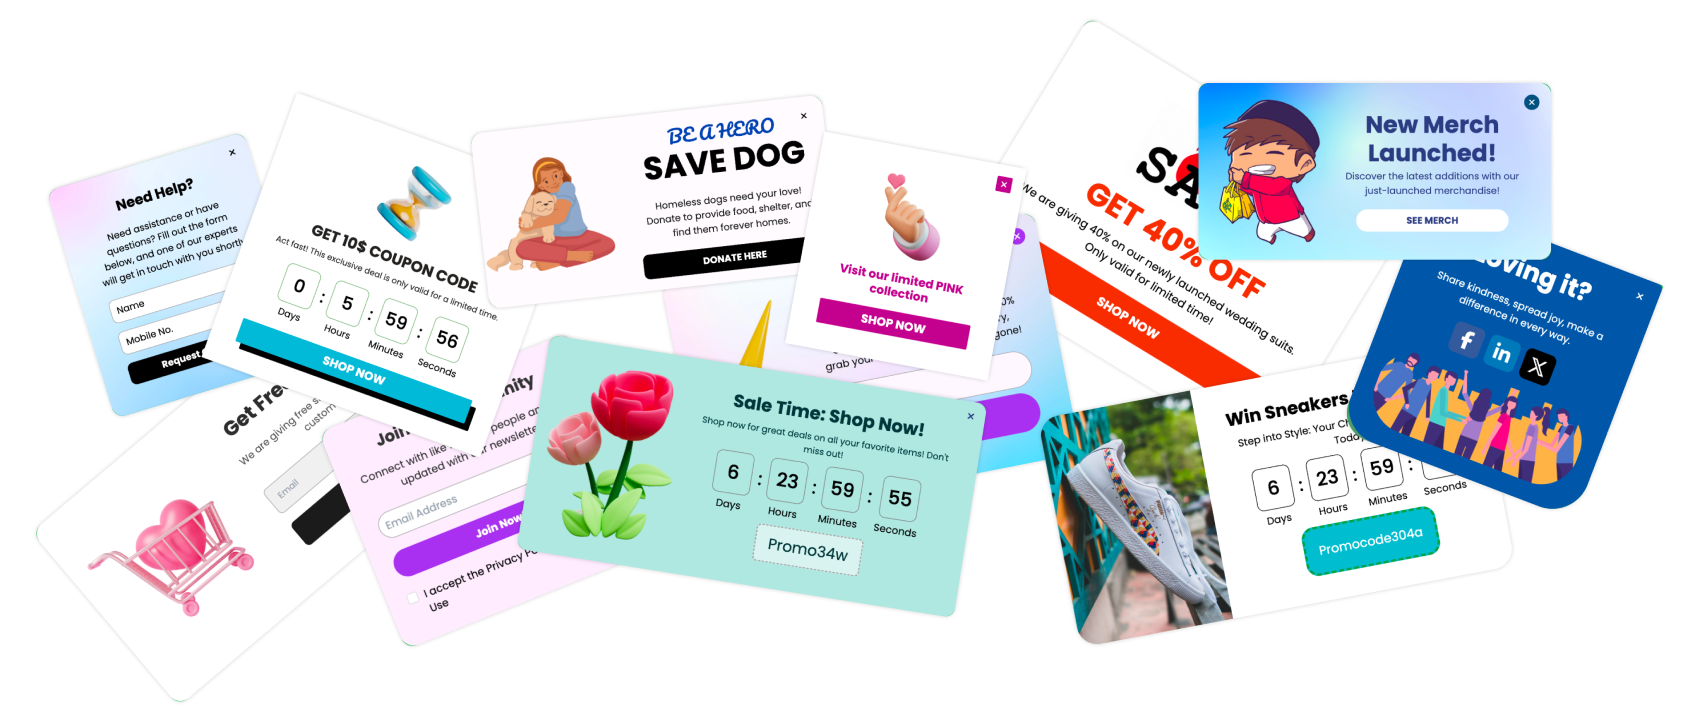
If you're using Divi website builder in WordPress, you might find creating customized and advanced popups a bit tricky.
There are so many plugins available, it can be tough to find one that truly meets your marketing needs.
I designed Poper to be a simple and powerful solution to this problem. In this guide, I'll show you how to create a Divi Popup using Poper.
Divi is a versatile and powerful WordPress theme used by millions of websites worldwide. However, while Divi excels at design flexibility, it lacks built-in popup functionality, making it difficult to create conversion-focused popups.
Step 1: Sign Up for a Poper Account
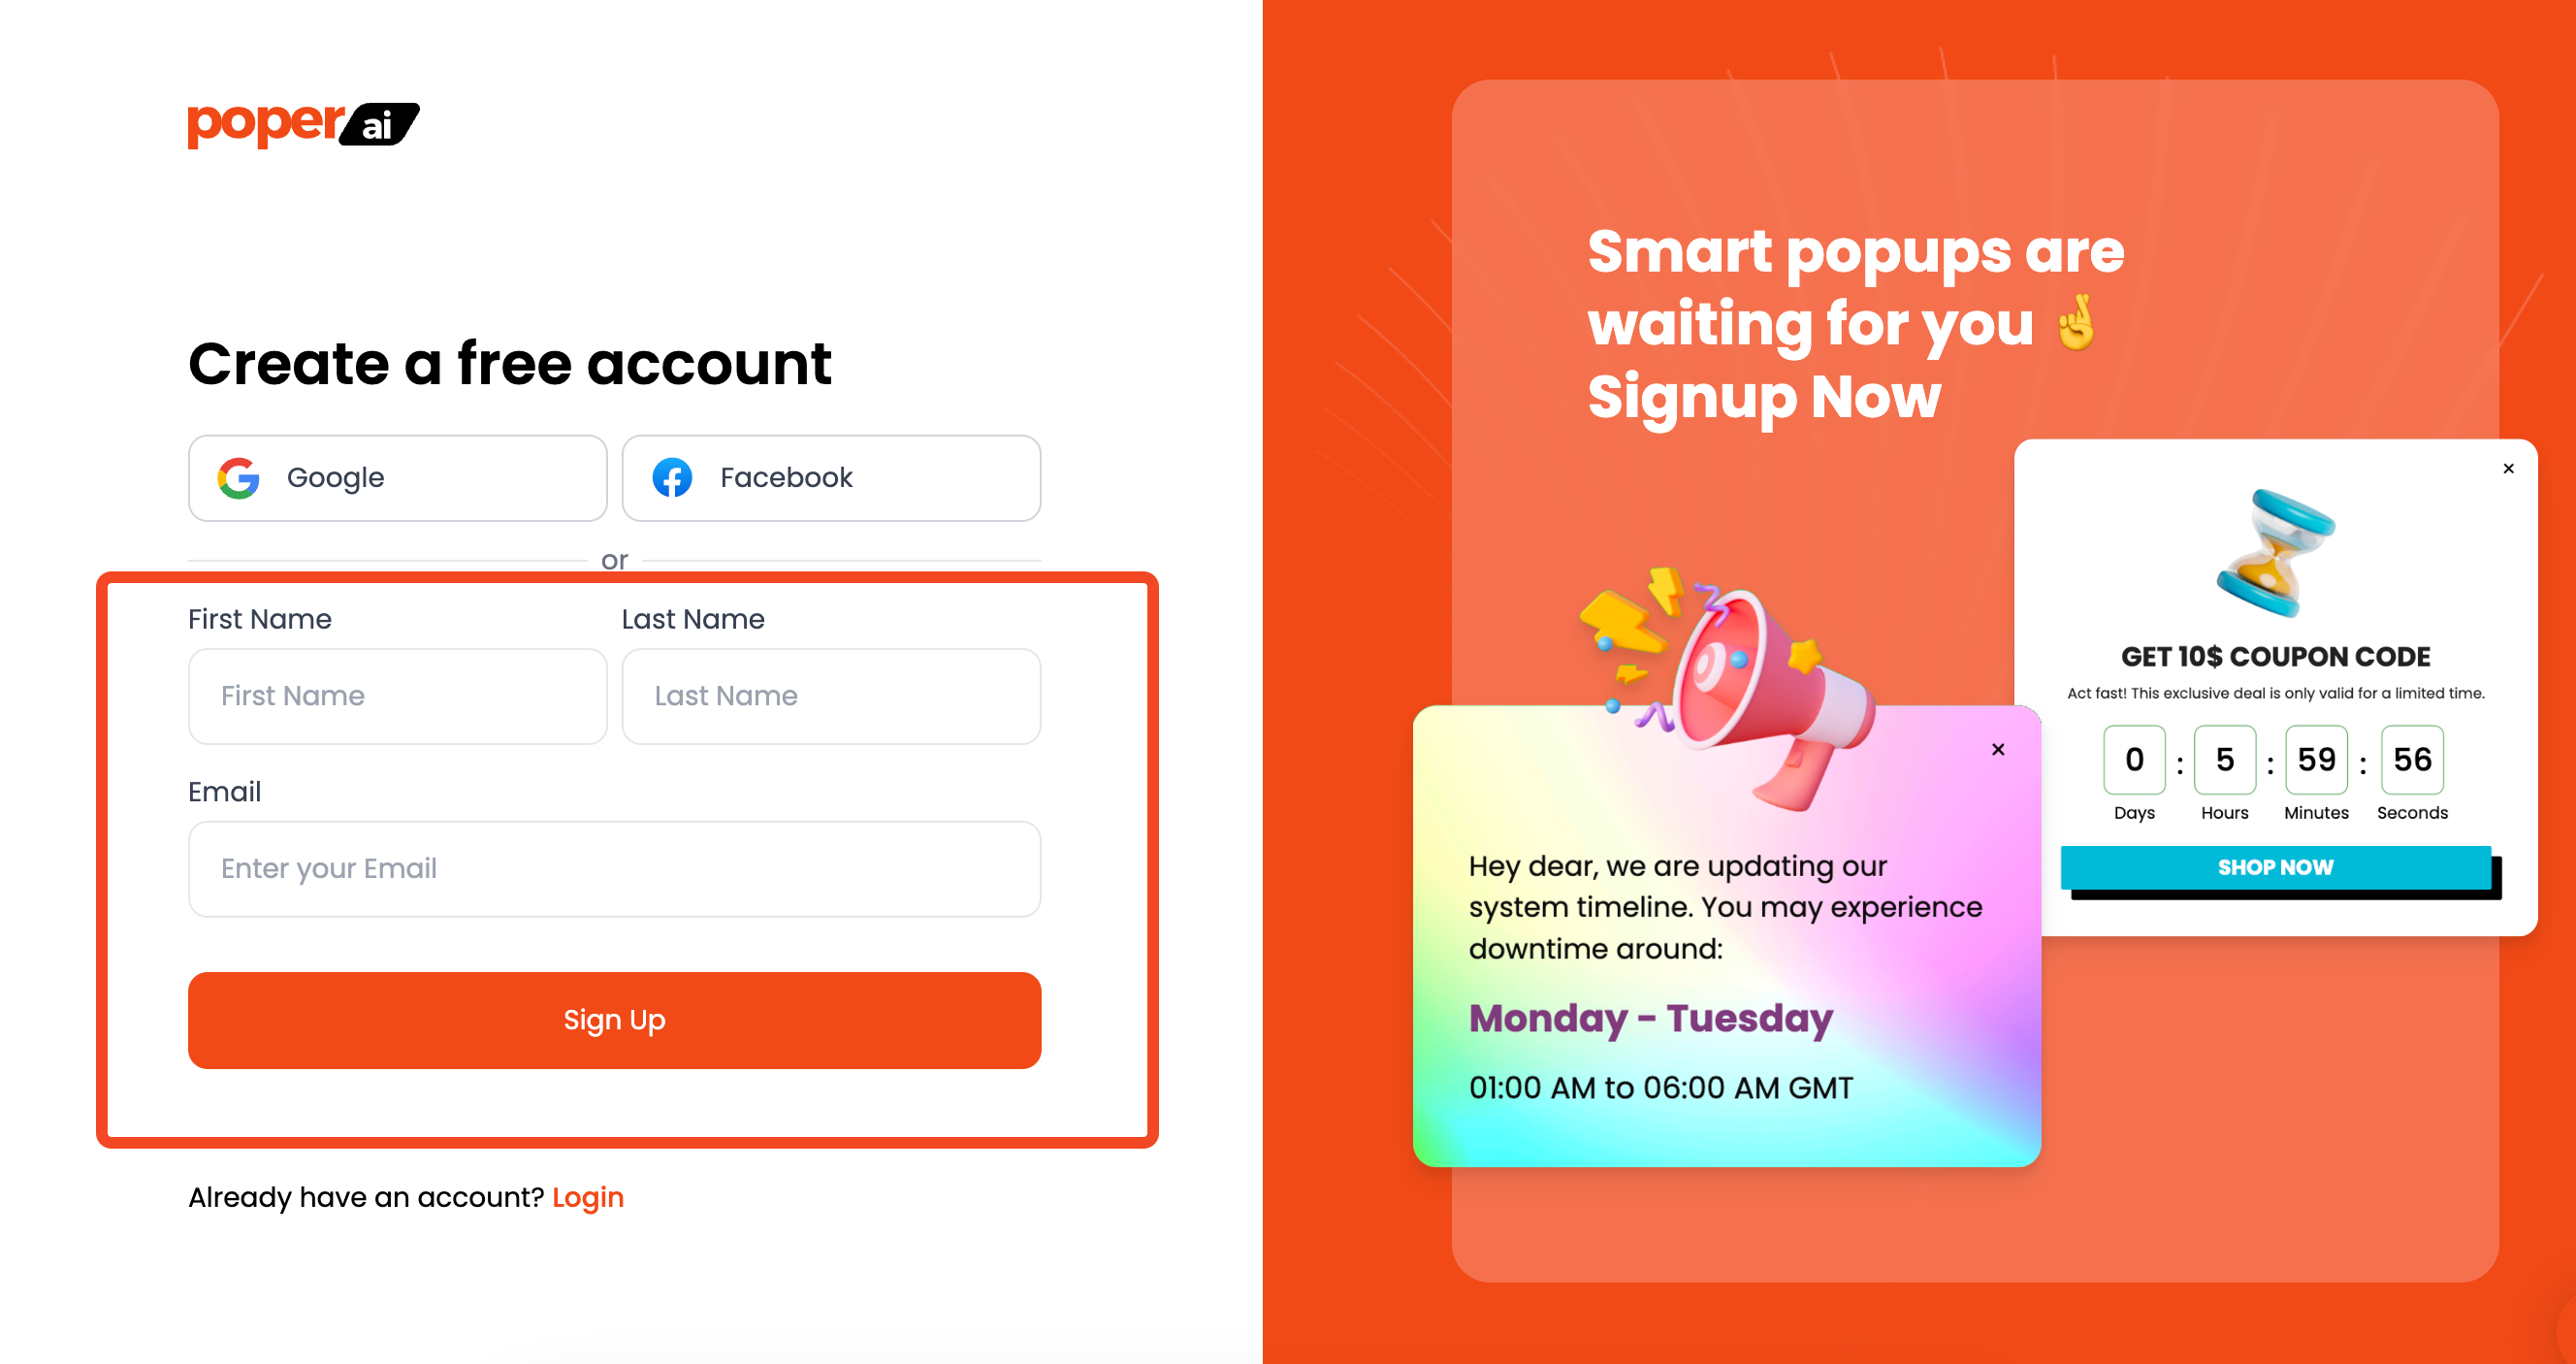
First things first, you'll need a Poper account. Sign up at Poper and you'll be ready to create popups that connect seamlessly with your Divi website, and more.
Step 2: Add Your Website Domain and Create a New Popup
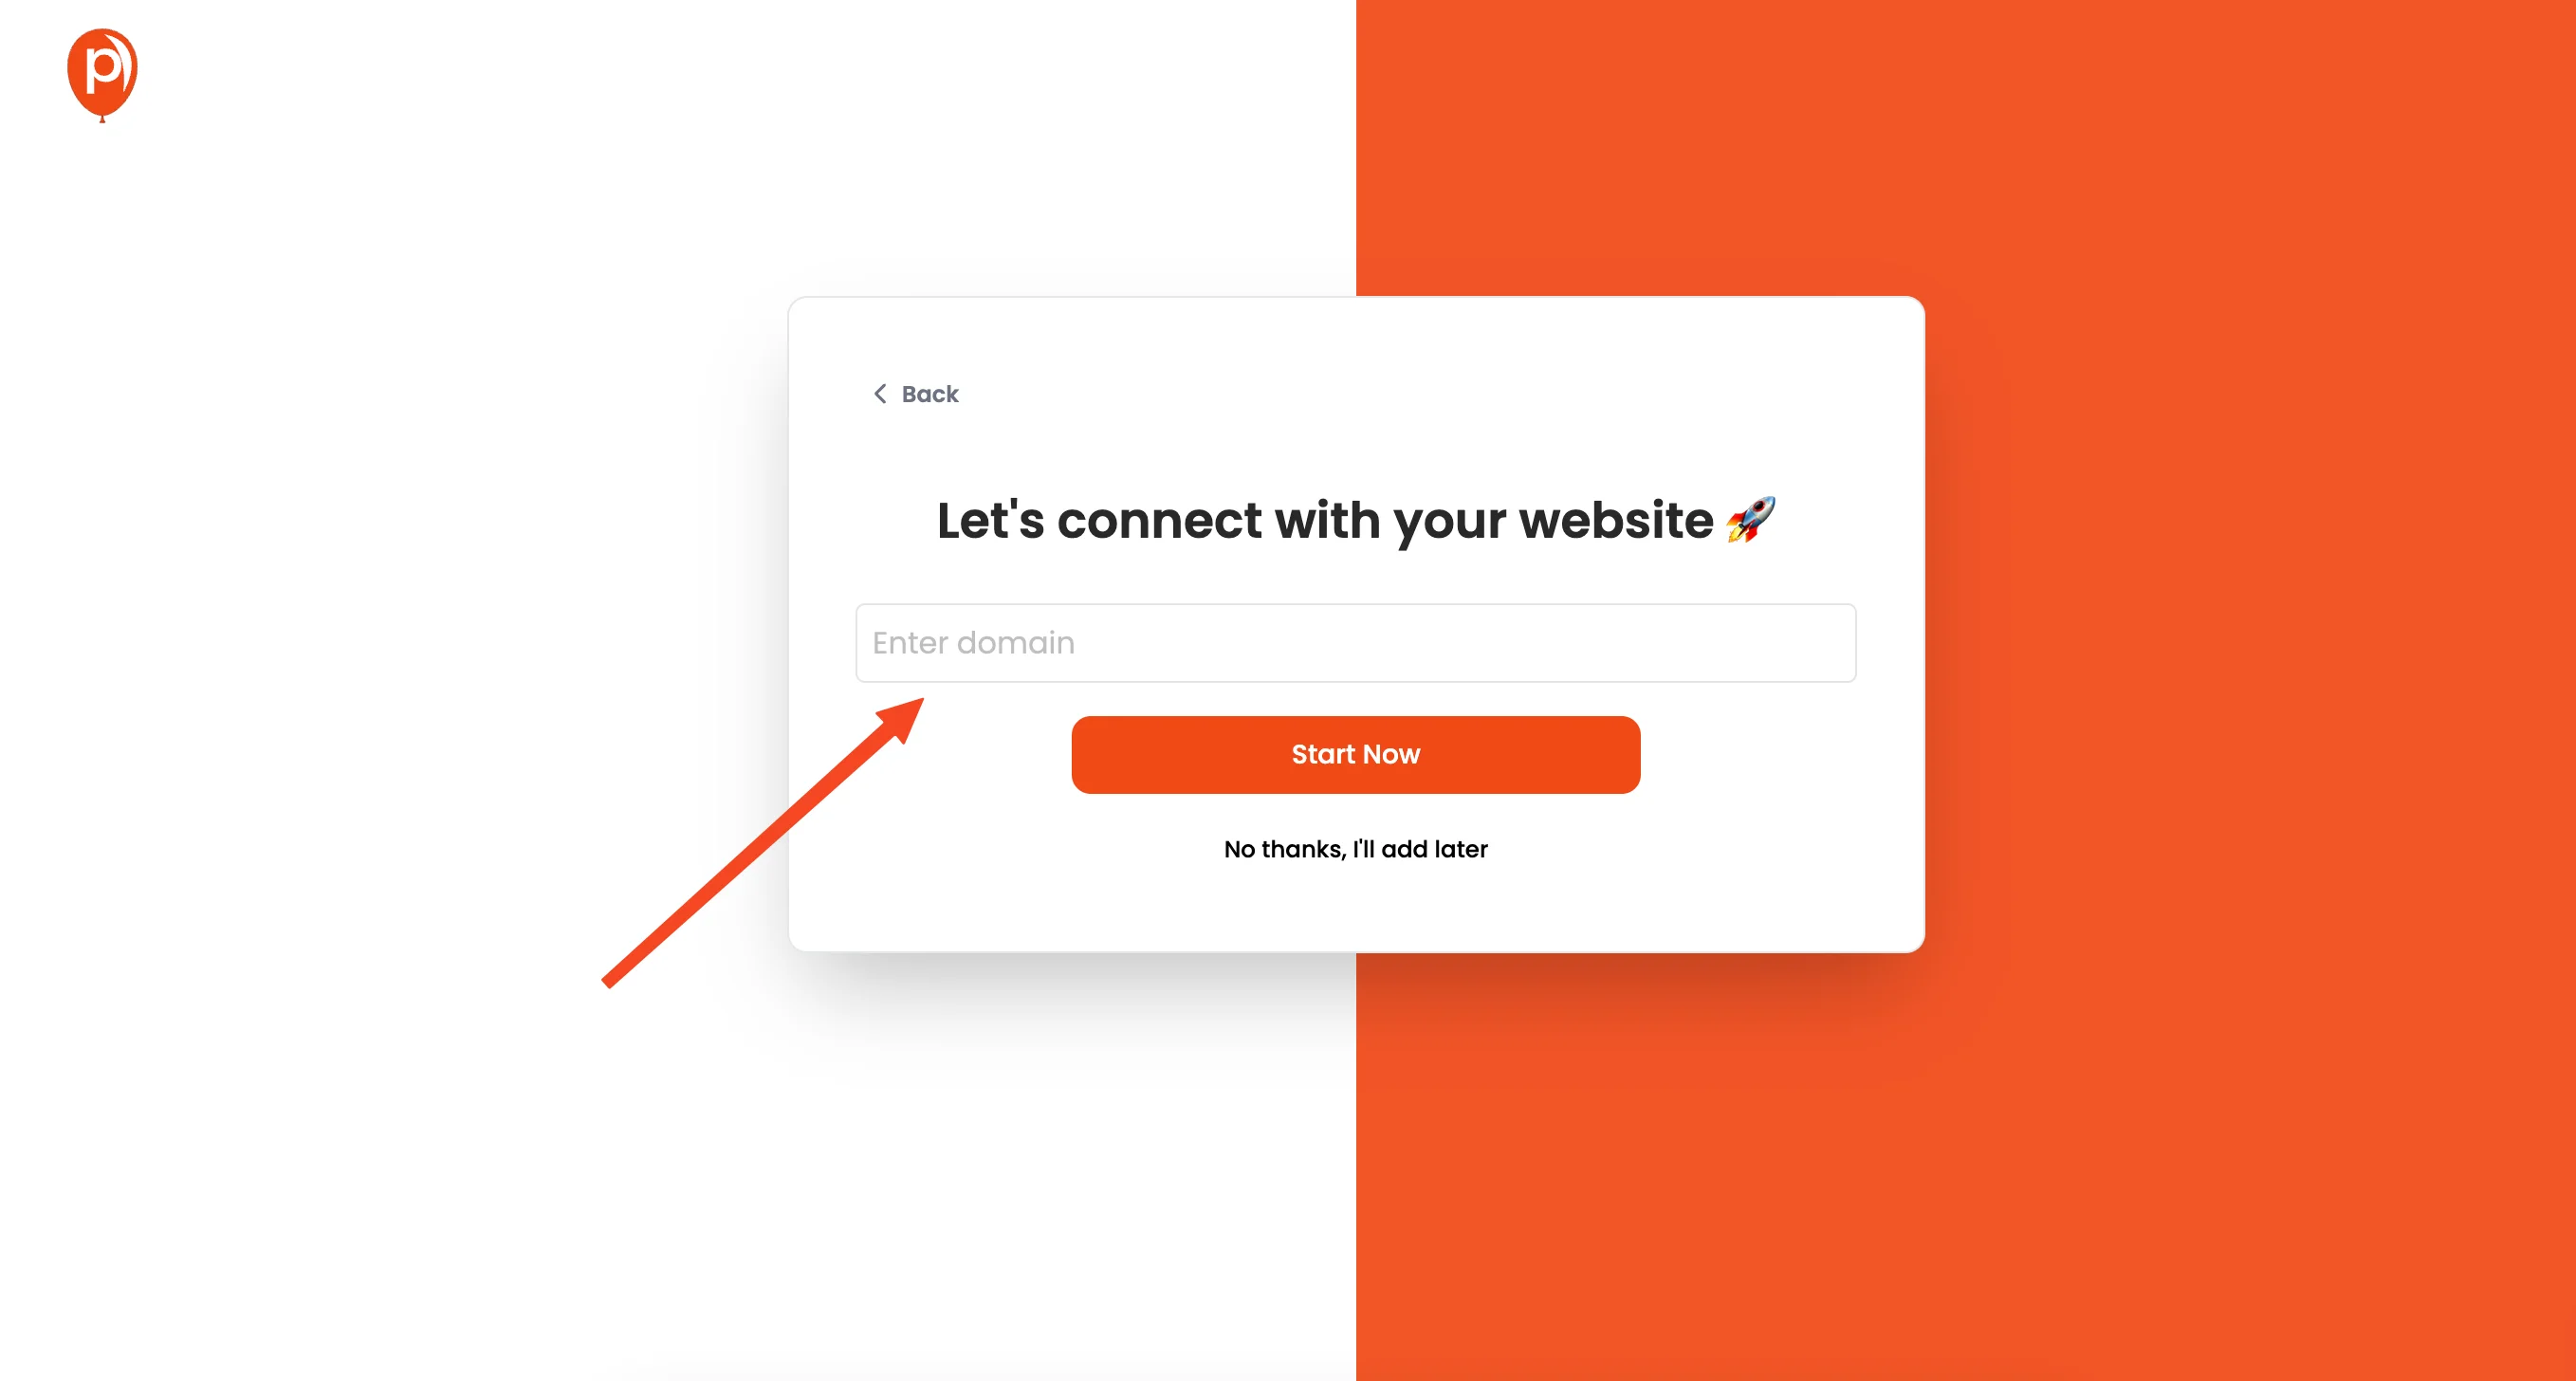
Once you're logged in, add your website domain to Poper. This lets Poper know where to display your popups. Then, click the "New Popup" button to start building your first popup.
Step 3: Choose a Template to Start From
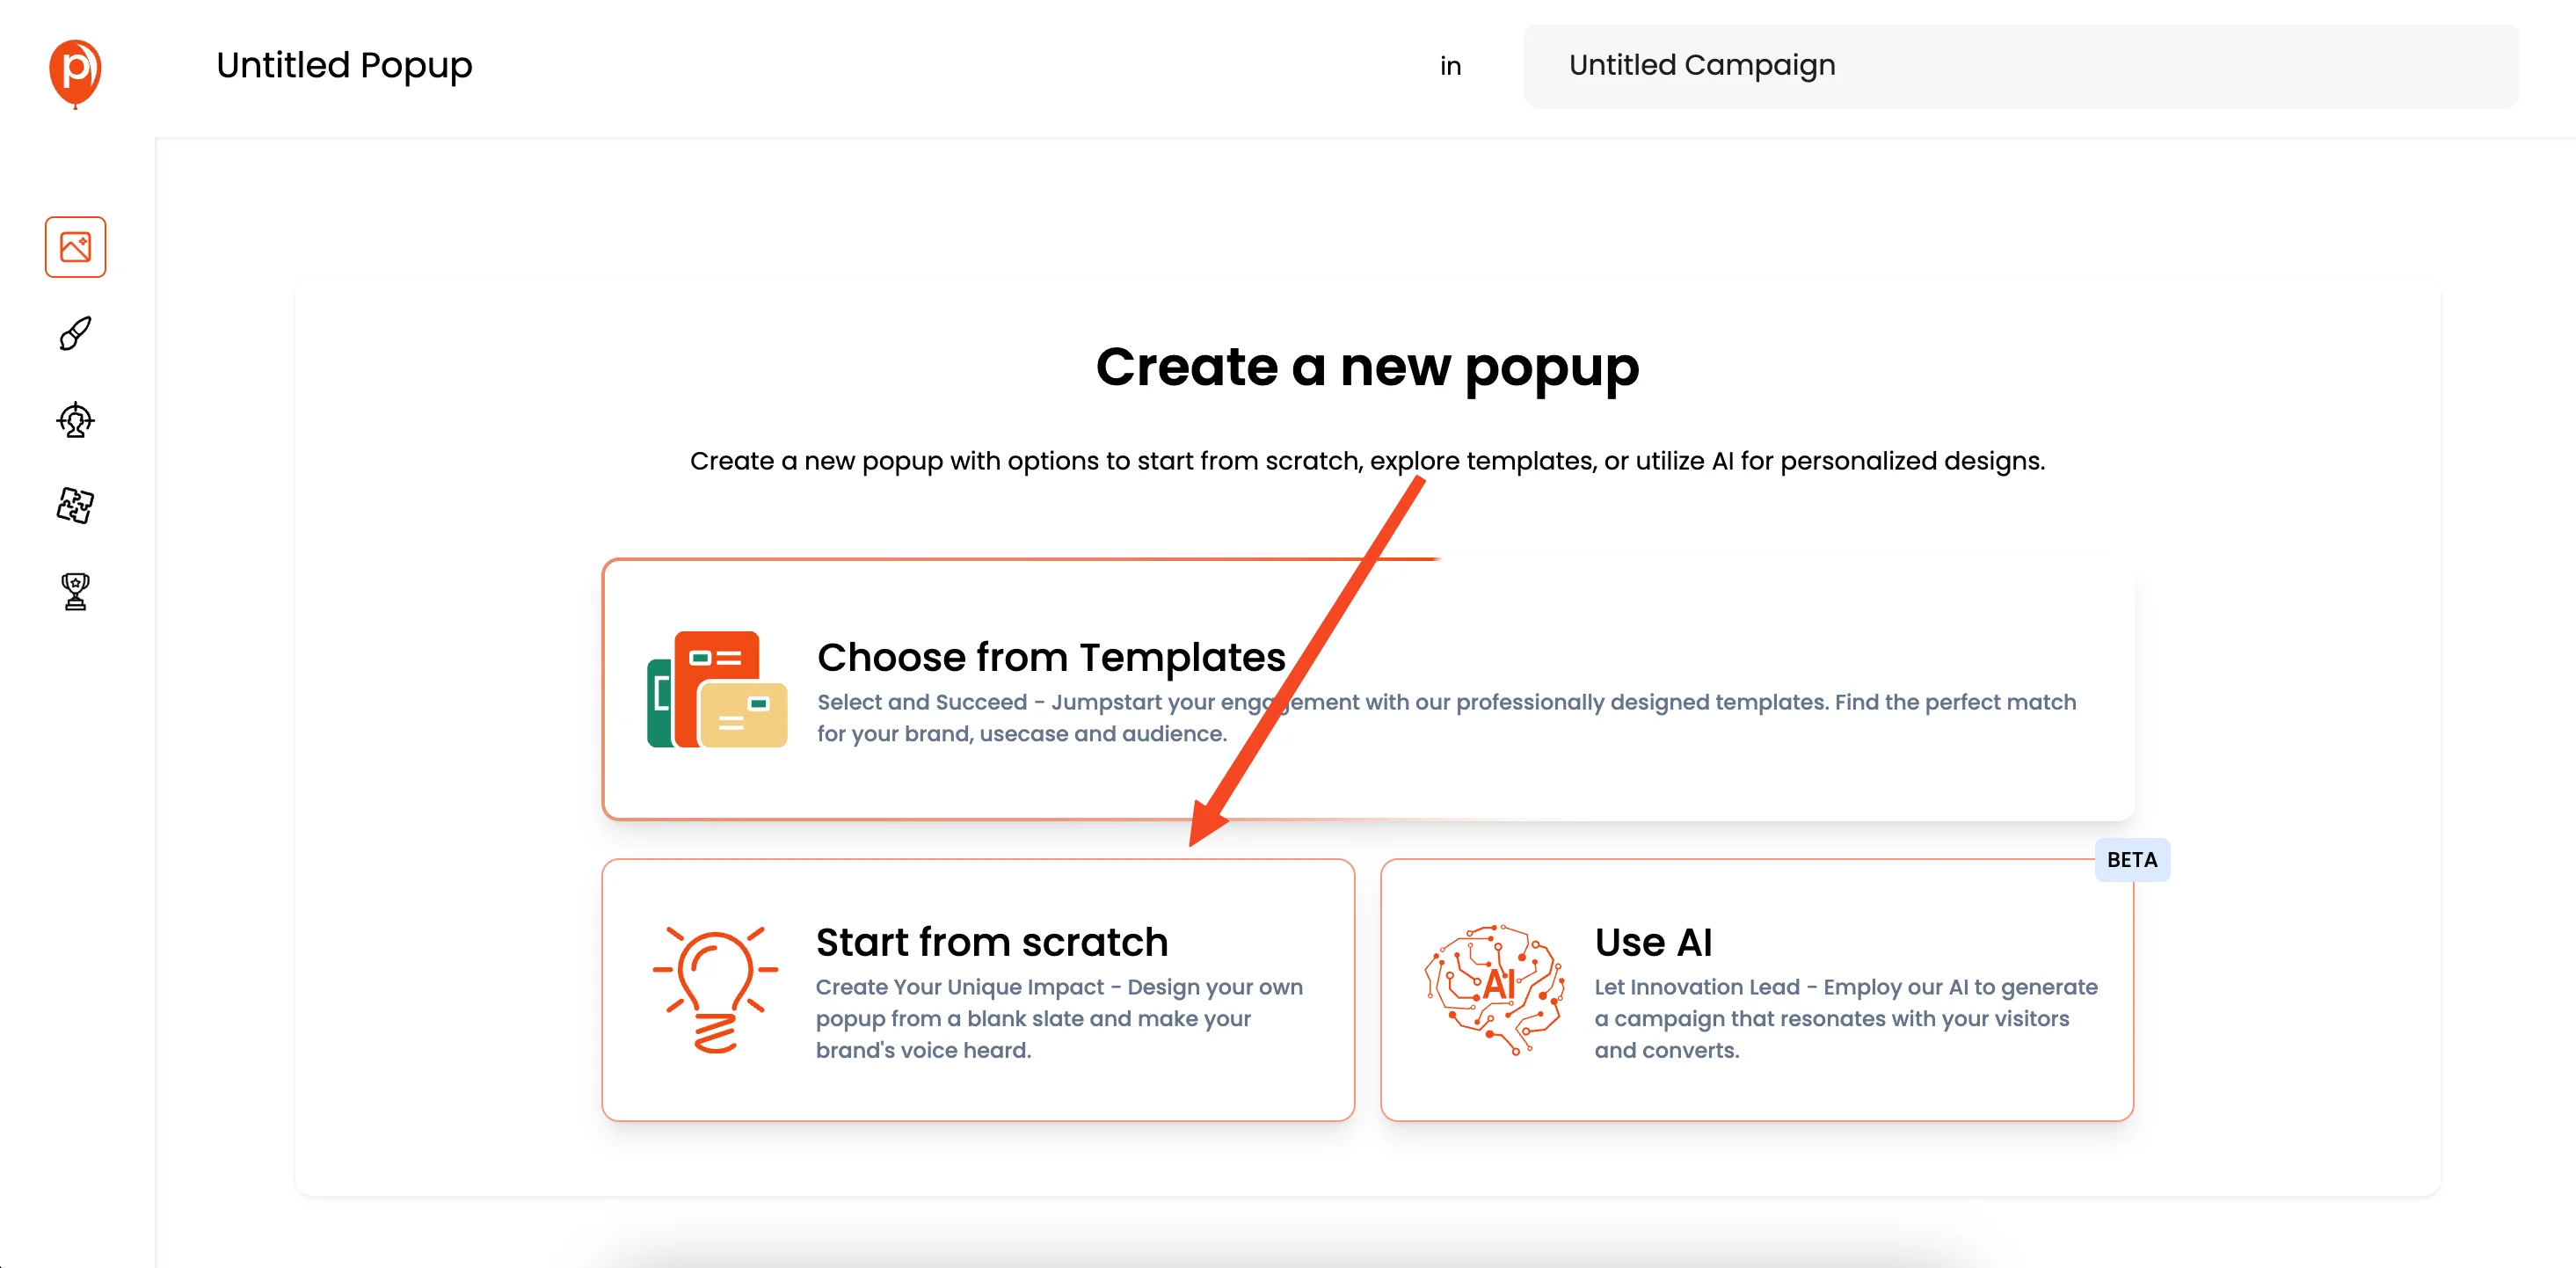
Instead of starting from scratch, I recommend browsing our template library. Click "Choose from Templates." This will give you a head start with a professionally designed popup.
Step 4: Search for the Perfect Divi Popup Template
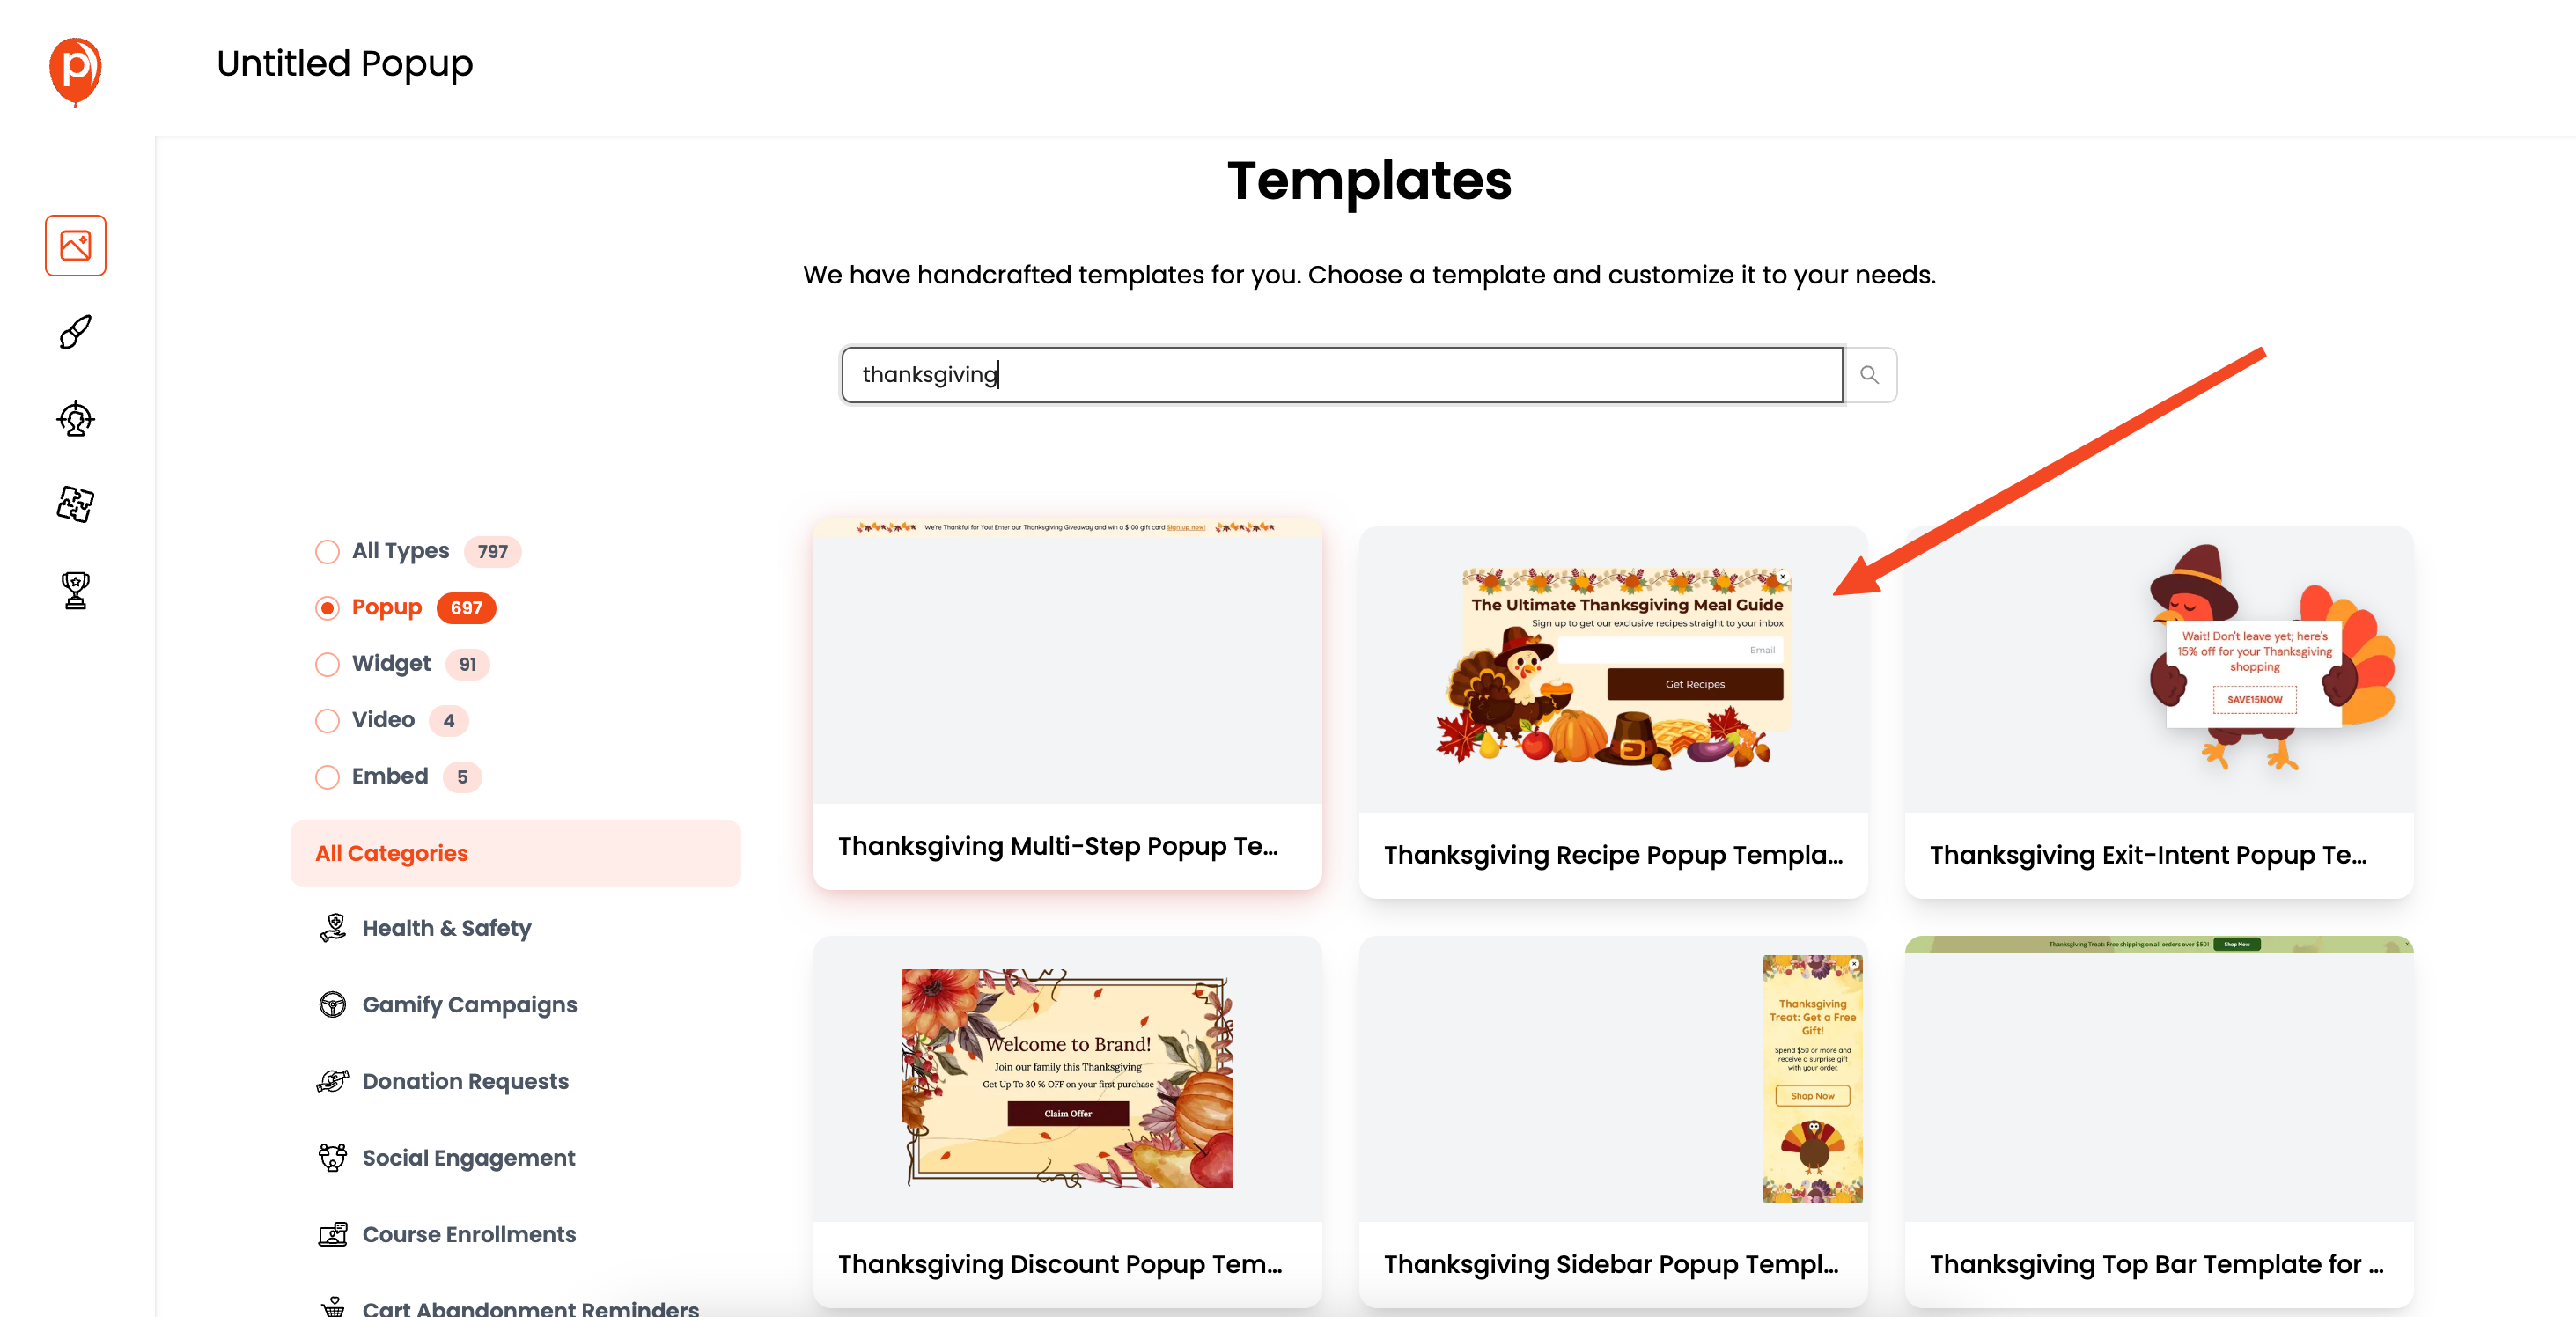
We have a huge collection, with over 800 templates to choose from! Search for the specific type of popup you're looking for. For example, if you're announcing a new product, search for "Thanksgiving."
Step 5: Customize Your Popup in the Editor
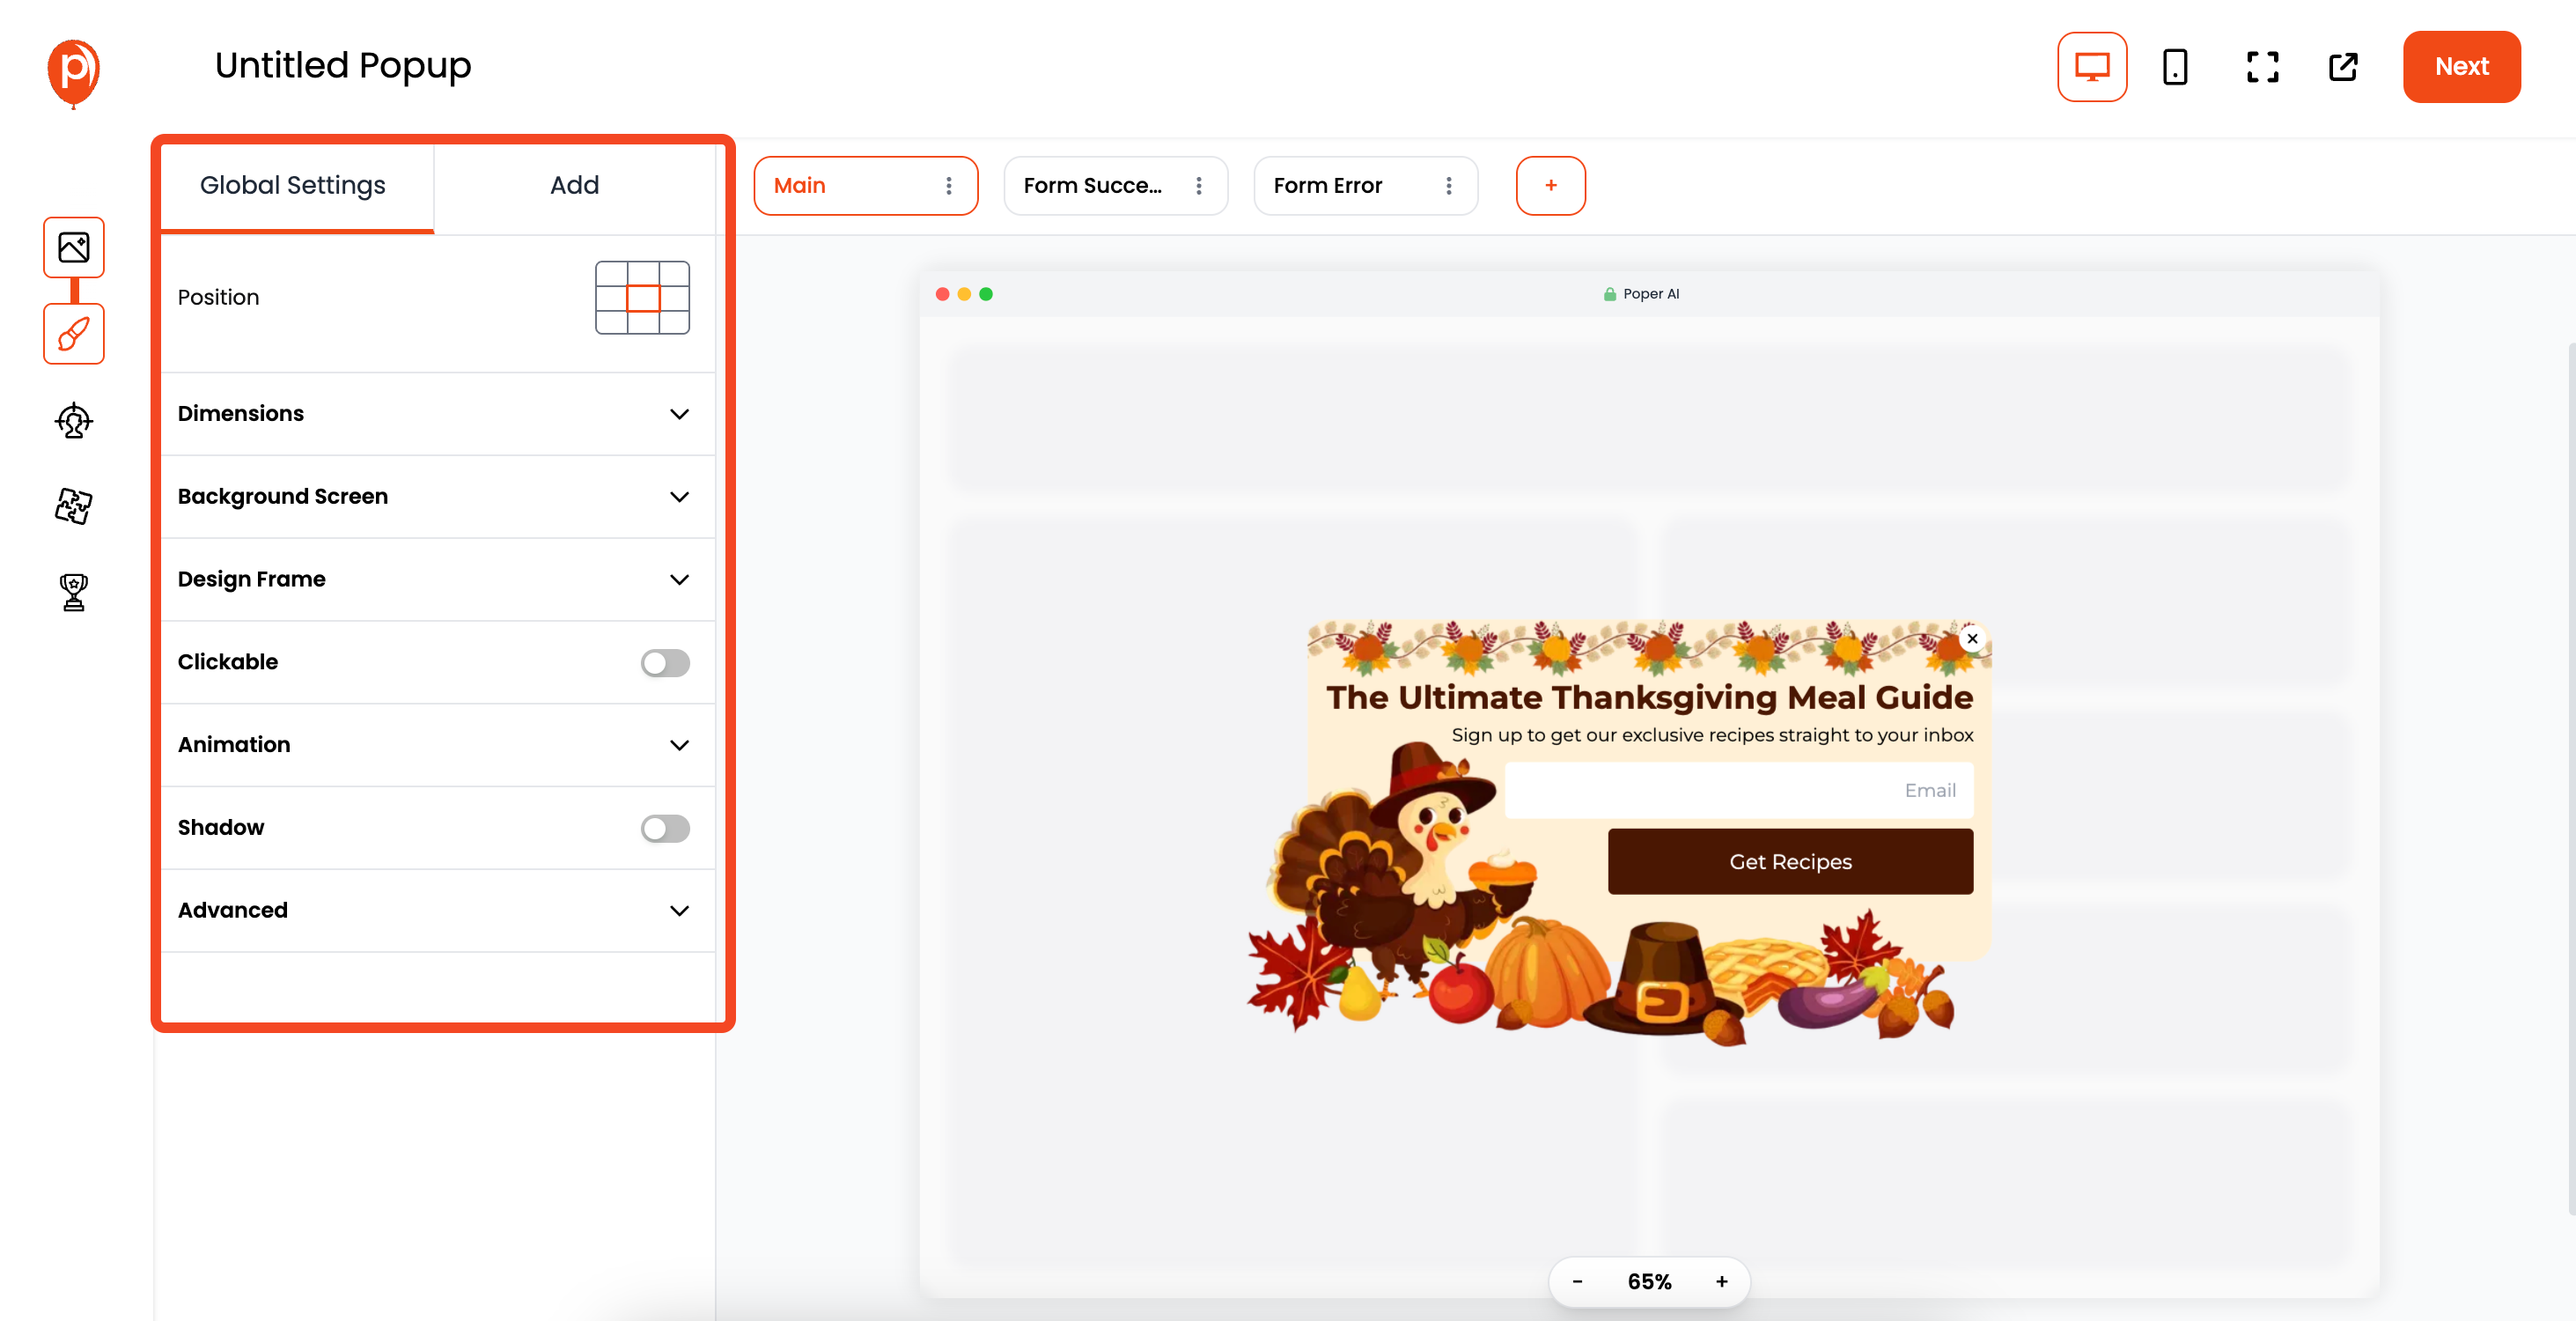
Selecting a template will open our popup editor. Here you can fully customize everything, including fonts, colors, images, and text. Take your time and make it your own. This ensures the popup perfectly matches your brand.
Step 6: Configure Display Conditions
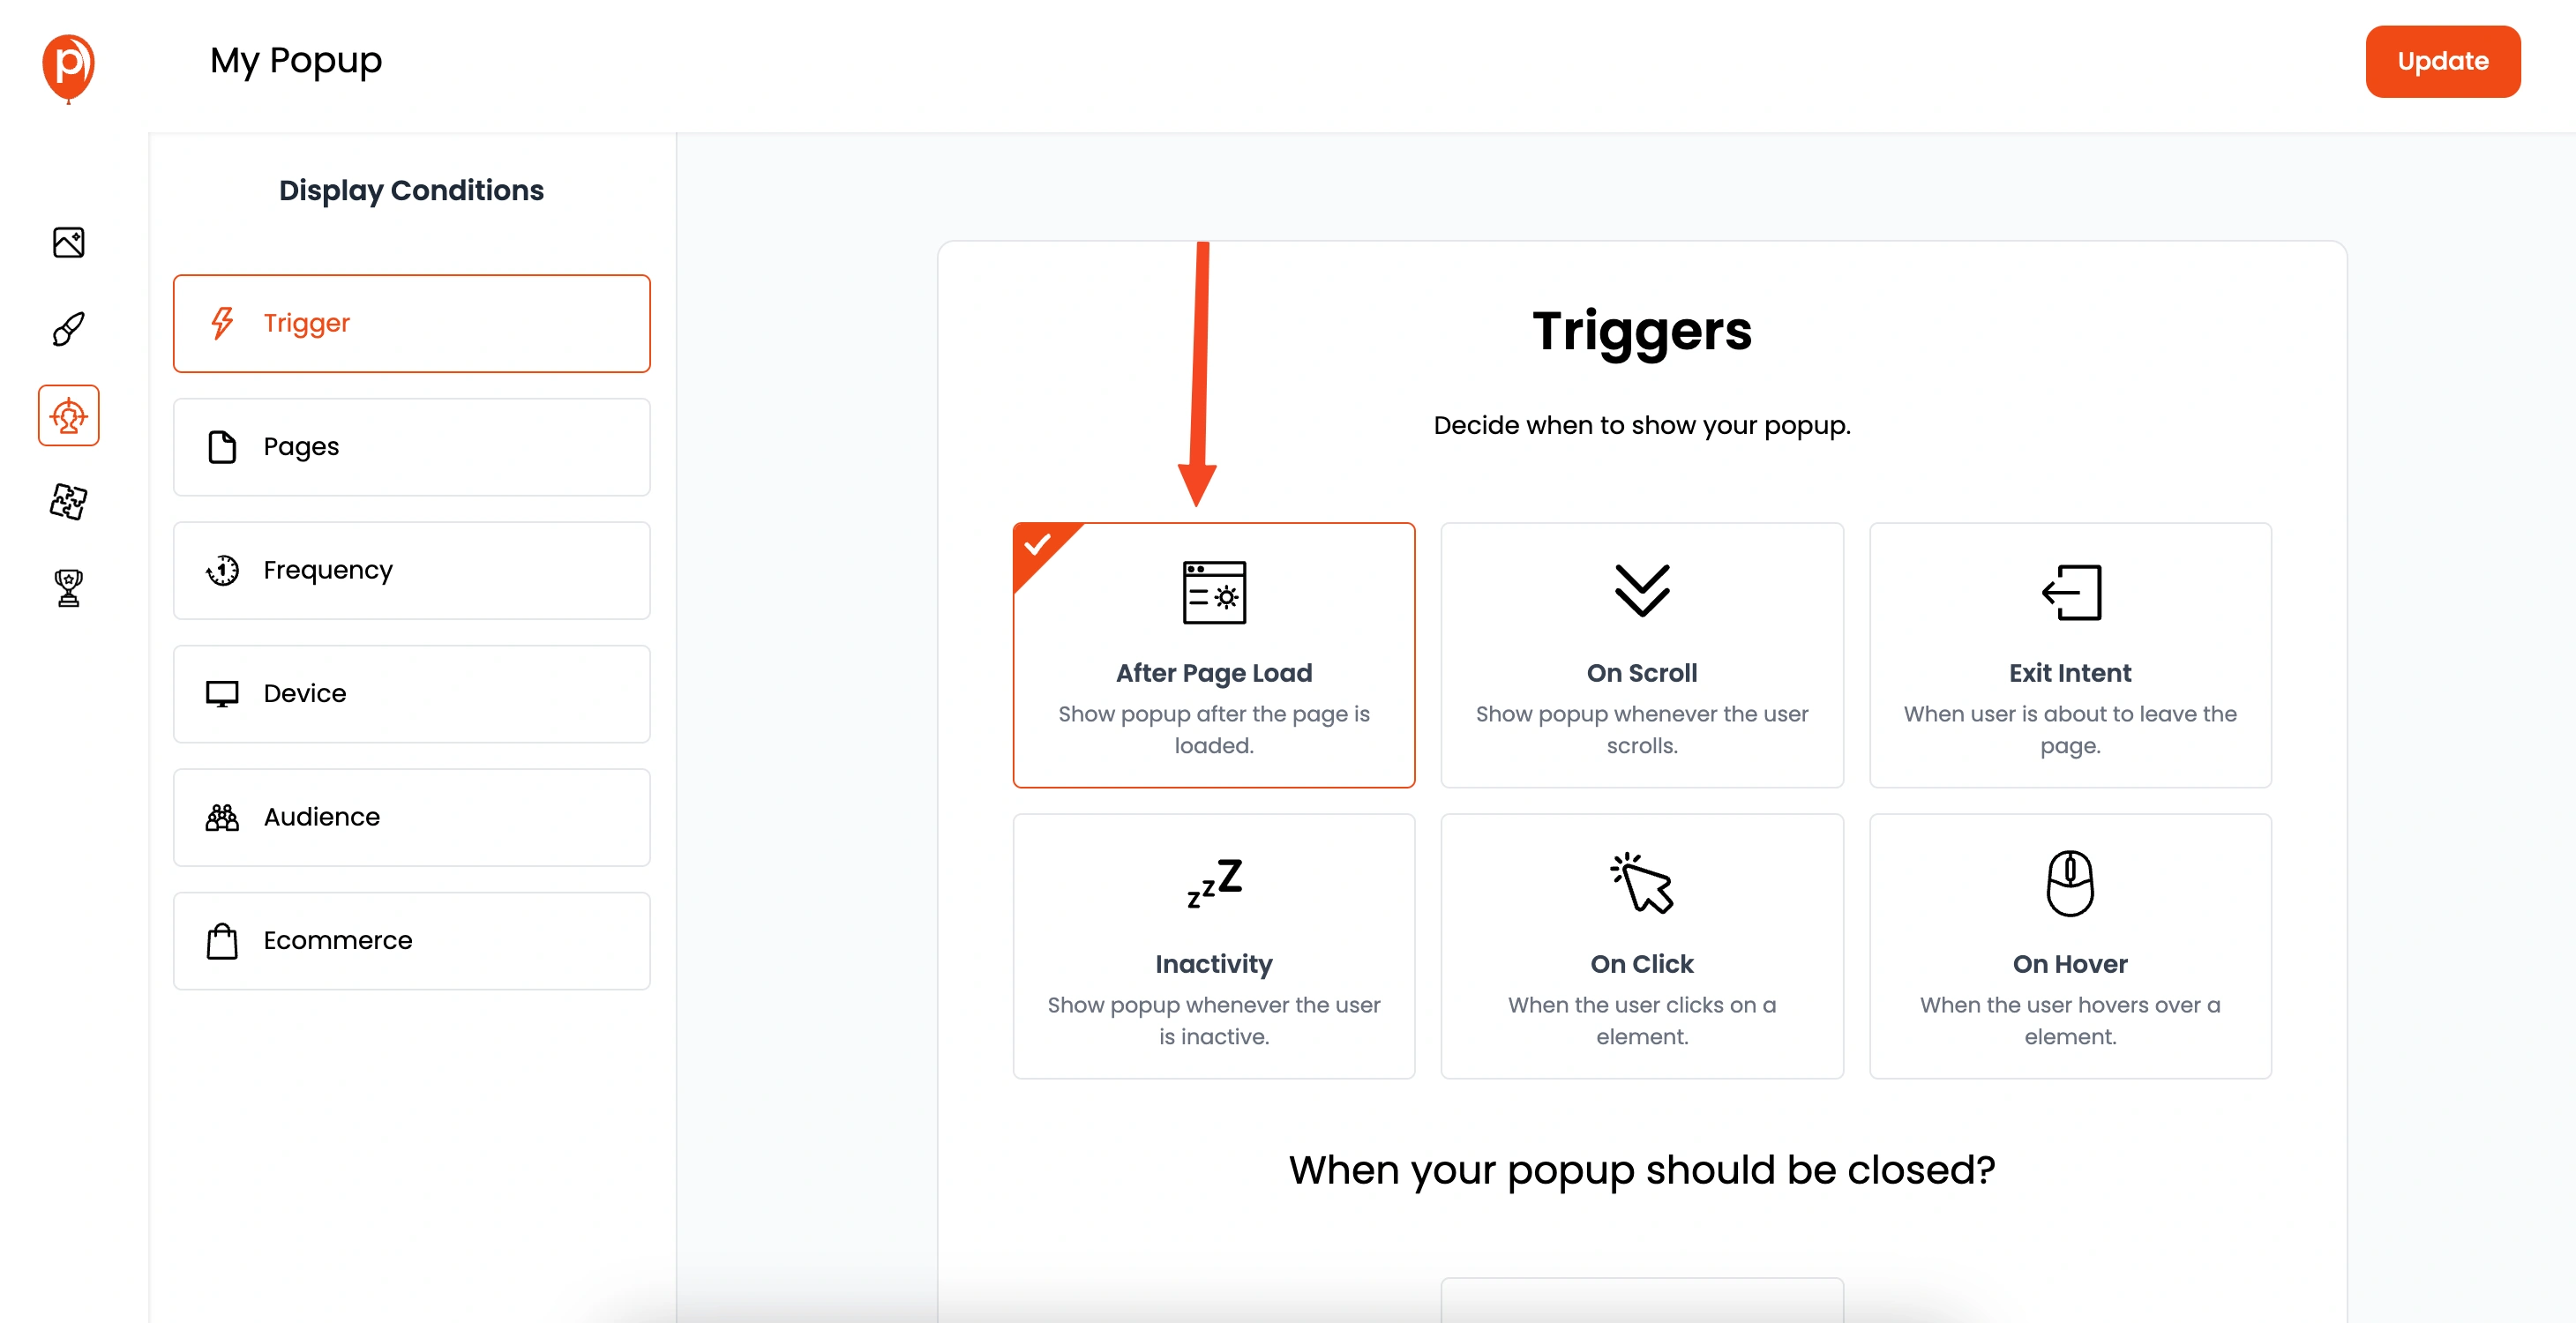
After you're happy with the design, click "Next" to configure display conditions. This is where you can target specific pages, audience demographics, and more. For example, you can show a popup only to visitors from a certain country, or only on your blog pages.
Step 7: Integrate with Your Favorite Email Tools
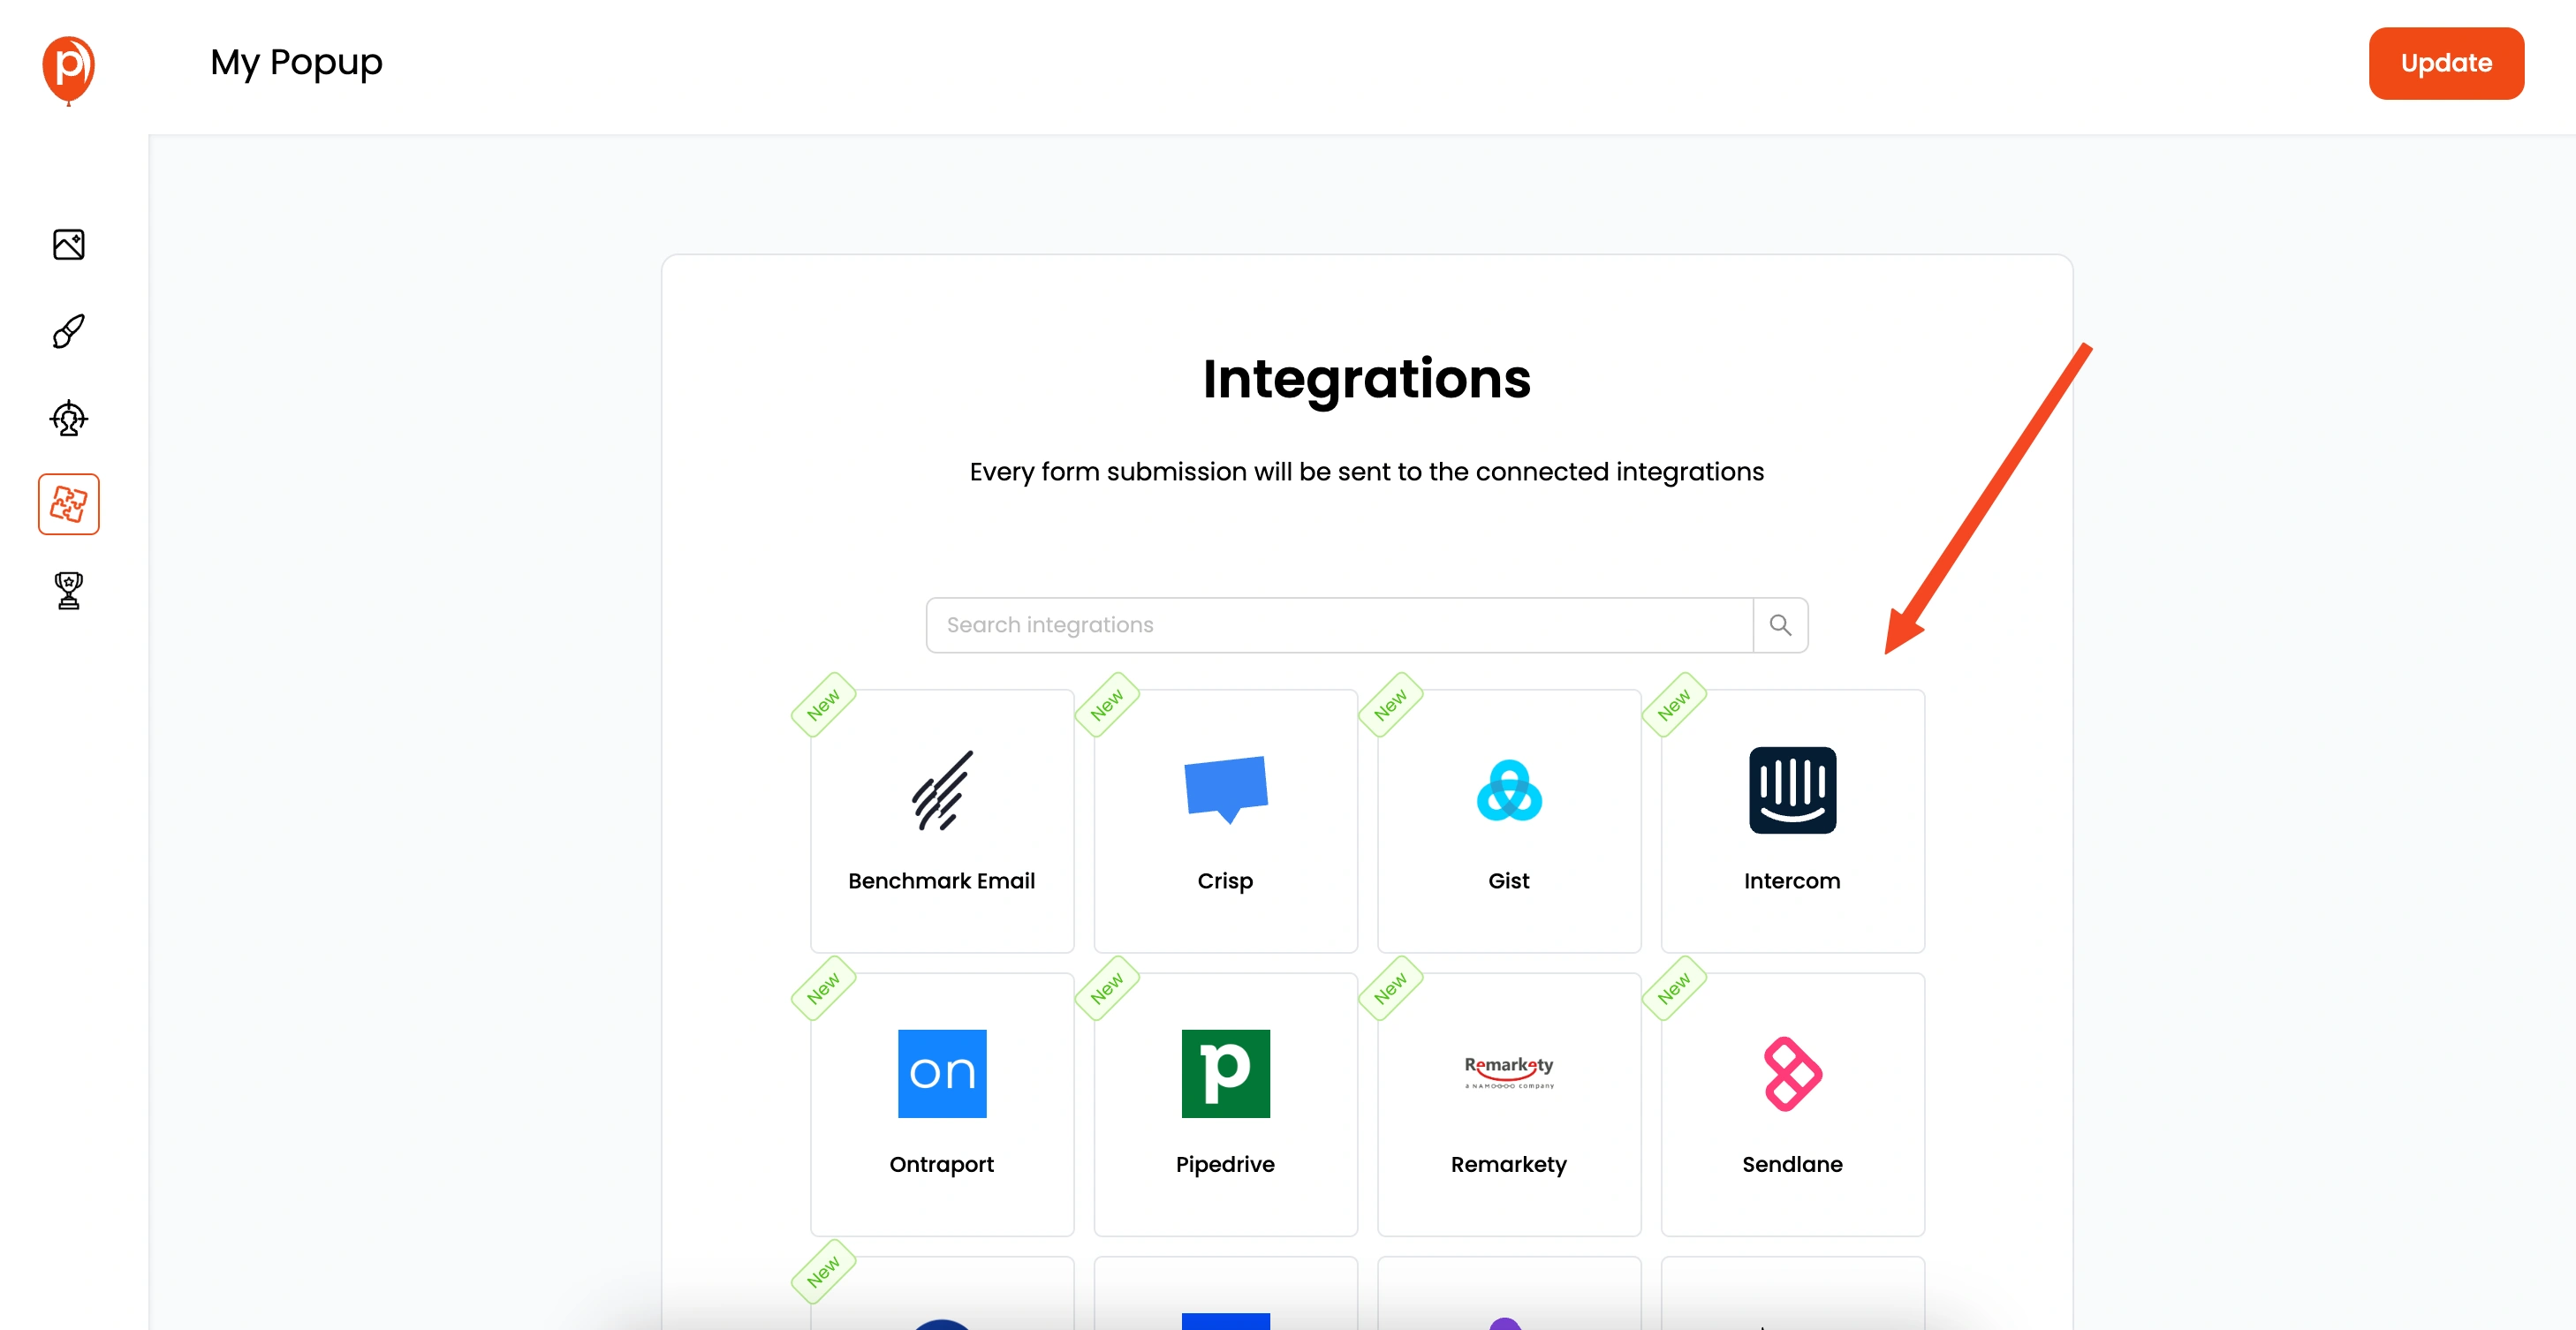
Click "Next" again to connect with integrations. Poper works with your favorite email tools like Mailchimp, Klaviyo, and many more that are dedicated to your Divi WordPress.
Simply follow the steps to connect your chosen tools. This allows you to automatically add leads collected by your popup to your email lists.
Step 8: Save and Publish Your Popup
Once you've set everything up, click "Save & Publish" to make your popup live. Don't worry, you can always go back and edit it later.
Step 9: Install the Poper WordPress Plugin
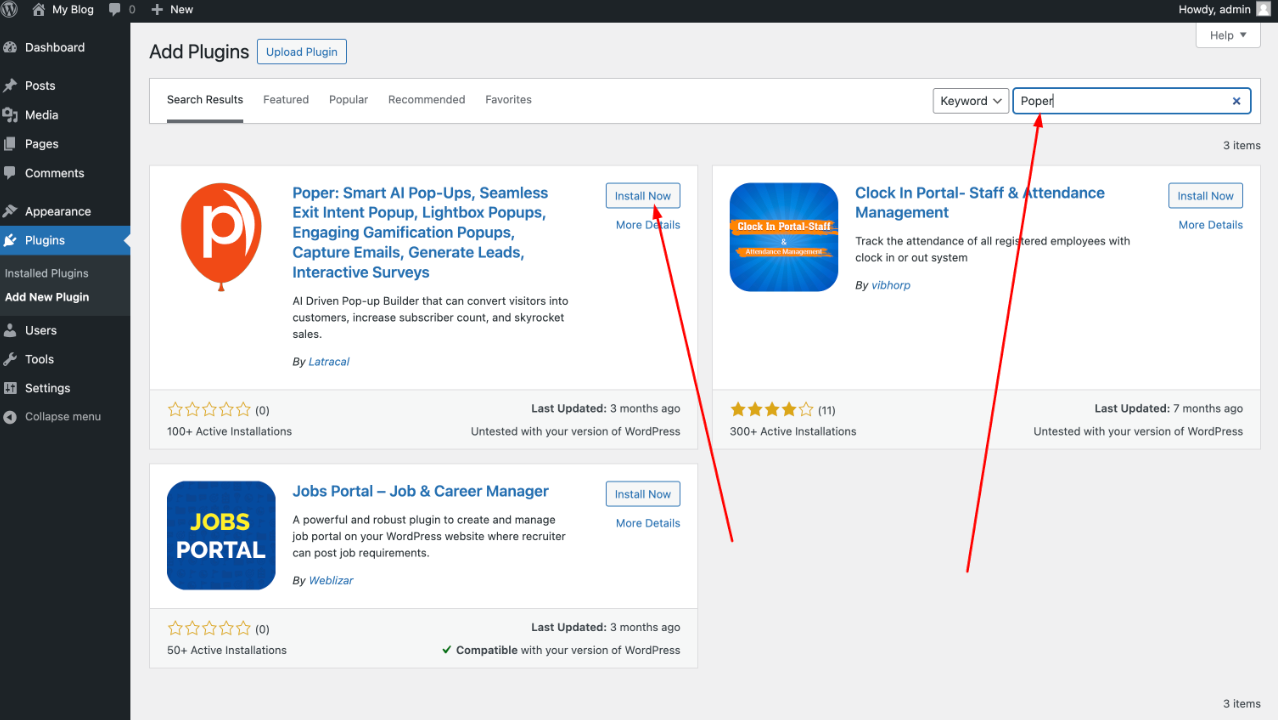
Now, let's connect Poper to your WordPress website. Go to your WordPress dashboard and search for the "Poper" plugin. Install and activate it.
Step 10: Activate the Poper Plugin
After activating, you'll see a new "Poper" menu item in your sidebar. Click on it.
Step 11: Connect Your Poper Account
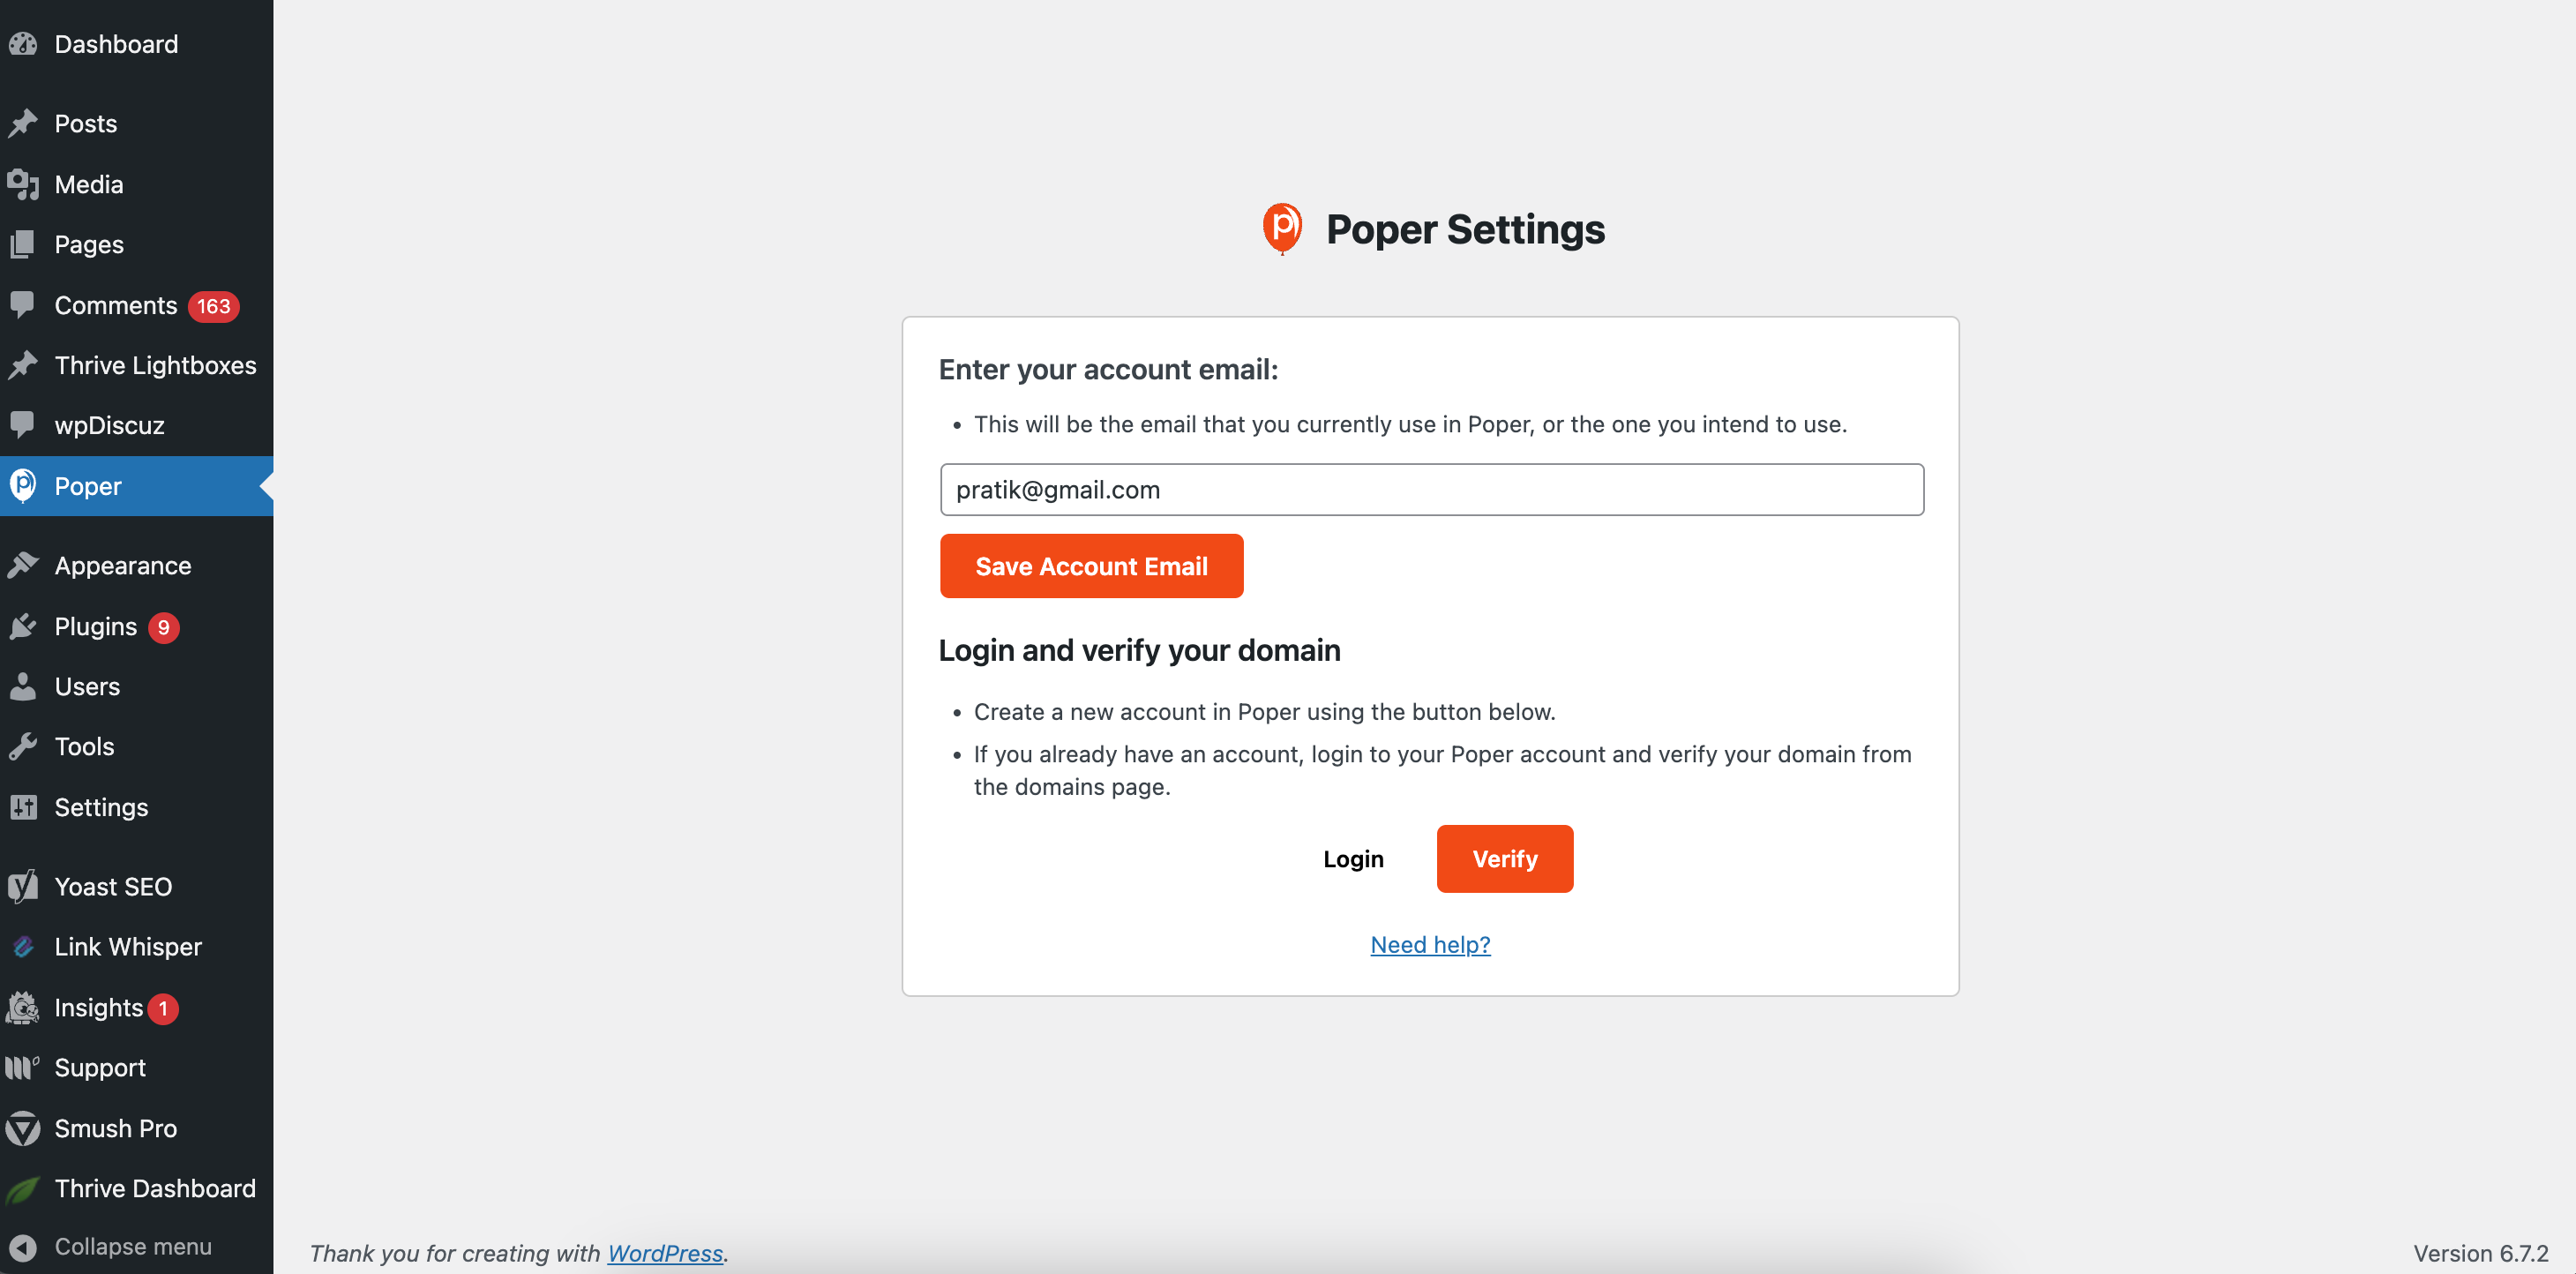
Enter the email address you used to sign up for Poper and click "Save." This links your WordPress site to your Poper account.
Step 12: Verify Your Installation
Go back to your Poper account and verify your installation. This confirms that your Divi WordPress website is successfully connected to Poper.
That's it! Your Poper popups are now visible on your Divi WordPress website. I hope this helps you create engaging and effective popups!
Why Use Poper for Divi Popups?
Creating popups with Divi alone can be a complex process, requiring custom coding or third-party plugins that may not integrate smoothly. Poper simplifies this by offering:
Pre-Built Templates: Choose from 800+ professionally designed popup templates that integrate flawlessly with Divi.
No Coding Required: Create and customize popups with an intuitive drag-and-drop interface.
Advanced Targeting Options: Show popups based on user behavior, page visits, time on site, and more.
Mobile Responsiveness: Ensure popups look perfect on all devices, enhancing the user experience.
Poper makes it easy for Divi users to launch popups that boost conversions and engagement without slowing down their website.
Benefits of Using Poper with Divi
Using Poper to create popups in Divi offers several advantages:
Increased Lead Generation: Capture emails and grow your subscriber base effortlessly.
Improved Conversion Rates: Target the right audience at the right time with precision.
Better User Engagement: Deliver relevant offers, updates, and promotions through customized popups.
Seamless Integration: Poper integrates with Divi without affecting your site speed or design.
Frequently Asked Questions (FAQs)
How do I create a Divi popup without coding?
With Poper, you can create Divi popups easily using pre-built templates and a drag-and-drop interface — no coding required.
Can I show Divi popups only on specific pages?
Yes, Poper allows you to set page-level display conditions, ensuring your popups appear on the most relevant pages.
Is Poper compatible with other Divi plugins?
Absolutely! Poper works seamlessly with Divi and other popular WordPress plugins, ensuring no conflicts.
Can I track the performance of my Divi popups?
Yes, Poper provides detailed analytics to track impressions, clicks, and conversions, helping you optimize your popup campaigns.

