Integrating MailerLite with Elementor allows you to create high-converting popups that capture leads, promote offers, and grow your email list. While MailerLite offers its own built-in popup tool, it lacks flexibility in design and trigger options, making Poper a more robust solution.
In this guide, we’ll explore two methods to add MailerLite popups to your Elementor site:
Using Poper for advanced design control and flexible triggers
Using MailerLite’s native popup editor for basic functionality
By the end of this guide, you’ll have a fully functional popup that connects to your MailerLite account and captures leads directly from your Elementor site.
Method 1: The Easy Way with Poper
I've designed Poper to make this process super simple, giving you more control over design and triggers. Here's how we'll do it:
Step 1: Sign Up for a Poper Account
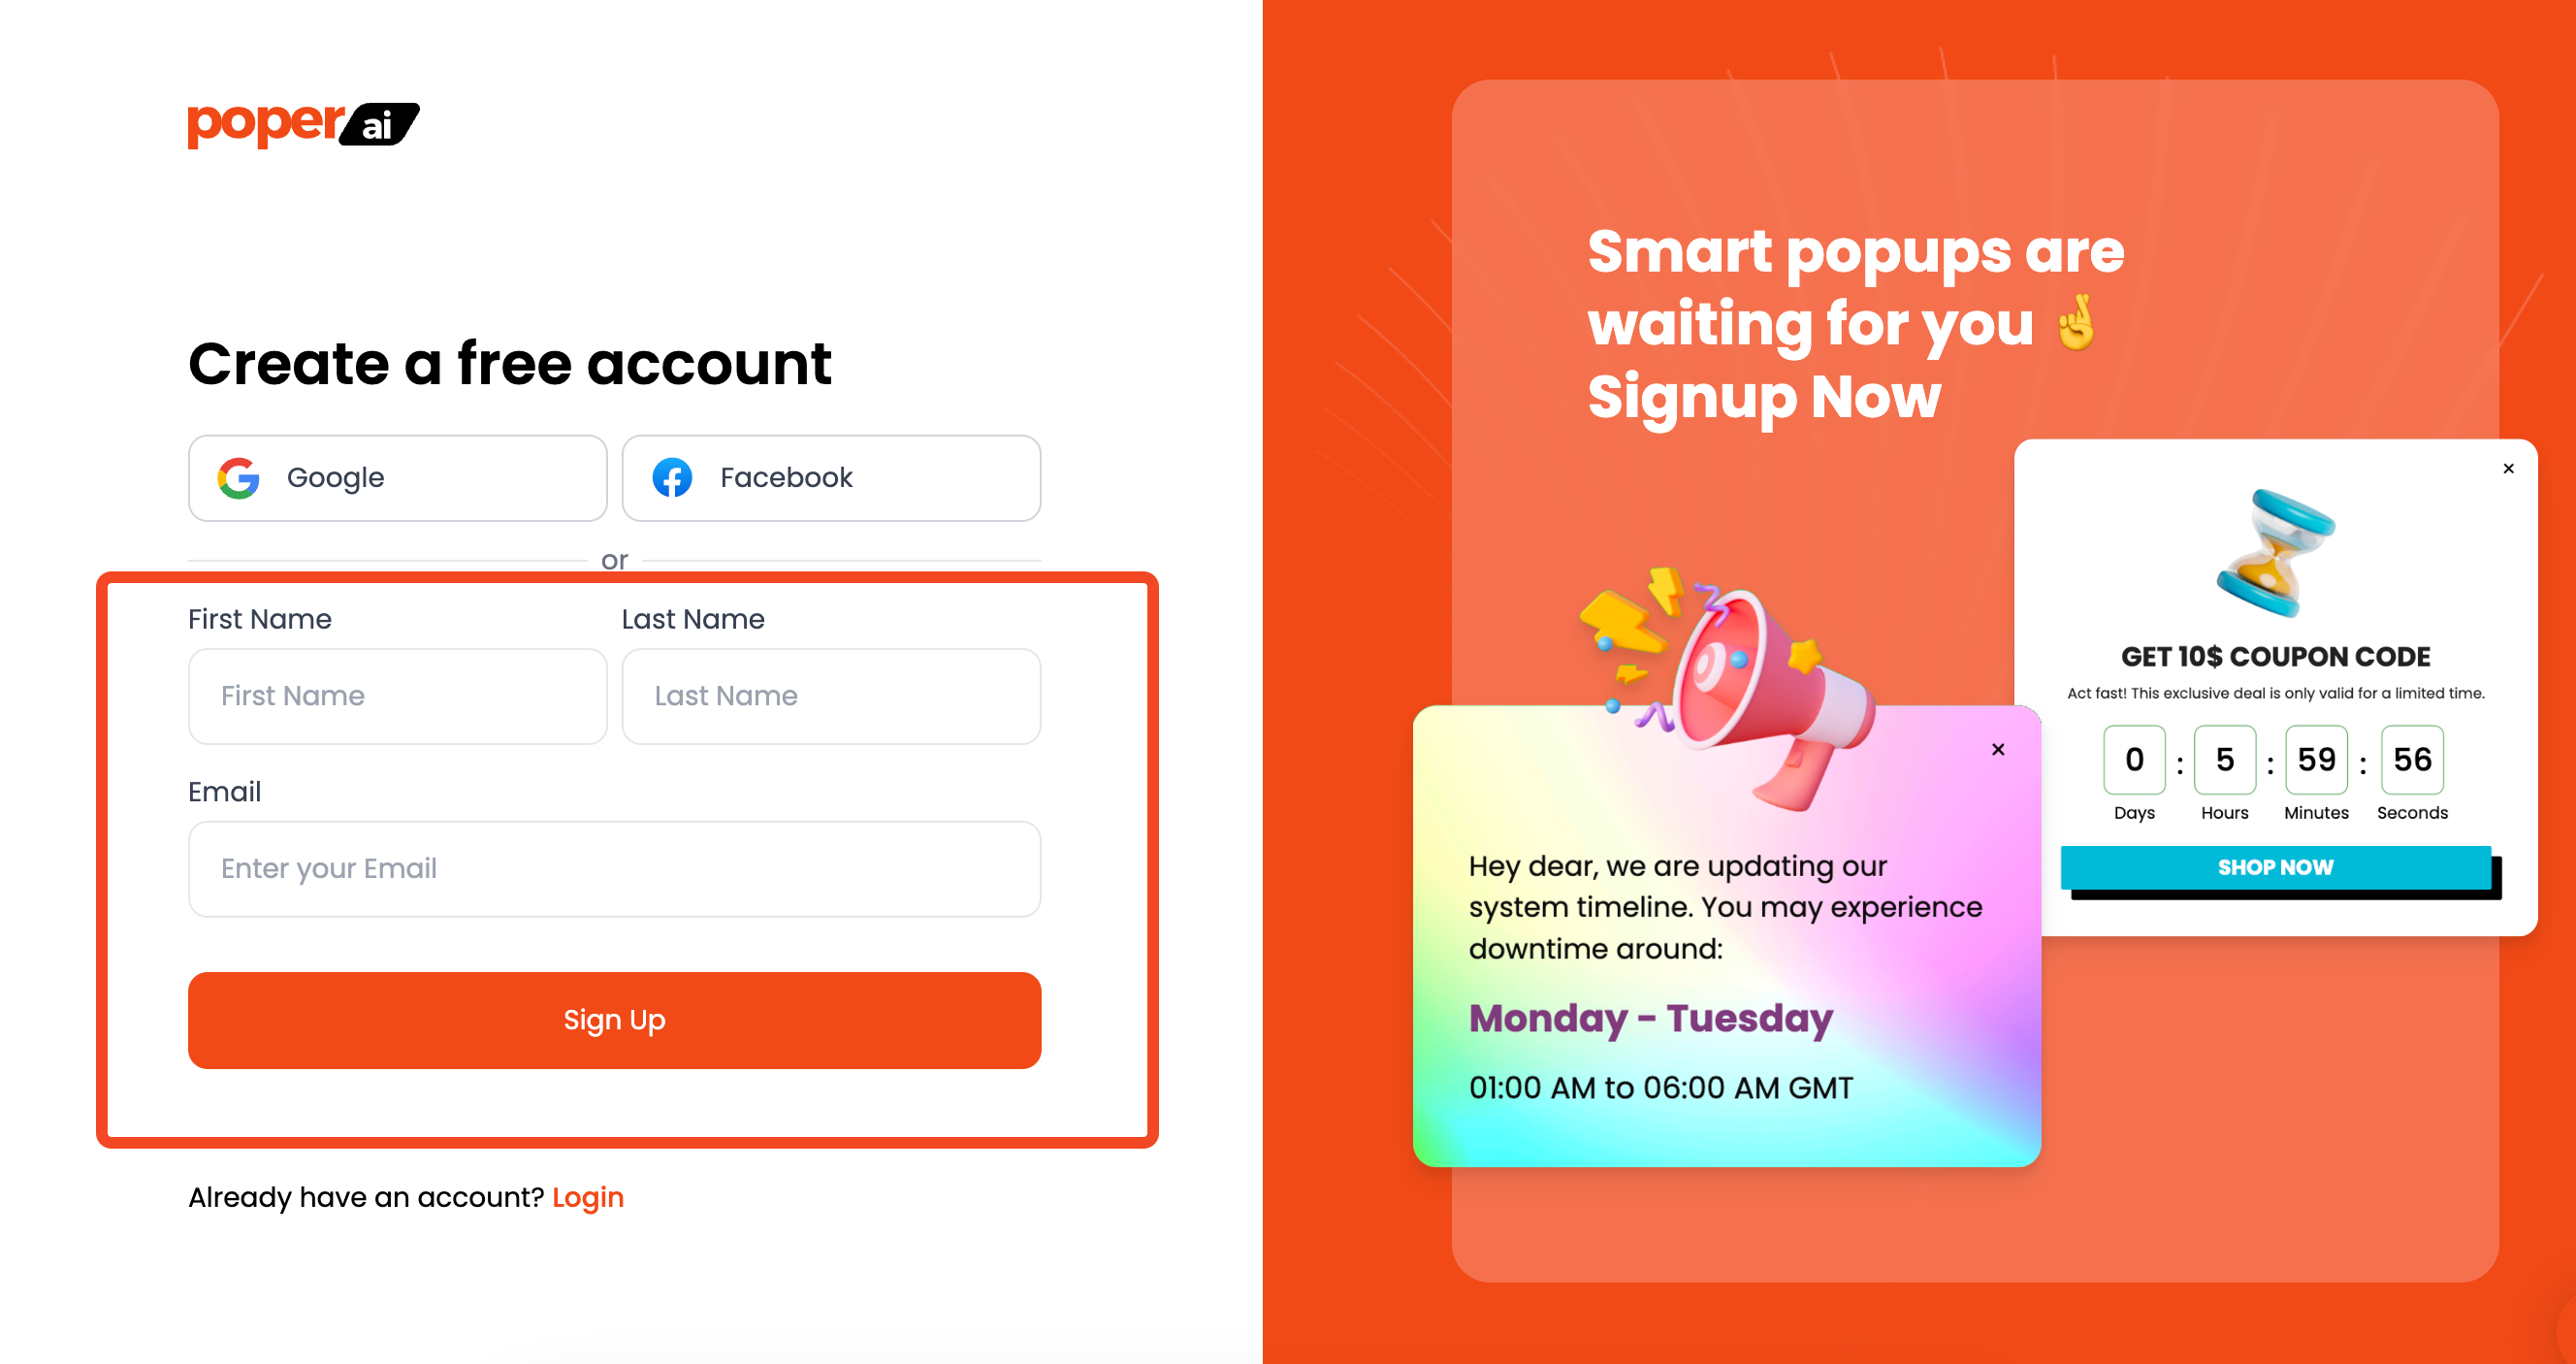
First, head over to Poper and sign up for an account. It's quick and easy. This is where you'll create and manage your popups.
Step 2: Add Your Website Domain
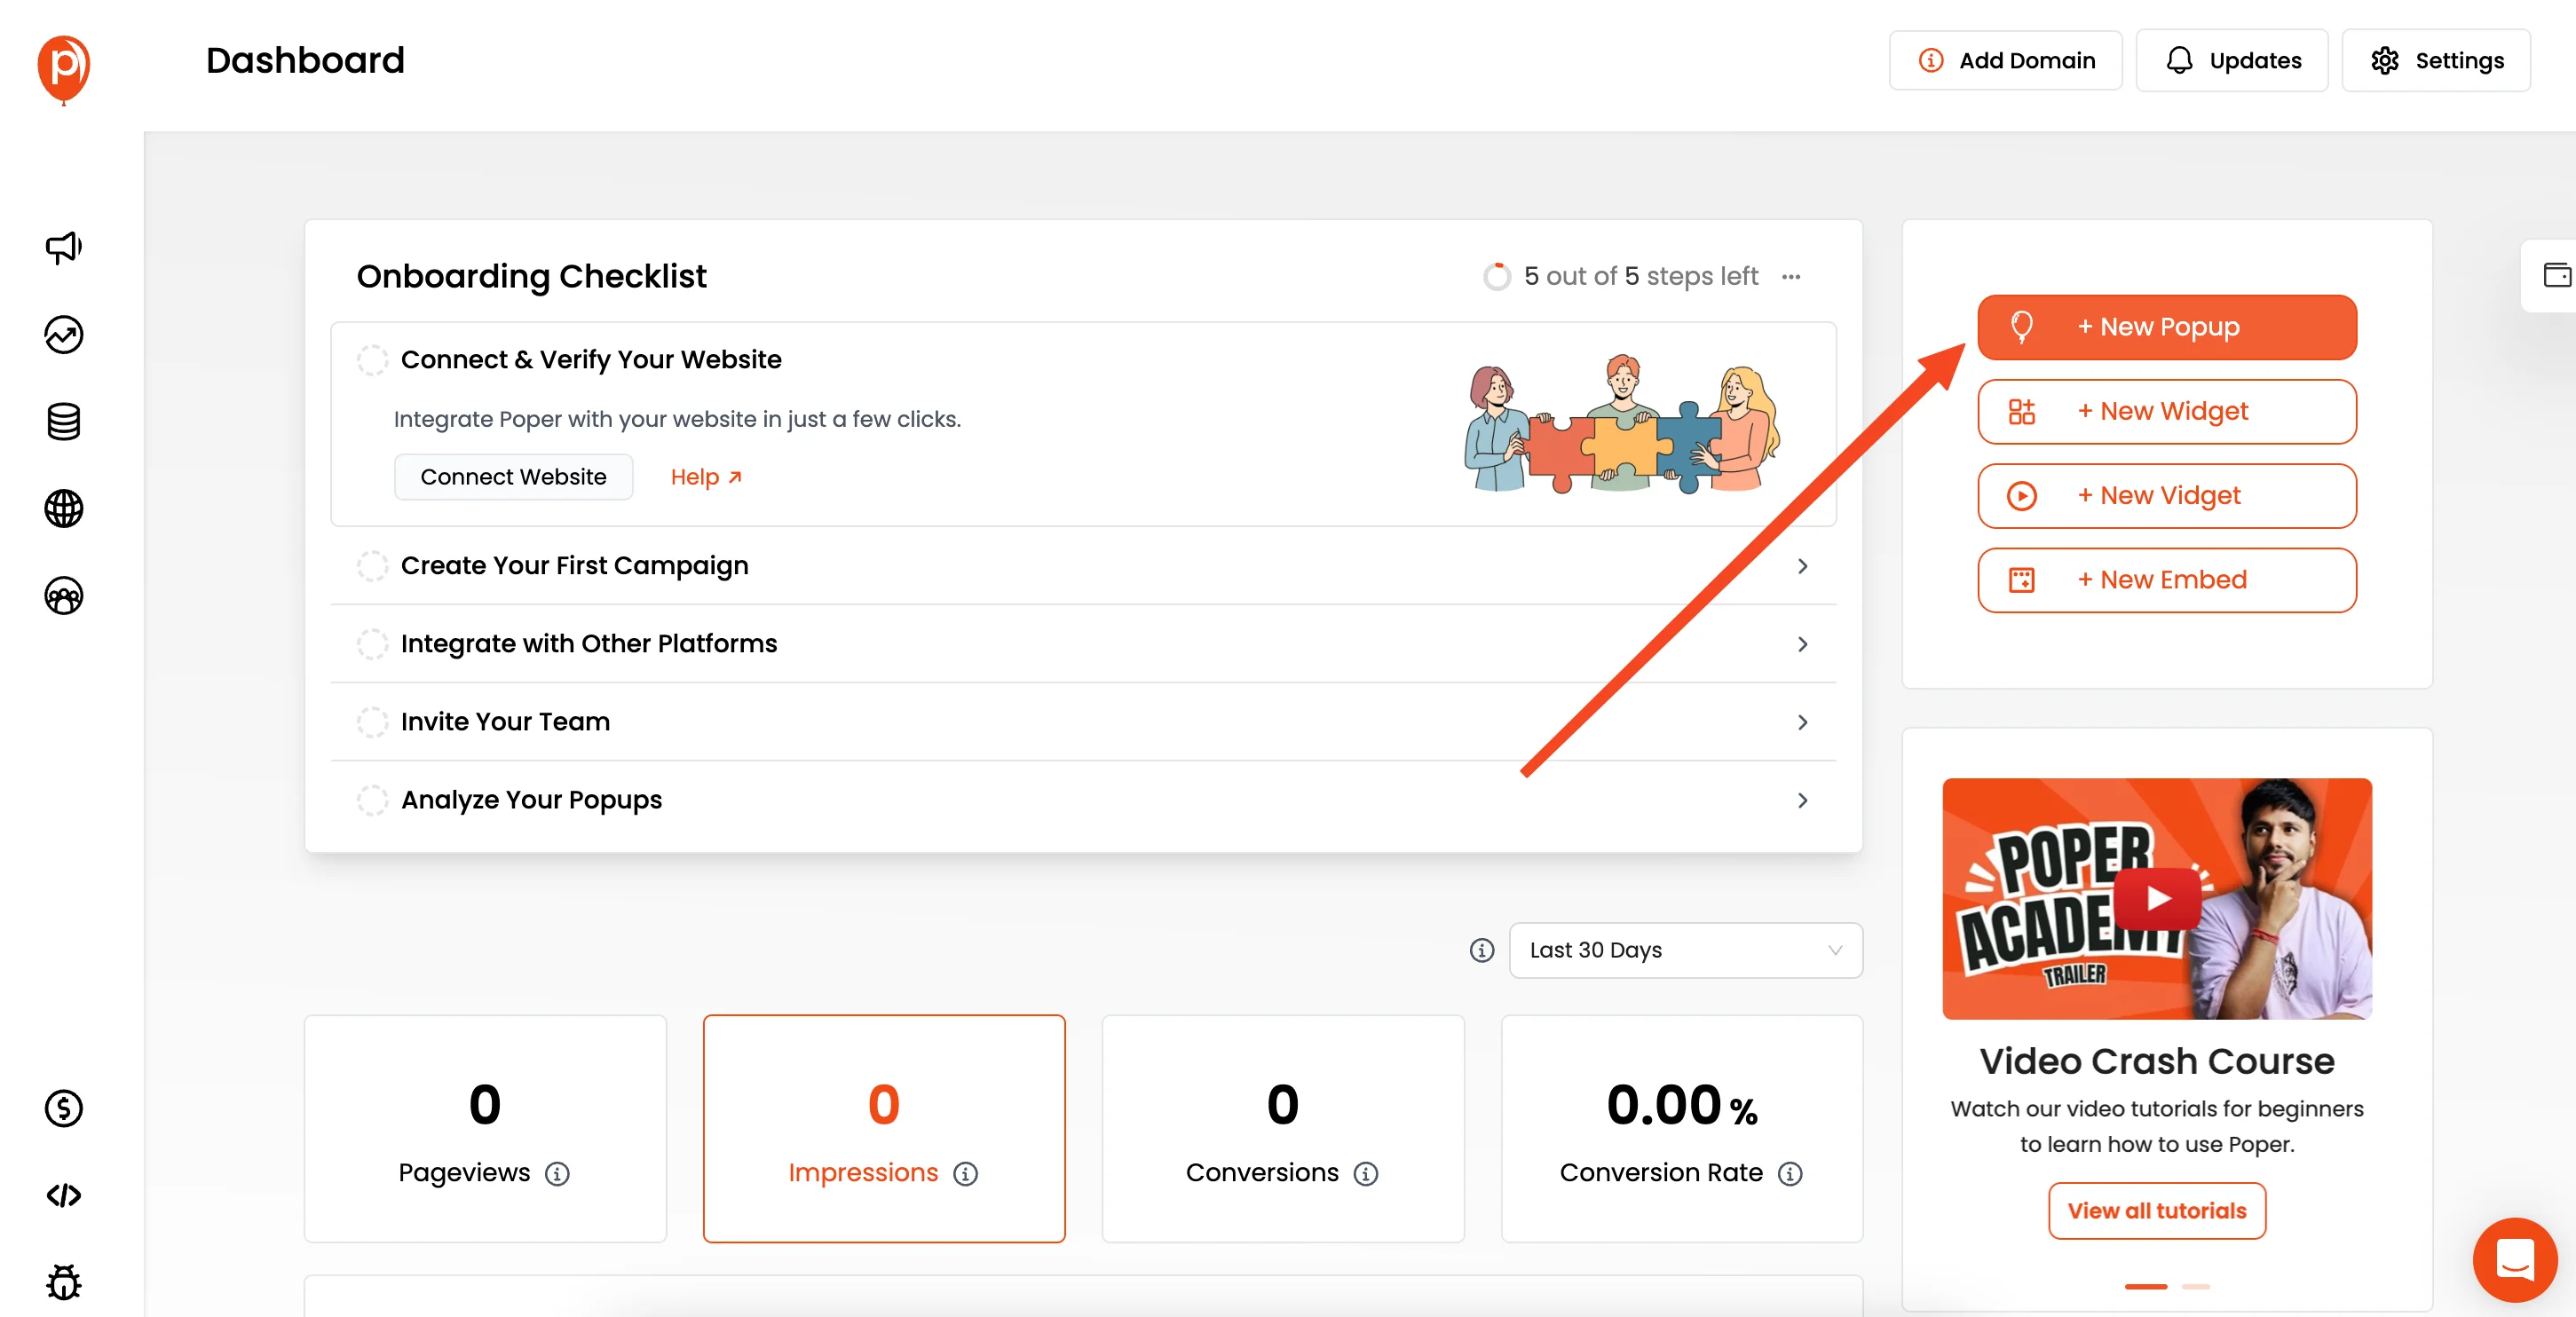
Once you're logged in, add your website domain to Poper. This lets Poper know where to display your popups. Then, click the "New Popup" button to start.
Step 3: Choose a Newsletter Template
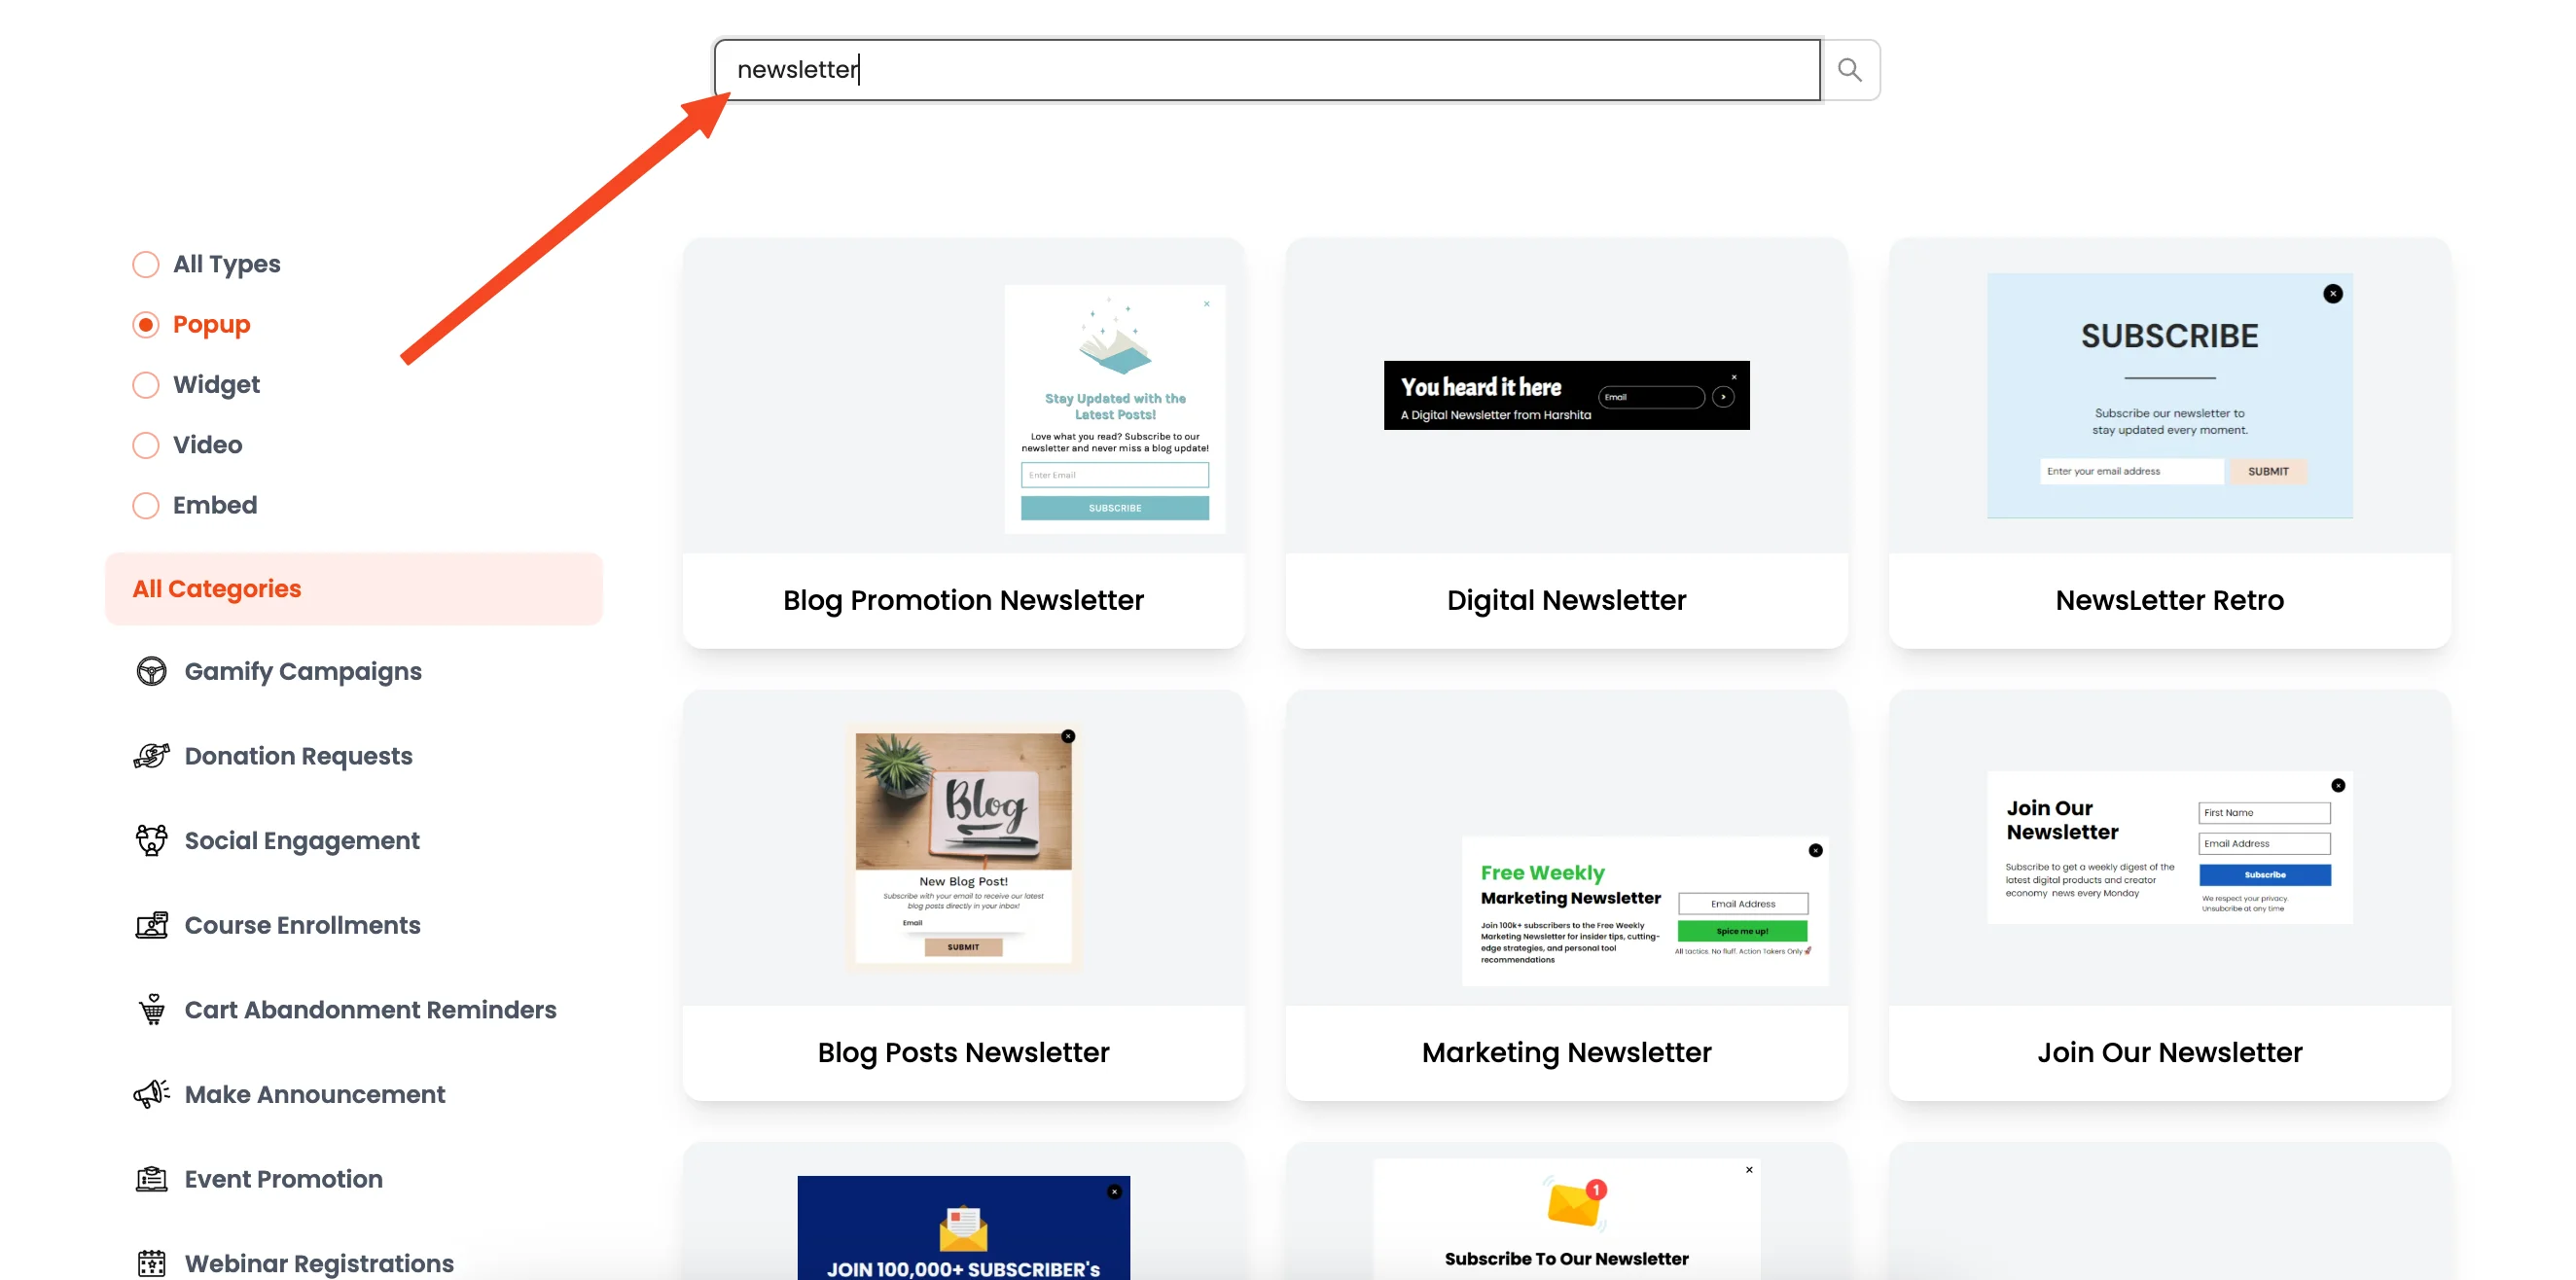
Click “Choose from Templates” and search for "newsletter." You'll see a bunch of templates – pick one that matches your website's style and the kind of offer you want to promote.
Step 4: Customize Your Popup's Design
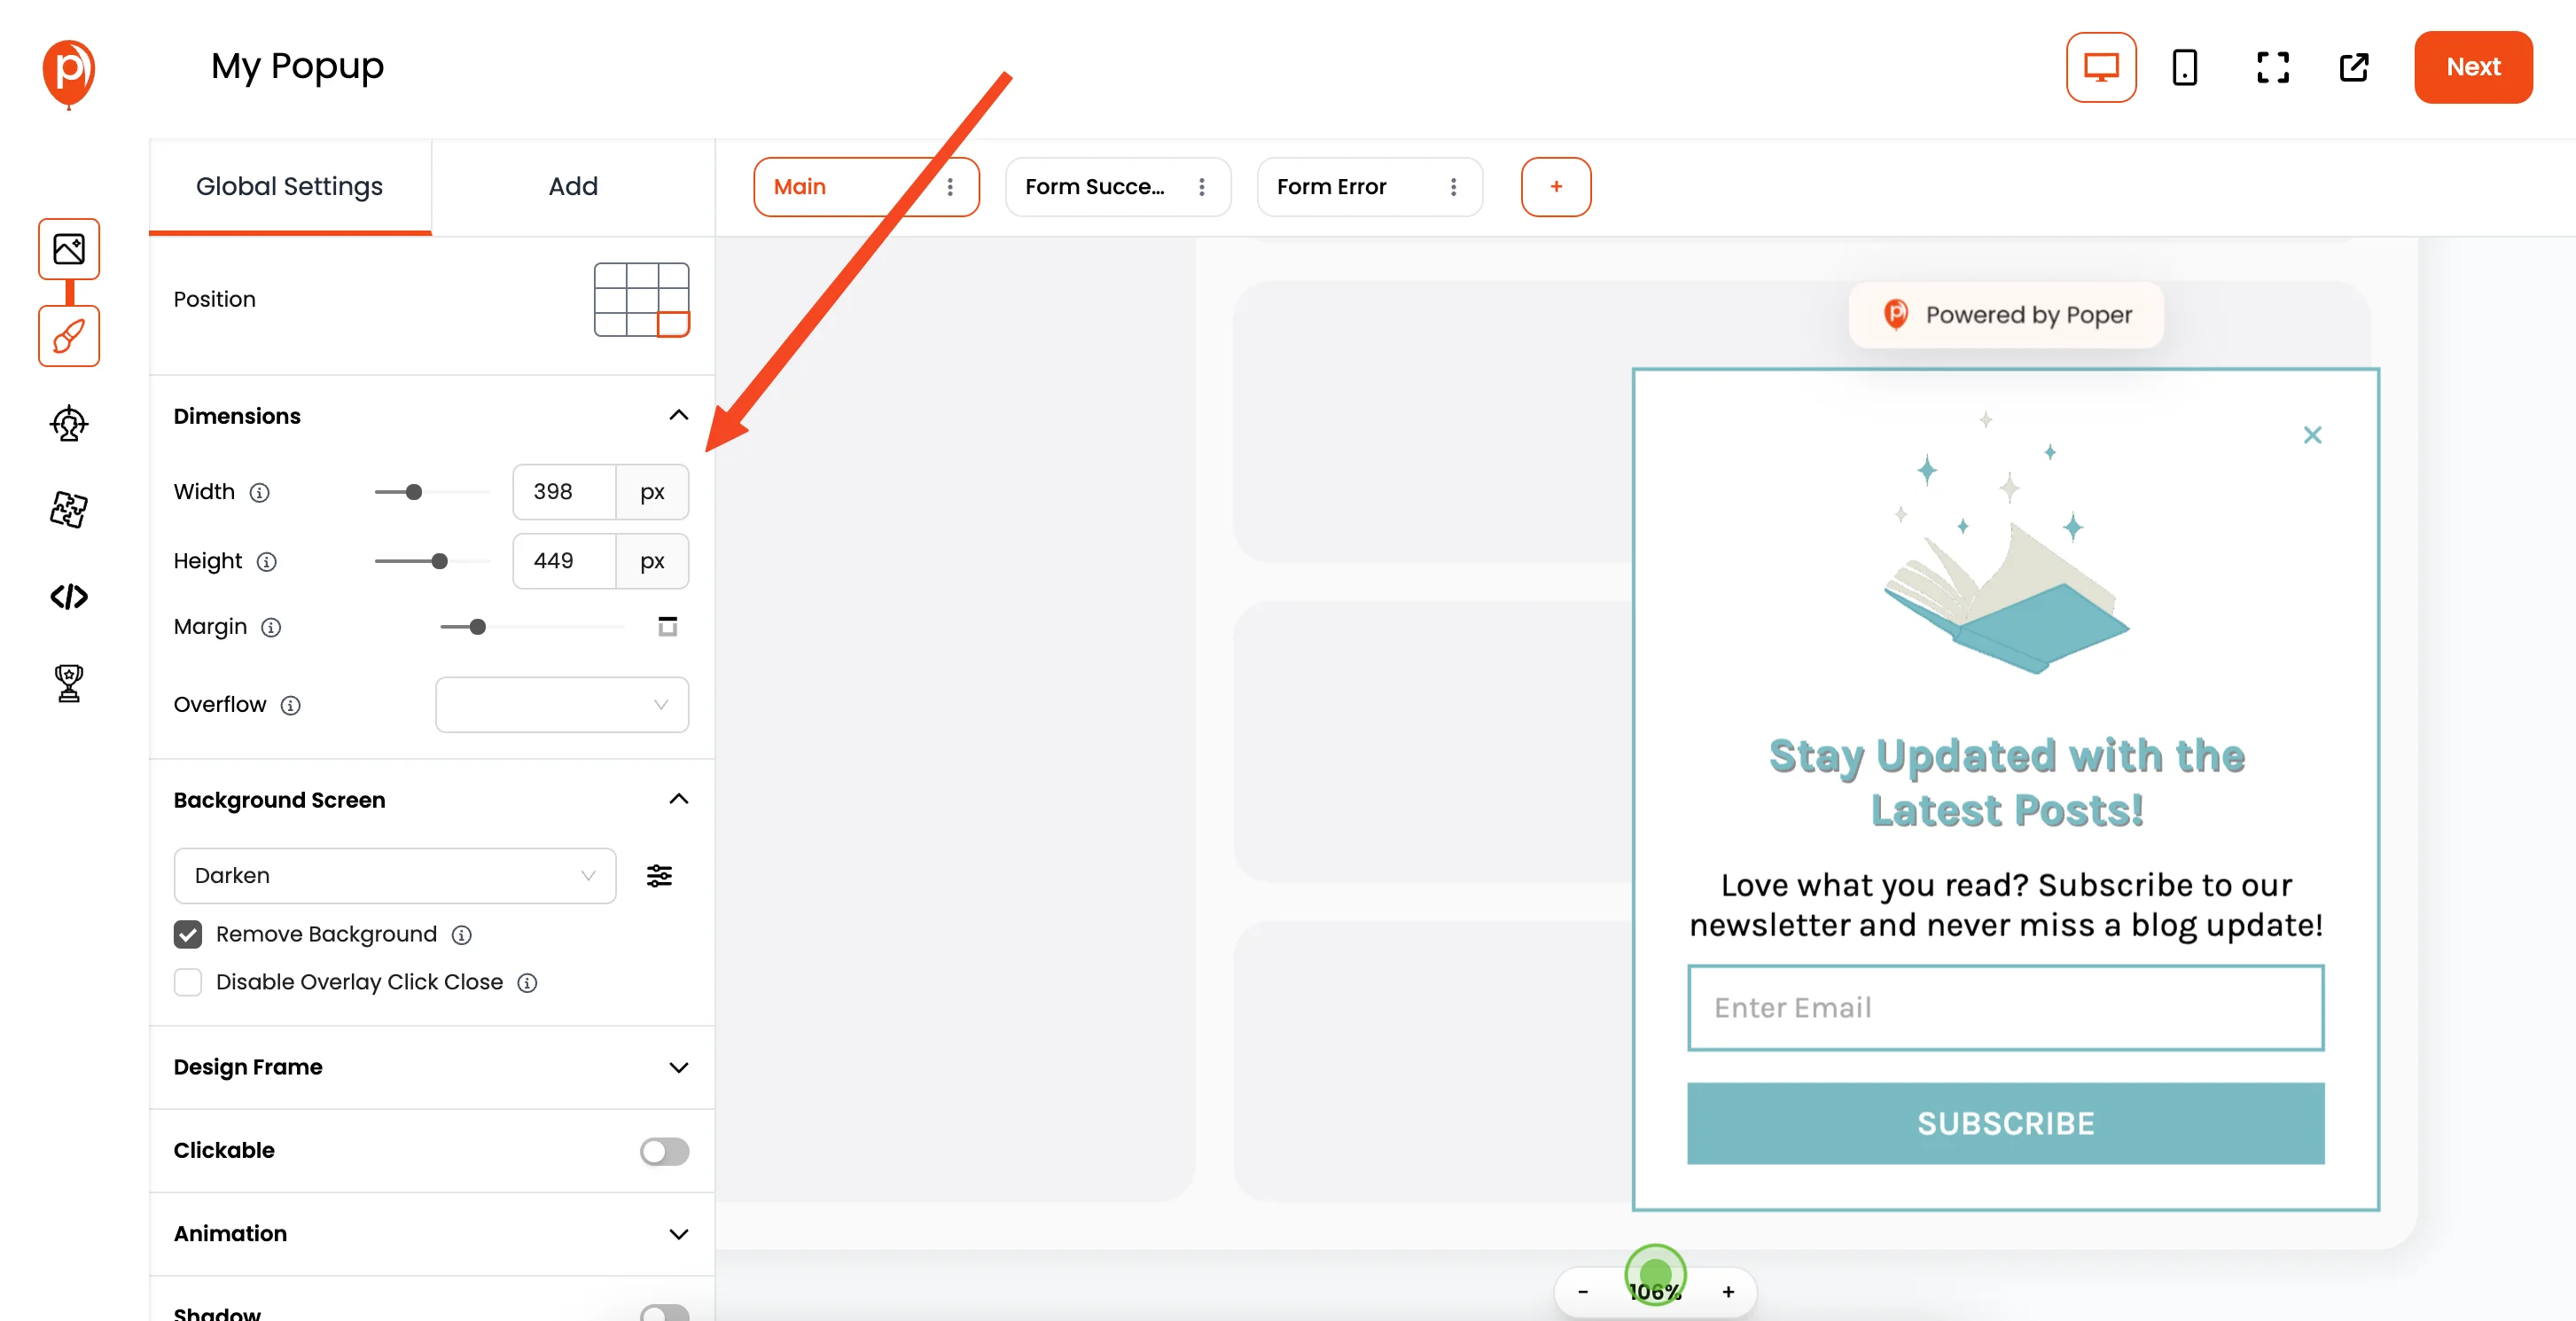
This opens the popup editor where you can change fonts, colors, images – everything! Make sure the popup looks great and clearly communicates your message.
Step 5: Set the Trigger to "On Click"
Click "Next" to move to the "Display Conditions" page. This is where you control when your popup appears.
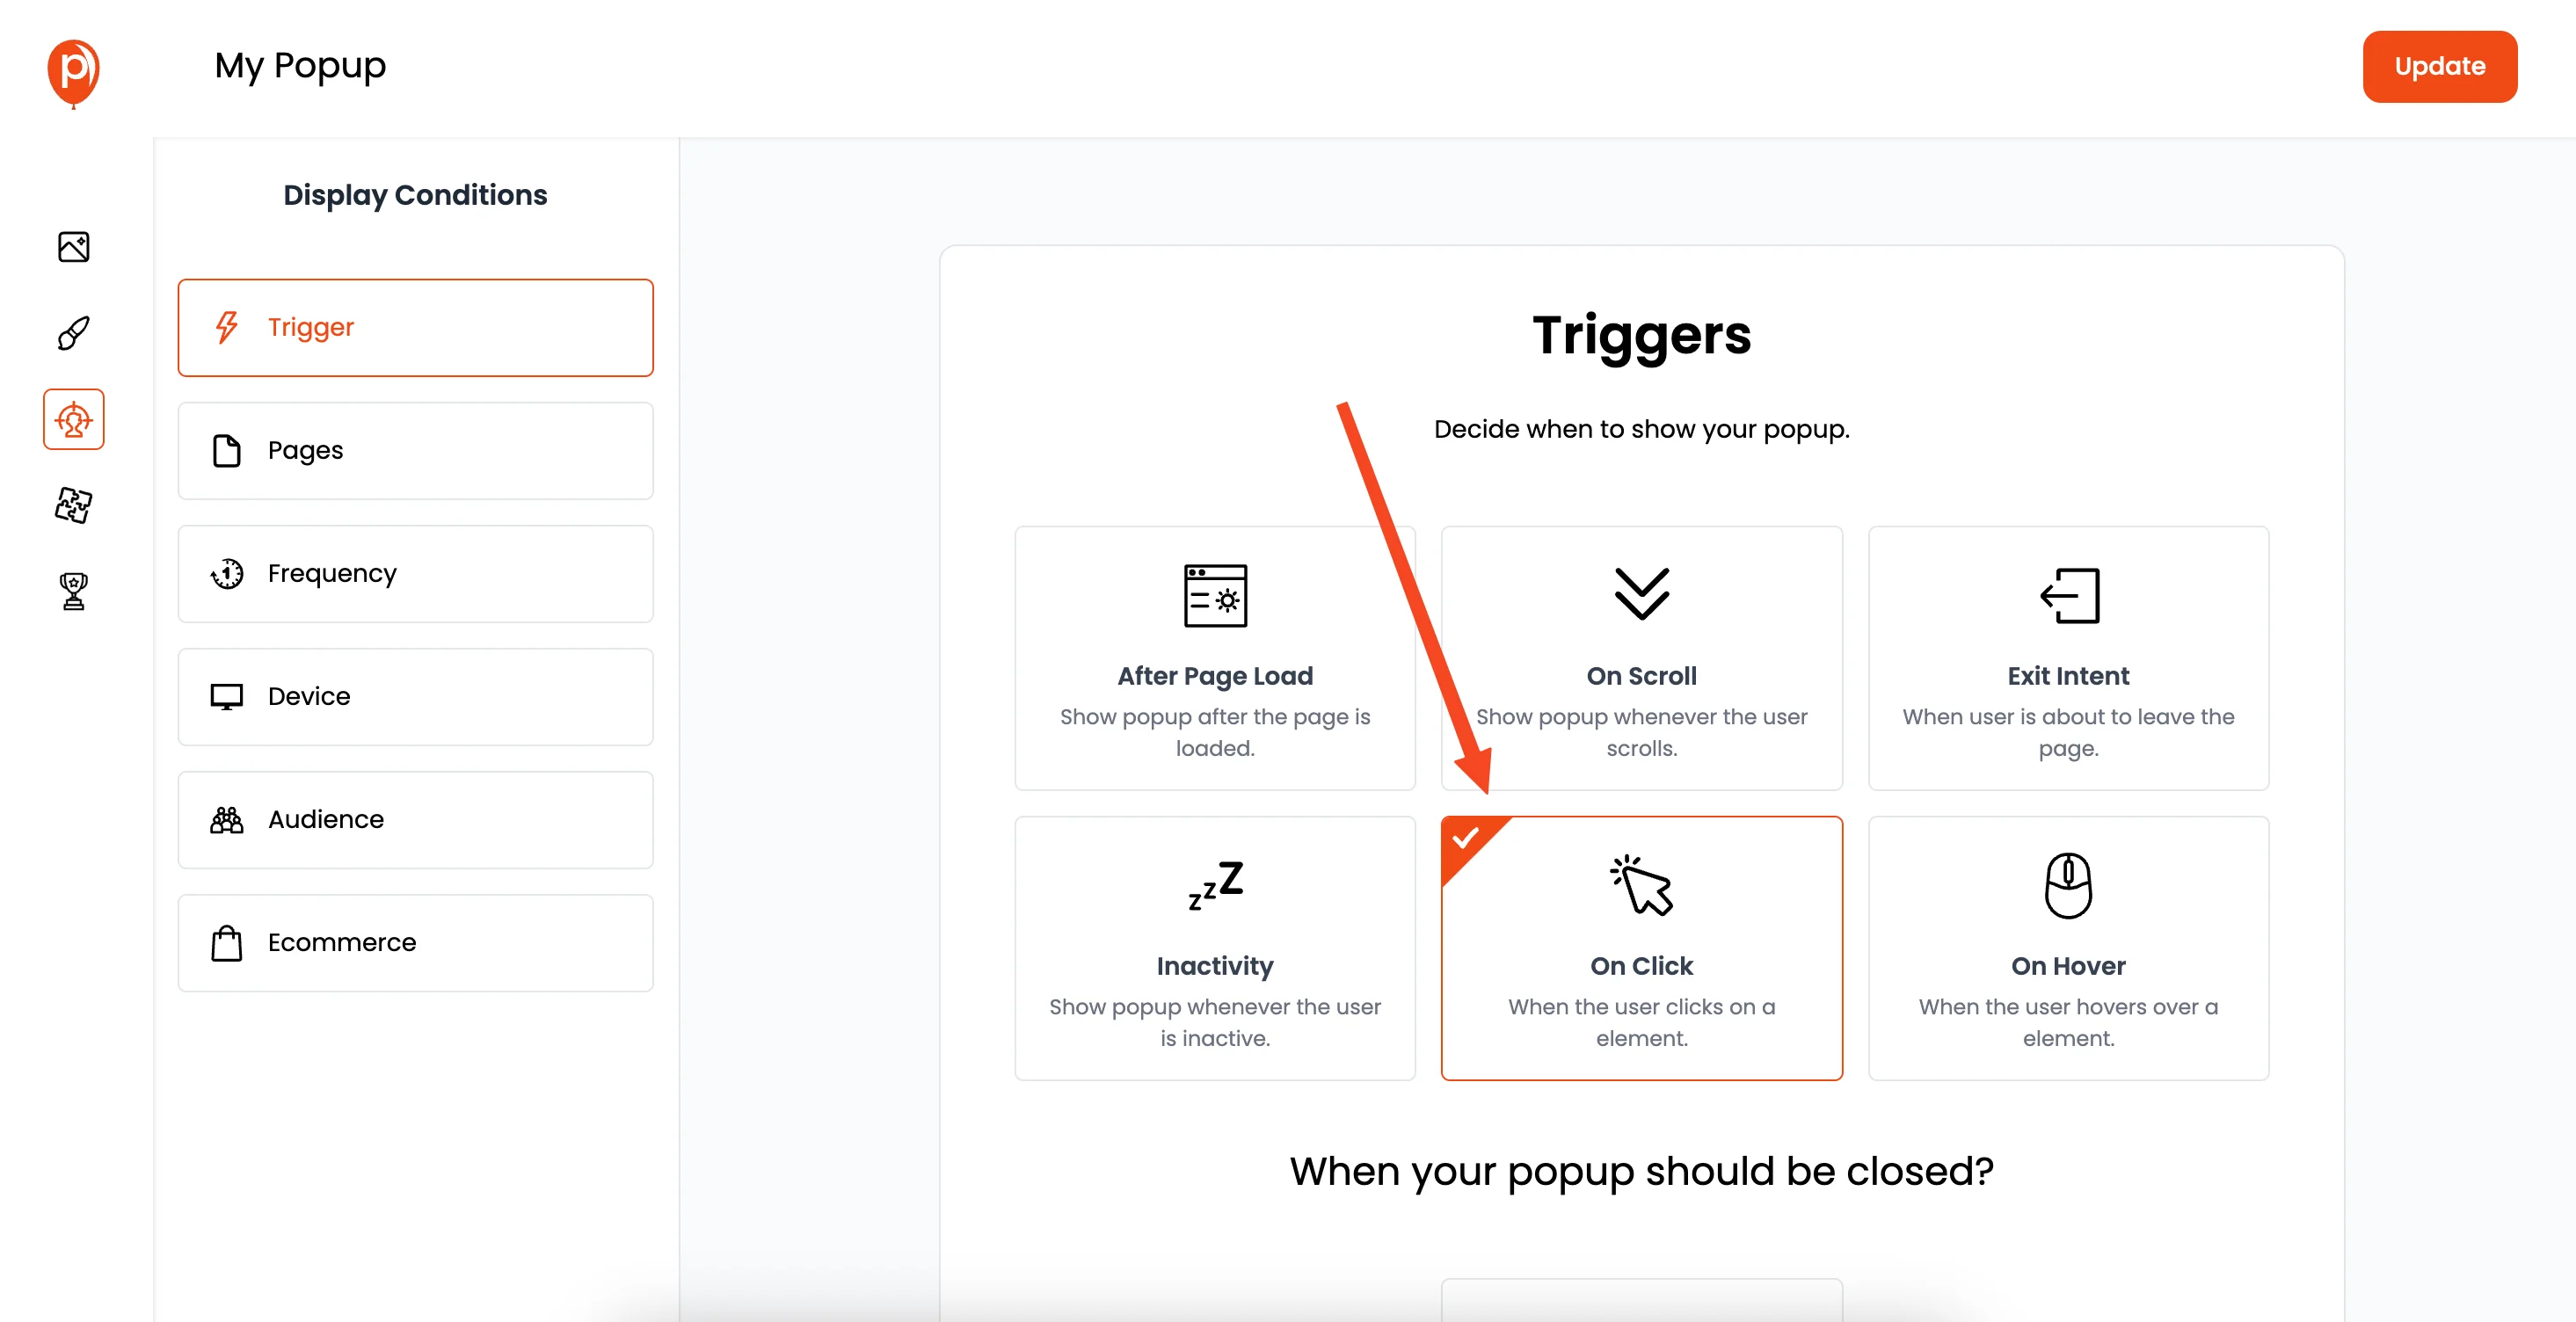
Select "On Click" as the trigger. Now, here's the cool part: you can enter the CSS selector of the button or link you want to trigger the popup.
For example, if you have a "Sign Up" button, find its CSS class or ID and paste it here. This means the popup will only appear when someone clicks that specific element.
Targeting is very important, target the pages, audience demographics and more to target the popups to specific users only
Step 6: Connect Your Popup to MailerLite
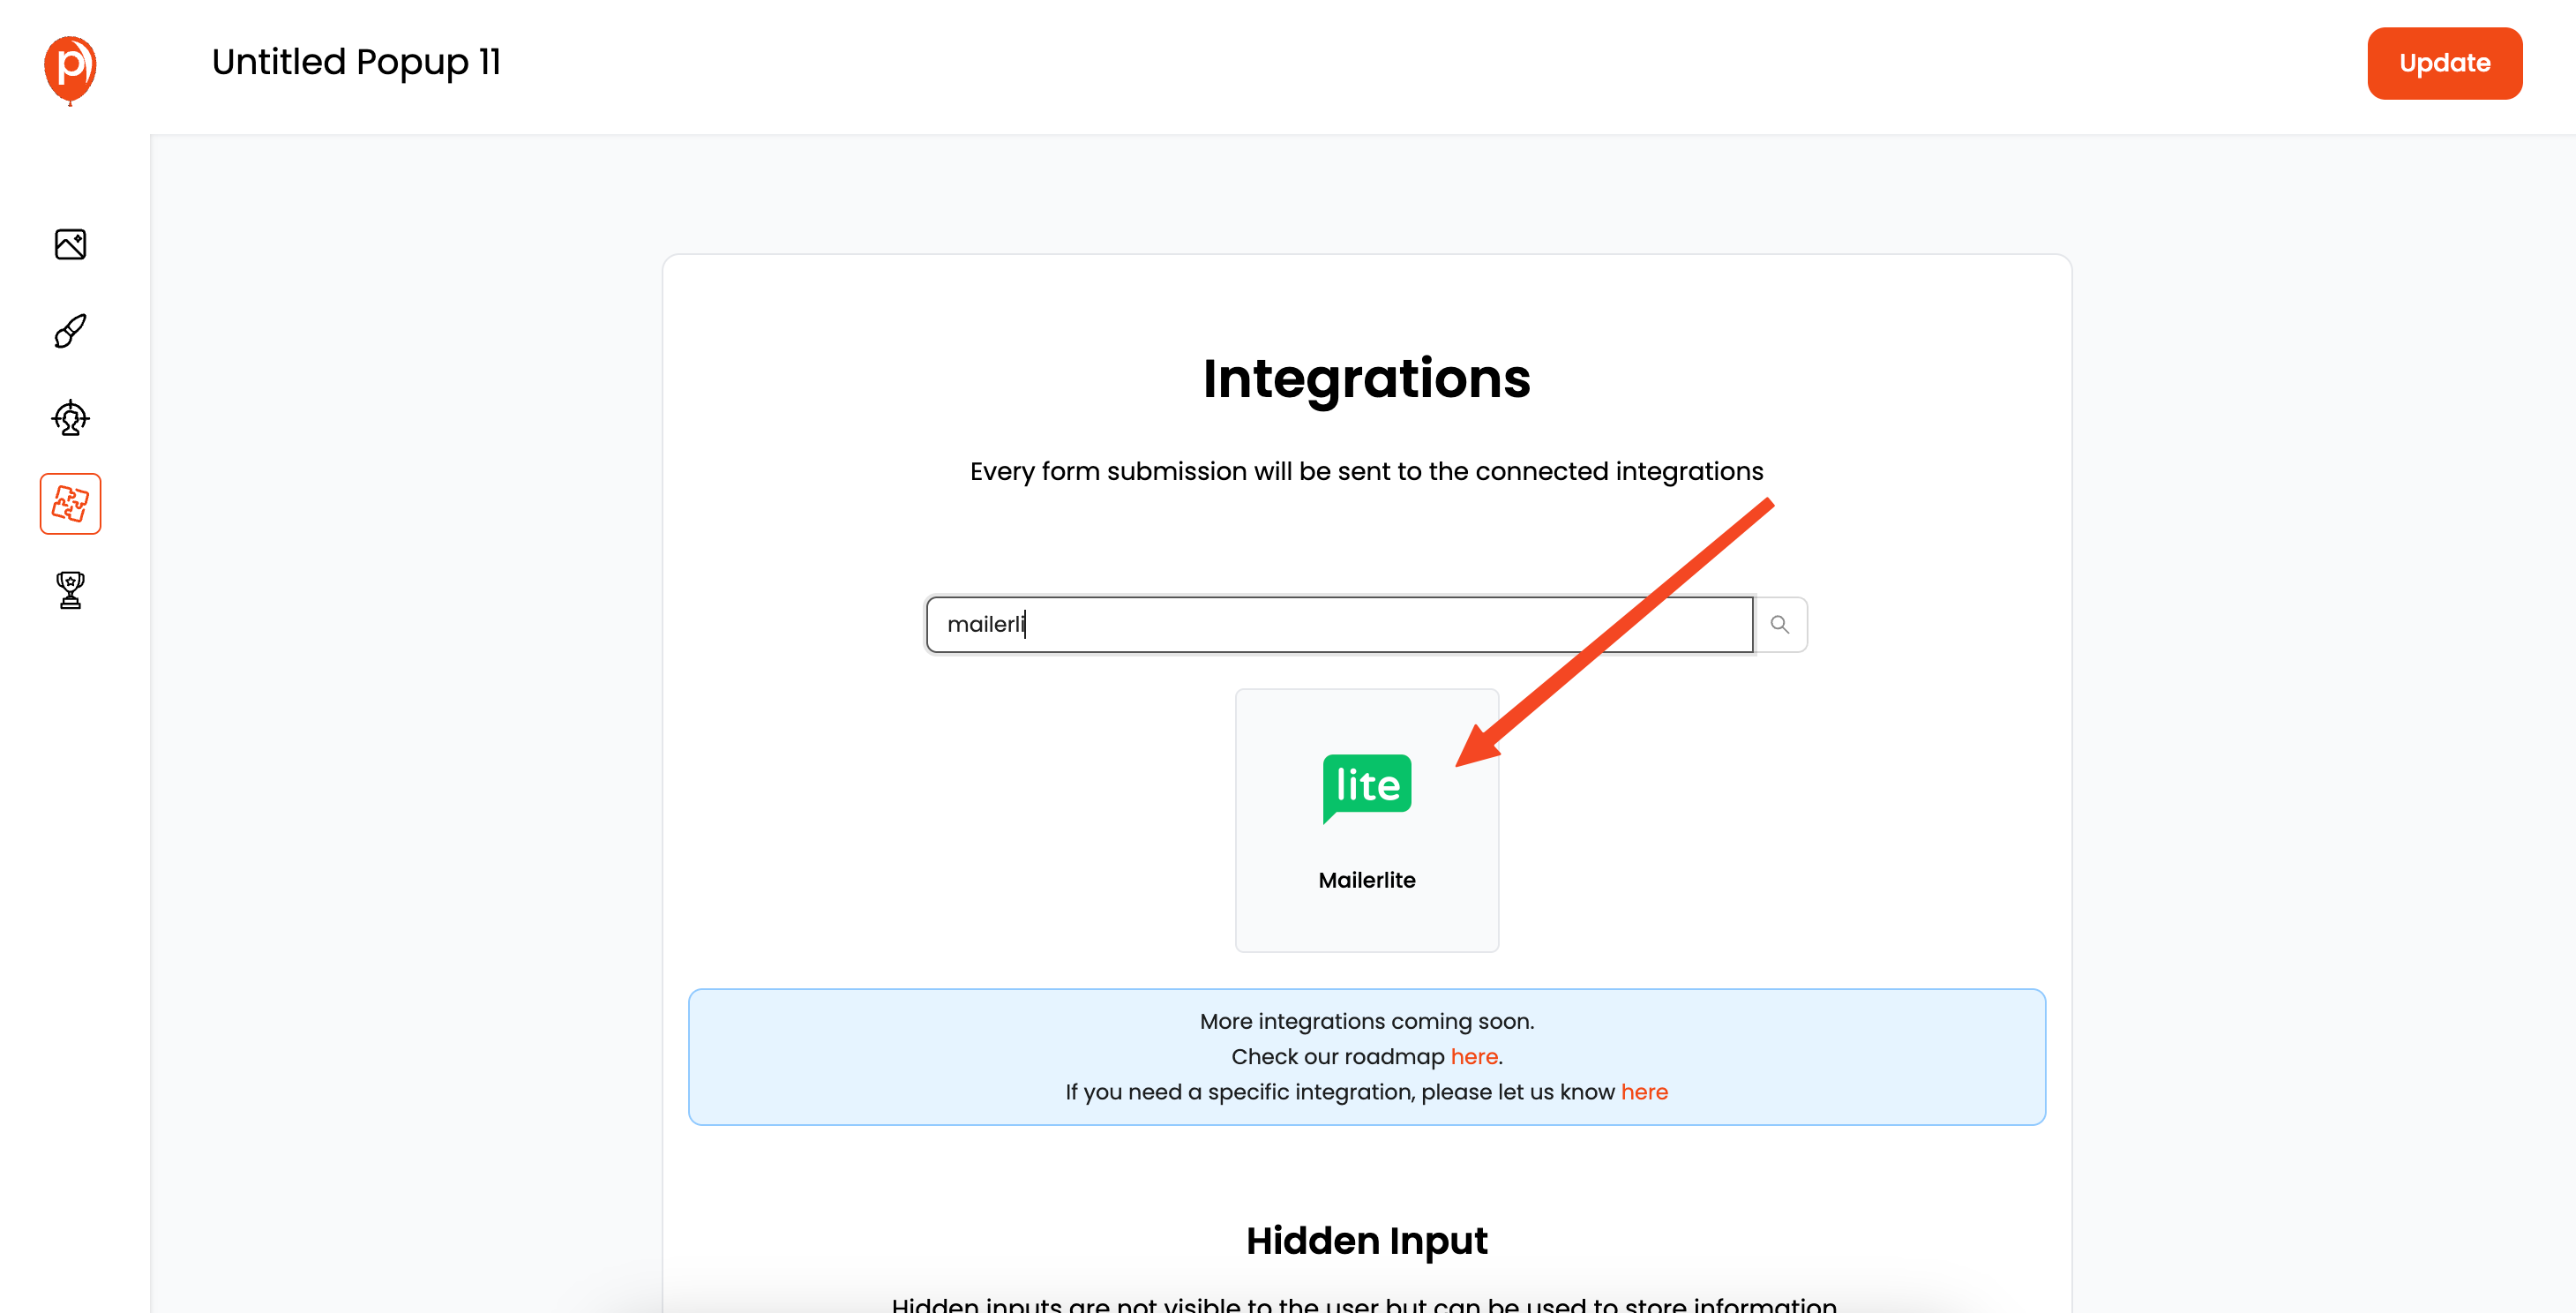
Click "Next" again to reach the "Integrations" page. Find MailerLite in the list and select it.
Step 7: Enter Your MailerLite API Key
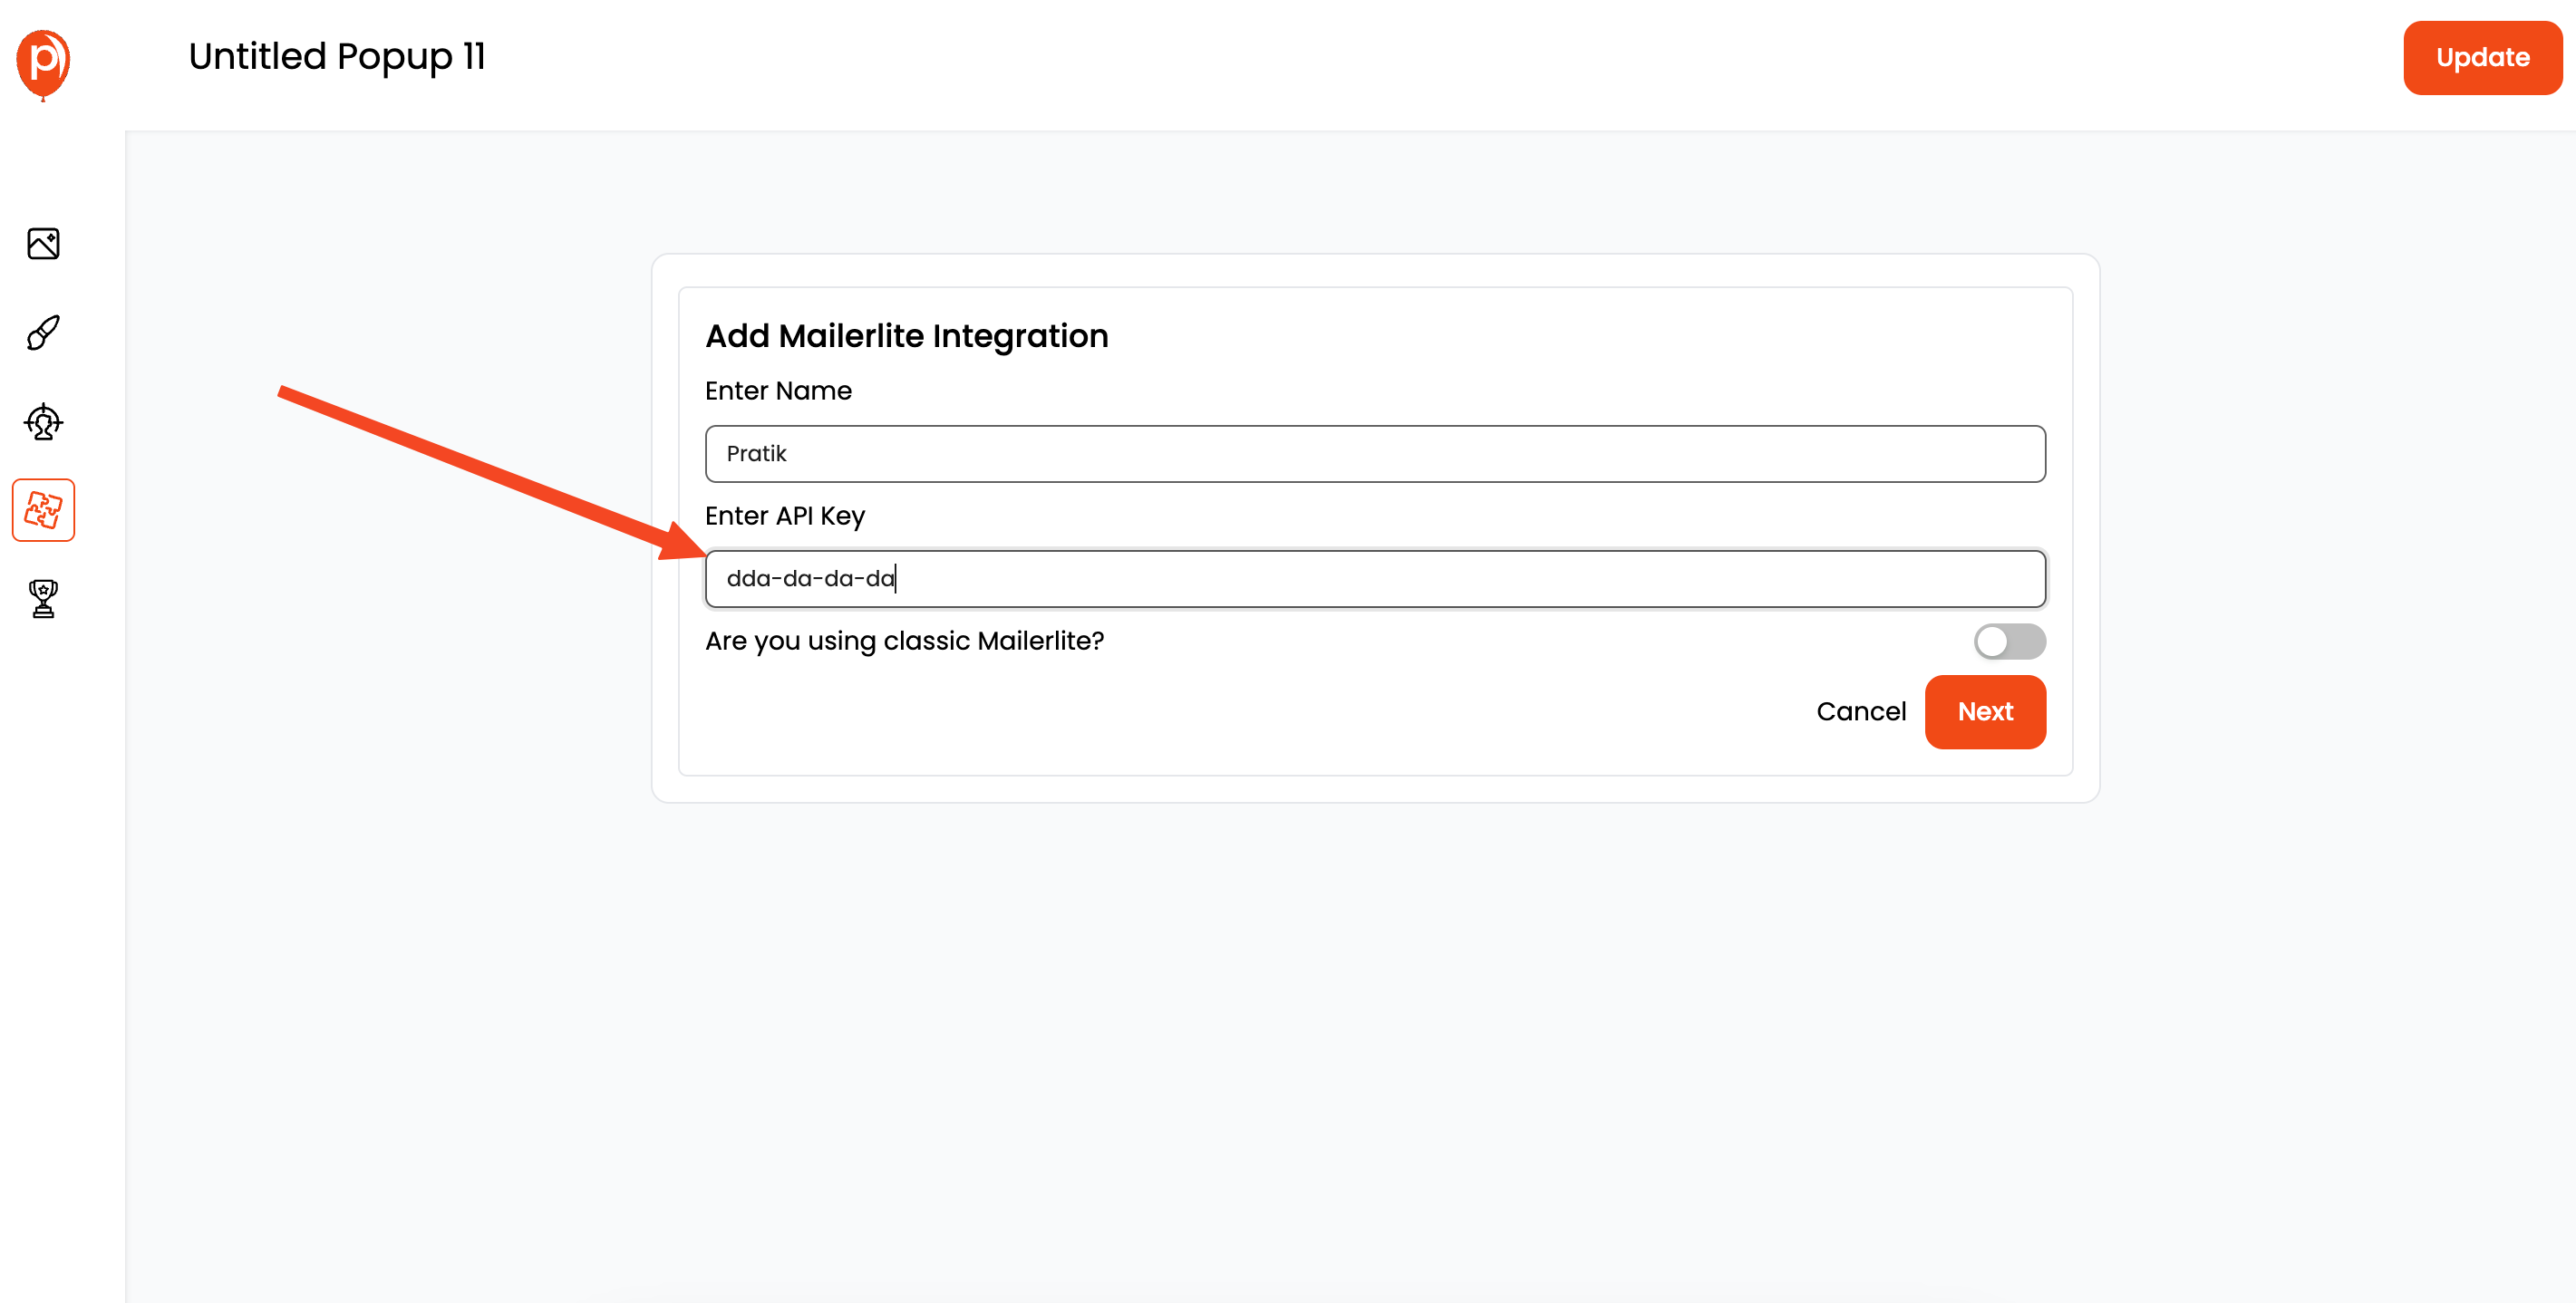
You'll be prompted to enter your MailerLite API key. This lets Poper securely connect to your MailerLite account. I have created a detailed guide on Mailerlite integration, here's the link: https://support.poper.ai/en/articles/10095426-mailerlite-integration
Step 8: Configure Your MailerLite Settings
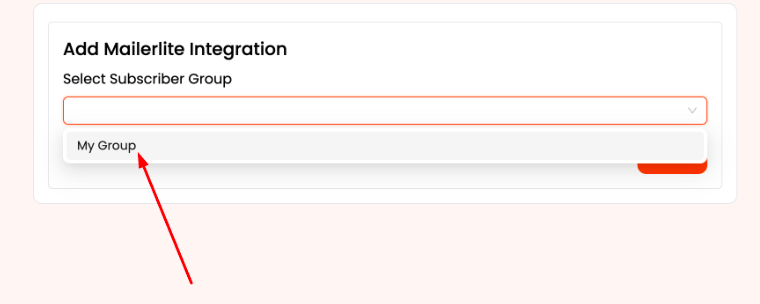
Select the subscriber group you want to add new subscribers to, and assign any relevant tags.
Step 9: Map Your Fields
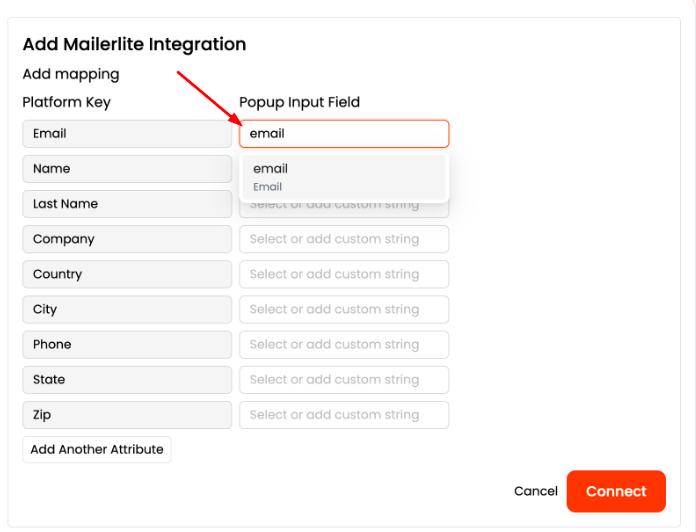
Map the form fields from your Poper popup to the corresponding fields in MailerLite. This ensures the data is correctly transferred.
Step 10: Install the Poper WordPress Plugin
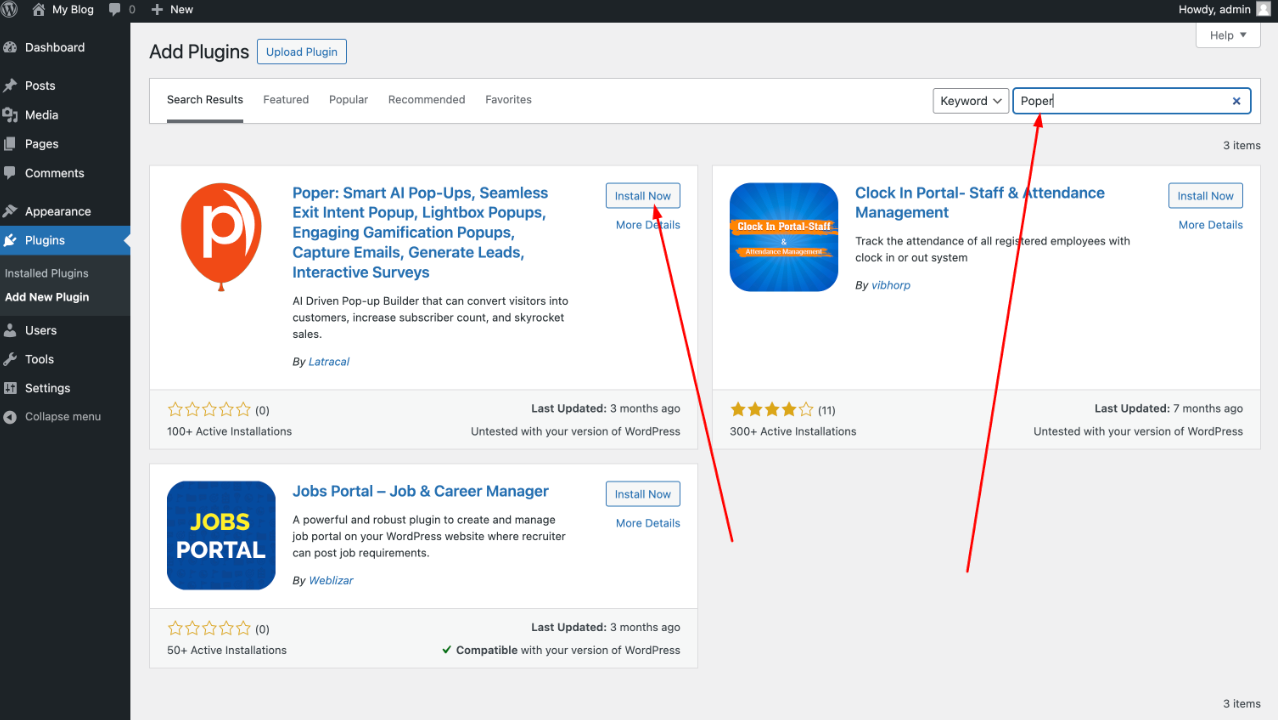
Head over to your WordPress dashboard, go to "Plugins," and search for "Poper." Install and activate the plugin.
Step 11: Connect the Plugin to Your Poper Account
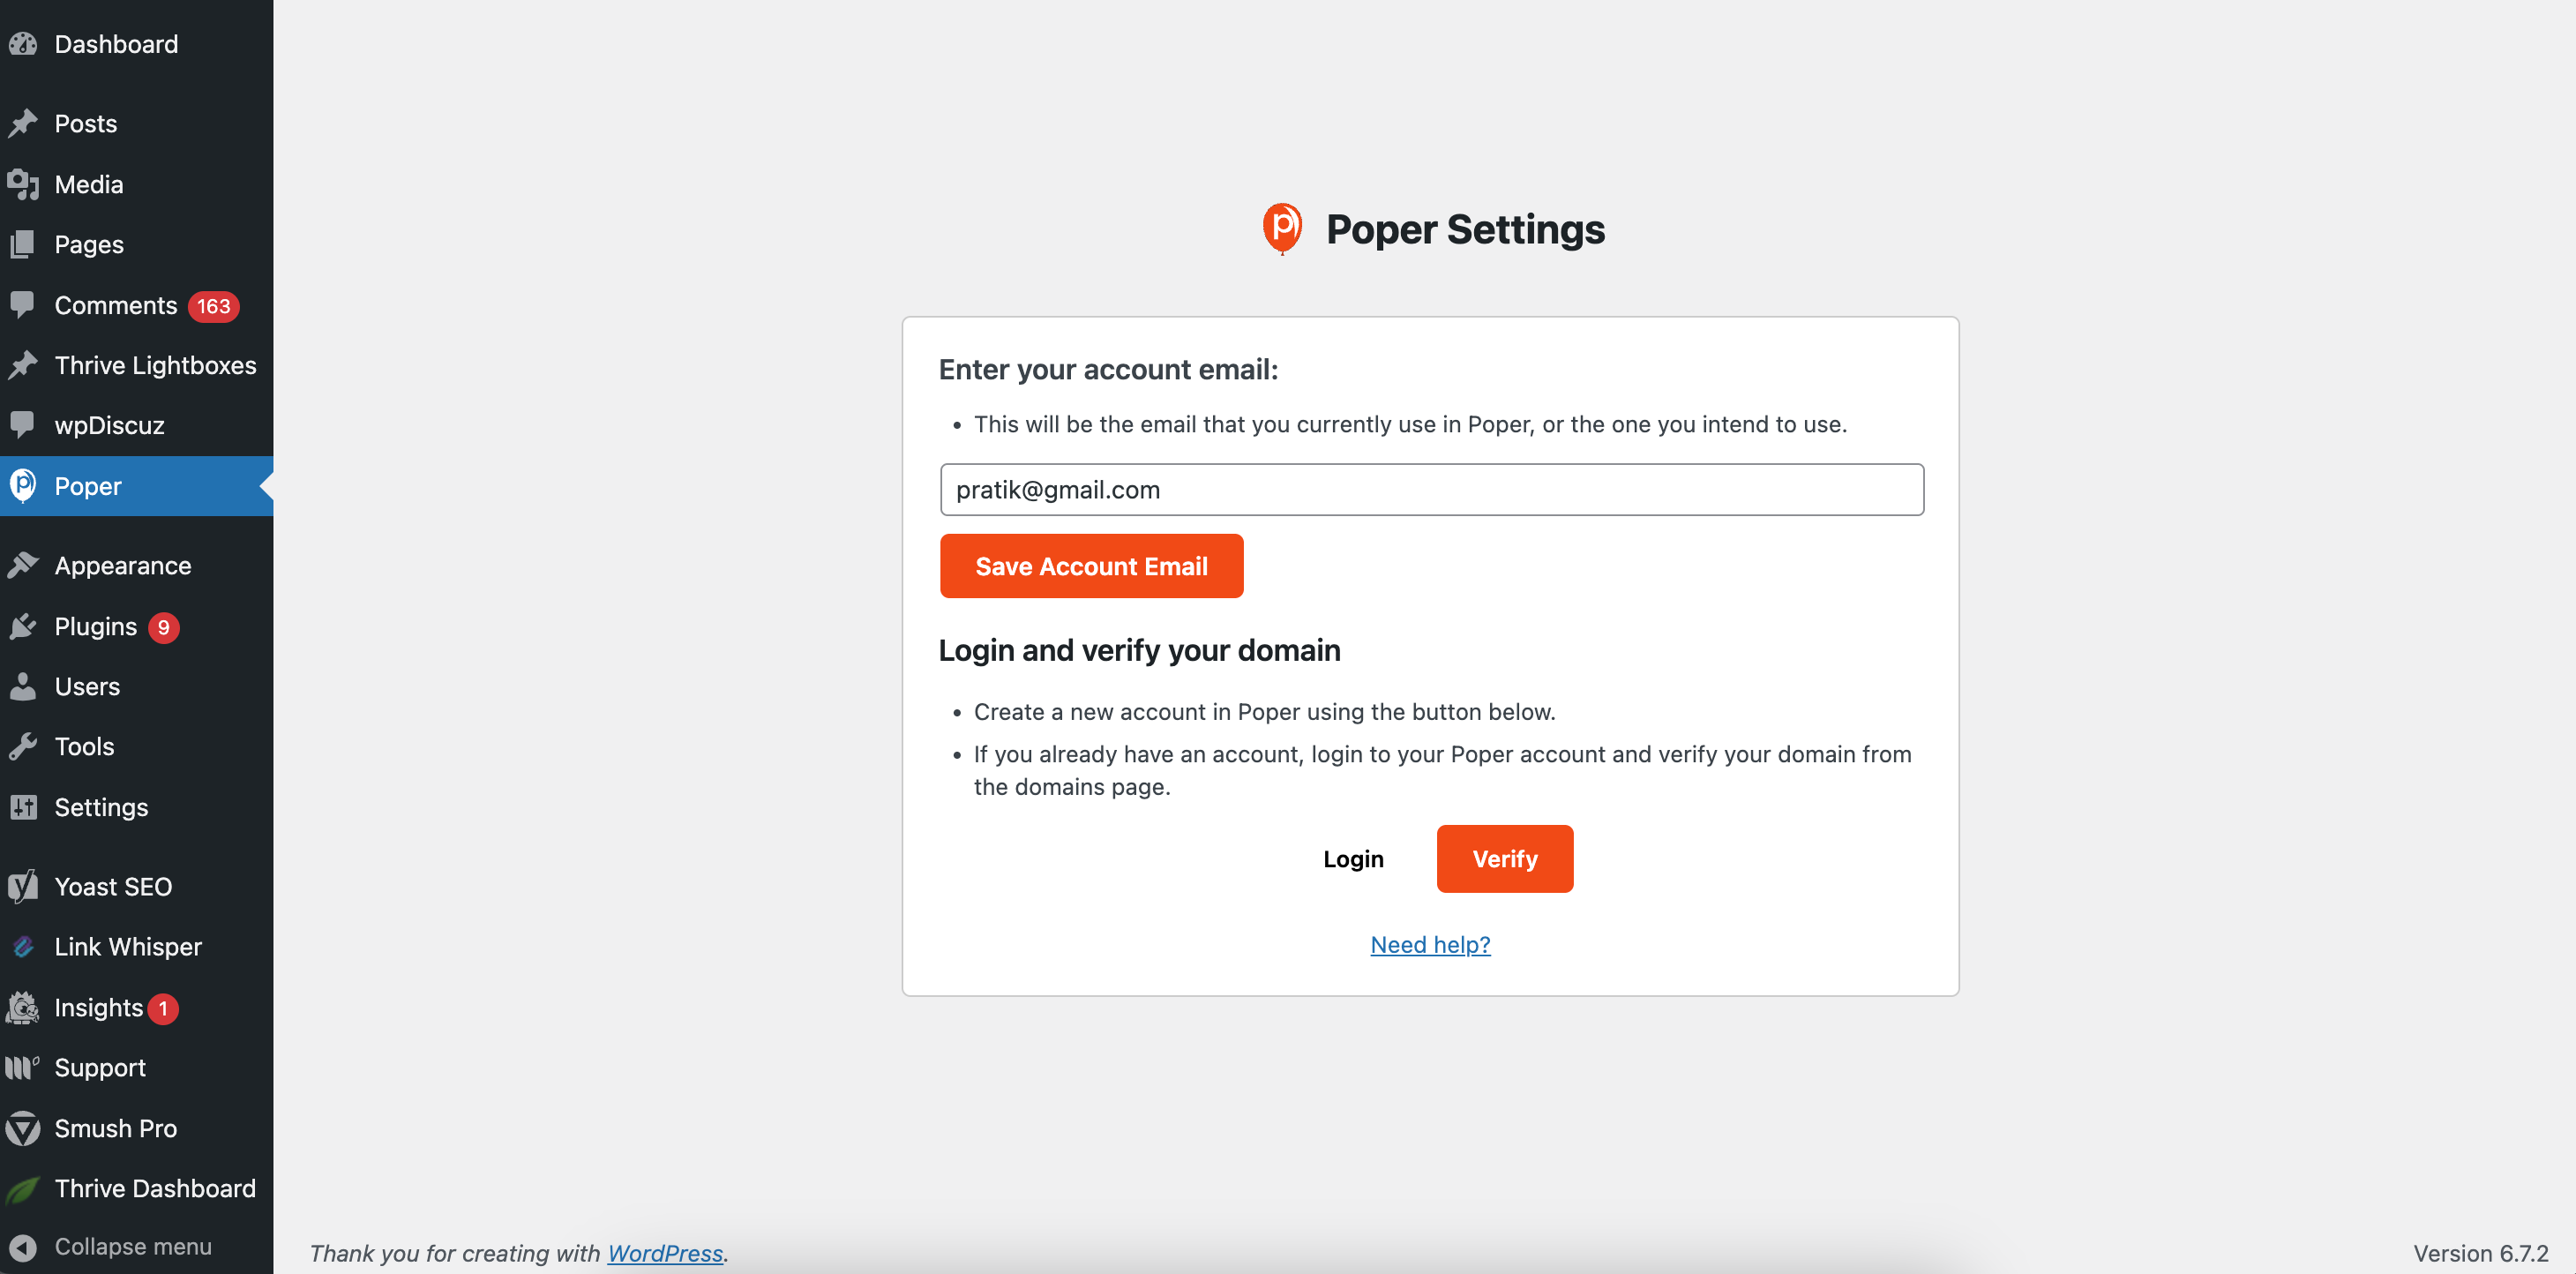
In your WordPress sidebar, you'll see a new "Poper" menu. Click on it and enter the email address you used to sign up for Poper. Then, click "Save."
Step 12: Verify Installation
Go back to your Poper account and verify your installation.
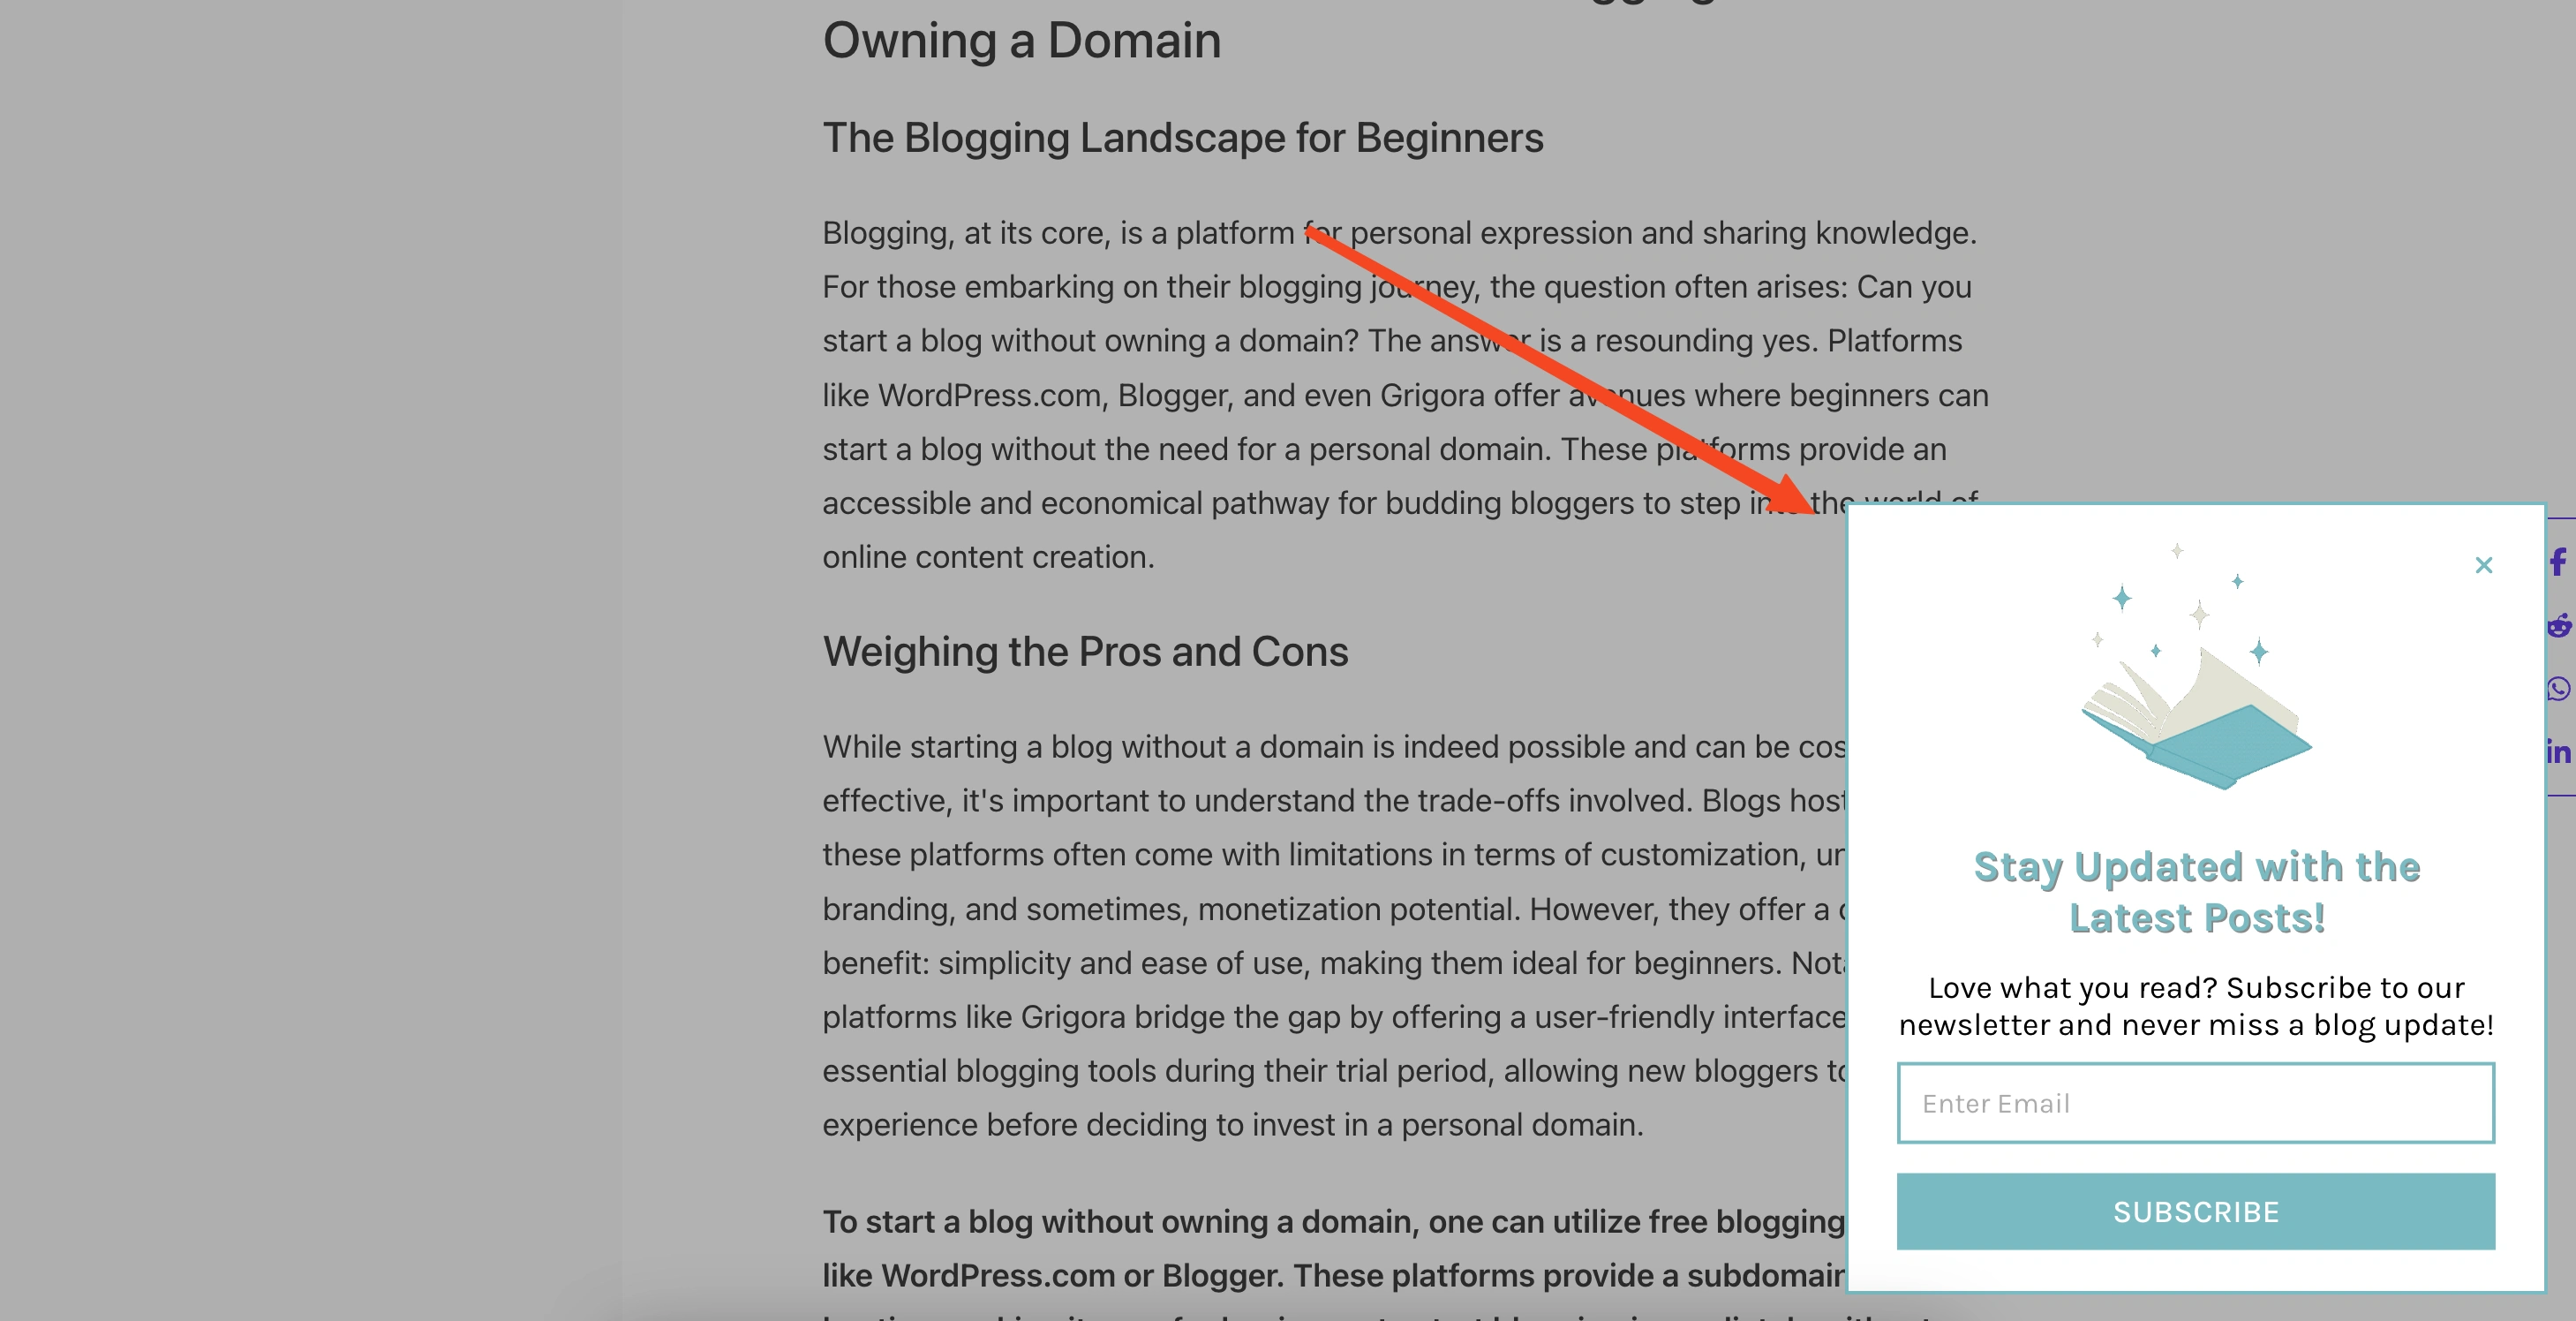
That's it! Now, when someone clicks your chosen button or link on your Elementor website, the Poper popup will appear, and new subscribers will be automatically added to your MailerLite list with the correct tags.
Method 2: Using MailerLite's Built-In Popups
MailerLite also offers its own popup functionality, but it's a bit less flexible in terms of design and triggers.
Step 1: Navigate to the Popup Forms Section
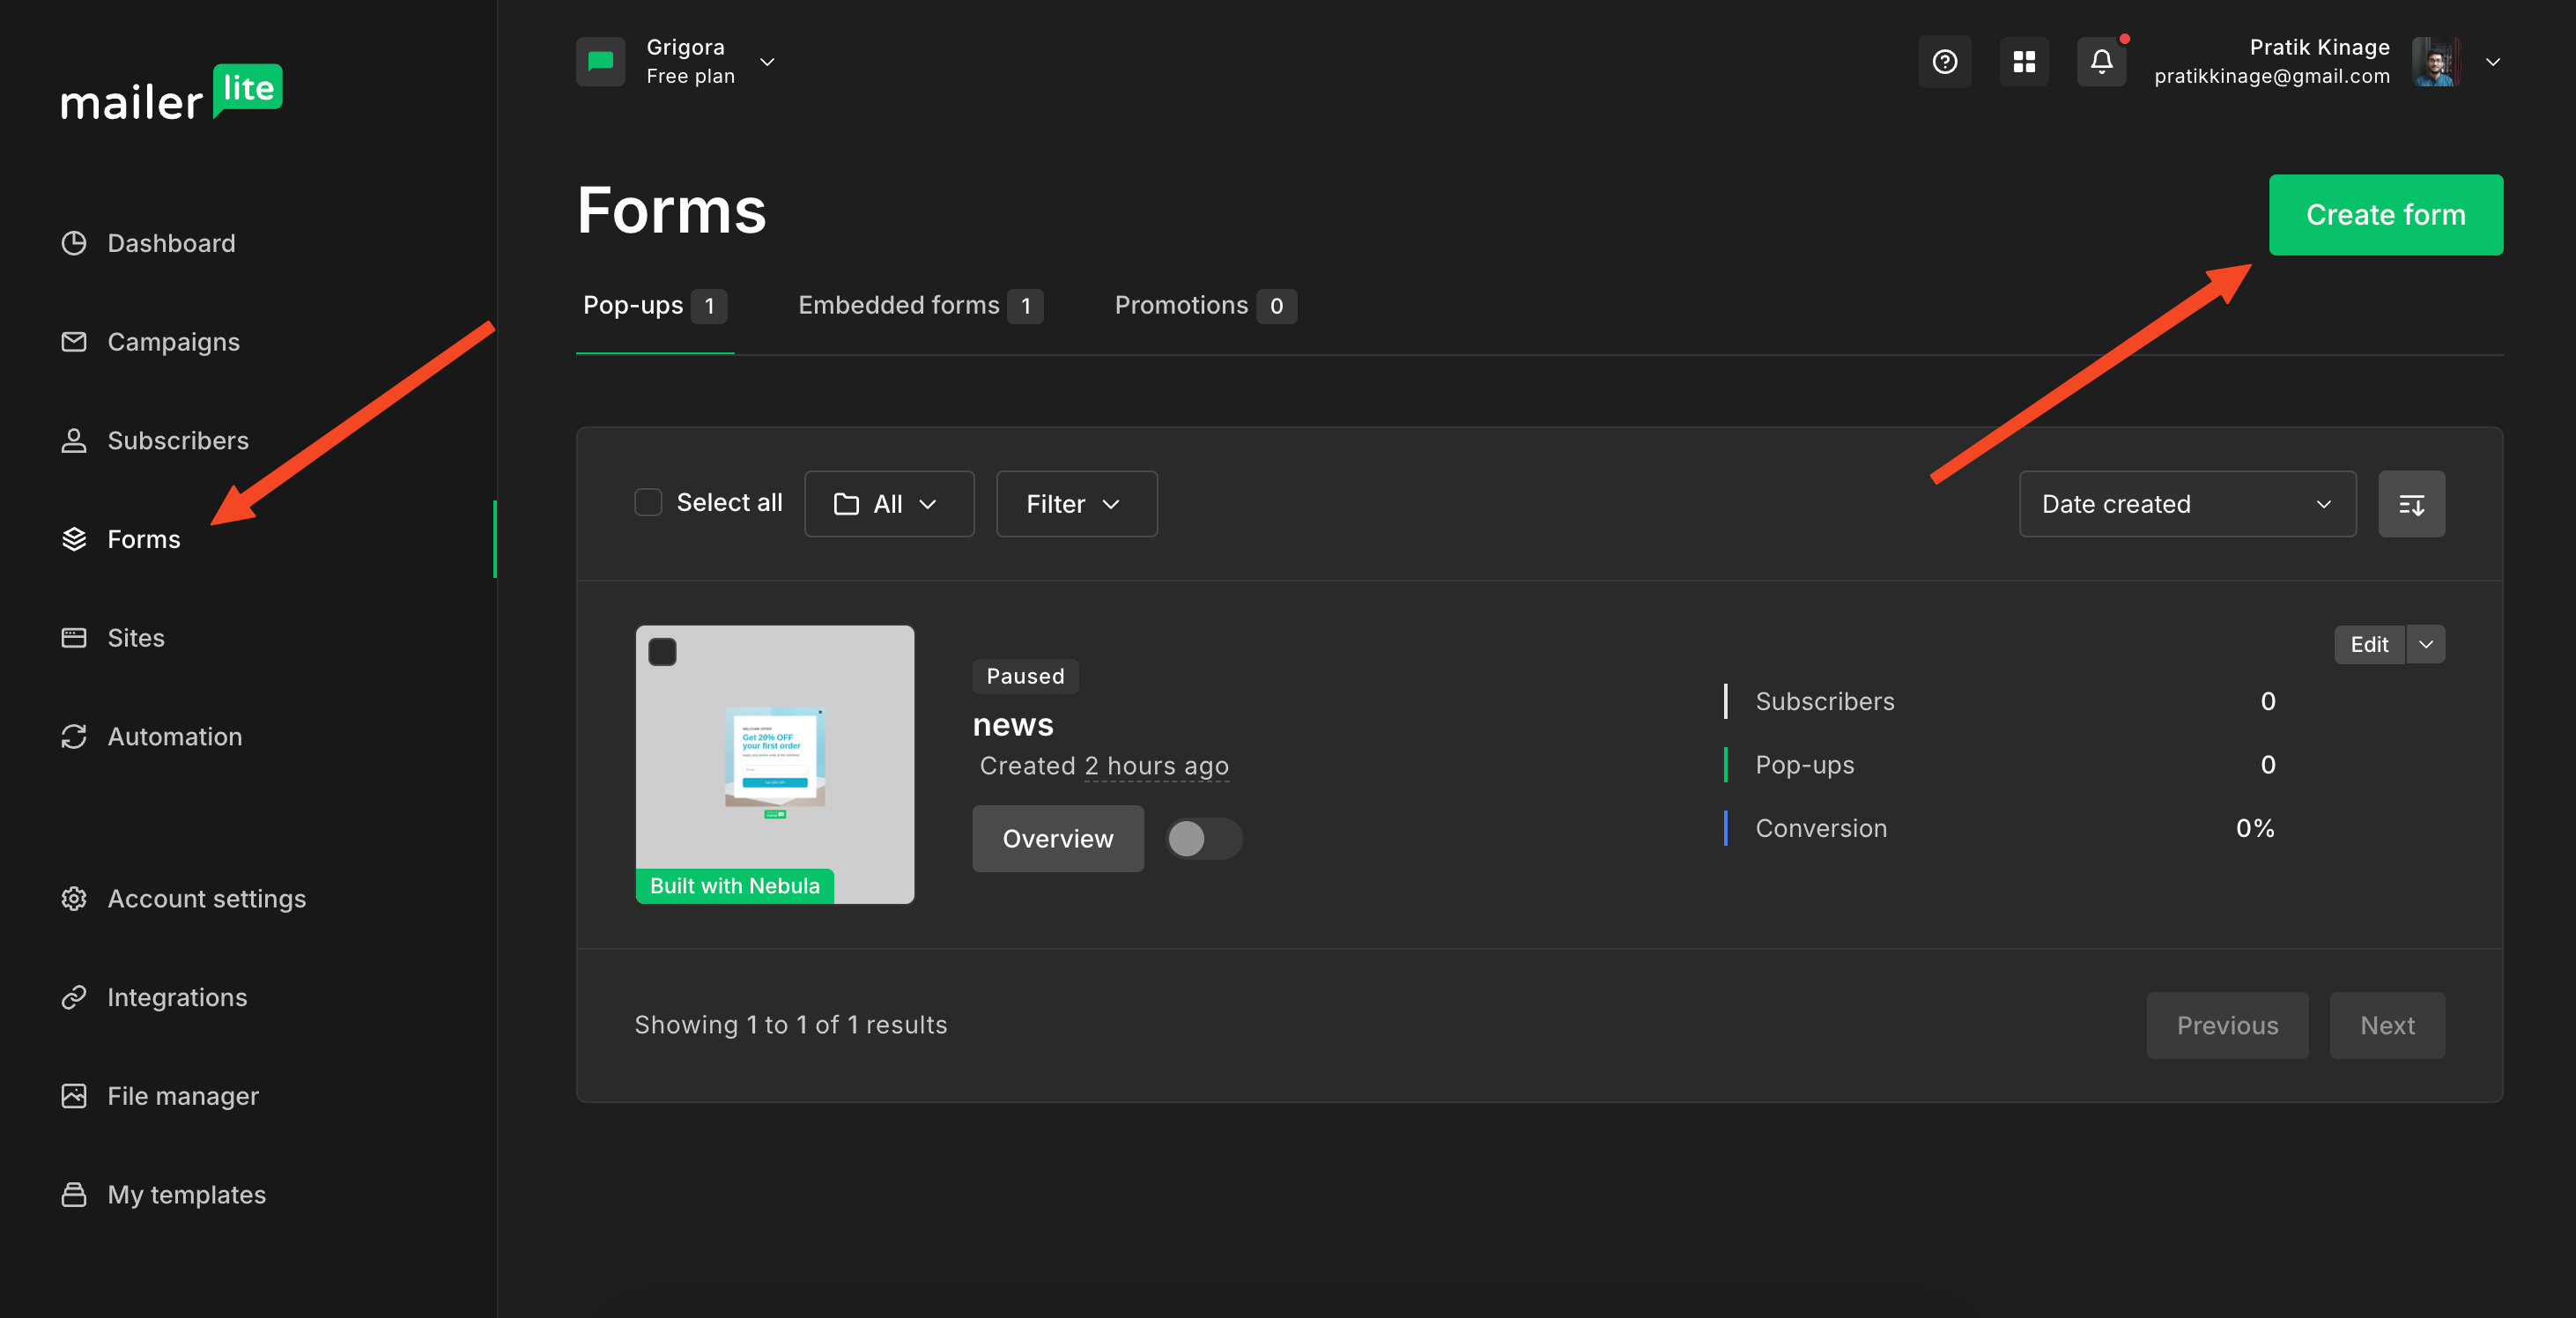
Go to your MailerLite dashboard and click on "Forms" then "Popups."
Step 2: Create a New Popup
Click on "Create Form."
Step 3: Name Your Popup and Select a Subscriber Group
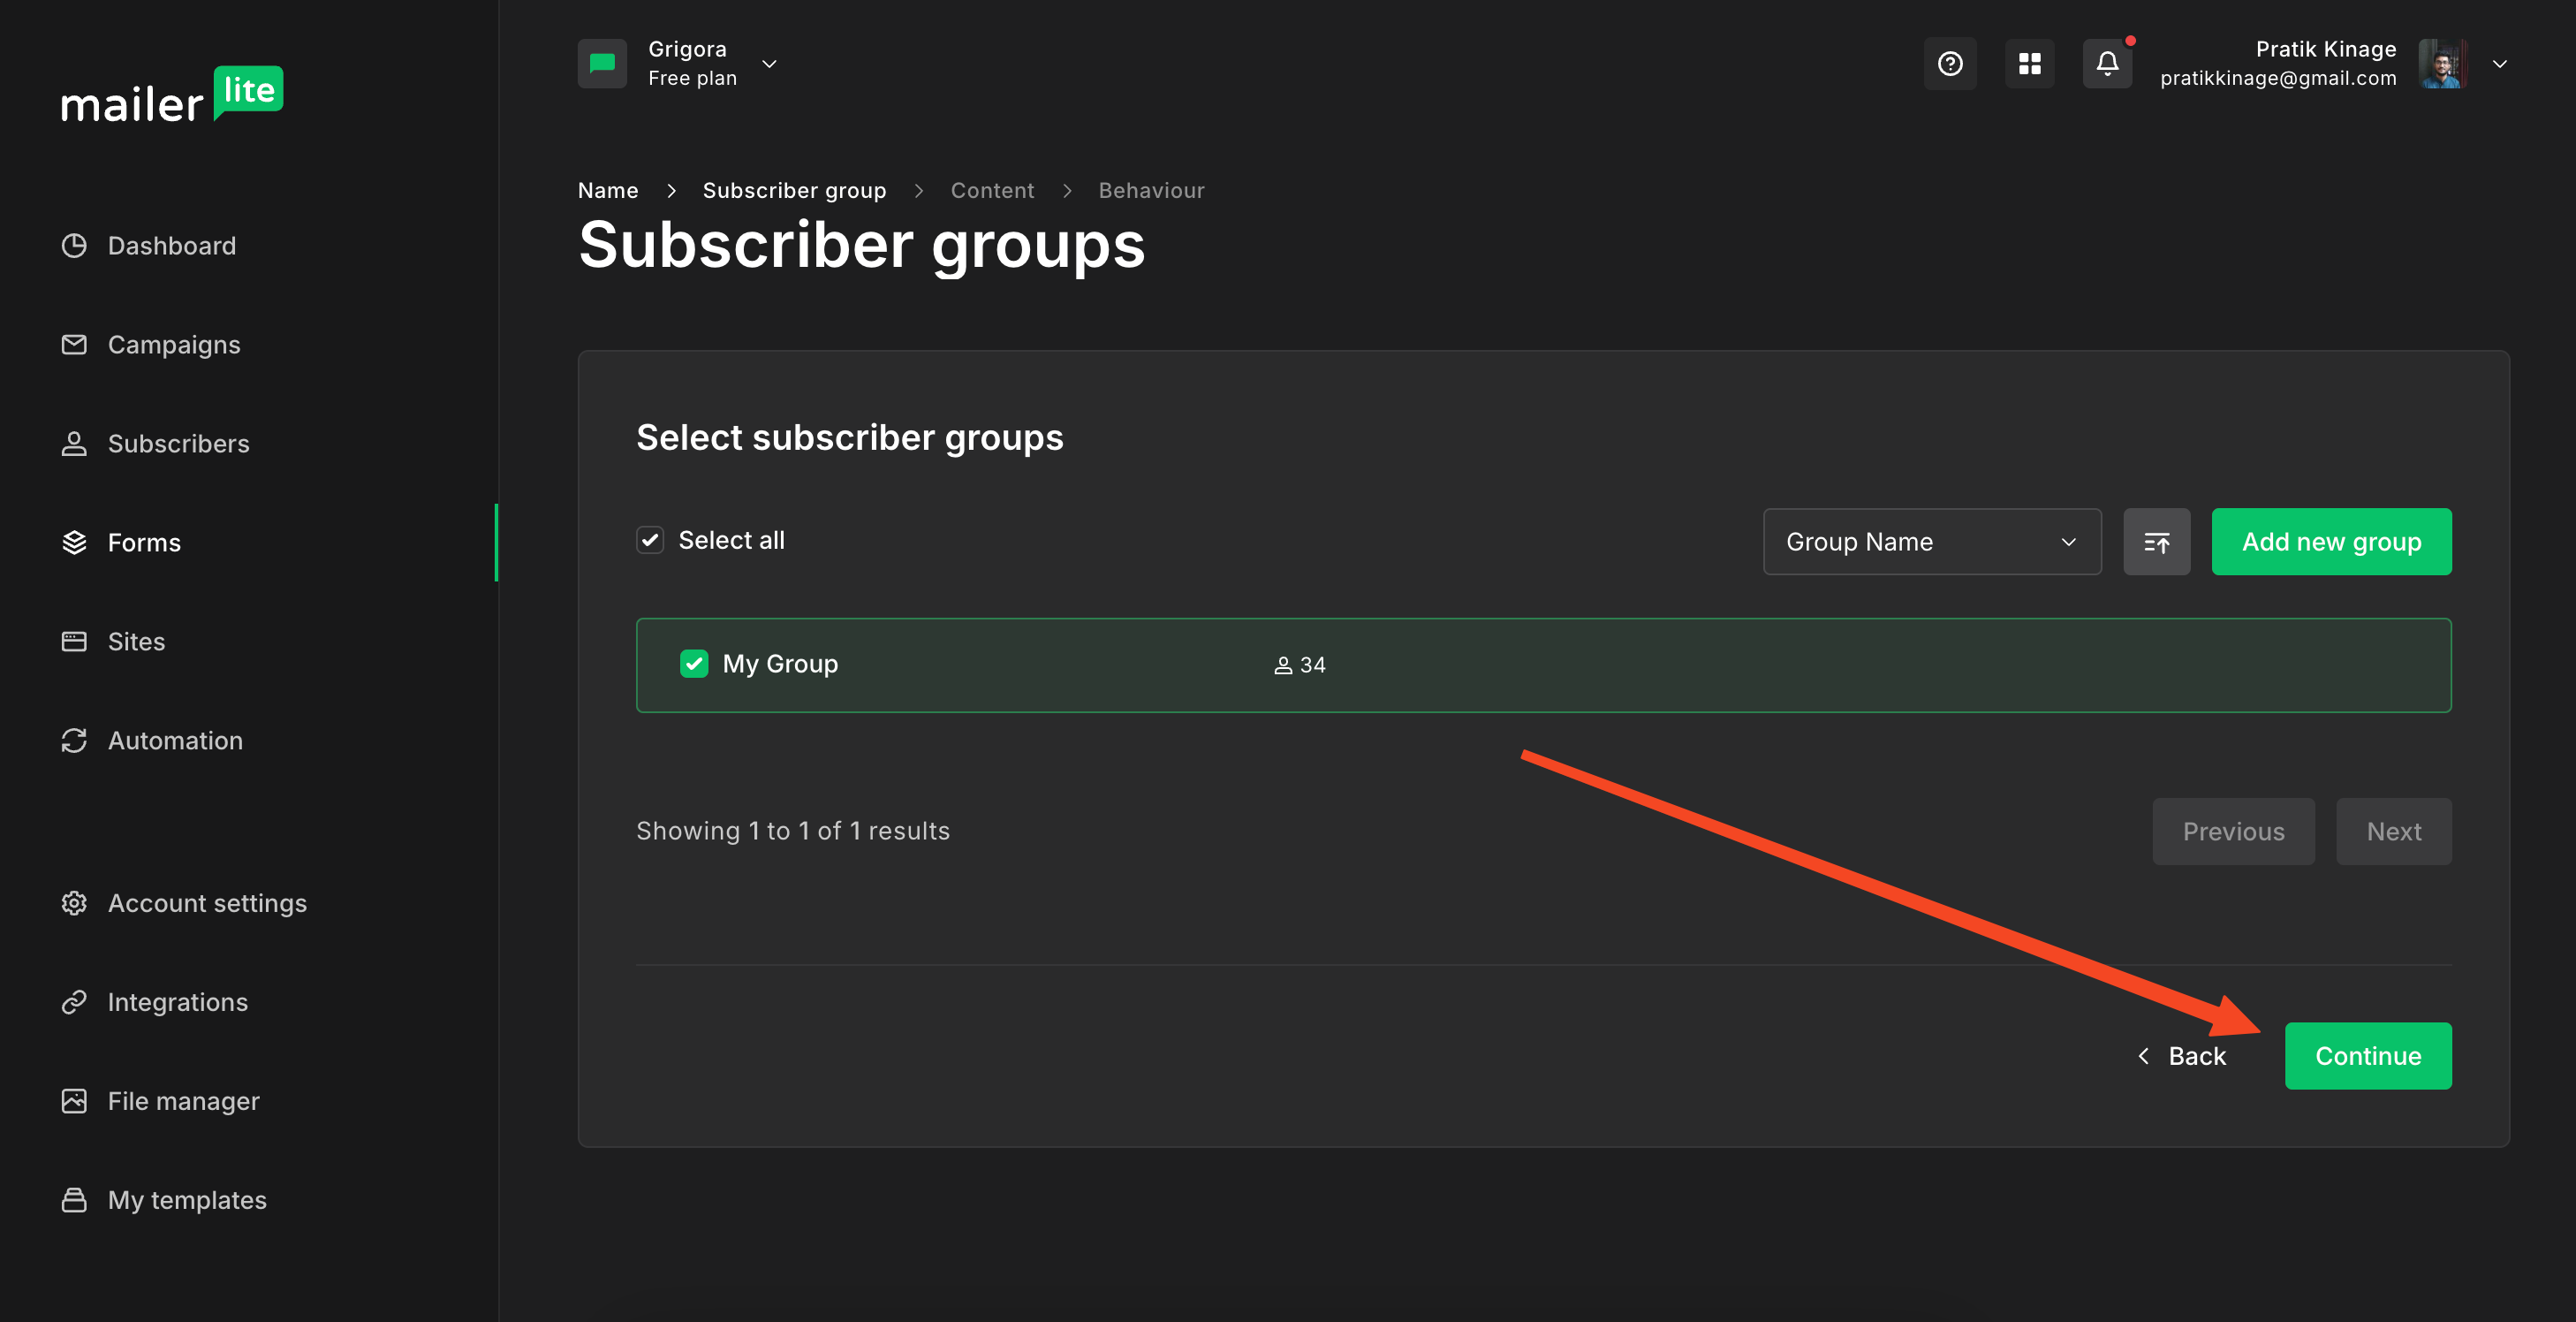
Give your popup a name and choose the subscriber group you want to add people to.
Step 4: Customize Your Popup
This opens the popup editor where you can add form fields and customize the design.
Step 5: Configure Triggers (Limitations)
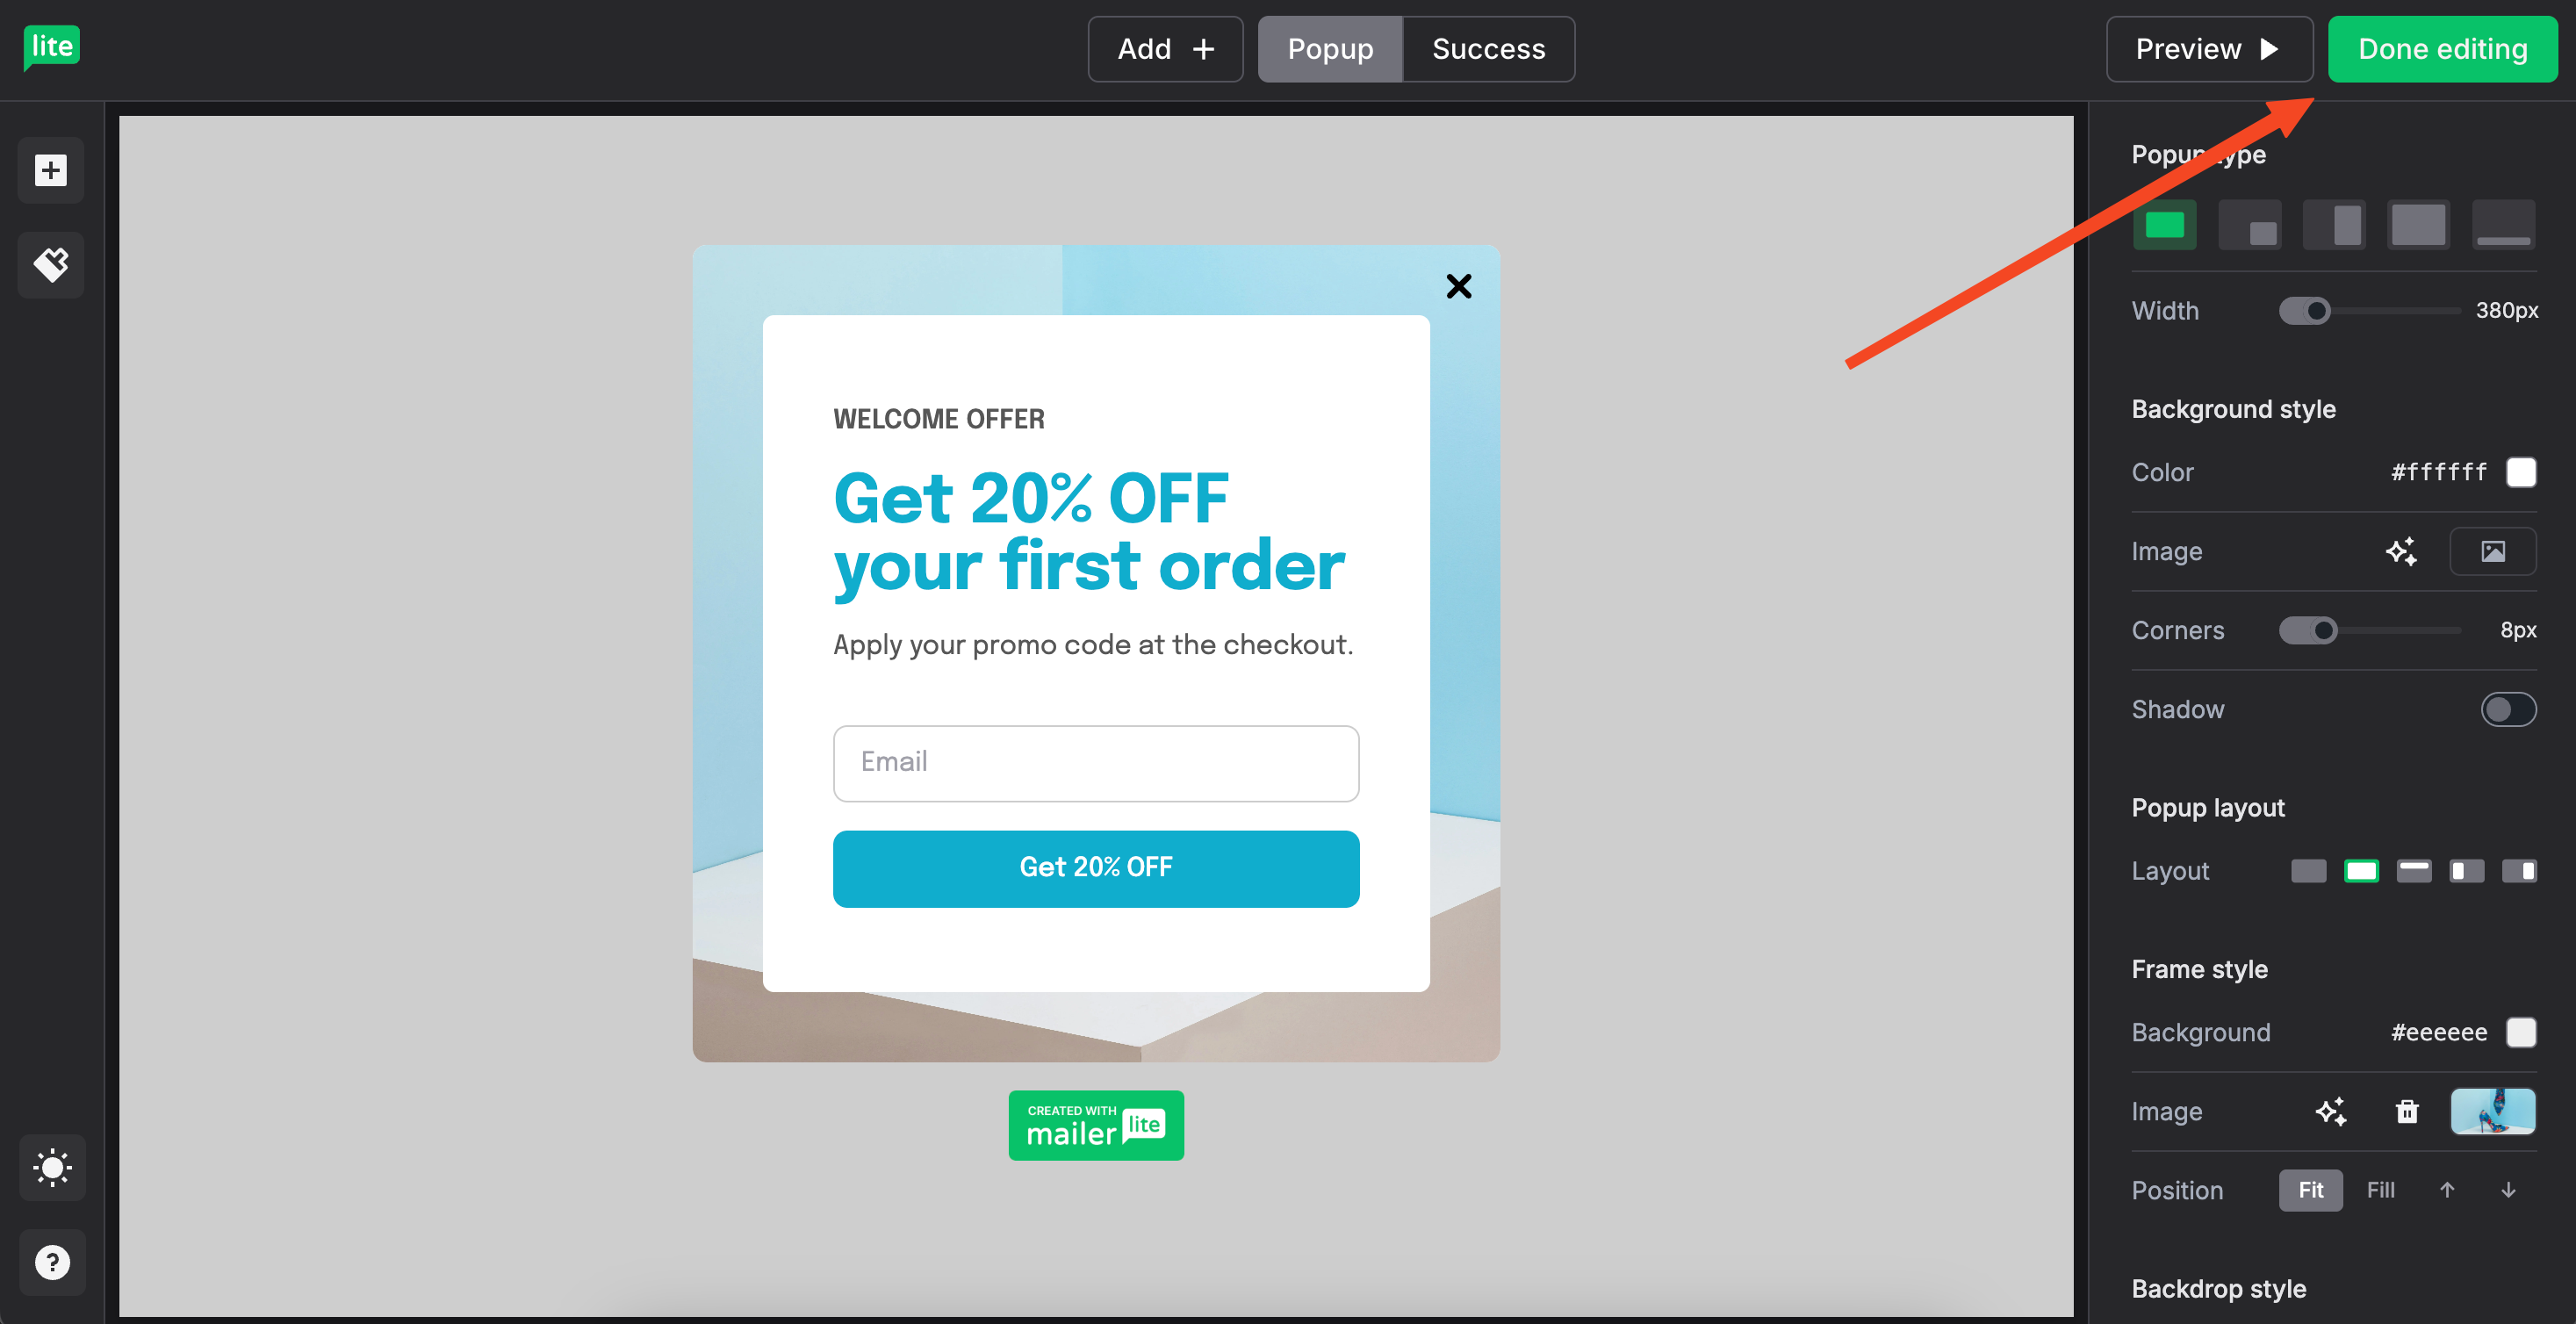
Once you're done designing, click the "Done Editing" button. On the next page, you can configure triggers. However, MailerLite's native popups don't support "on click" triggers. This means you're limited to options like time delay or exit intent. Click on Save Changes.
Step 6: Paste the JavaScript Code
MailerLite will give you a JavaScript code snippet. You'll need to paste this code into the <head> section of your website. You can do this using a plugin like "Insert Headers and Footers" or by editing your theme's header.php file (if you're comfortable with that).
That's it! Your MailerLite popup will now be visible on your website, based on the triggers you selected.
Important Note: MailerLite popups offer less design flexibility and lack the "on click" trigger, which can sometimes be frustrating for users.
Why Use Popups on Elementor for MailerLite?
Popups are a proven method to engage website visitors, reduce bounce rates, and increase conversions. When used effectively, popups can:
Capture email subscribers to grow your list
Promote special offers, discounts, and lead magnets
Reduce cart abandonment with exit-intent popups
Personalize content based on visitor behavior
According to research, websites that use exit-intent popups can increase conversion rates by up to 20-30%, making them a powerful tool for lead generation.
Poper vs. MailerLite: Which is Better for Elementor Popups?
Design Flexibility
Poper: Fully customizable popup designs with drag-and-drop editing, custom CSS, and a variety of templates.
MailerLite: Limited customization options with fewer templates and less design flexibility.
Trigger Options
Poper: Supports multiple trigger types including on-click, time delay, scroll percentage, and exit intent.
MailerLite: Only supports basic triggers like time delay and exit intent. On-click triggers are not available.
Integration Ease
Poper: Seamlessly integrates with Elementor, MailerLite, and other platforms through API.
MailerLite: Requires manual JavaScript installation and limited control over trigger actions.
If you need advanced design control and trigger flexibility, Poper is the better choice for adding MailerLite popups to Elementor.
Common Errors and Troubleshooting Tips
API Connection Issues
Double-check the MailerLite API key.
Verify domain connection in Poper.
Popup Not Displaying on Elementor
Check CSS selectors for on-click triggers.
Verify that the Poper WordPress plugin is installed and activated.
MailerLite Data Not Syncing
Ensure correct field mapping between Poper and MailerLite.
Verify API permissions for data transfer.
Advanced Tips to Improve Popup Performance
A/B Test Your Popups
Test different designs, headlines, and CTAs to identify the highest-performing variation.
Use Exit-Intent Popups
Capture abandoning visitors with relevant offers before they leave the site.
Personalize Popups Based on Behavior
Show personalized messages based on visitor behavior, such as time spent on site or specific pages visited.
Frequently Asked Questions (FAQs)
How do I integrate MailerLite with Elementor?
Use Poper for a seamless connection that supports advanced triggers or manually add MailerLite’s JavaScript to your site.
Can I trigger a popup on button click in Elementor?
Yes, Poper allows on-click triggers, while MailerLite requires custom JavaScript to achieve the same.
Why isn’t my MailerLite popup showing up in Elementor?
Check that the JavaScript code is correctly placed in the
<head>section and verify trigger settings.
Conclusion: Why Poper is the Best Choice for MailerLite and Elementor Popups
For advanced popup control and seamless MailerLite integration, Poper offers a more flexible and powerful solution than MailerLite’s native popups. By following this guide, you can easily create high-converting popups that capture leads and enhance user engagement.
Sign up for Poper today to get started with customizable popups on your Elementor site.


