

Substack is fantastic for newsletters, but getting that signup form in front of your website visitors seamlessly can sometimes be a hassle. That's where Poper comes in – we make managing these kinds of embeds simple.
Here’s how I recommend getting it set up:
How to Embed Substack In Website
Step 1: Get Your Poper Account Ready
First things first, if you haven't already, sign up for Poper. Once you're in, add the domain name of the website where you want the Substack embed to appear. This tells Poper where it's allowed to show your creations.
Step 2: Start a New Embed Campaign
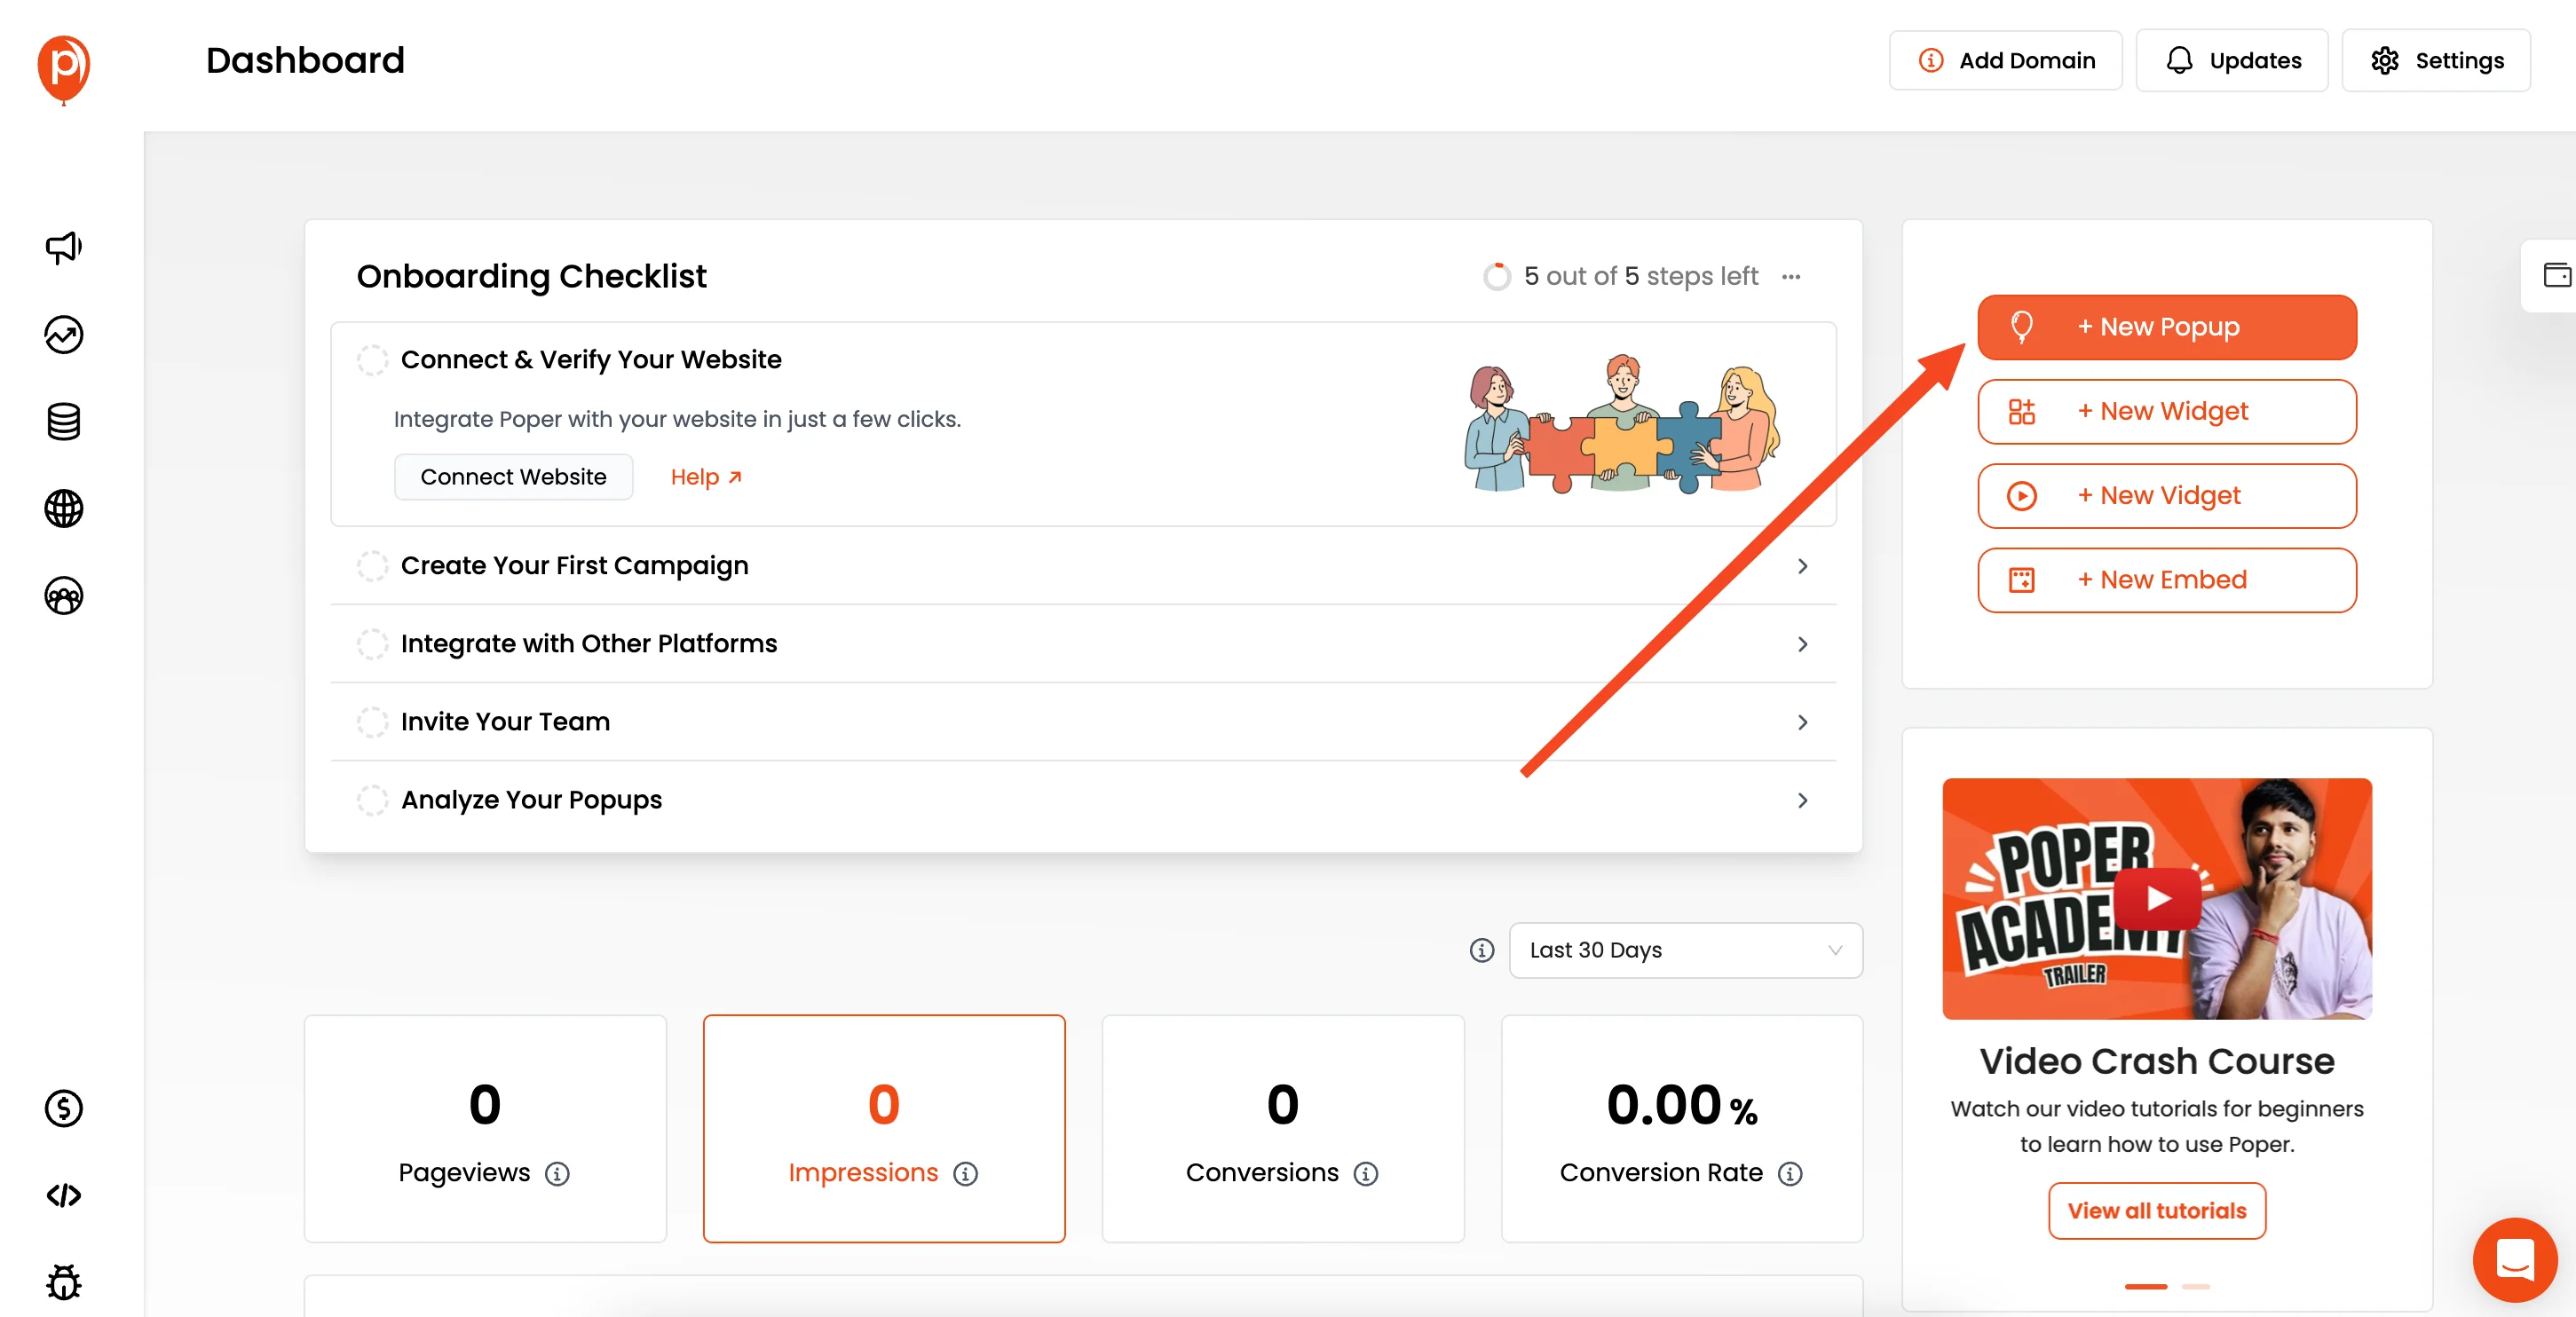
From your Poper dashboard, click the button to create a new campaign – you might see it labeled "New Popup" or similar.
Don't worry about the name for now. When prompted, choose the option to "Start from Scratch" to get a blank canvas.
Note: Don't worry, you can change from Popup to Embed later. We chose popup as it has "Start from Scratch" option.
Step 3: Grab Your Substack Embed Code
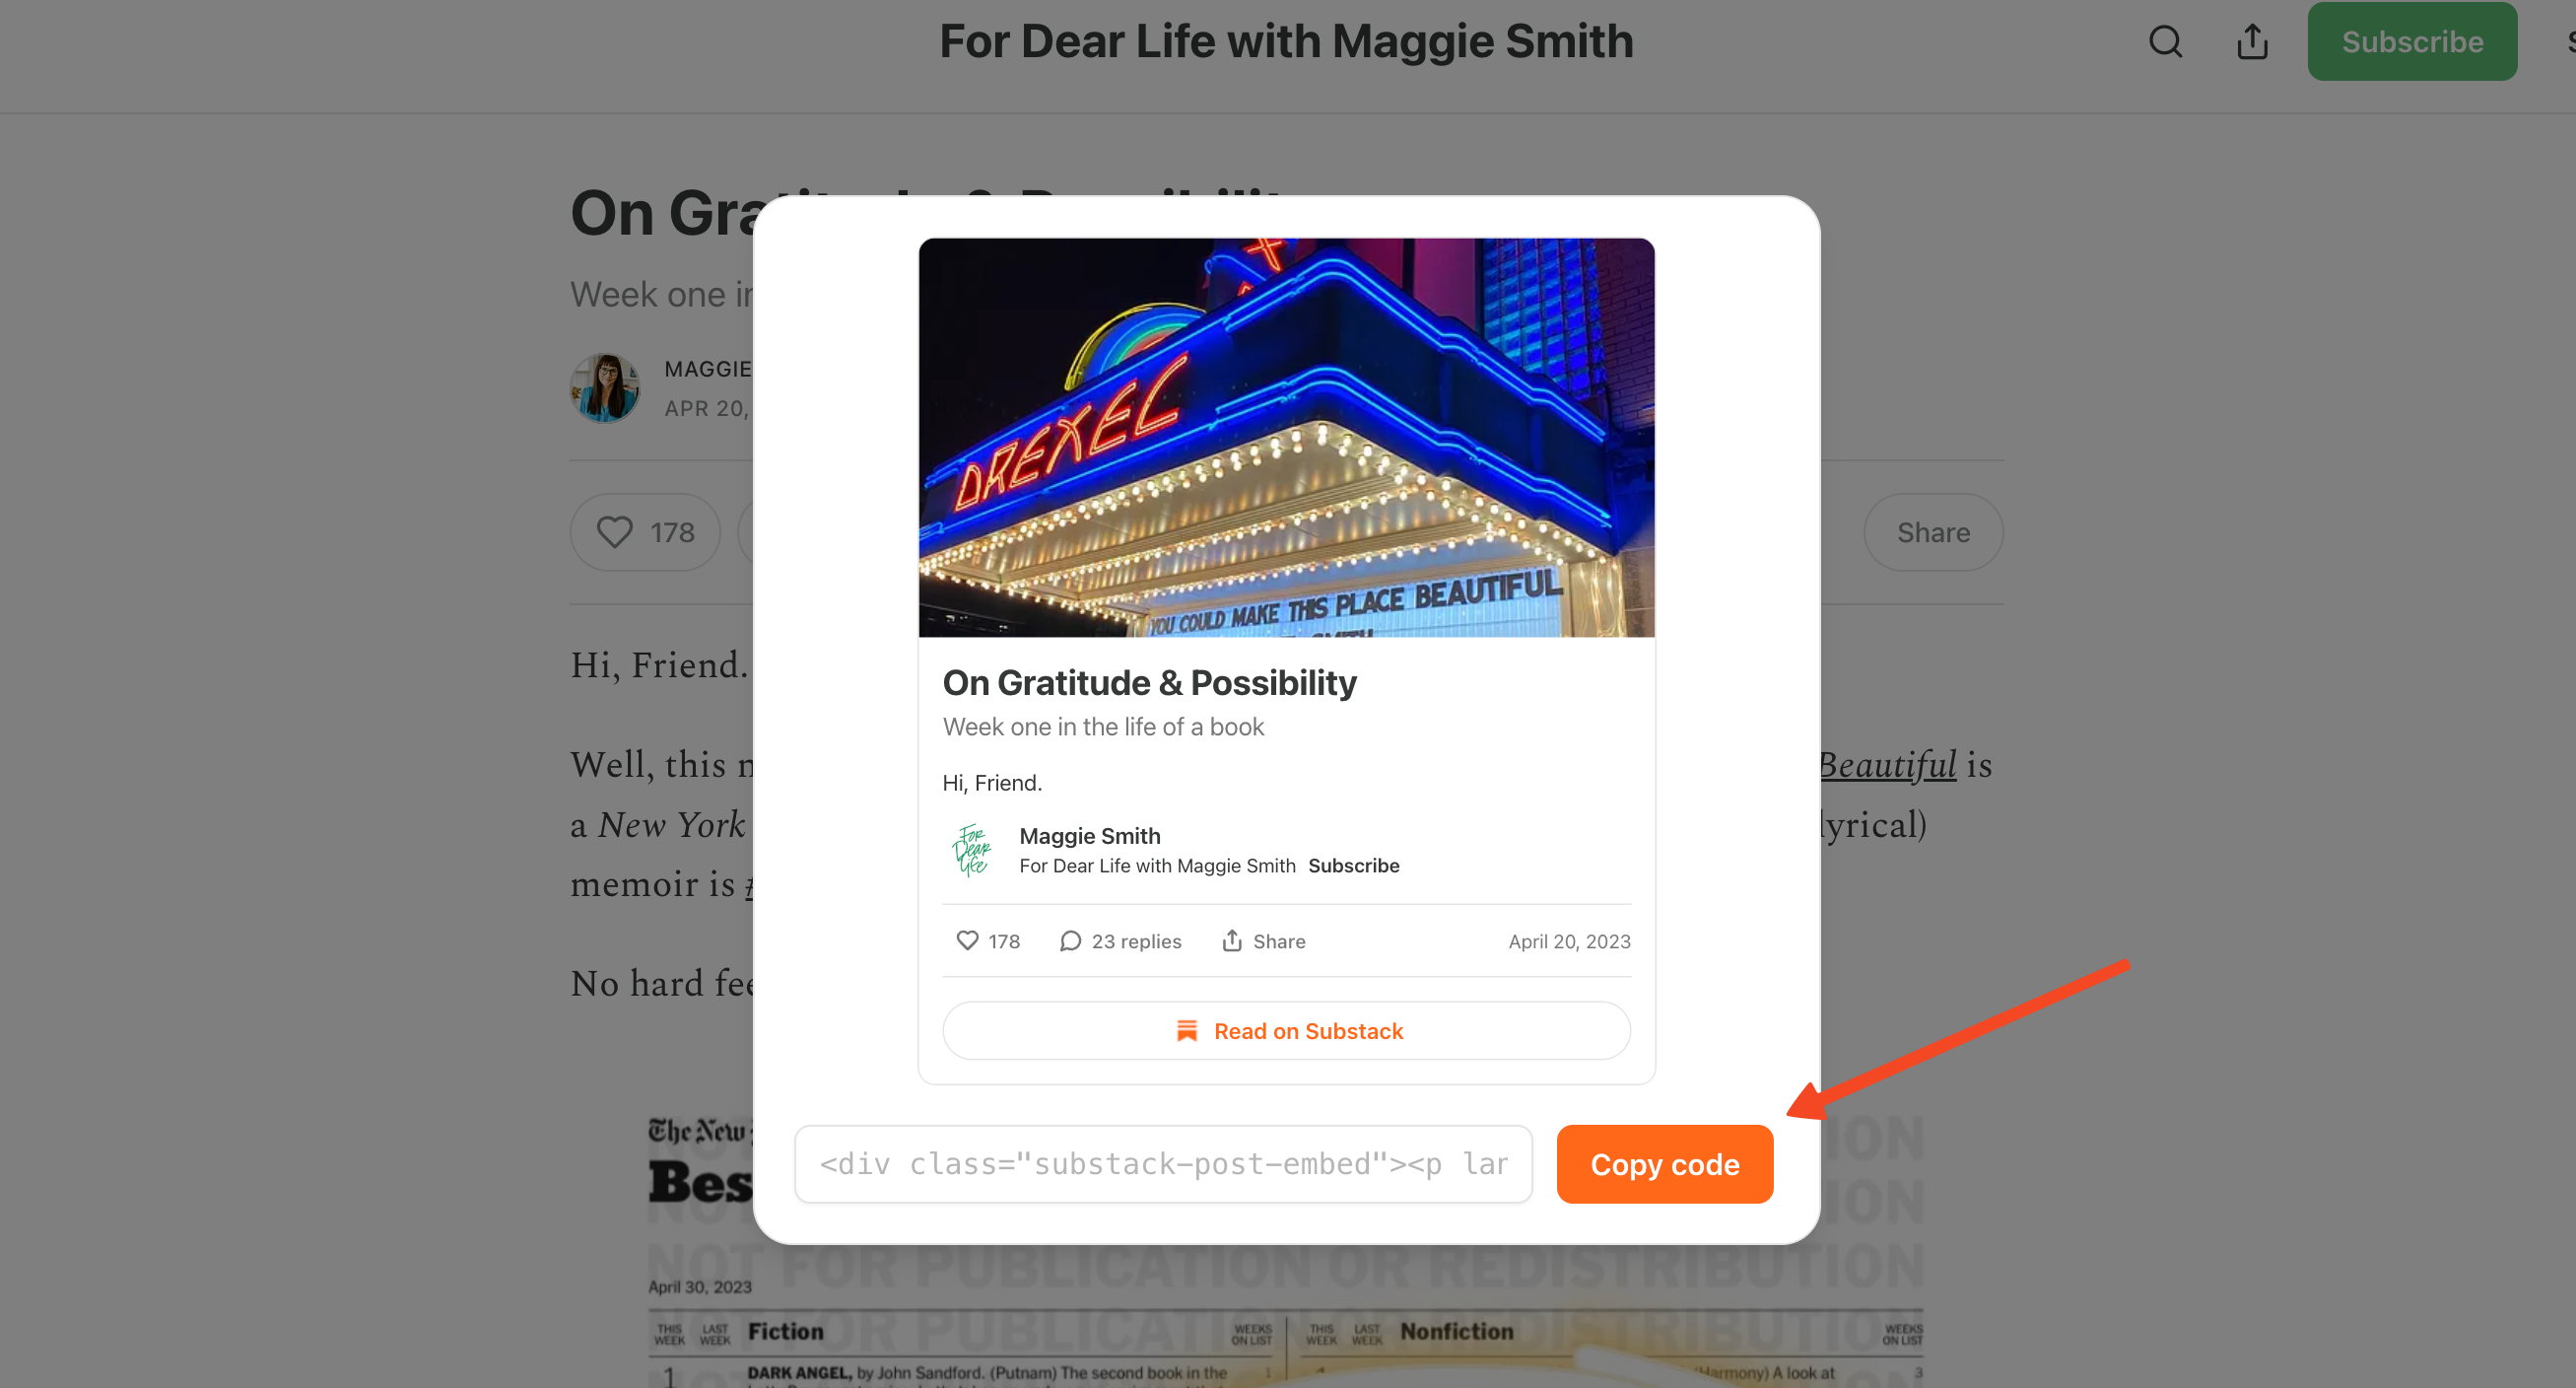
Now, head over to your Substack publication. Find the specific post or page that has the signup form you want to embed. Look for a "Share" button (often near the top right) and click it.
You should see an "Embed" option – click that, and then copy the HTML code provided. Substack makes this pretty straightforward.
Step 4: Add the Substack Code to Poper
Go back to the Poper editor canvas you opened in Step 2. Look for an "Add" tab or button, usually in a sidebar.
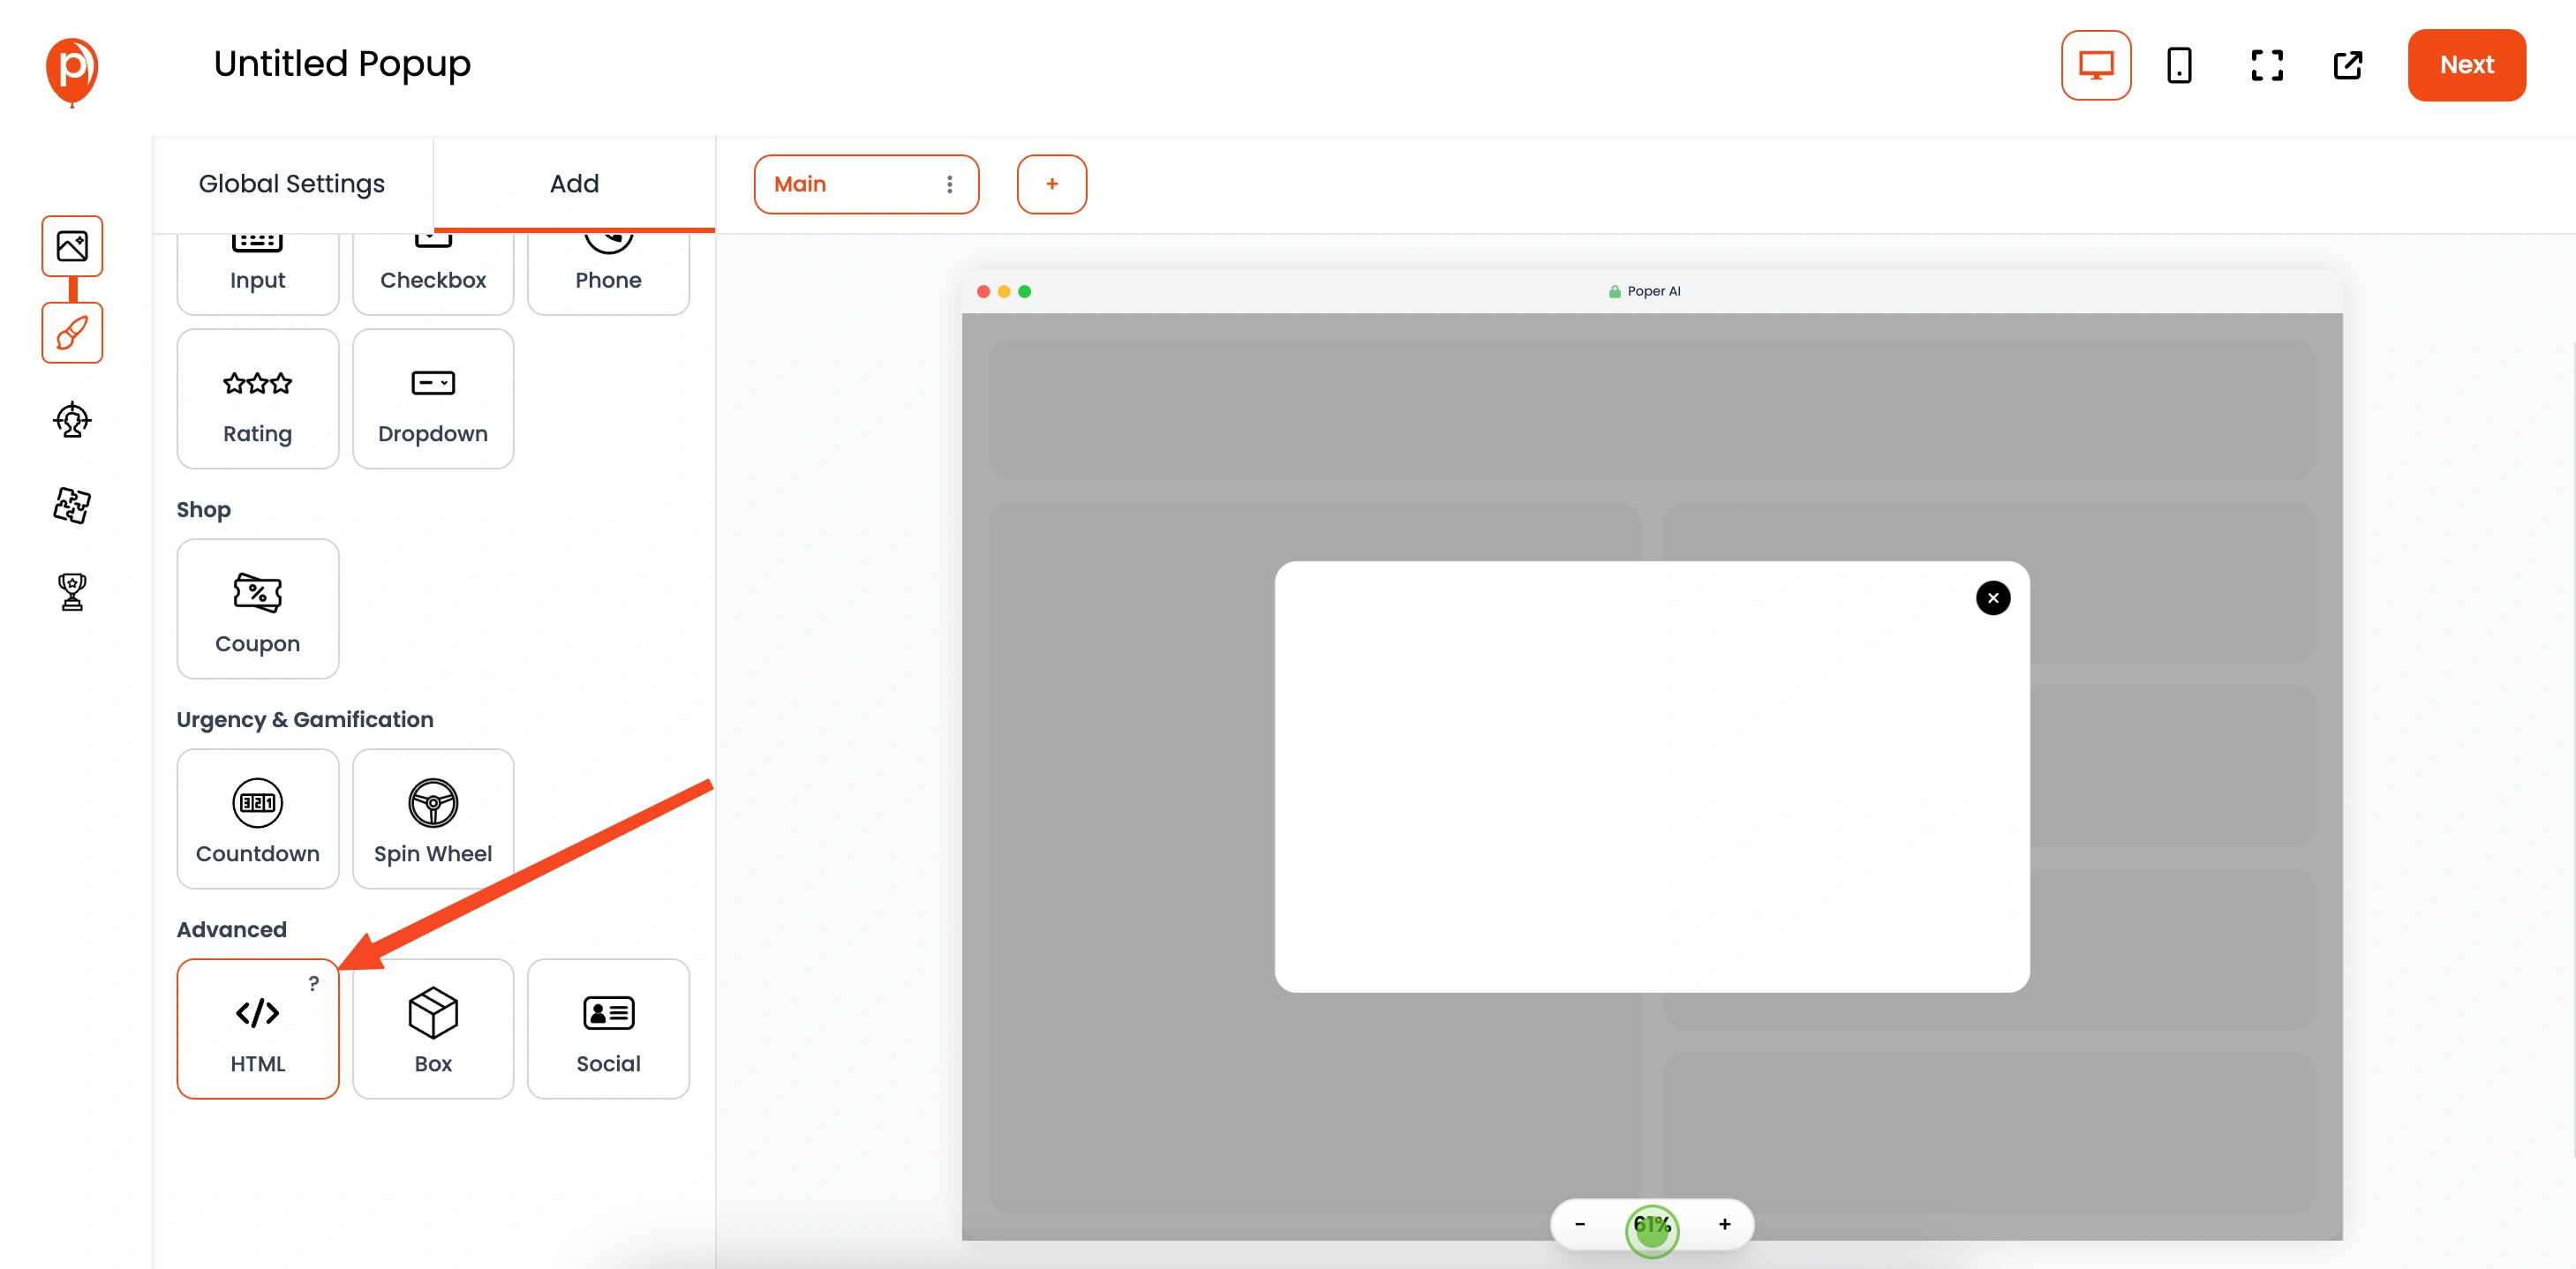
This shows all the building blocks you can use. Find and click the "HTML" element. This element is powerful because it lets you insert any custom HTML, like the code you just copied from Substack.
Step 5: Paste and Position the Code

With the HTML element selected, you'll see a field in the sidebar where you can paste code. Go ahead and paste the Substack embed code you copied earlier.
You should see your Substack form appear on the Poper canvas. You can then drag and drop this element to position it exactly where you want it within the editor space. Try centering it for a clean look.
Step 6: Convert Your Popup to an Embed
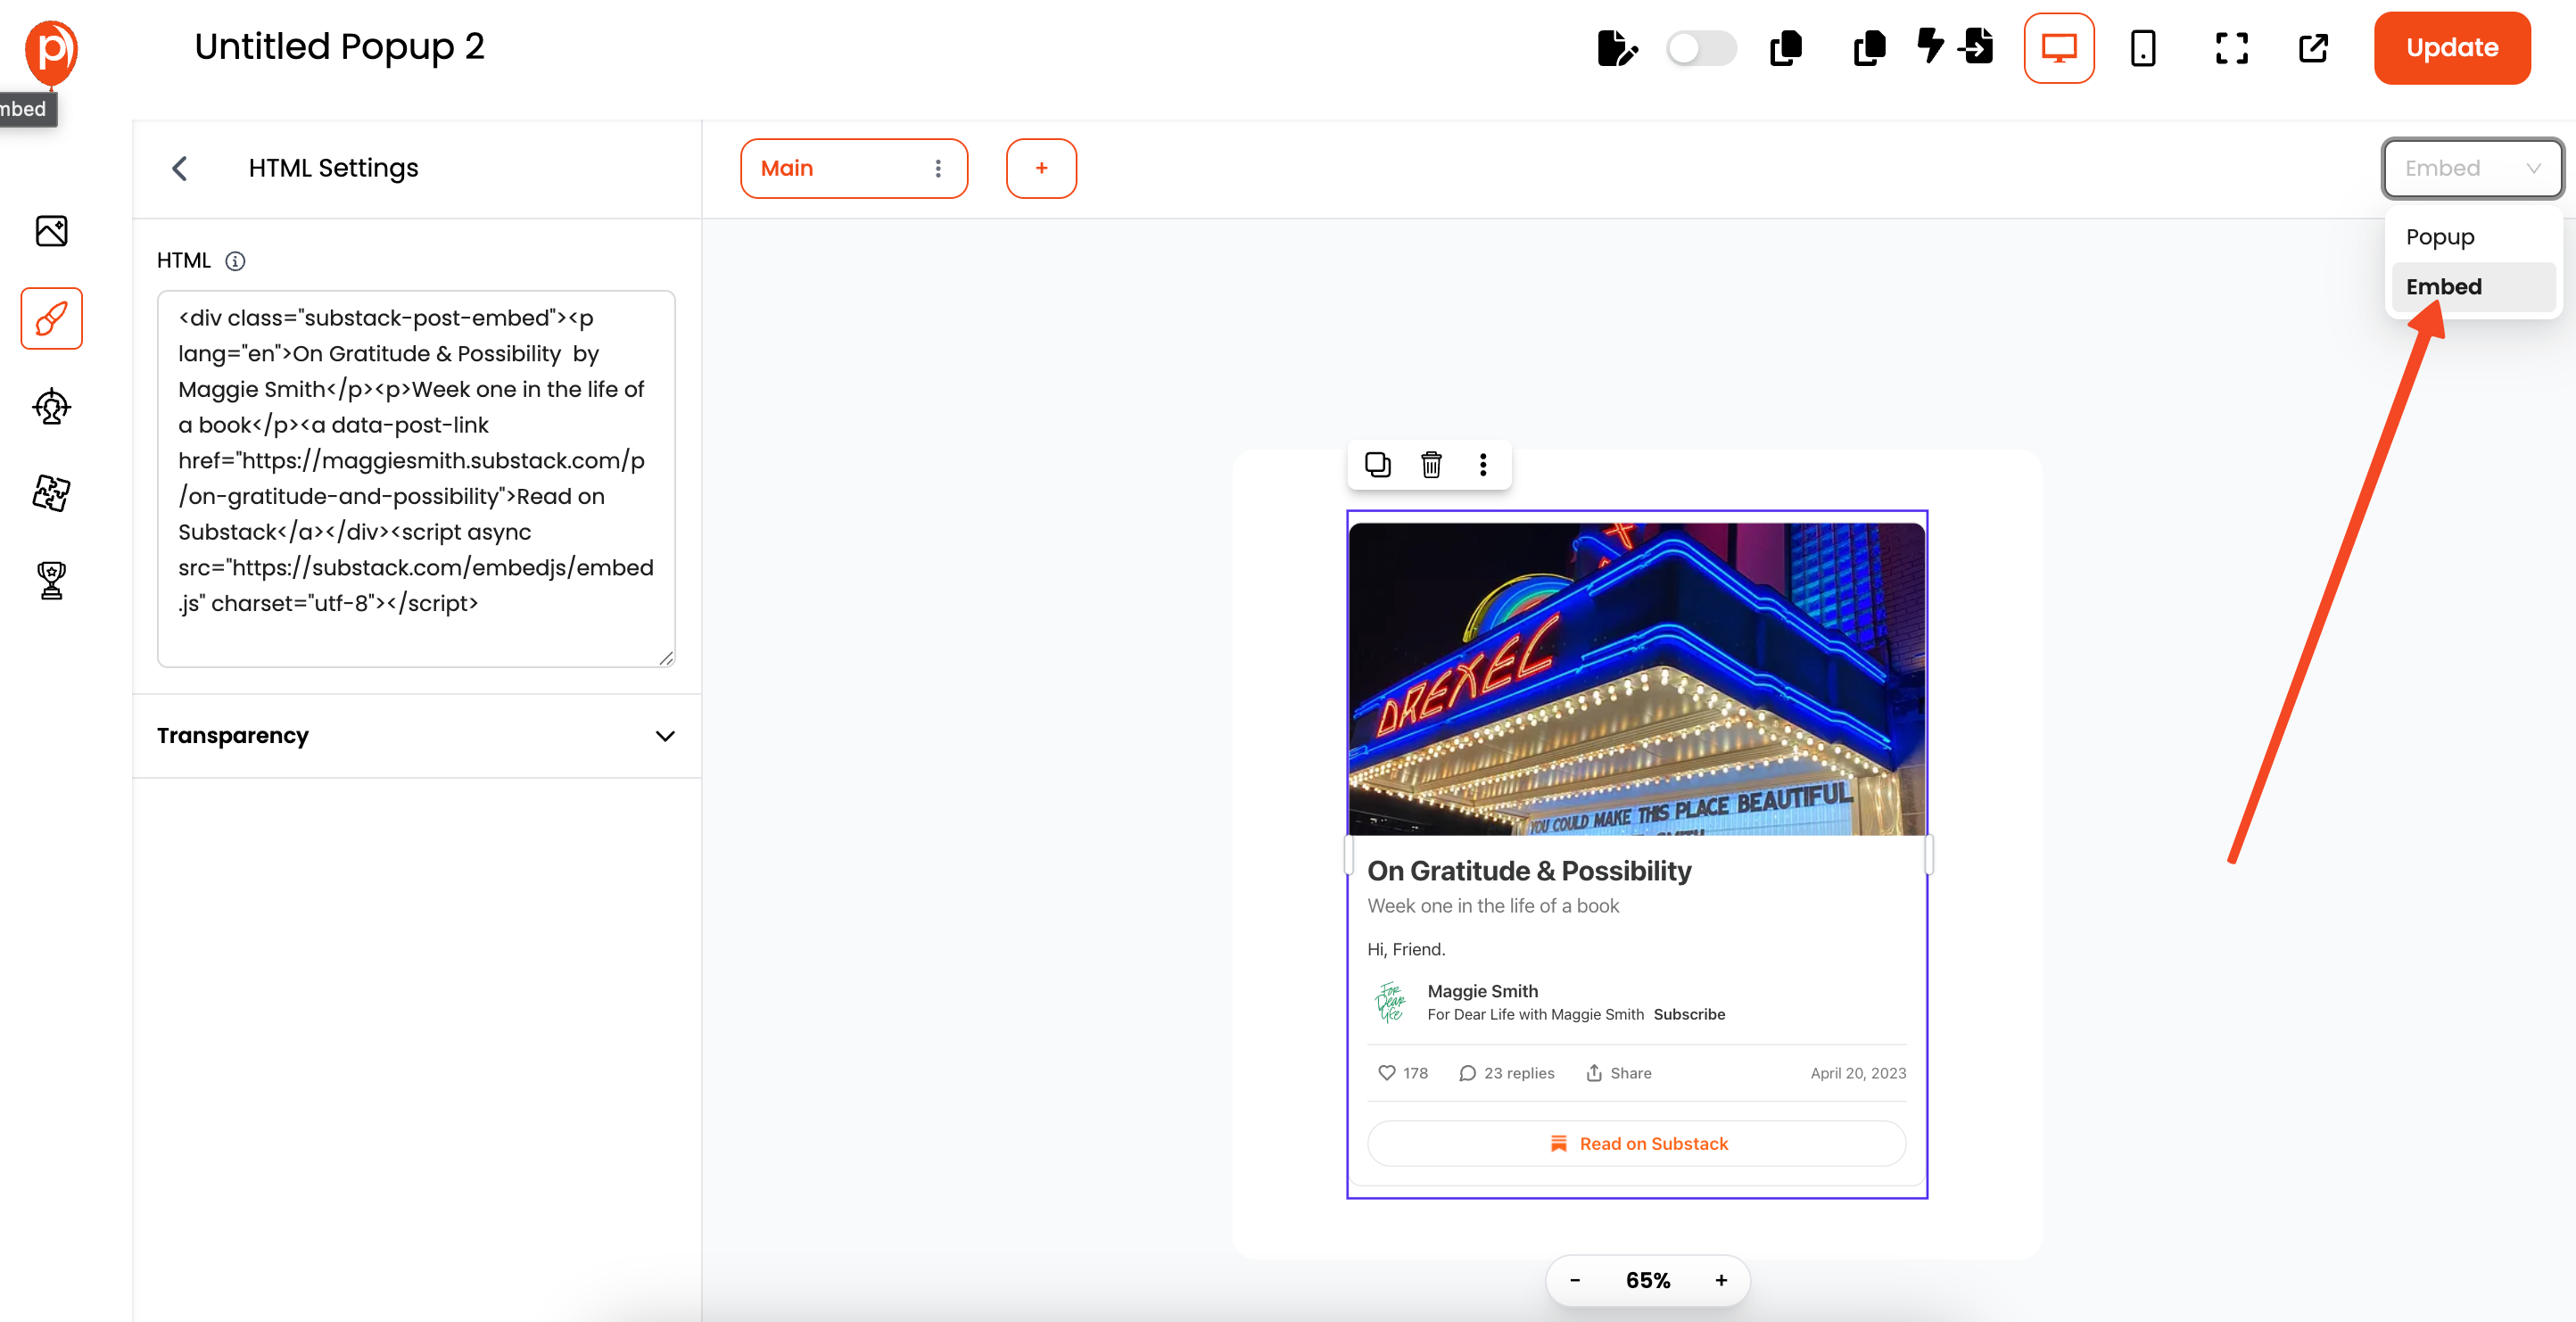
This is a key step! By default, you might be editing a popup. We need to tell Poper this should be an embed that sits directly within your page content.
Look for a dropdown menu, perhaps near the top right of the editor, that lets you change the campaign type. Select "Embed" from the options. This ensures it behaves correctly on your site.
Step 7: Fine-Tune the Appearance (Optional)
Want those nice rounded corners on your embed, especially if the Substack default is square? You can adjust this.
Go to the main settings, sometimes called "Global Settings" or similar, and find the "Dimensions" or "Style" section. Look for an "Overflow" property and set it to "Hidden". This often clips the corners cleanly when you've also set a border-radius.
Step 8: Set Display Conditions
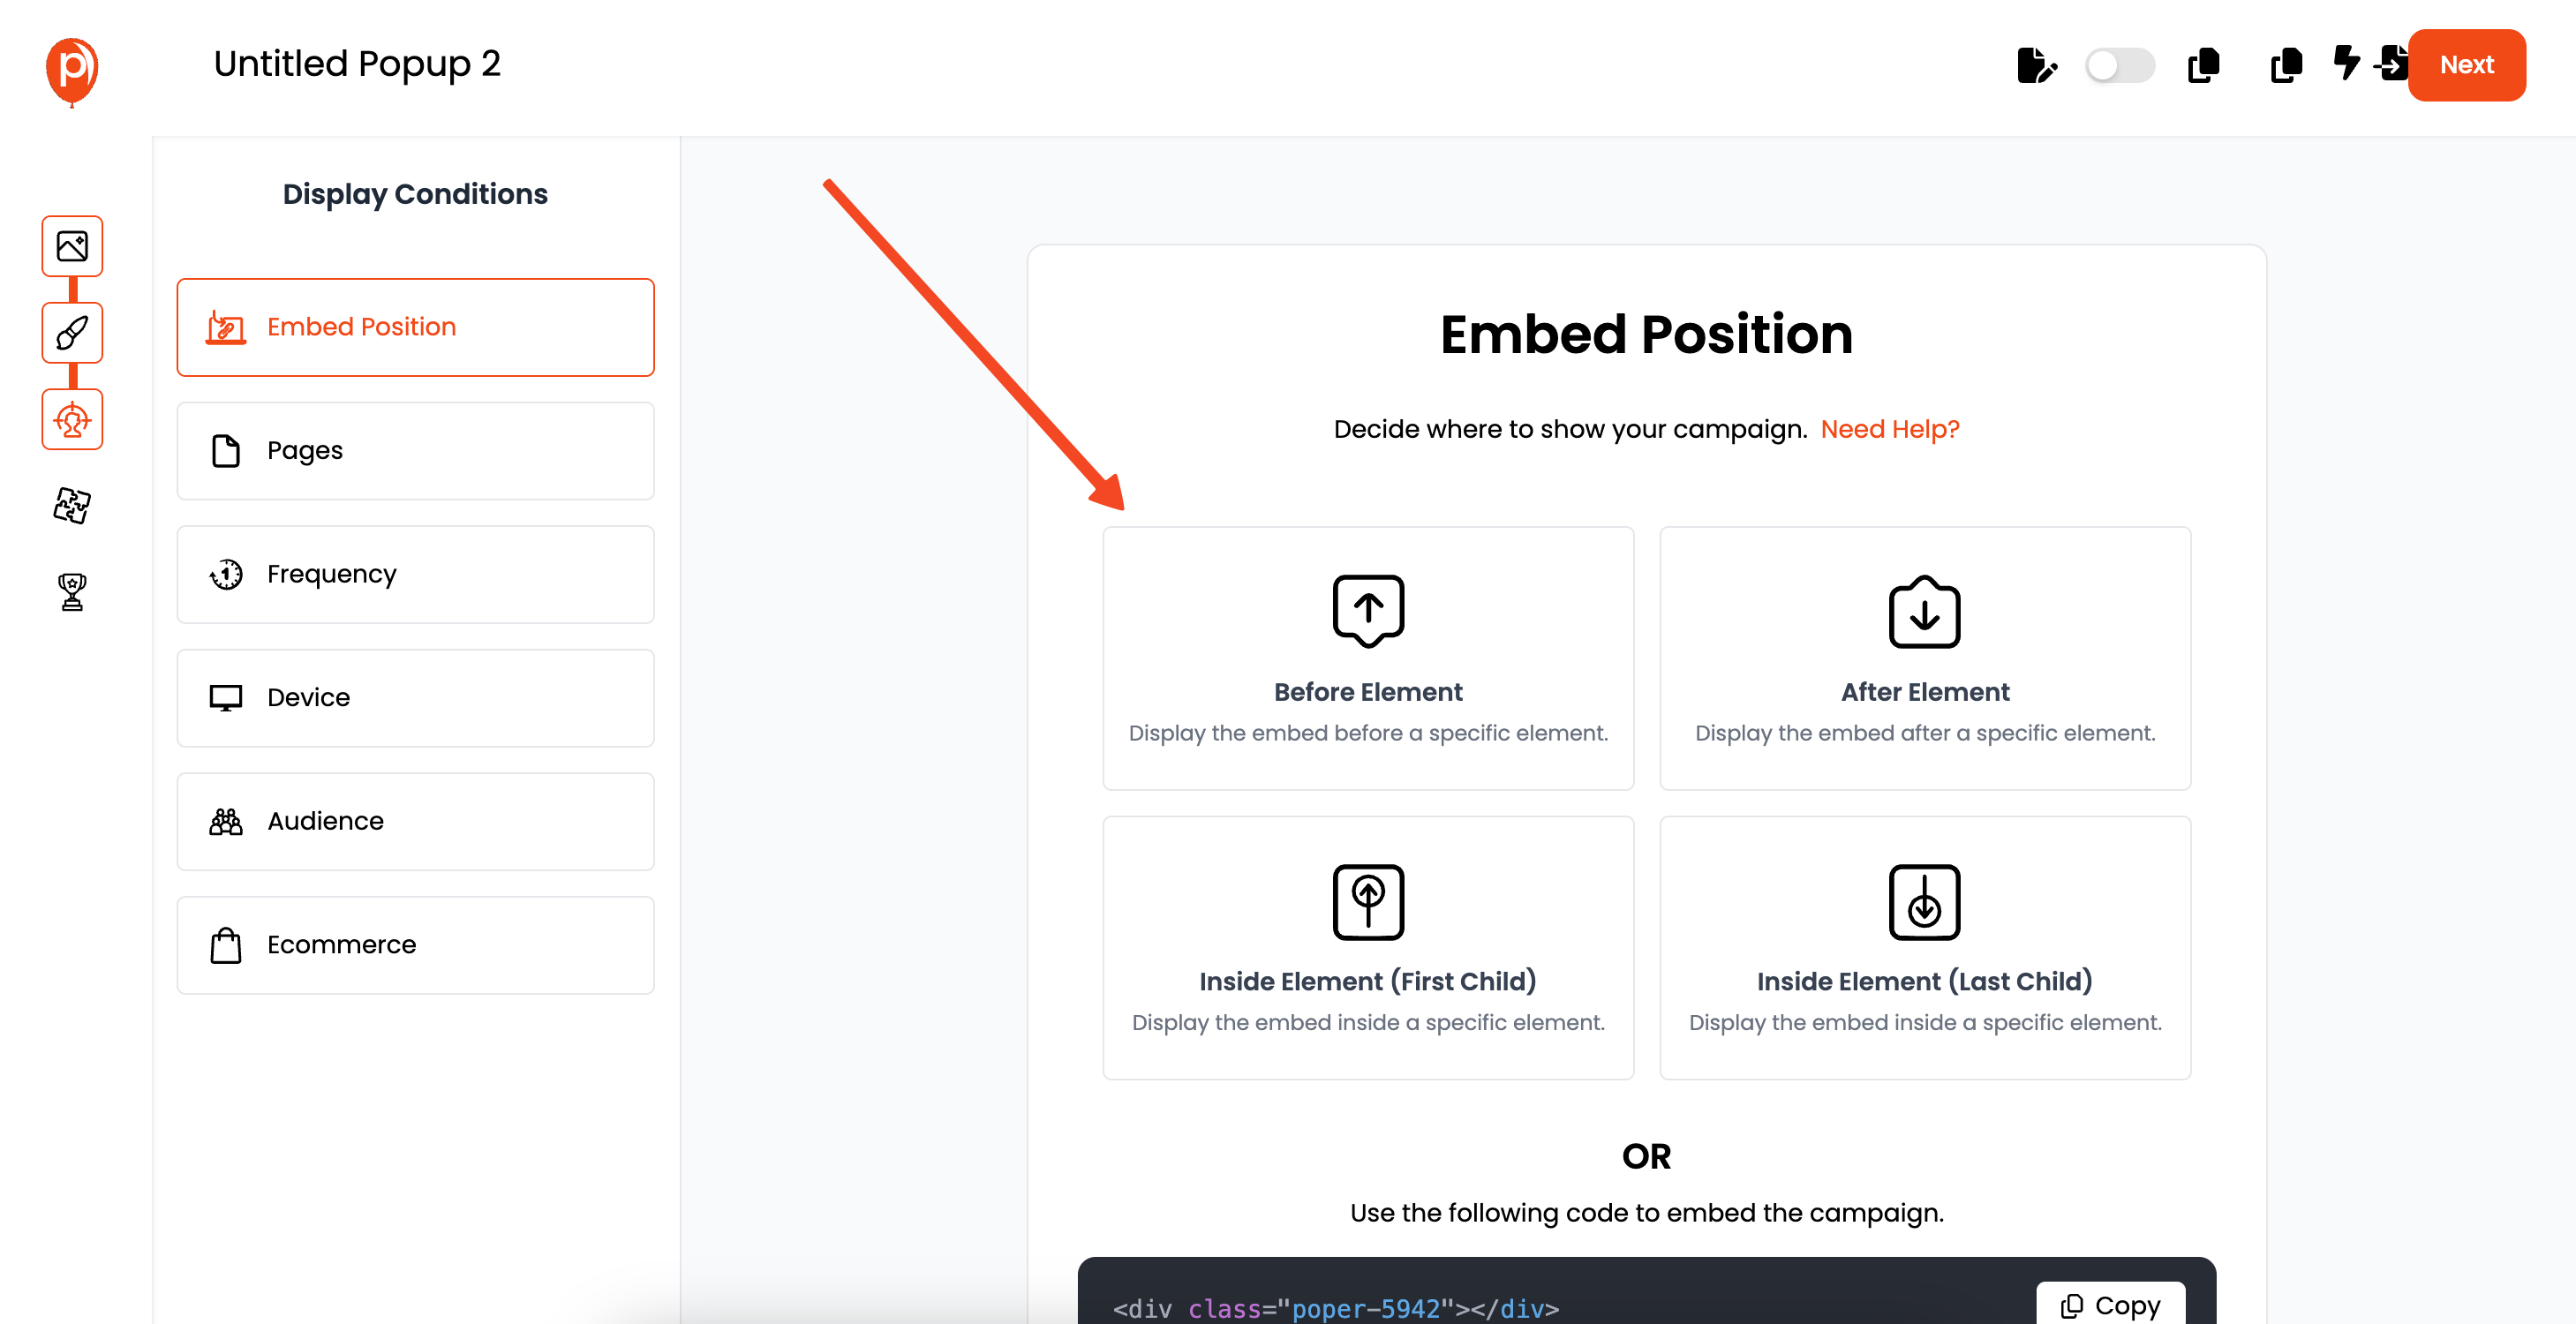
Almost there! Click "Next" or navigate to the "Display Conditions" or "Targeting" section. Since this is an embed, you have to set where you want it.
Step 9: Save and Publish Your Embed

Once you're happy with how the embed looks and where it will show, hit "Save" and then "Publish". This makes your Poper embed live and ready to be added to your site.
Step 10: Add Poper to Your Website
Now for the final connection. In your Poper dashboard, find the "Code" or "Installation" section. Select the type of website you have (e.g., HTML, WordPress, Shopify). We'll provide a small code snippet.
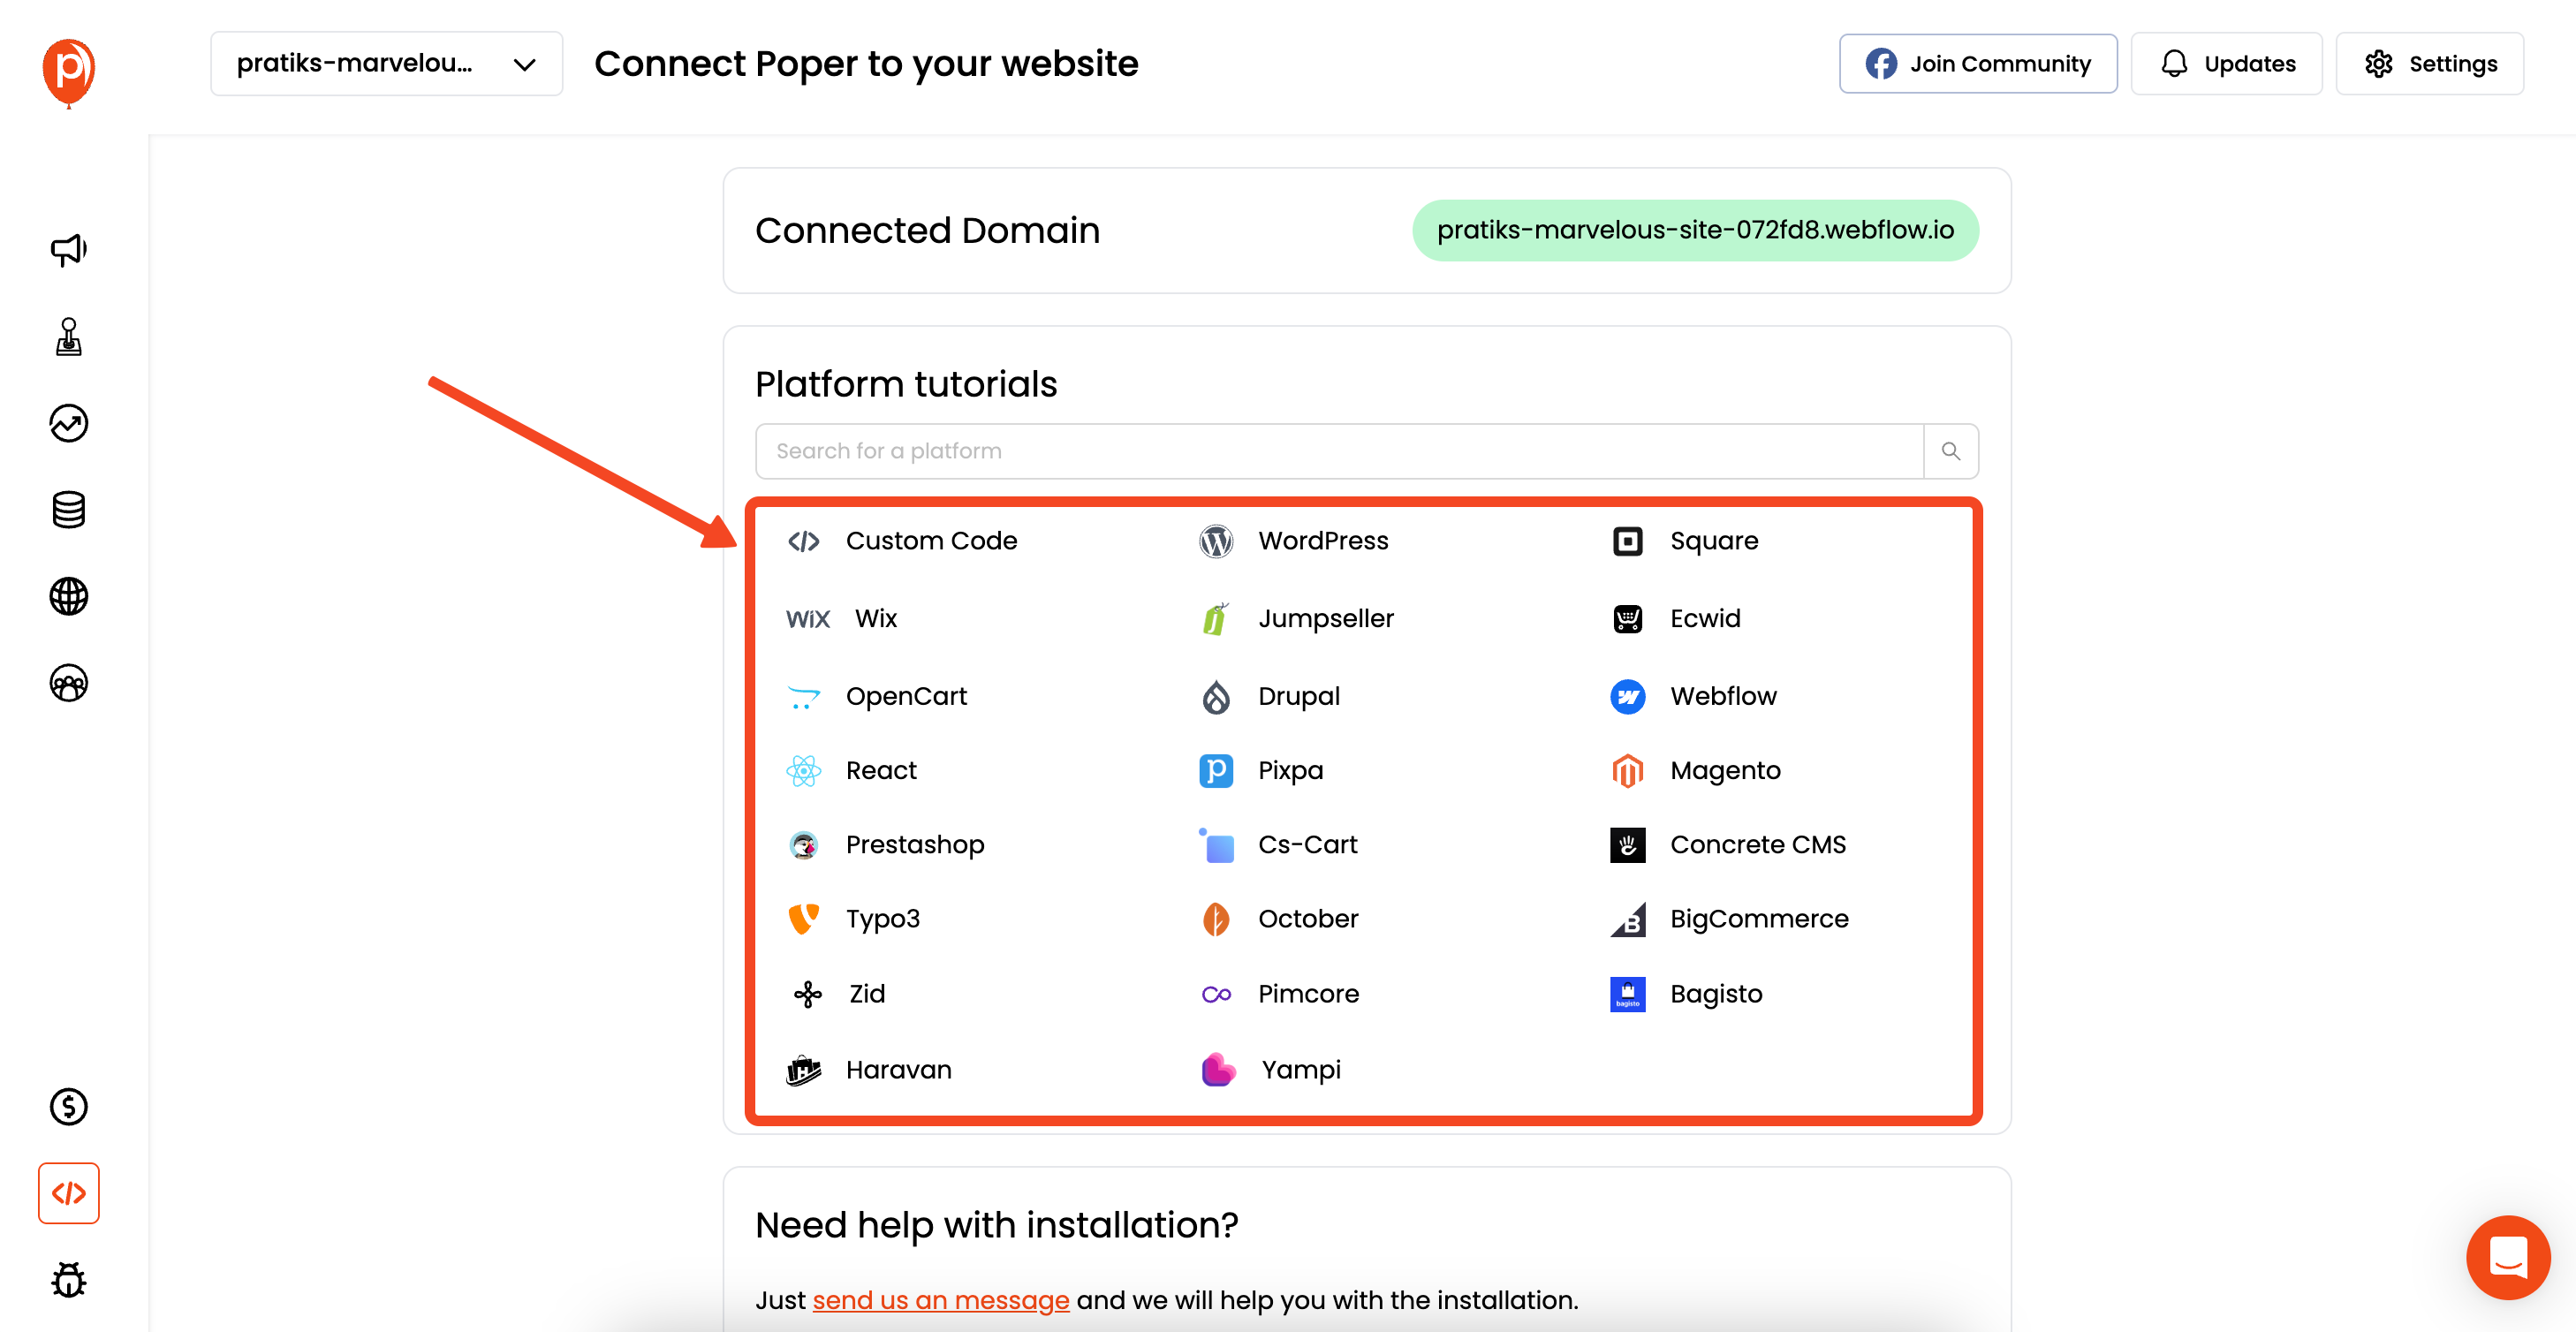
Copy this snippet and paste it into the HTML of your website, usually just before the closing </body> tag.
This single Poper snippet handles all your Poper campaigns (popups, embeds, etc.) for that domain.
Step 11: Test It Out
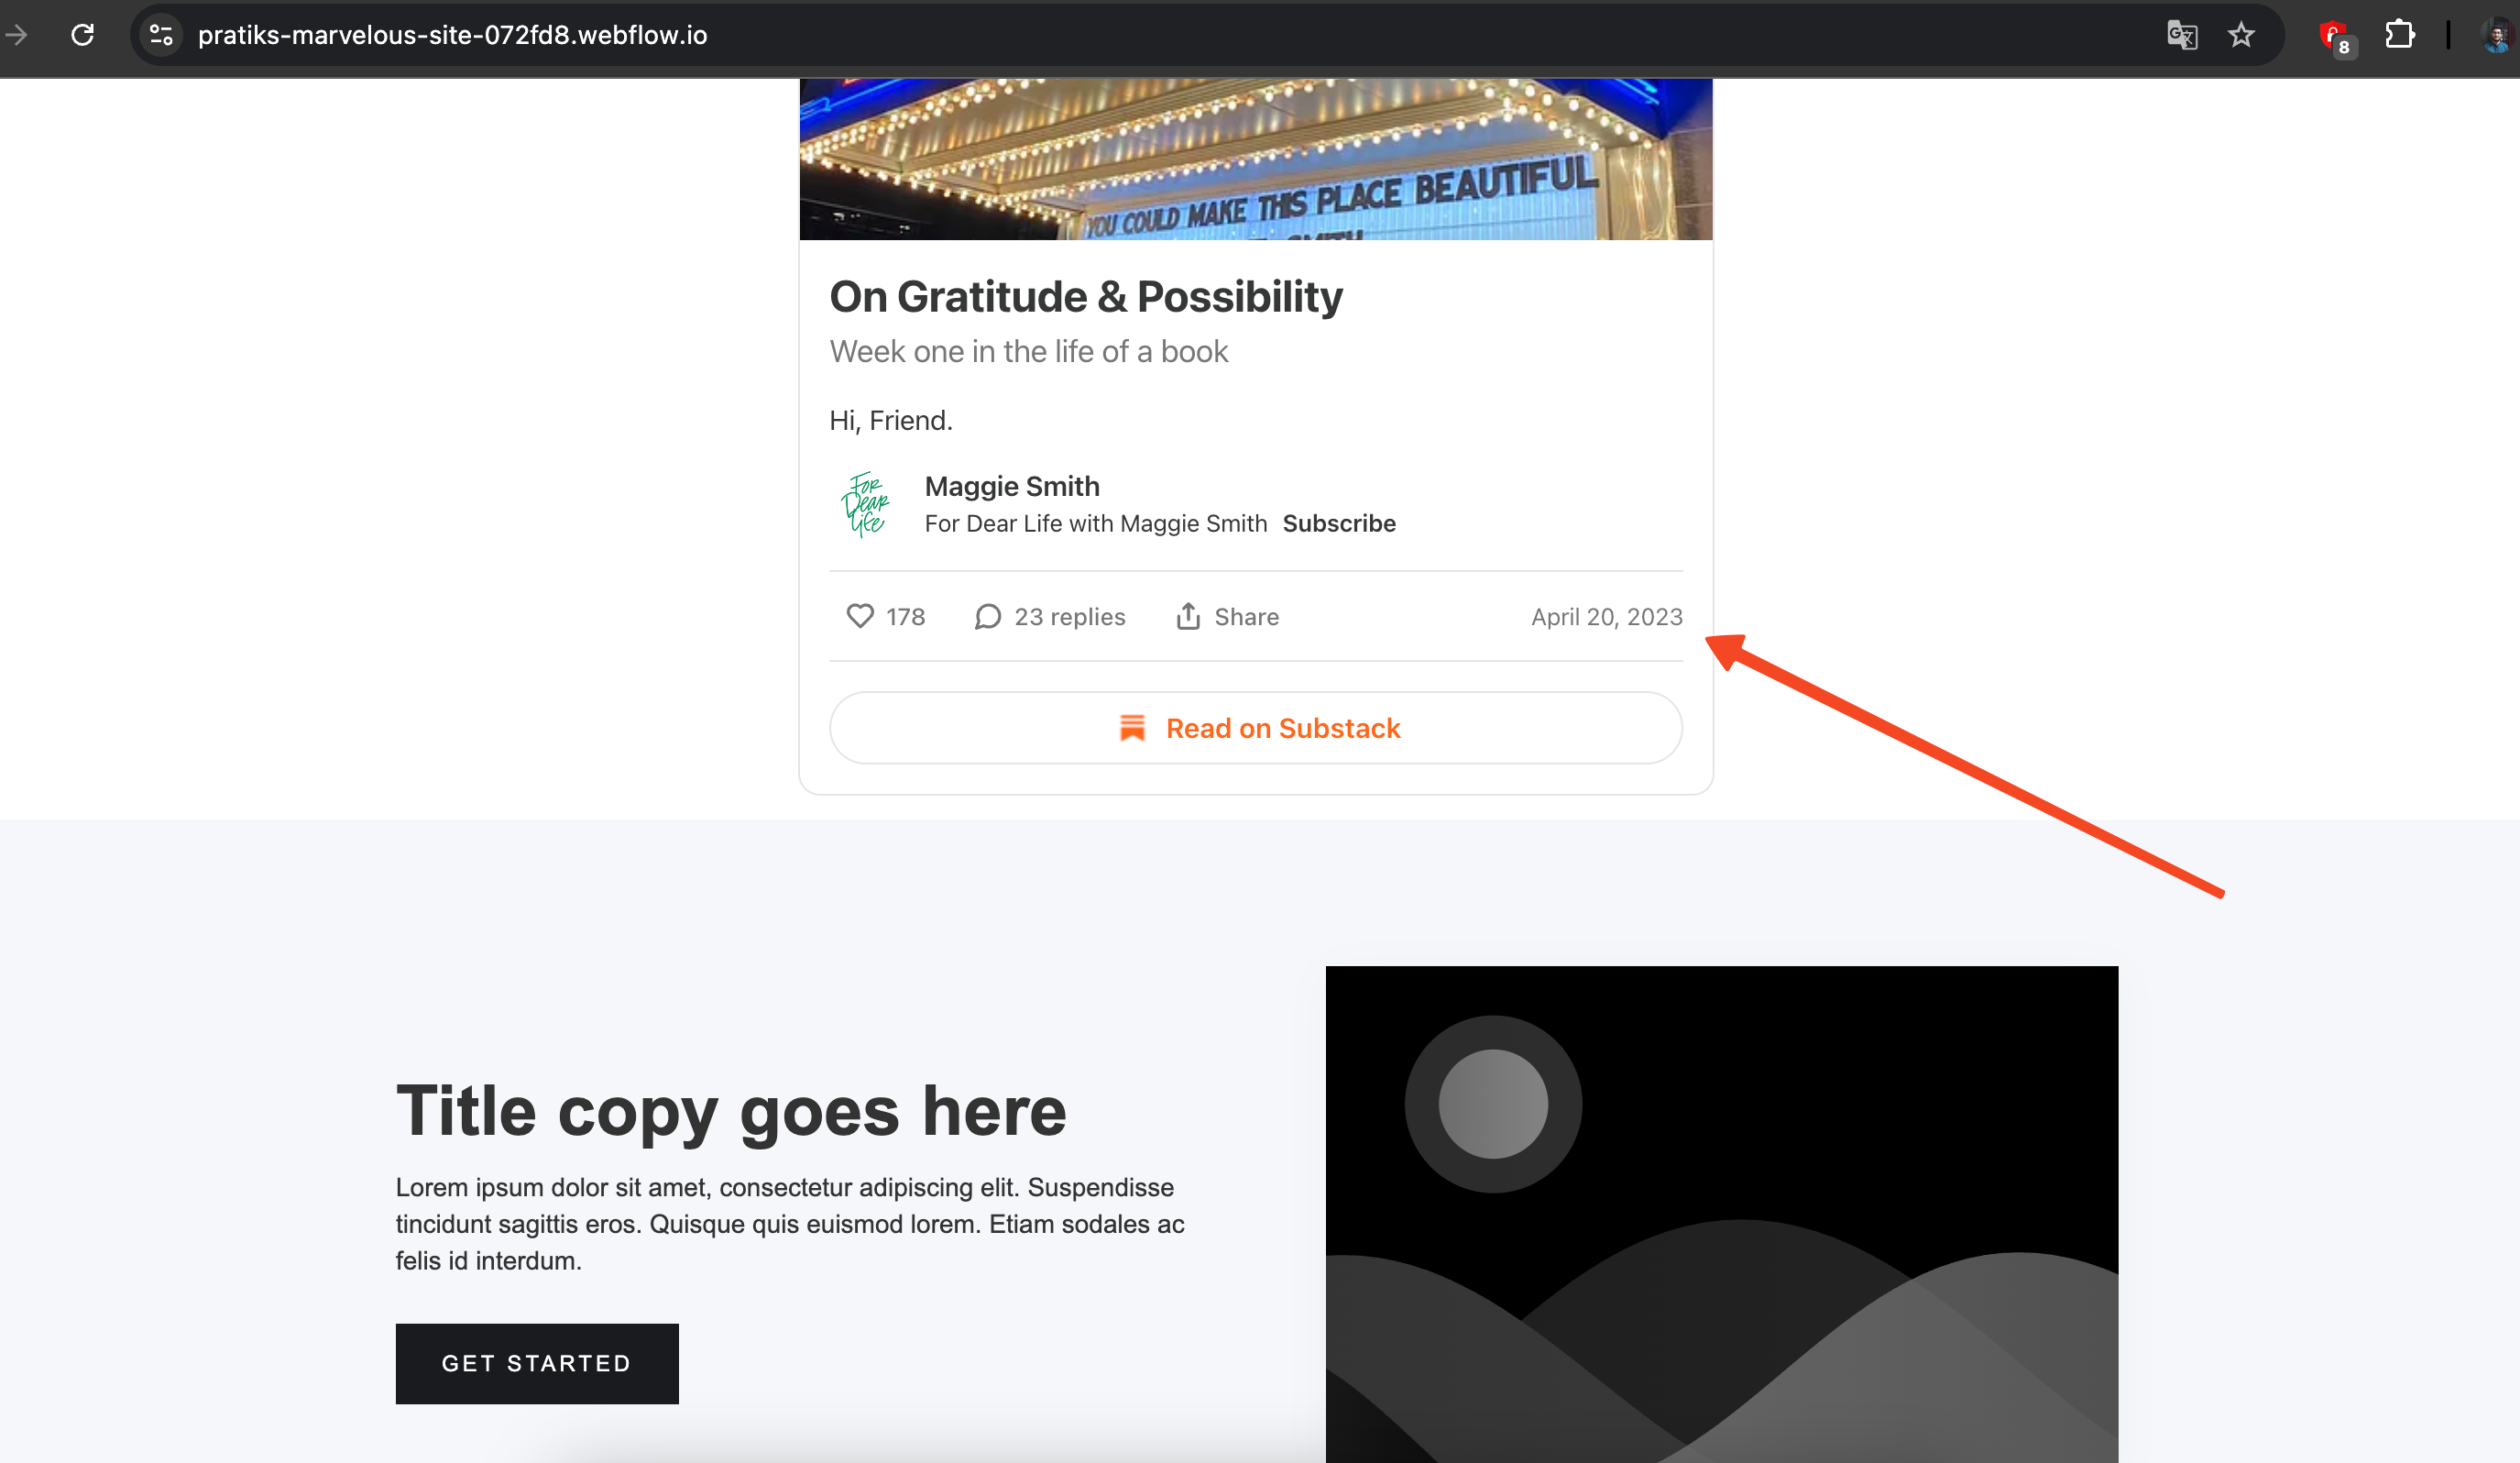
After adding the Poper code to your website, deploy or update your site. Then, visit the page(s) where you intended the Substack embed to appear. You should see your signup form right there in the content, powered by Poper!
That's it! You've successfully used Poper to Embed Substack In Website, giving your website visitors an easy way to subscribe without navigating away. Let me know if you run into any questions!
How Poper Features Enhance Substack Embedding
This table highlights key Poper features and their specific benefits when used to embed Substack code:
| Poper Feature | How it Helps with Substack Embeds | Example Use Case |
| HTML Element | Directly accepts and renders Substack's official embed code. | Pasting the Substack <iframe> or <script> code for a signup form. |
| Visual Container Styling | Allows adding borders, padding, backgrounds around the embed. | Adding a subtle border and padding to make the Substack form fit site design. |
| CSS Selector Placement | Enables precise positioning without editing theme files. | Placing the Substack embed exactly below a blog post or inside a sidebar div. |
| Central Dashboard | Manage multiple Substack embeds (or other campaigns) easily. | Updating the placement rule for all Substack embeds across the site at once. |
| Display Conditions | Show the Substack embed only on specific pages or devices. | Embedding a specific Substack post only on a related blog category page. |
| No-Code Management | Simplifies updates and adjustments for non-developers. | Changing the container background color without needing CSS knowledge. |
(Section 4: Why Manage Substack Embeds with Poper?)
Advantages of Using Poper for Substack Integration
Instead of manually pasting Substack code into your site's HTML each time, using Poper offers significant benefits:
Effortless Placement: Use CSS selectors for precise control without code editing.
Easy Styling: Visually adjust the container (borders, padding, etc.) to match your brand.
Centralized Control: Manage all Substack embeds (and other Poper campaigns) from one dashboard.
Targeting Flexibility: Apply Poper's rules to show embeds contextually (specific pages, devices, audiences).
Simplified Updates: Change placement or styling easily within Poper without touching site code repeatedly.
Tips for Embedding Substack Content
Use Official Code: Always start with the embed code generated directly by Substack.
Context is Key: Place signup forms or posts where they are most relevant to your website content.
Test Functionality: Ensure signup forms submit correctly and links within embedded posts work as expected.
Consider Size: Adjust container styling or placement based on the dimensions of the Substack content.
Mobile View: Check how the embed looks and functions on mobile devices.
Conclusion: Embed Substack Seamlessly with Poper Management
So, can you embed Substack in your website? Yes, and using Poper is the smart way to manage the integration. By taking the official embed code from Substack and leveraging Poper's HTML element, CSS selector placement, and styling options, you gain powerful, no-code control over how and where Substack content appears on your site.
Streamline your workflow and enhance your website with integrated Substack content, managed efficiently through Poper.
Frequently Asked Questions (FAQs)
Q1: Does Poper create the Substack signup form or post content?
No. Poper is a tool to manage the placement and container styling of the embed code provided by Substack. You must generate the actual content and embed code within your Substack account first.
Can I use Poper to embed my entire Substack publication feed?
Typically, no. Substack's embed options usually focus on specific signup forms or individual posts. Embedding dynamic feeds often requires specific widgets or APIs that Substack may not offer for full publication embedding. This method works for the code Substack does provide.
Can I style the internal elements of the Substack embed (like button colors) using Poper?
No. Poper styles the container around the HTML element holding the Substack code. Due to browser security (Same-Origin Policy), you cannot use Poper or your site's CSS to directly style content loaded from Substack's domain within an iframe or script-generated element. Any internal styling must be done via Substack's own settings, if available.
Will signups through the embedded form count in my Substack analytics?
Yes. Since you are embedding Substack's official form code, submissions through it should function identically to submissions on your Substack page and be tracked within your Substack dashboard.

