We all want to grow our email lists, right? Whether it's through popups, subtle nudges, or other methods, getting more subscribers means more chances to connect with your audience, share offers, and ultimately, boost your website's success.
So, let's dive into how you can add a Mailchimp popup to your WordPress website. There are two main ways to go about this:
Using Poper Popups (the easier method)
Directly through Mailchimp
Let's explore both options.
Adding a Mailchimp Popup Using Poper
I personally find this method much easier and more flexible. Here's how you can do it:
1. Create a Poper Account
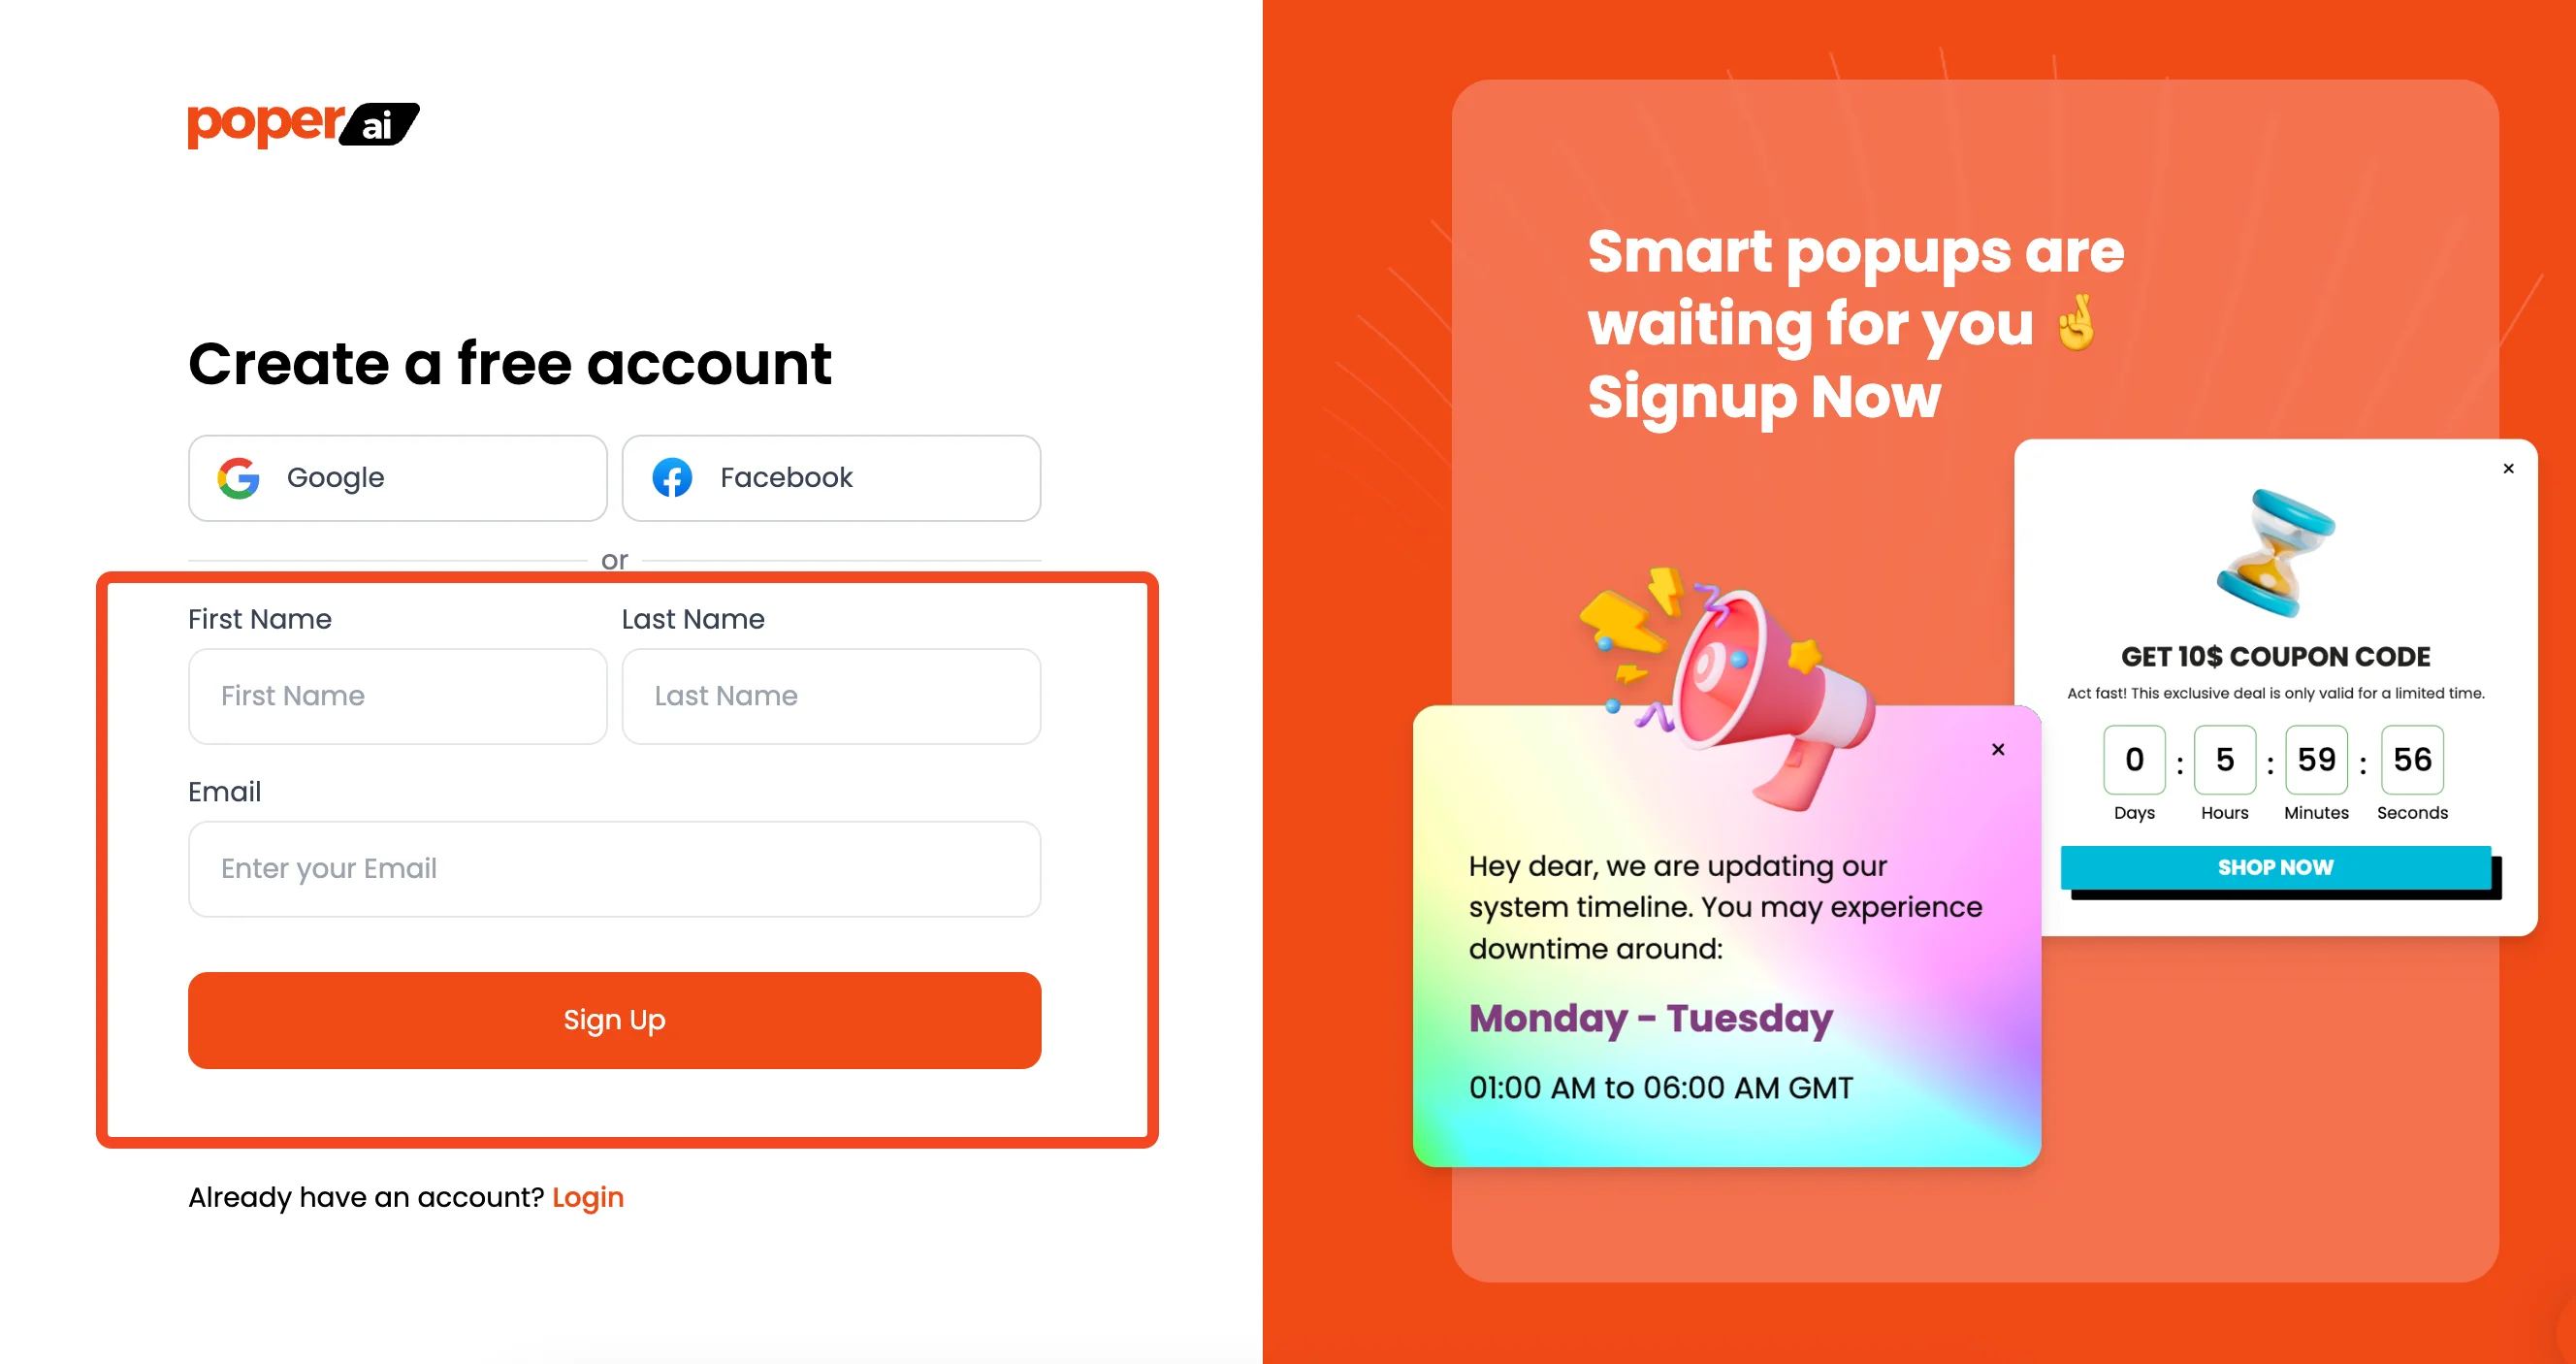
First, you'll need to sign up for a Poper account. This is where you'll create your popups and connect them to your WordPress website. Poper is designed to make this whole process smooth and straightforward.
2. Add Your WordPress Website
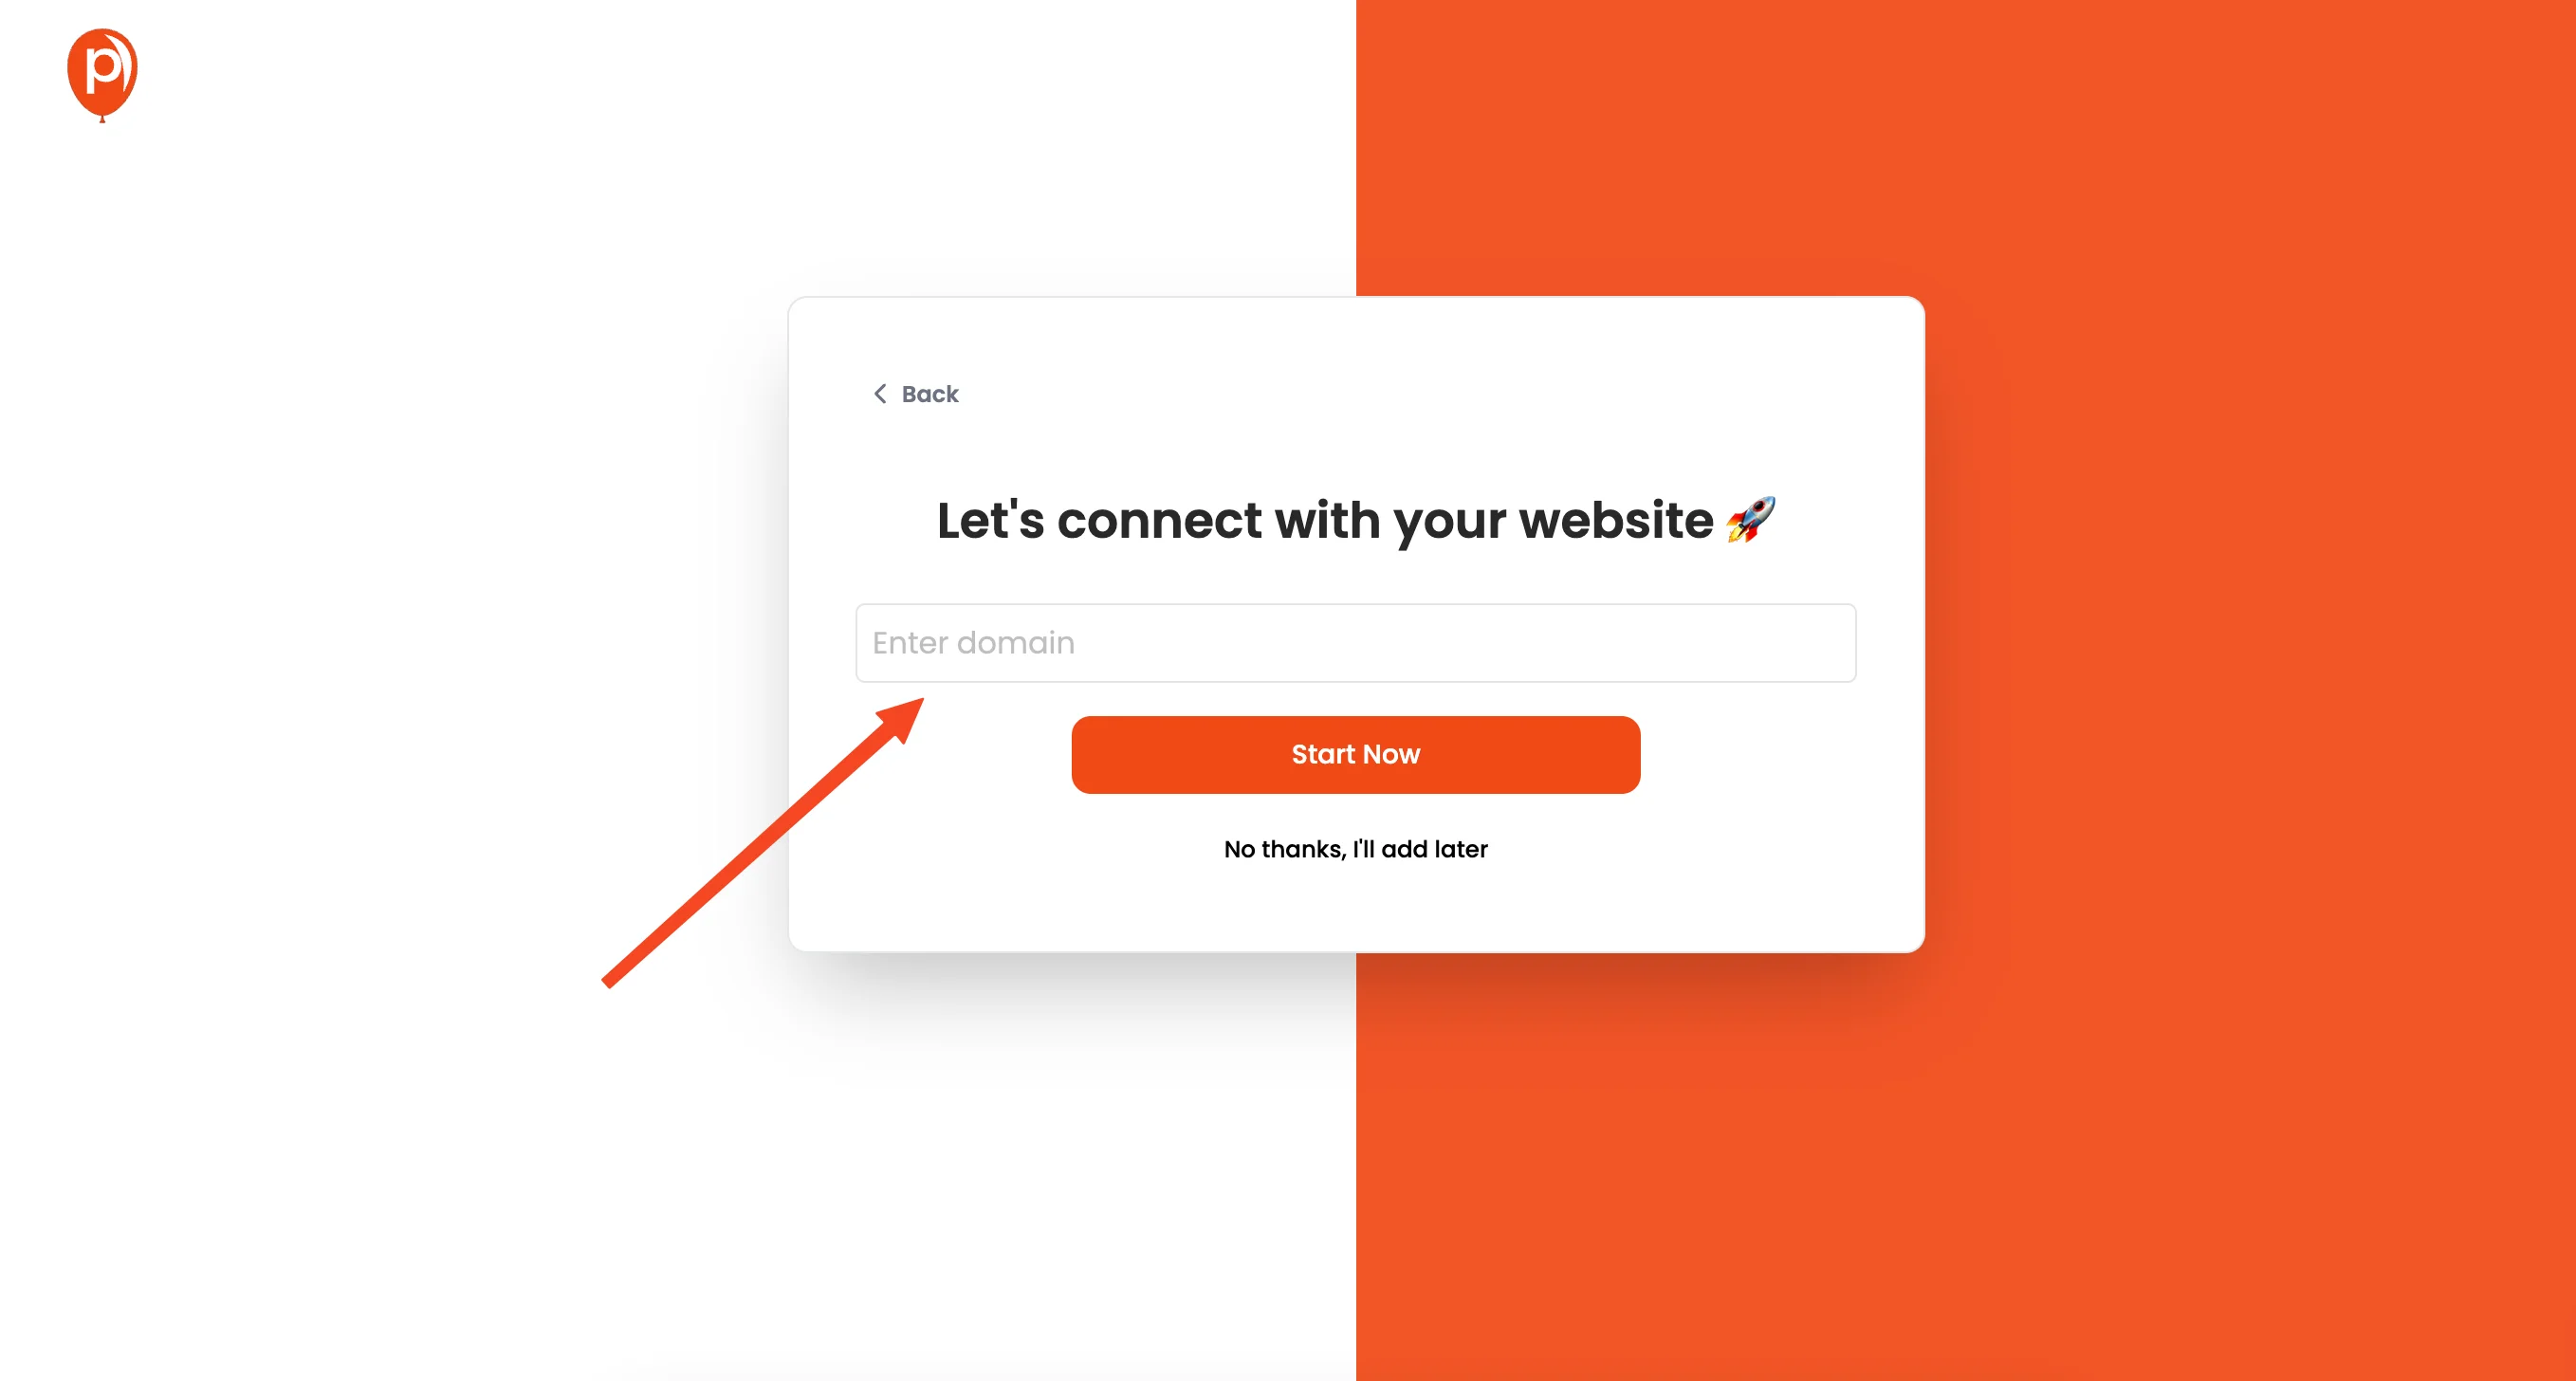
Once you're in, add your WordPress website's domain to Poper. Then, let’s start creating your new popup.
3. Create a New Popup
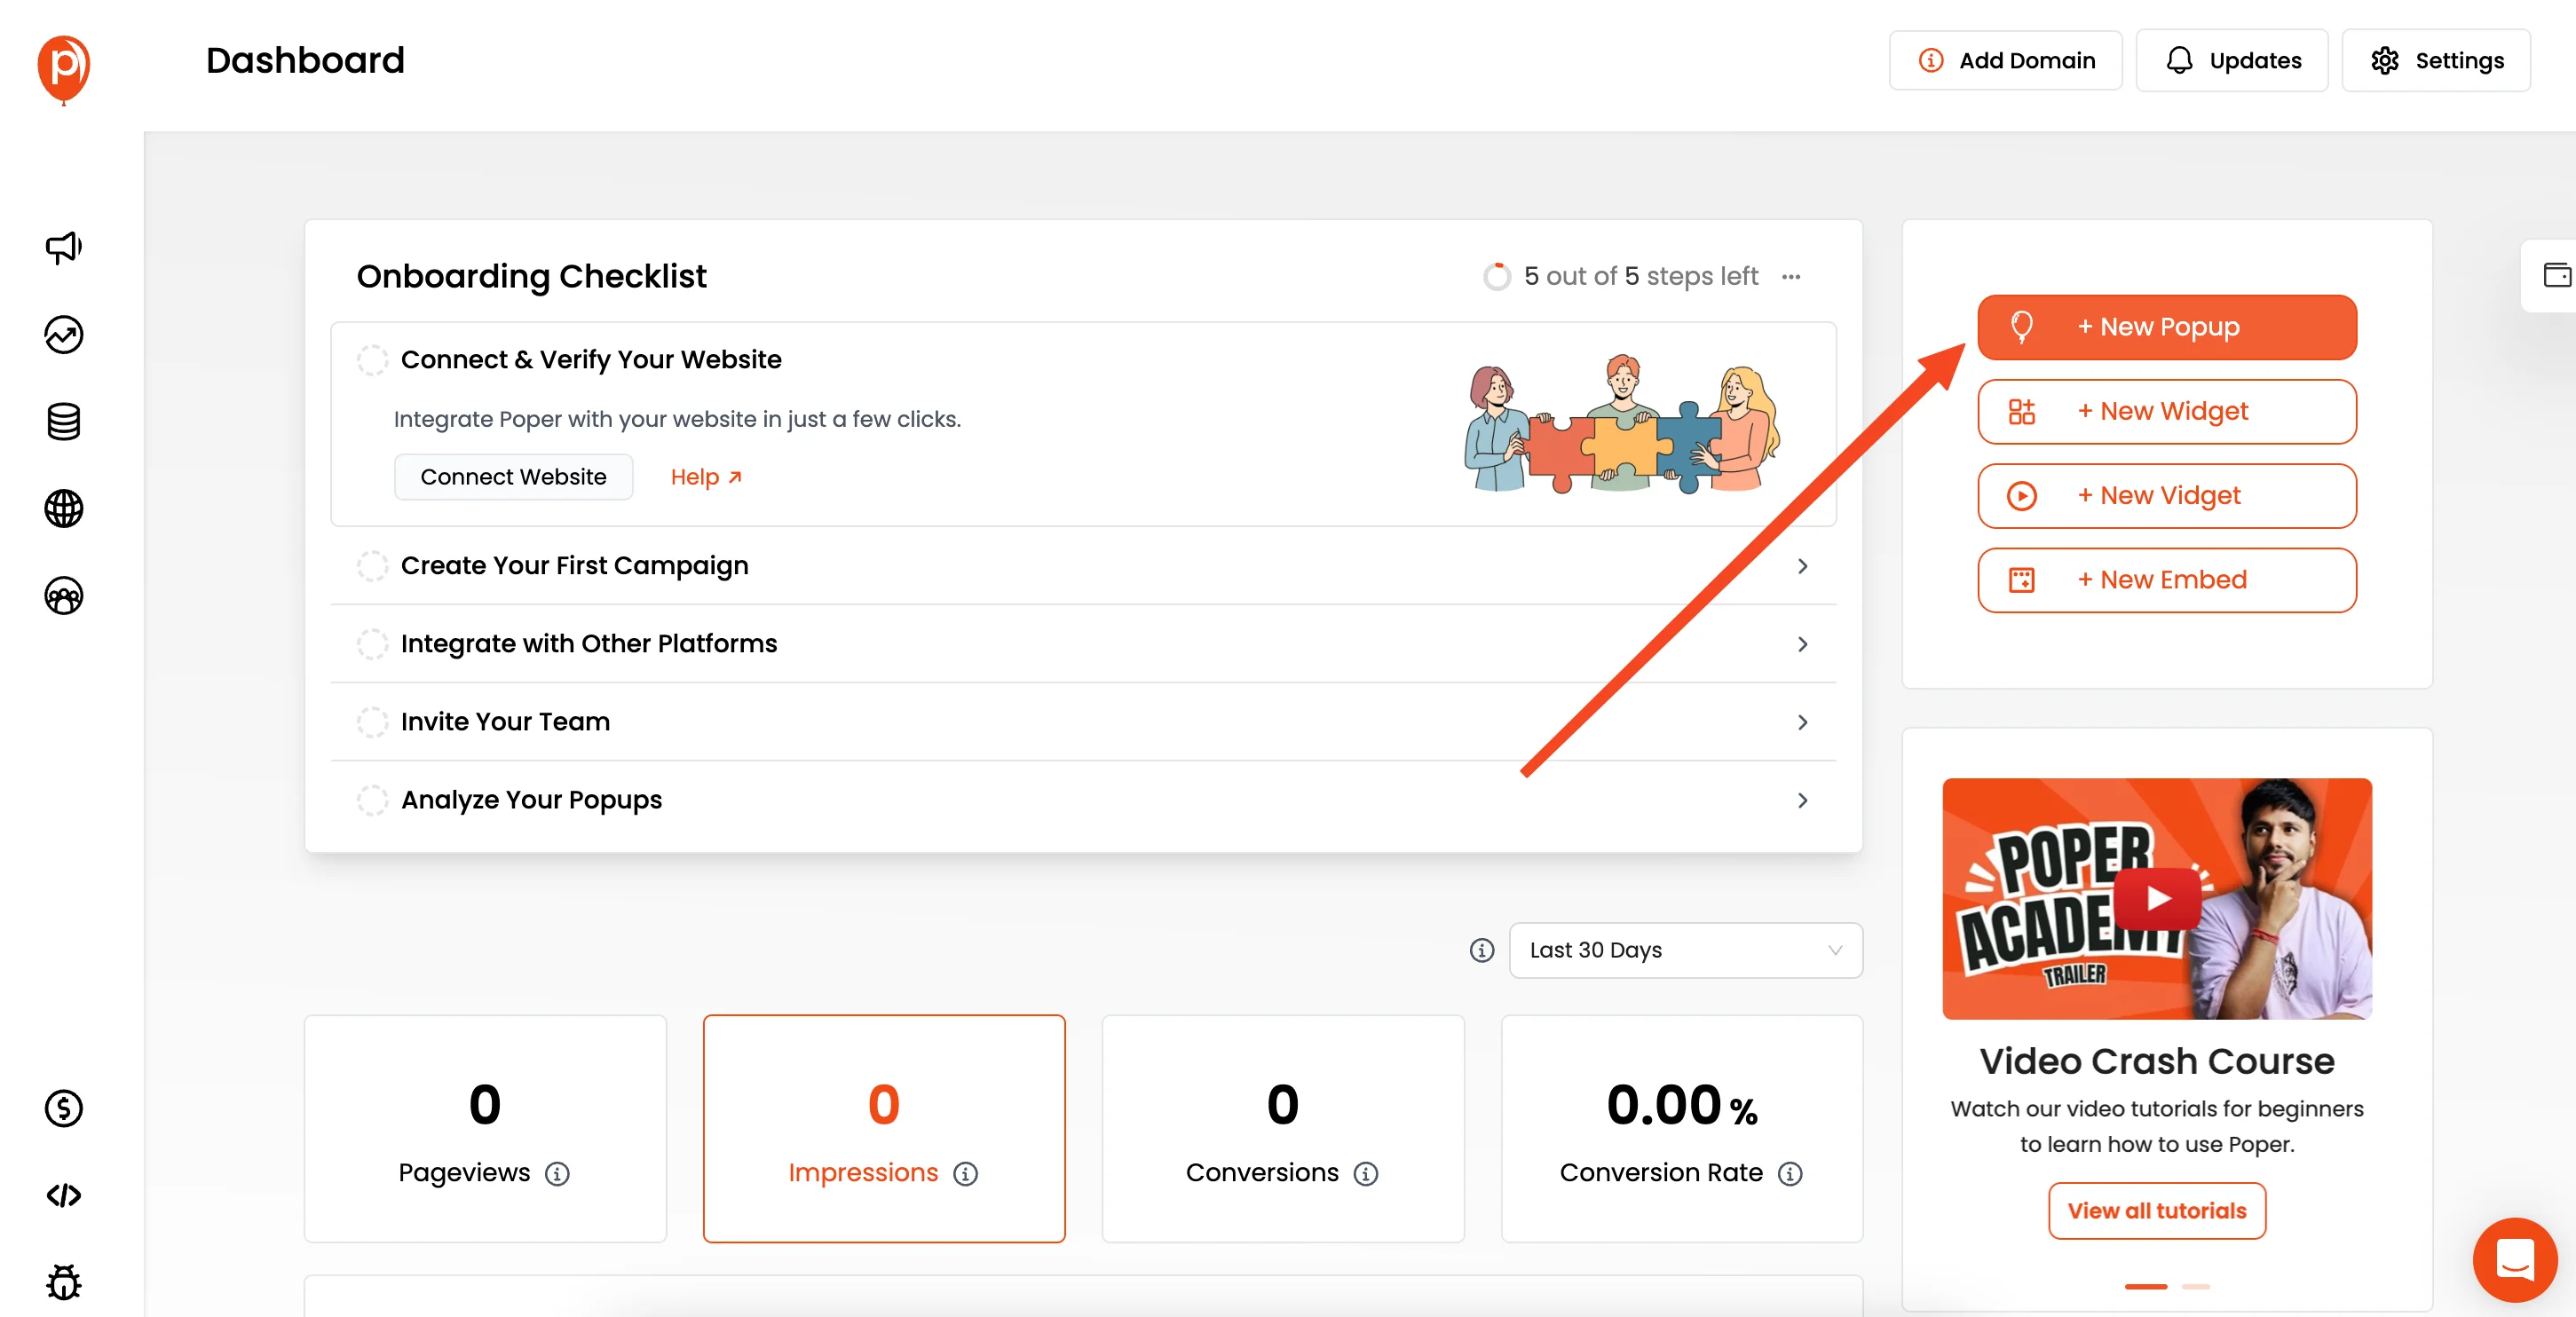
Click on the "New Popup" button and select "Choose from Templates". This will take you to our library of templates.
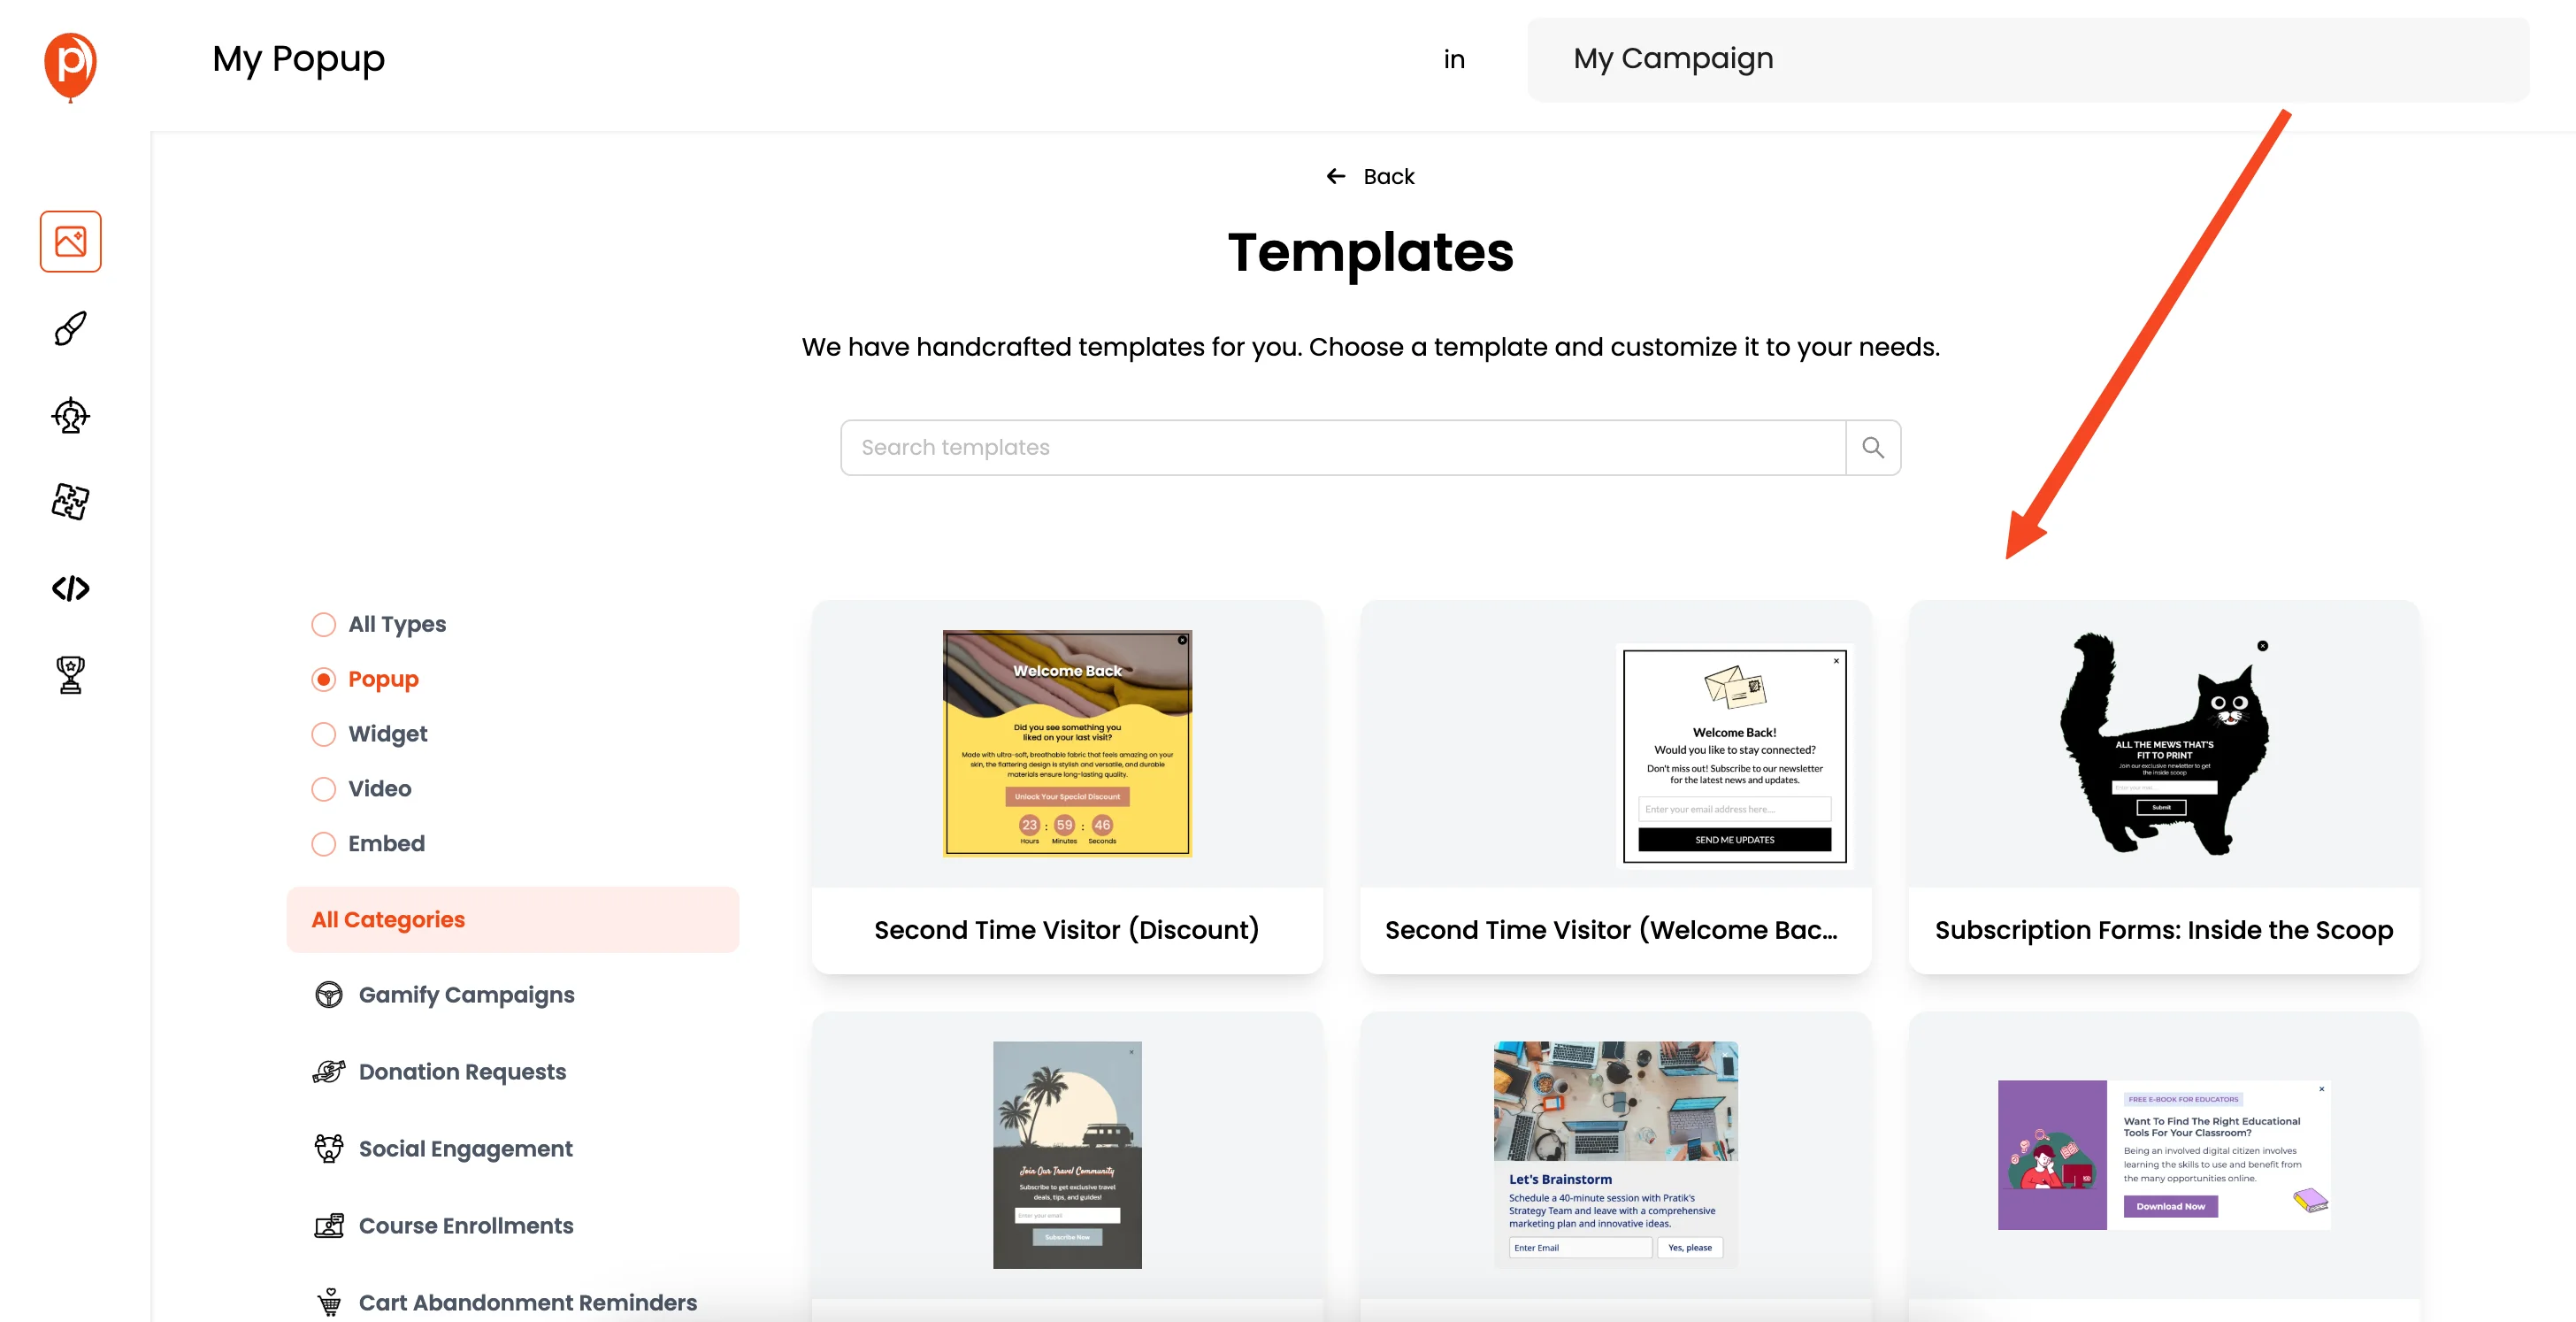
4. Select a Newsletter Template
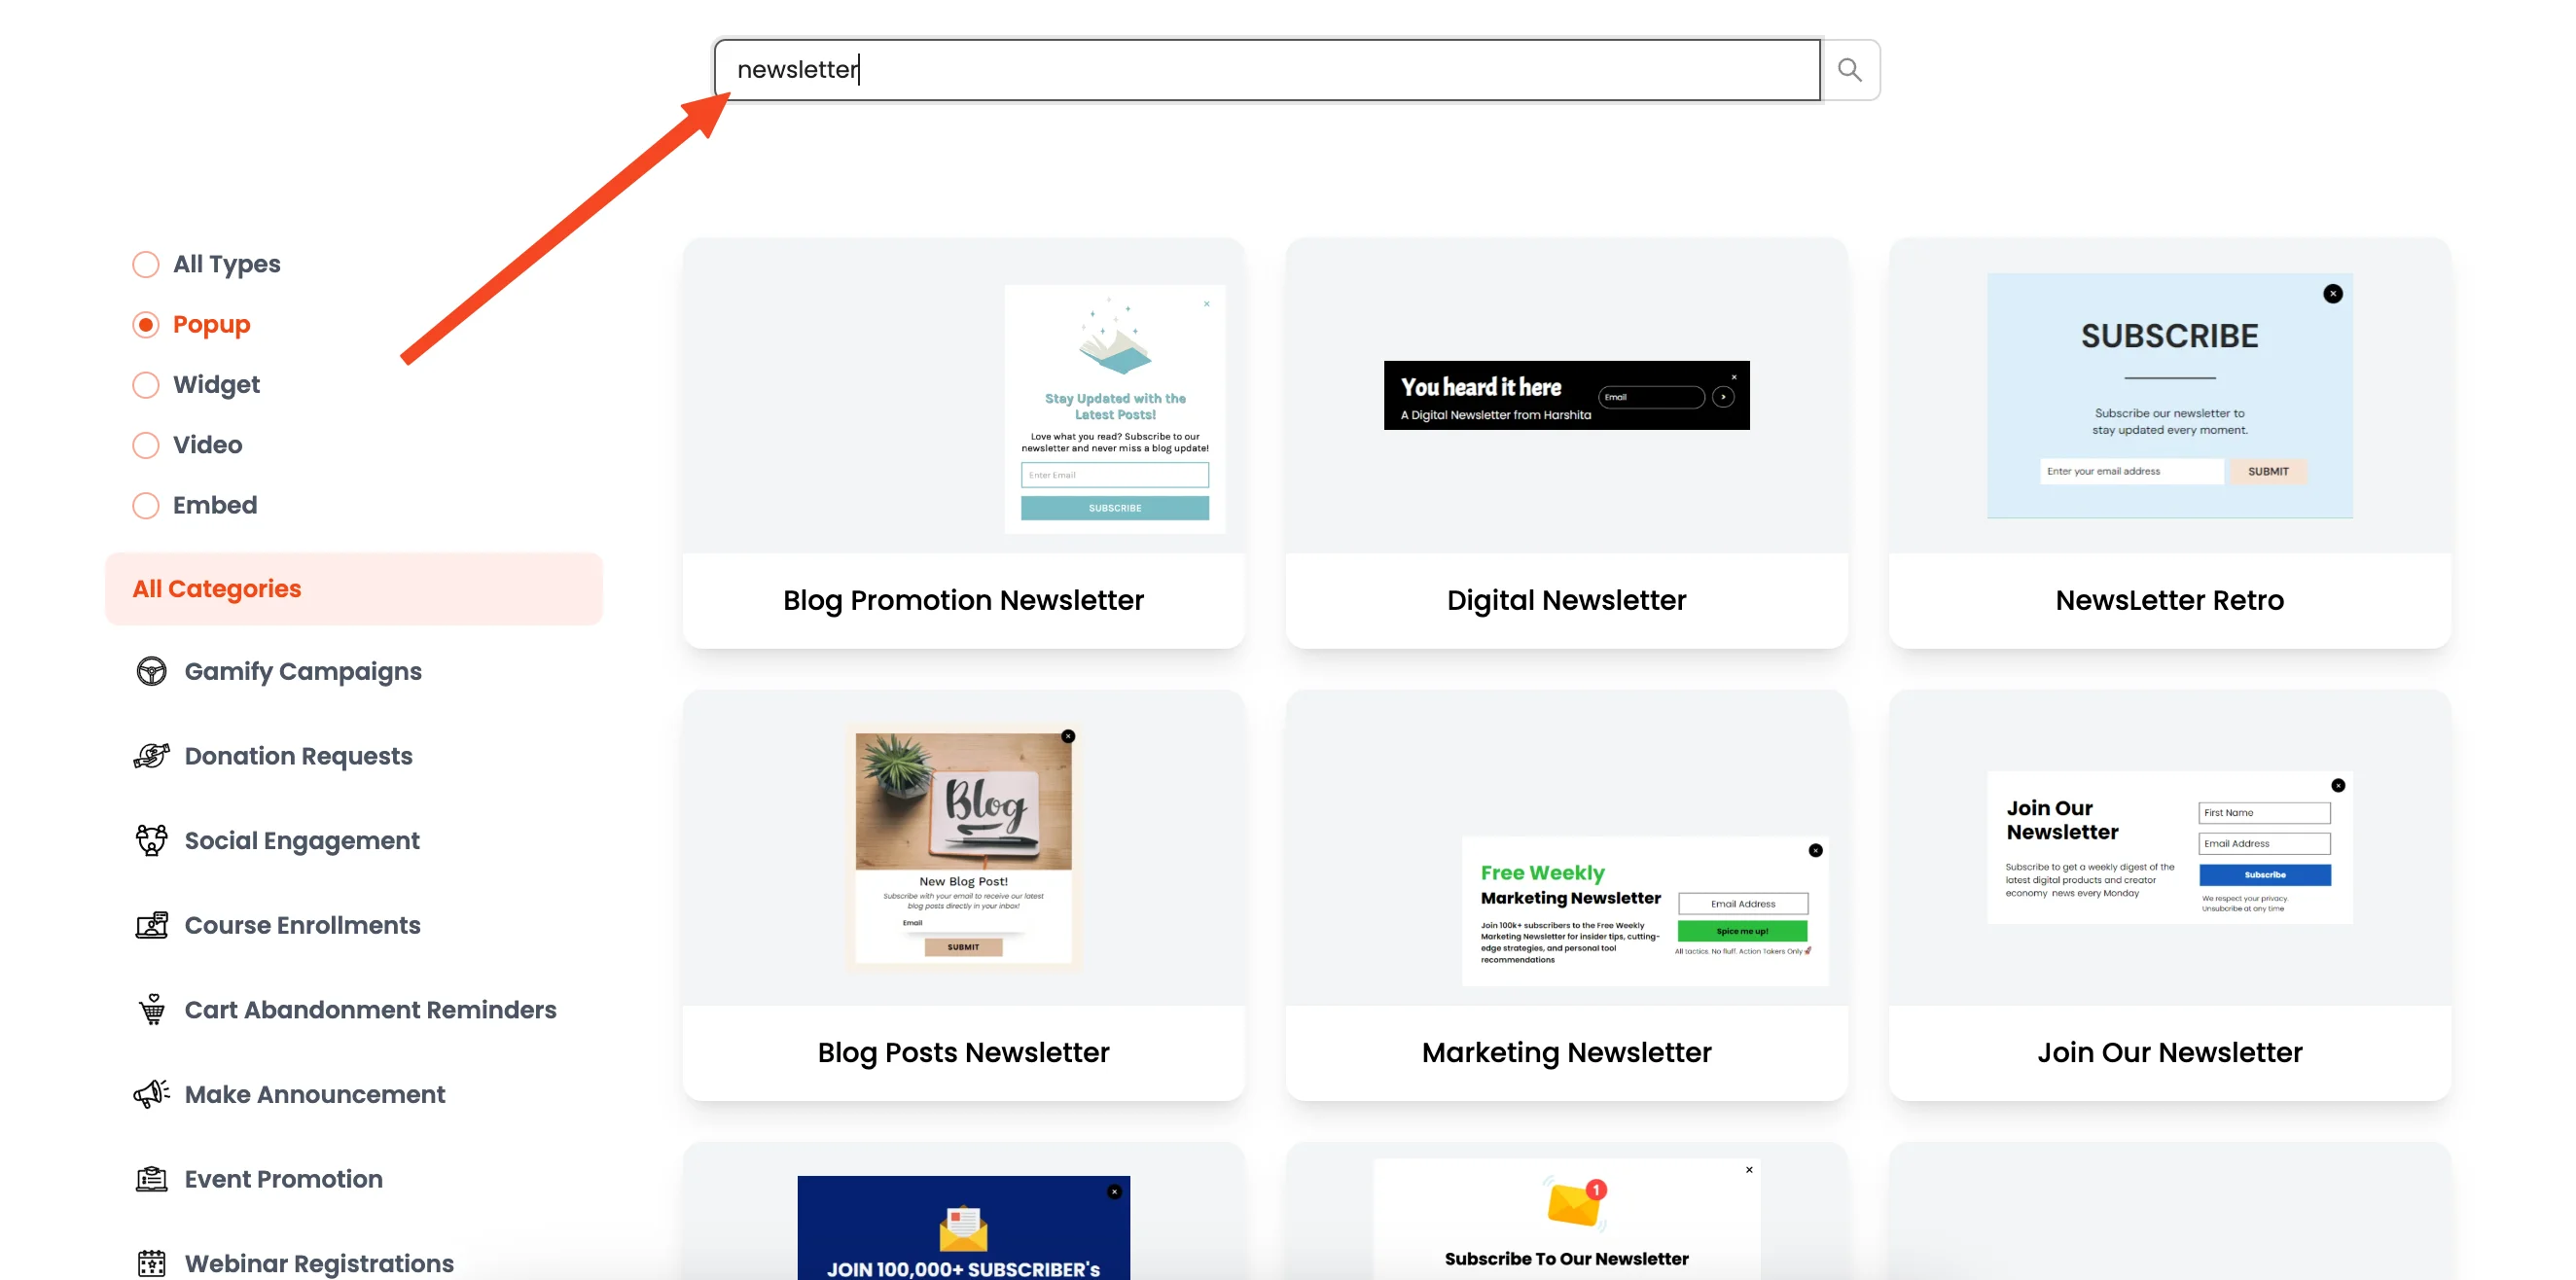
Search for "newsletter" and browse through the hundreds of available templates. Find one that matches your website's style and branding.
5. Customize Your Popup
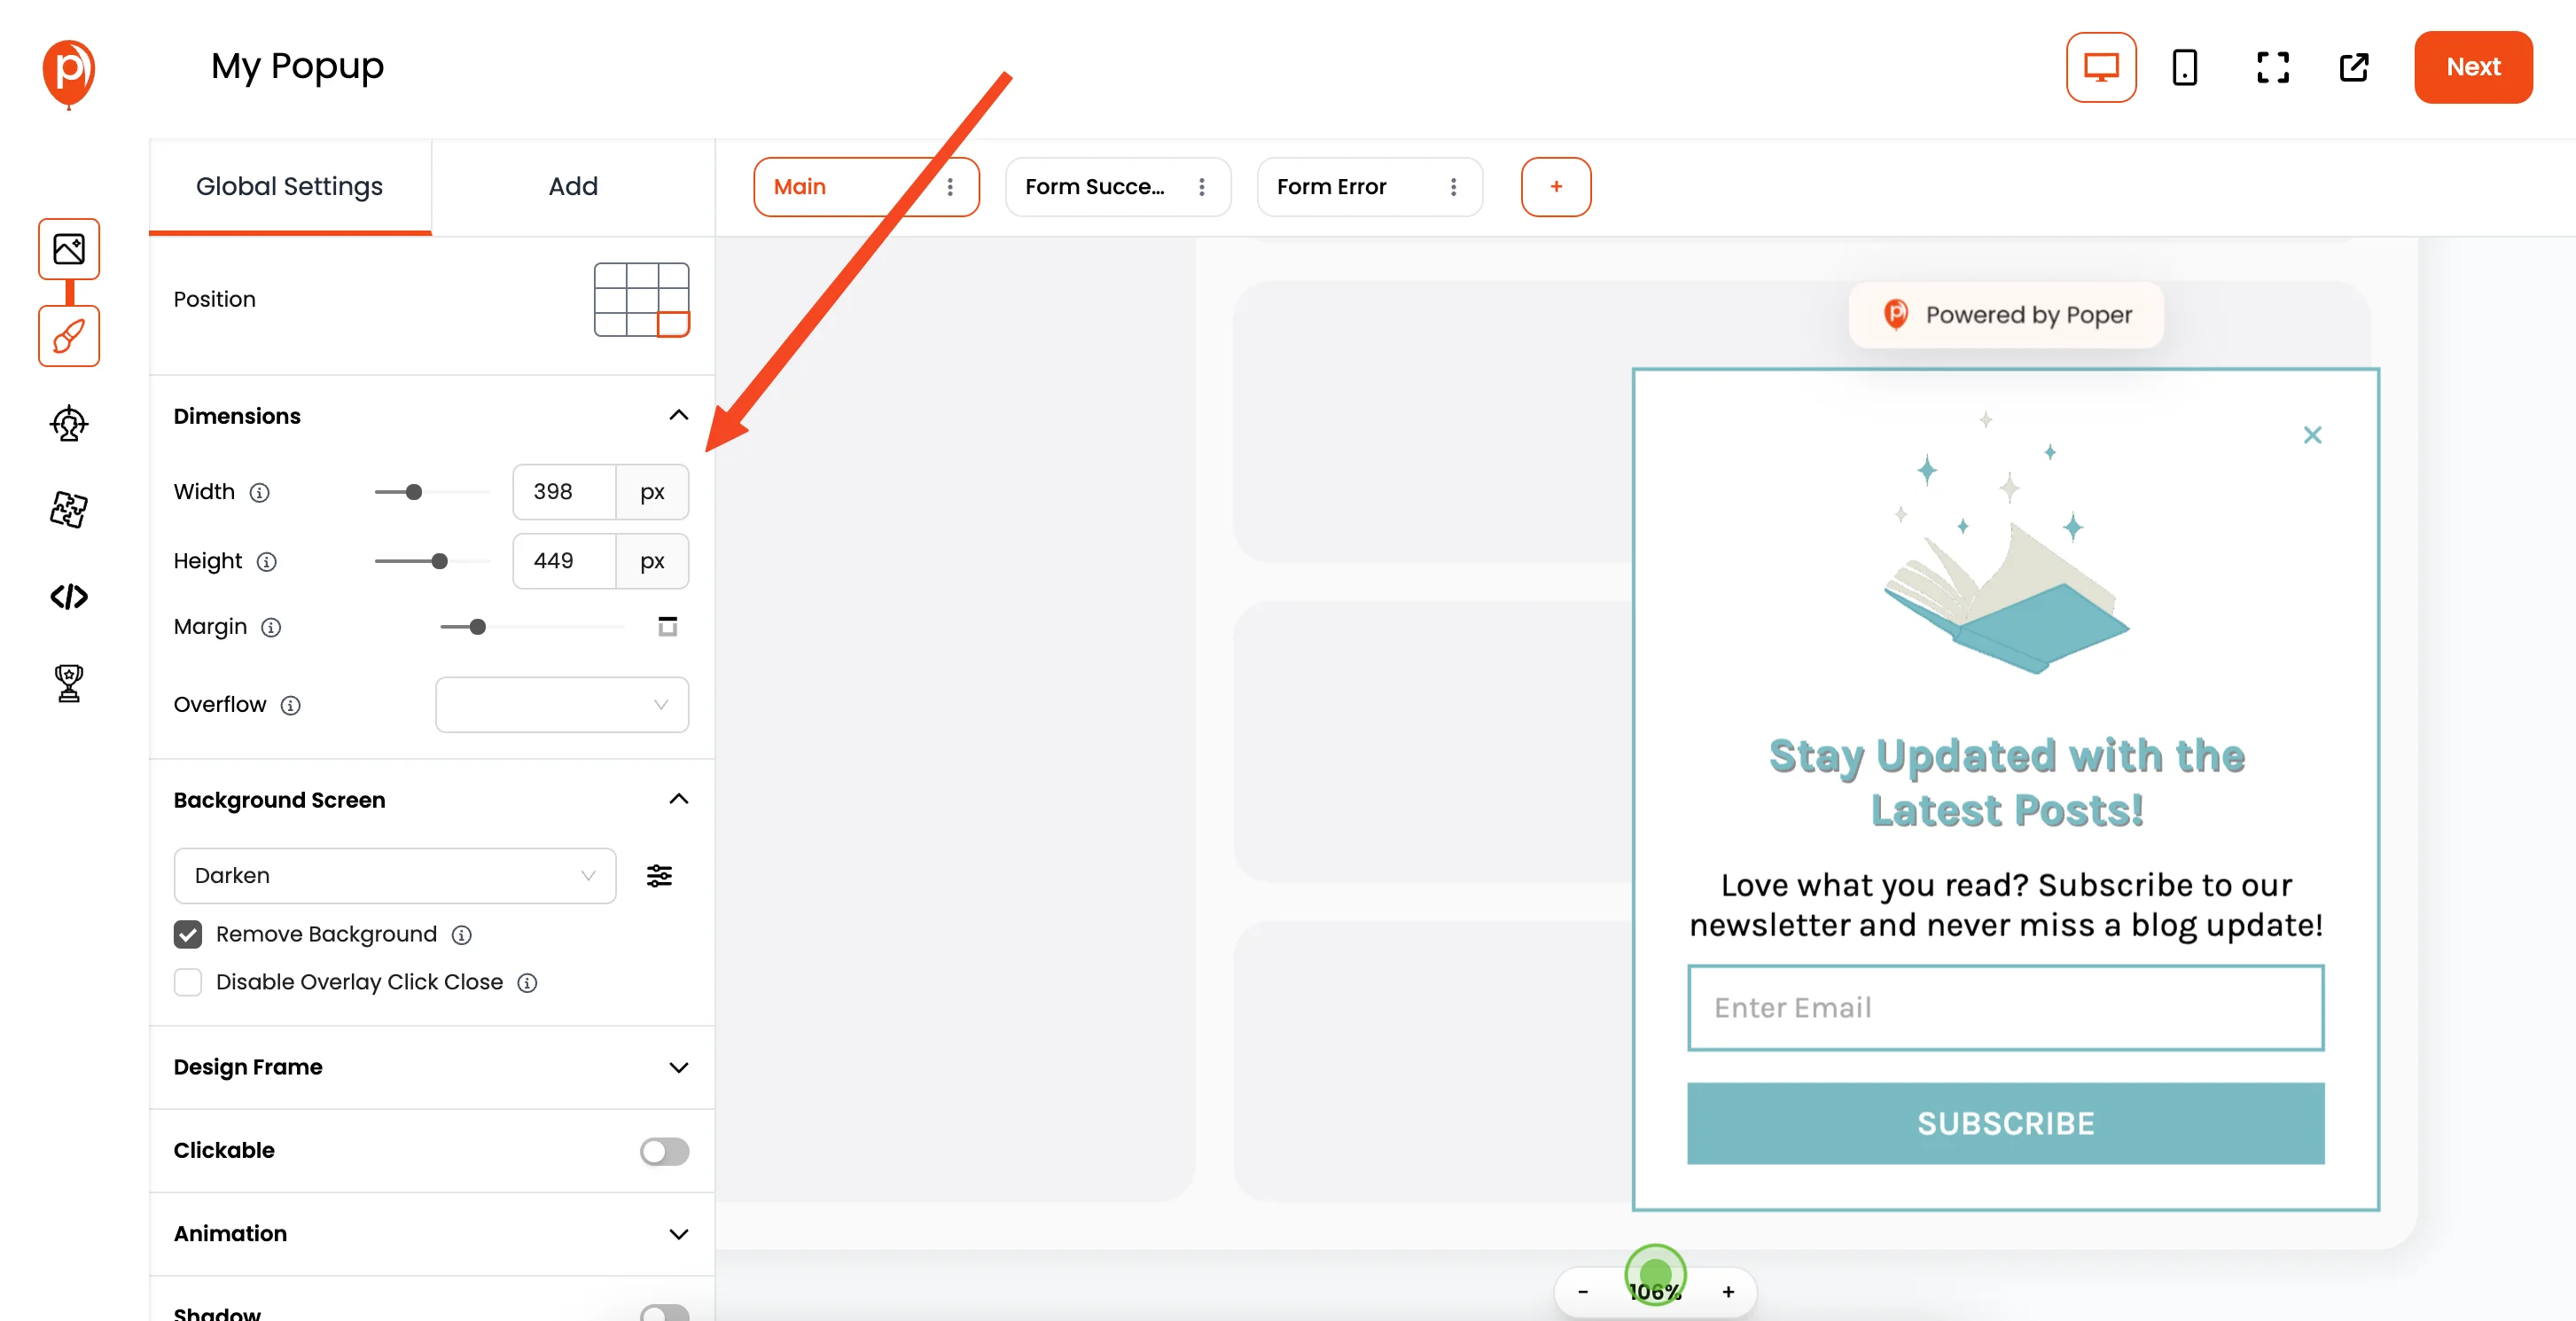
After selecting a template, you will enter our popup editor. Here, you can tweak everything from fonts and colors to the overall design. Make it your own and ensure that it aligns with your brand.
6. Set Display Conditions
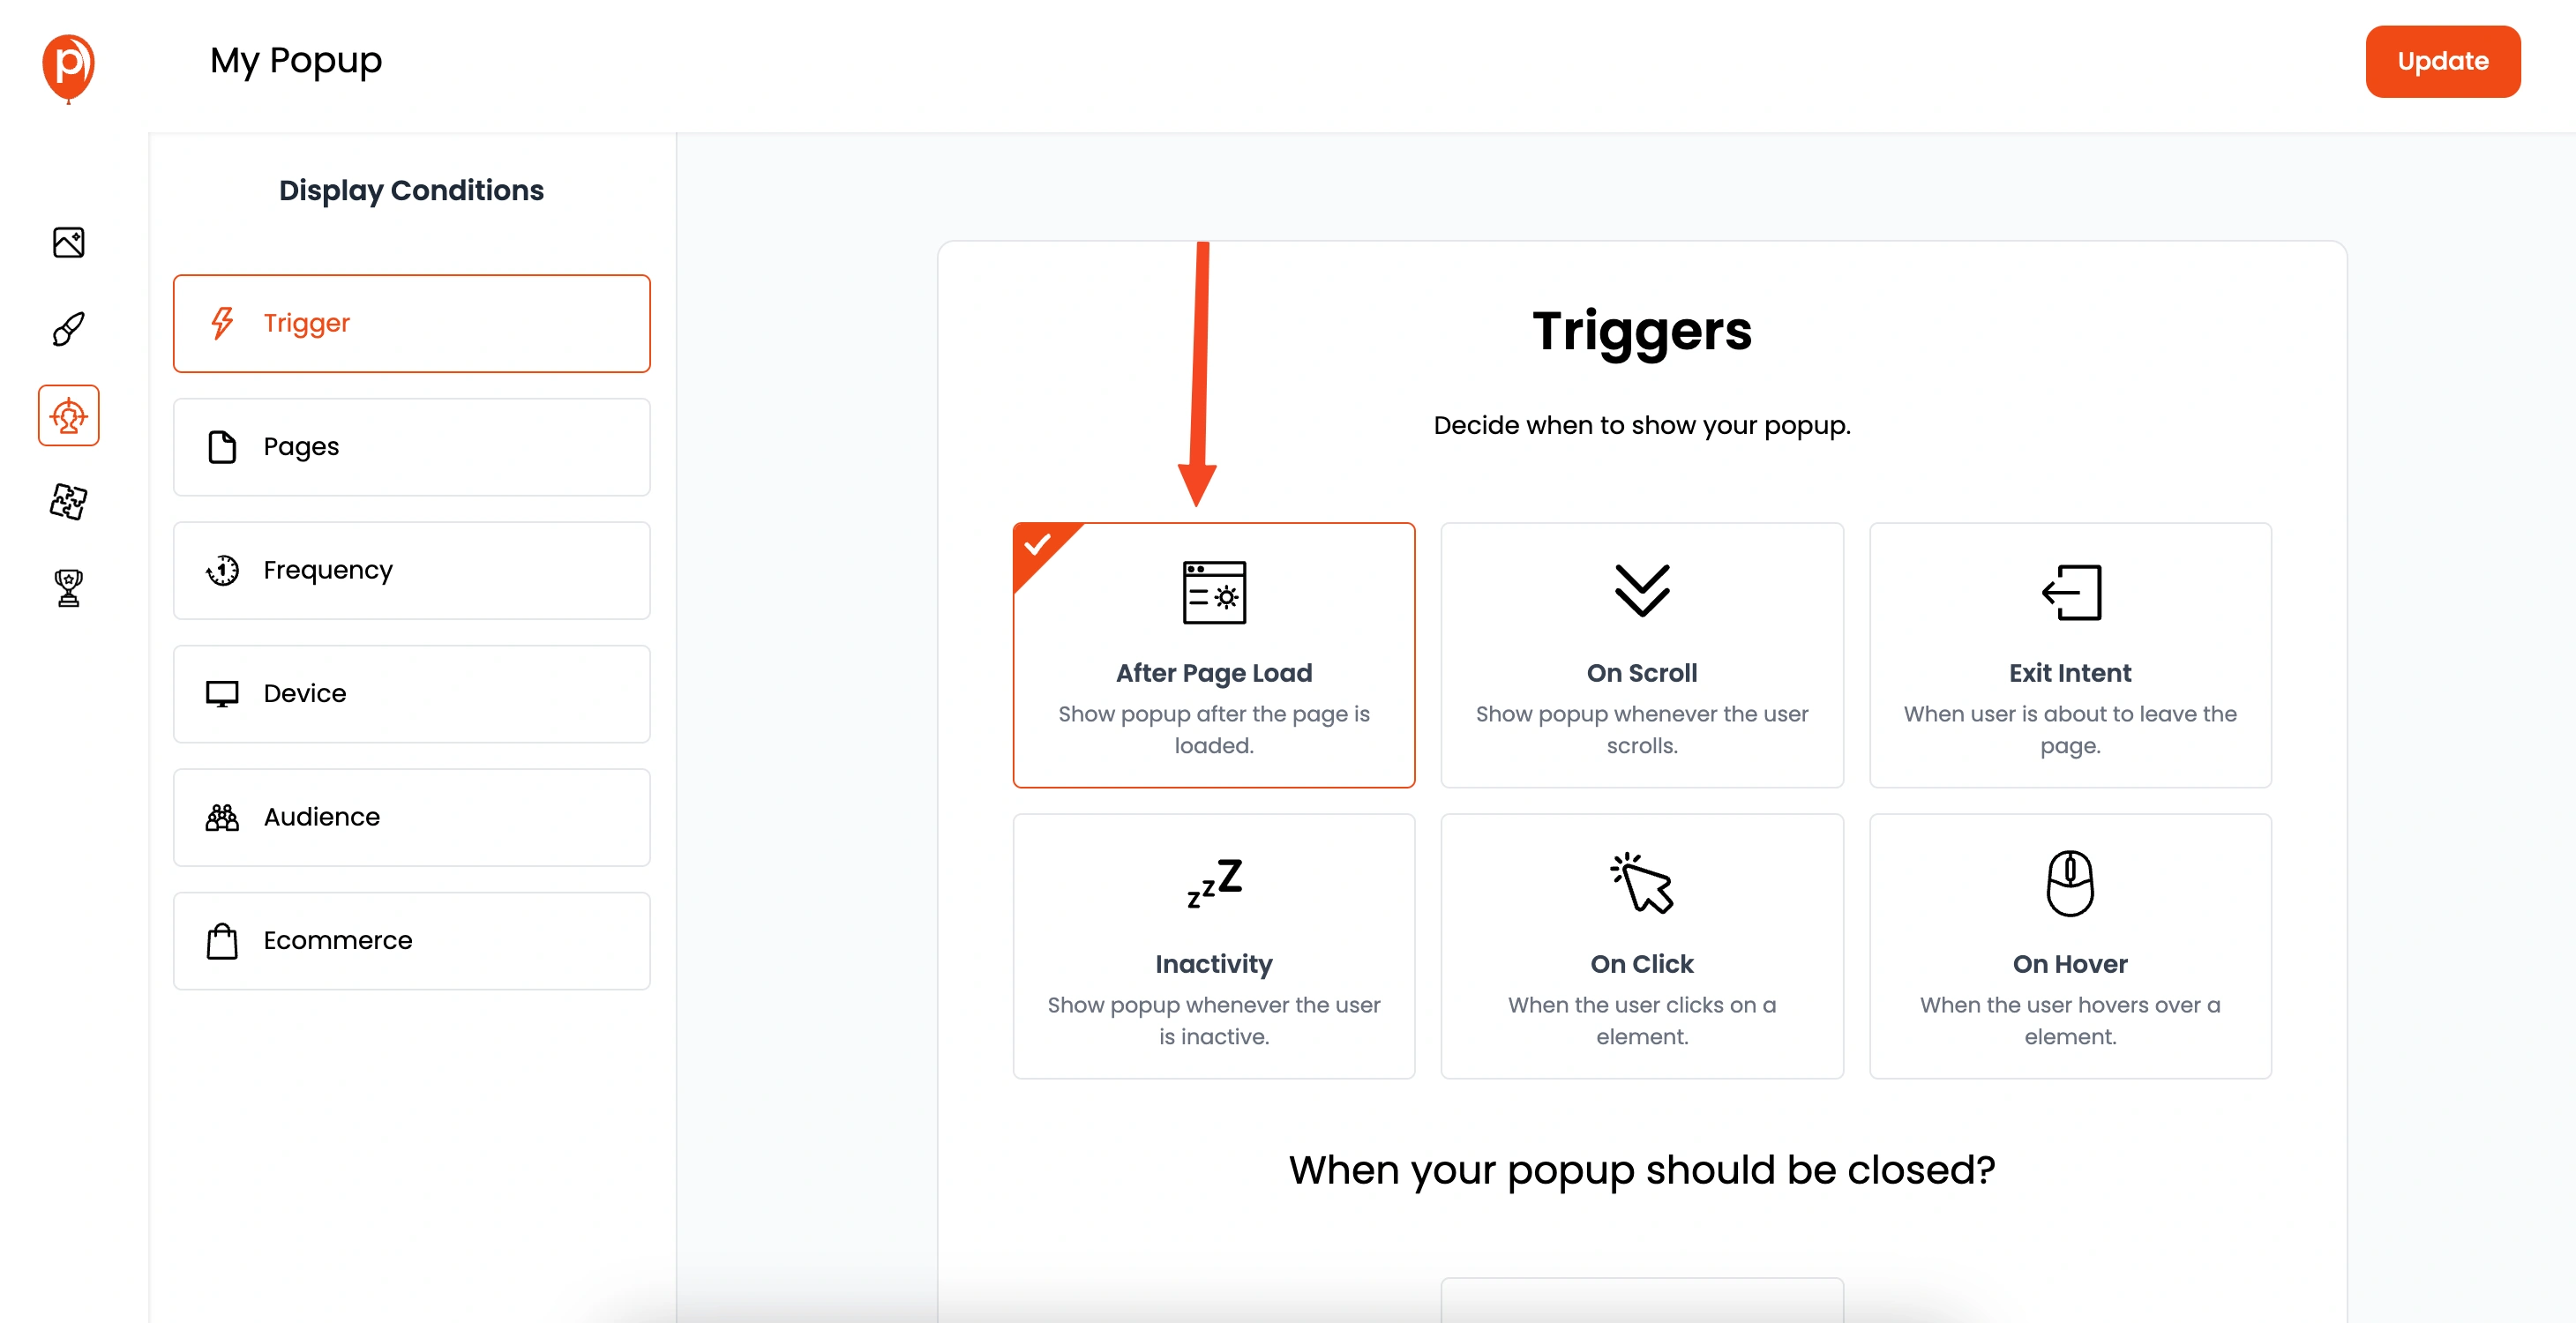
Click on "Next" to move to the Display Conditions section. This is where you can target specific pages, user demographics, and other parameters to show the popup to the right audience at the right time.
7. Connect to Integrations
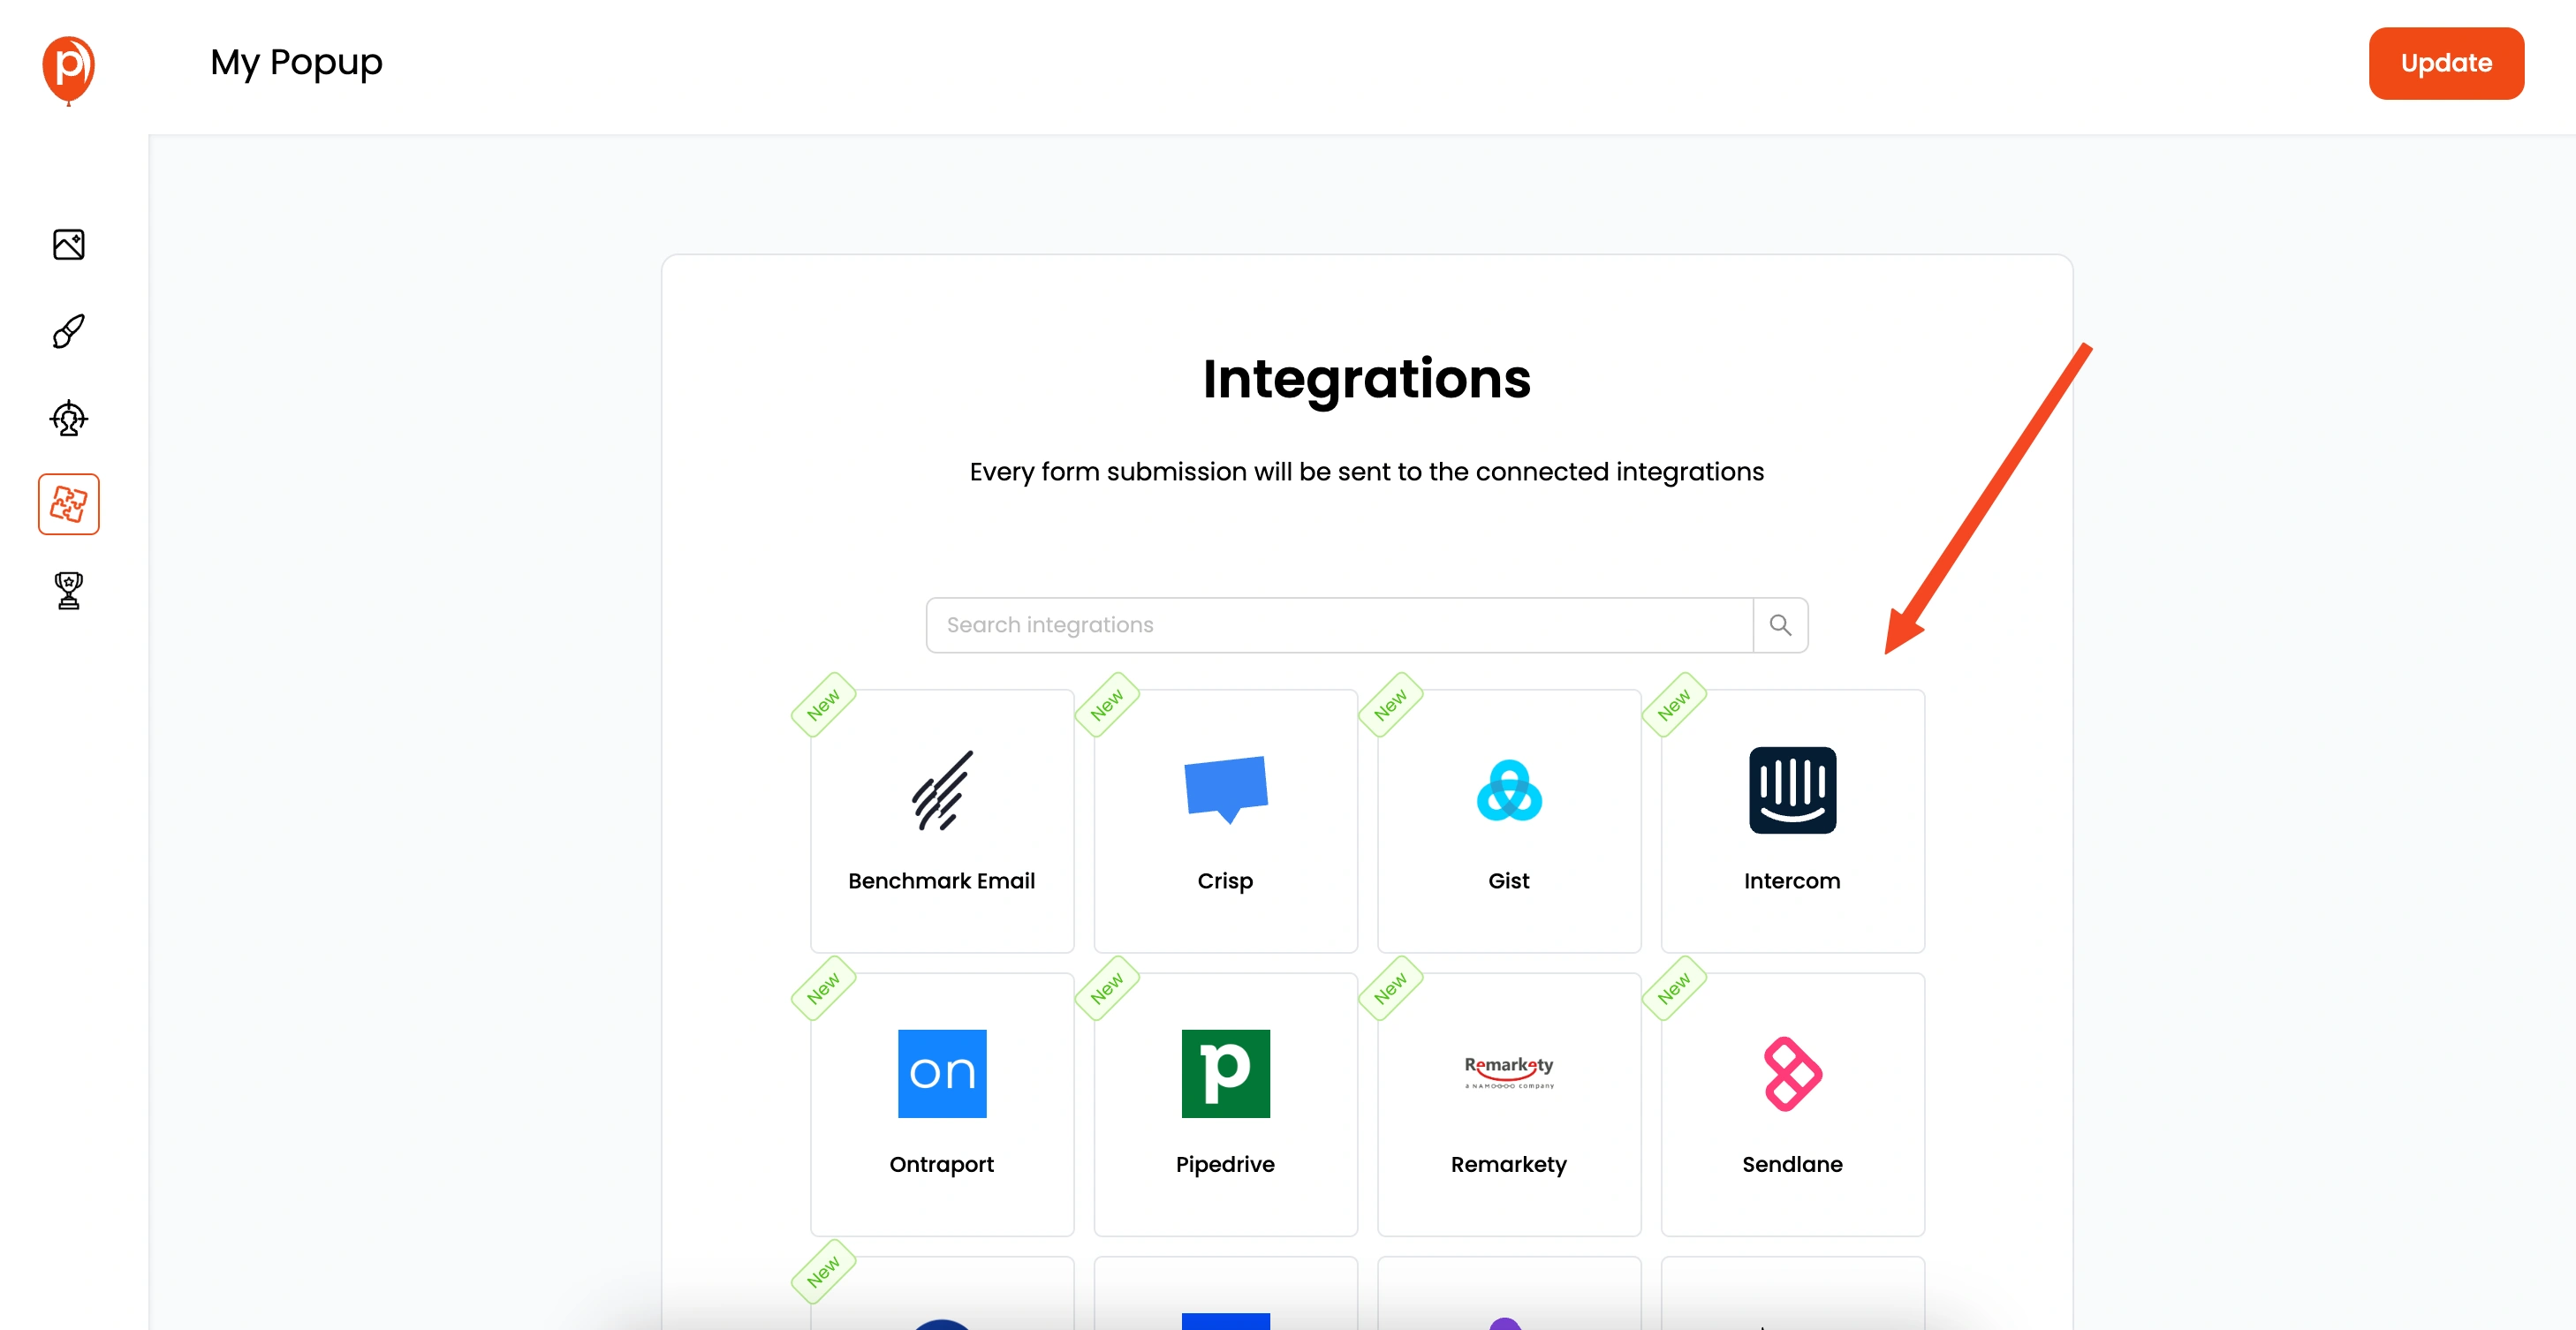
Click "Next" again to go to the integrations page.
8. Select Mailchimp
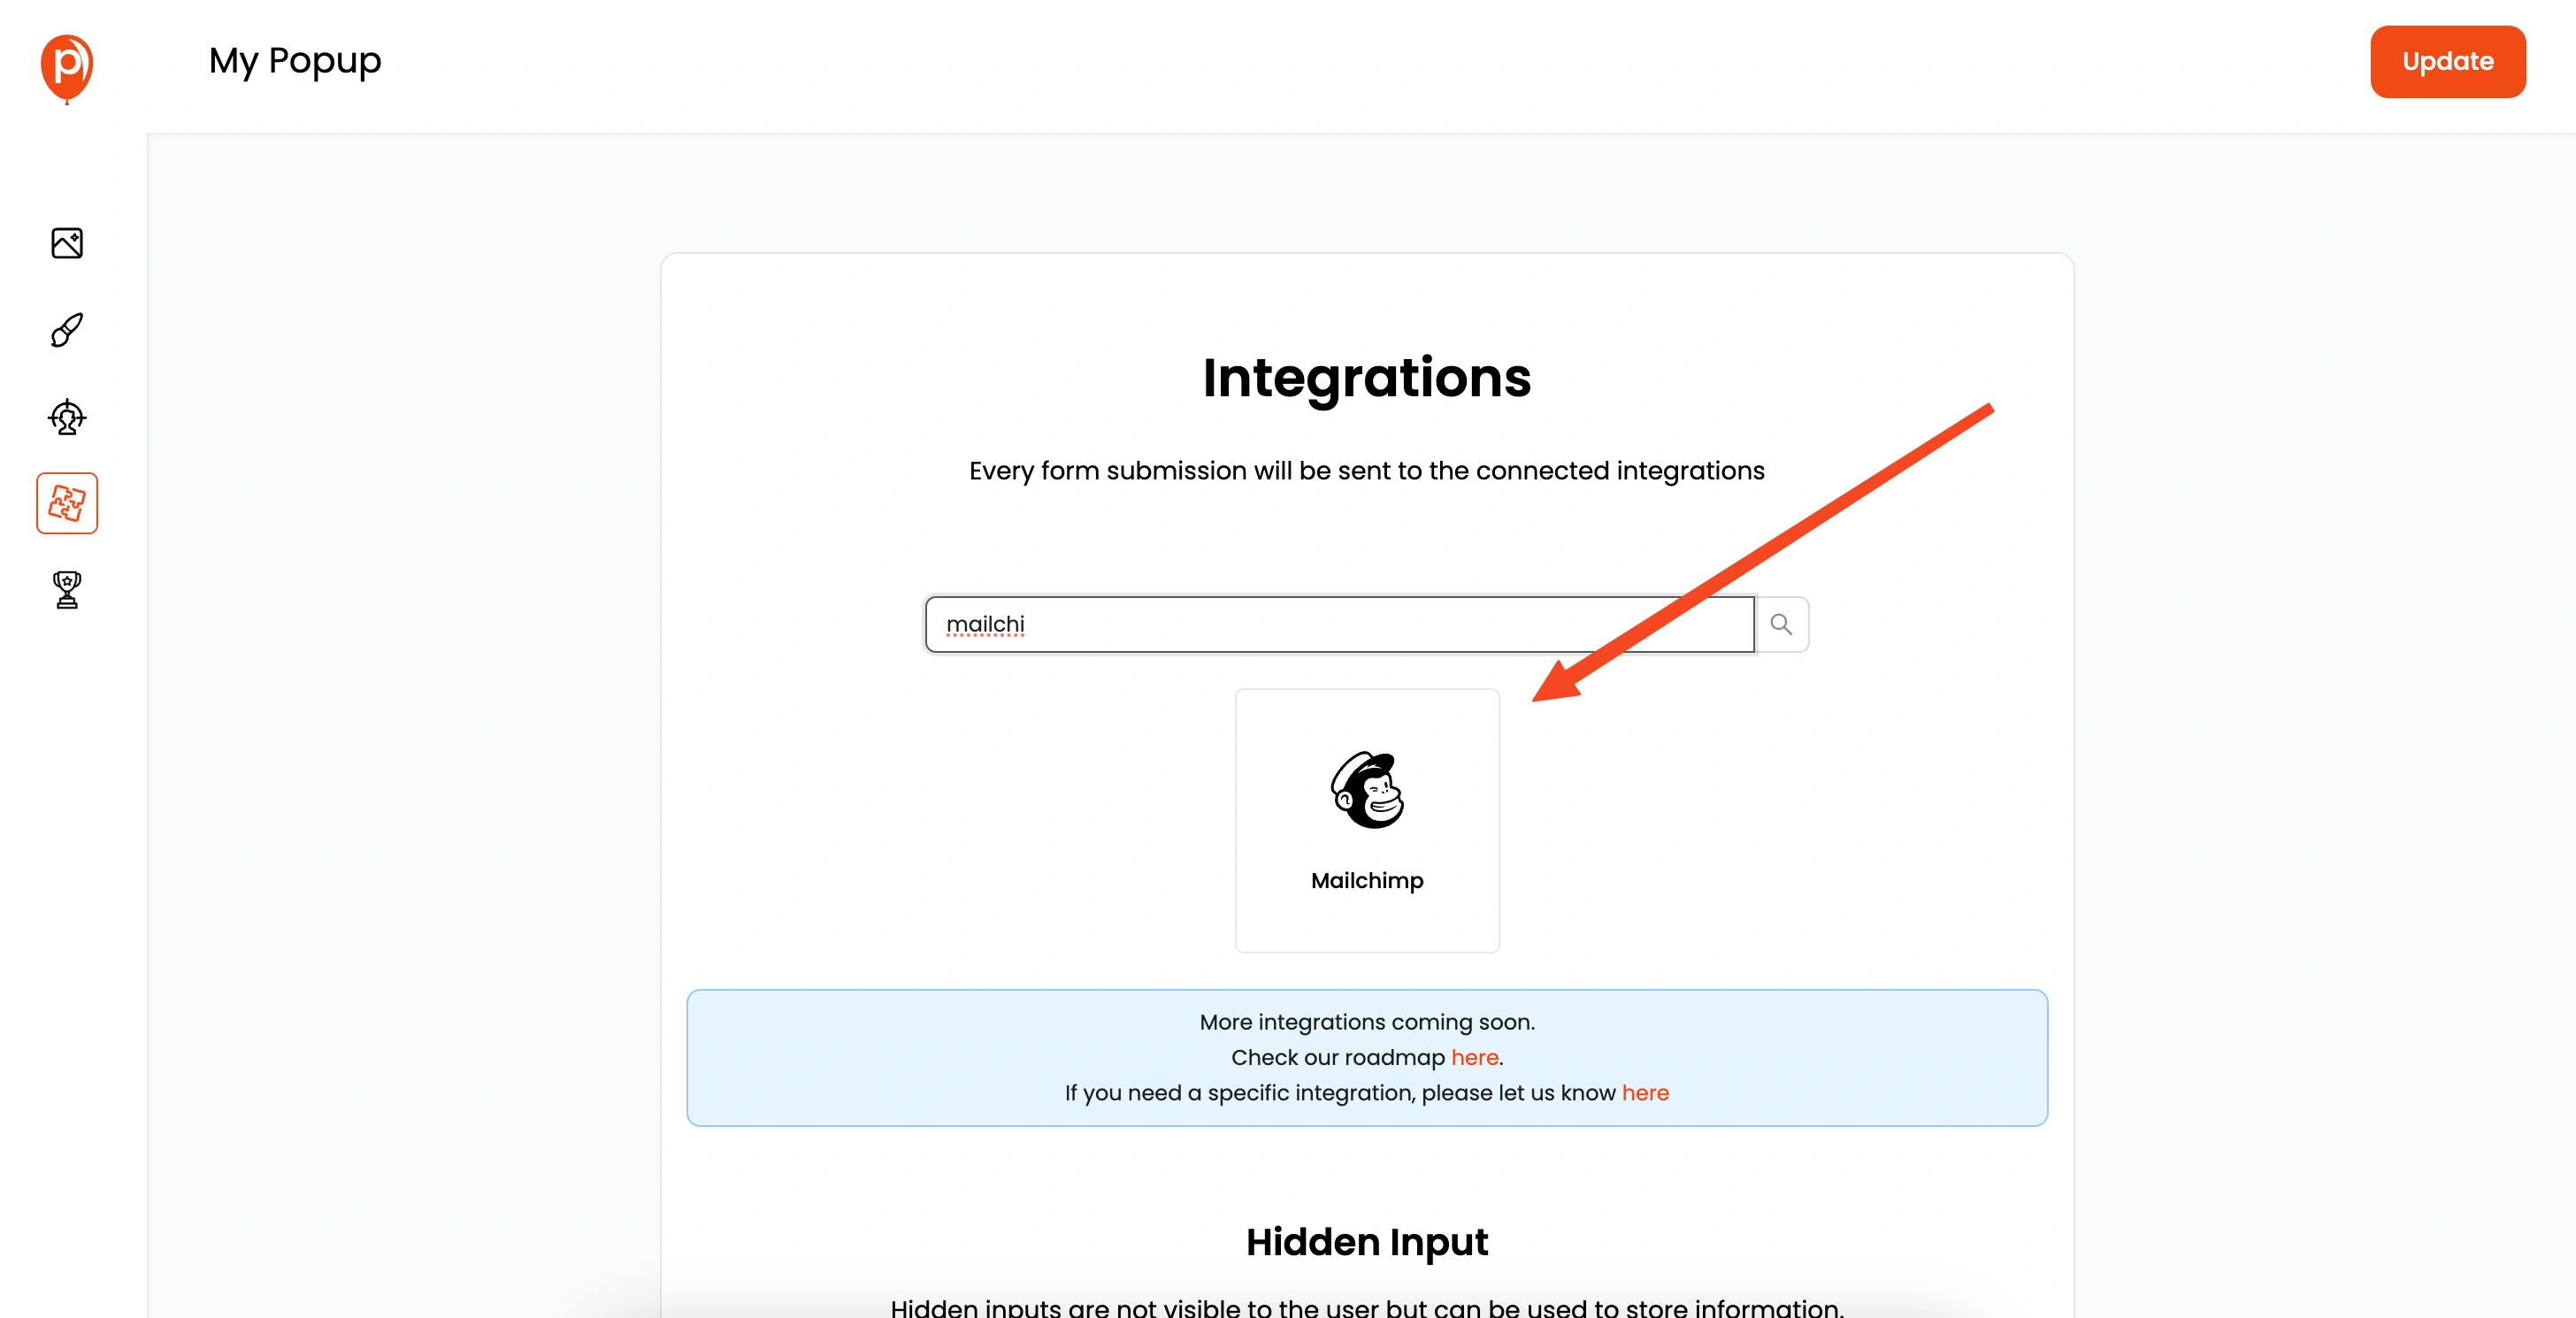
Choose Mailchimp from the list of available integrations.
9. Connect Your Mailchimp Account
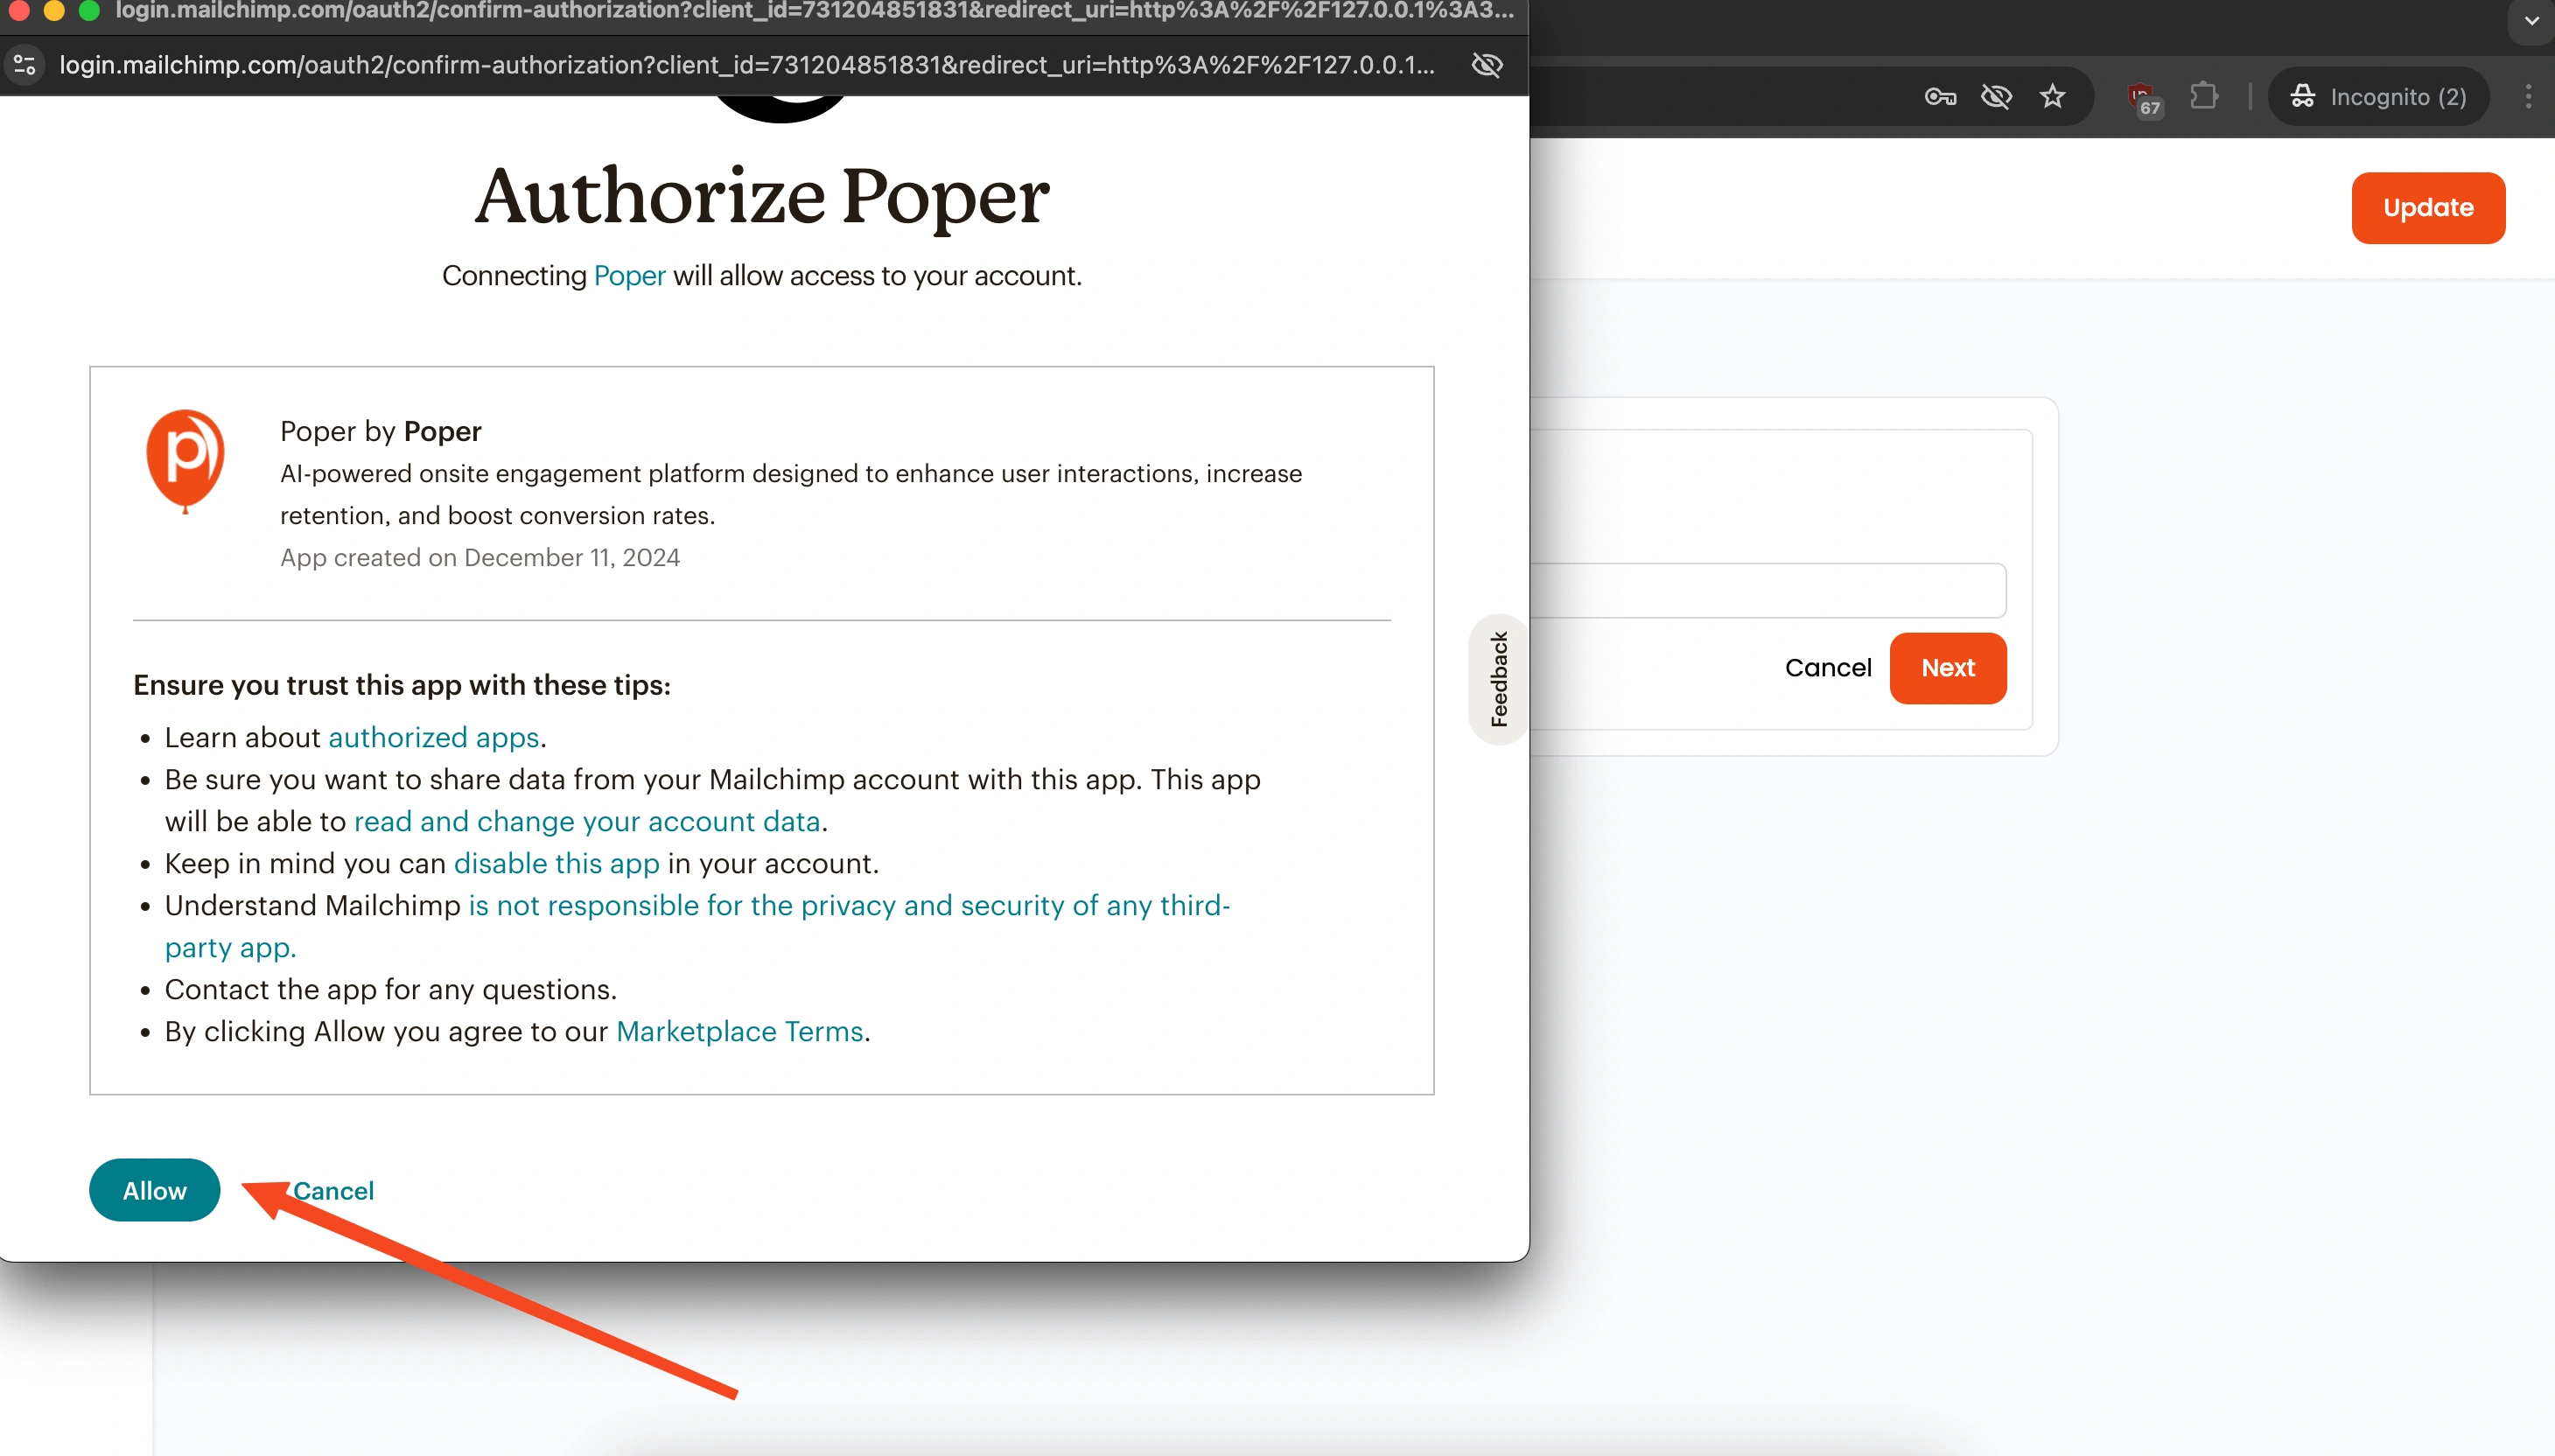
Enter your Mailchimp account name, then click "Next". You’ll be prompted to log in to your Mailchimp account.
10. Choose Your List and Assign Tags
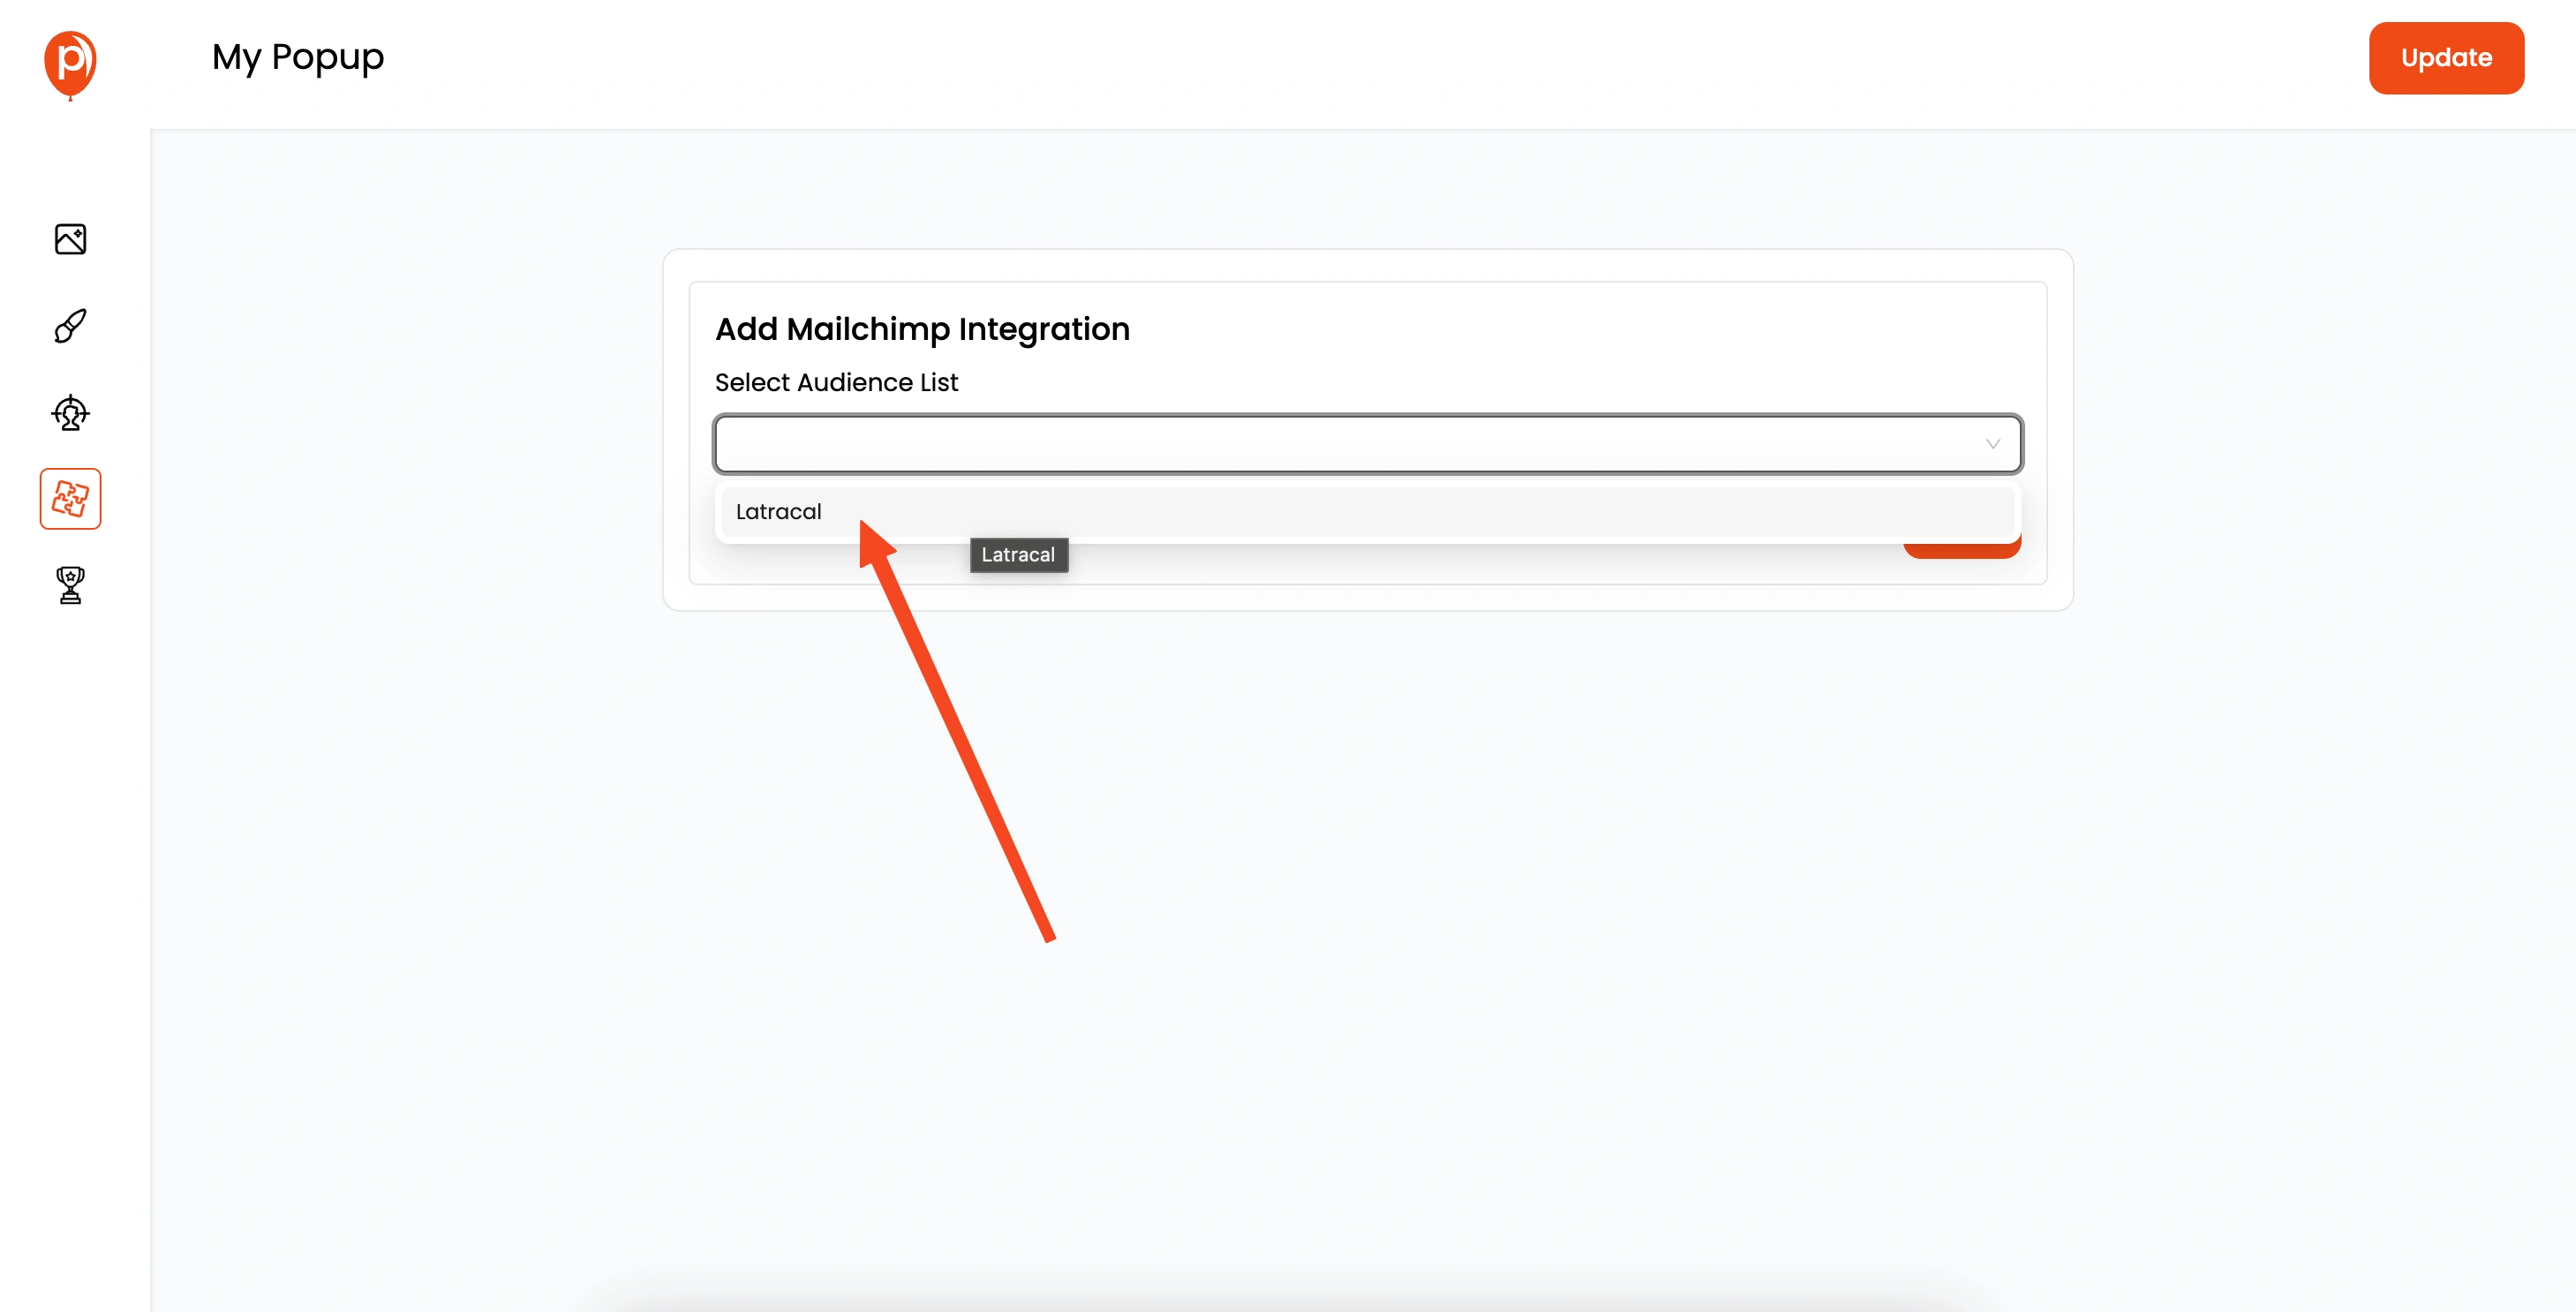
Select the specific audience list in Mailchimp where you want to add new subscribers and assign tags to segment your contacts.
11. Map the Merge Fields
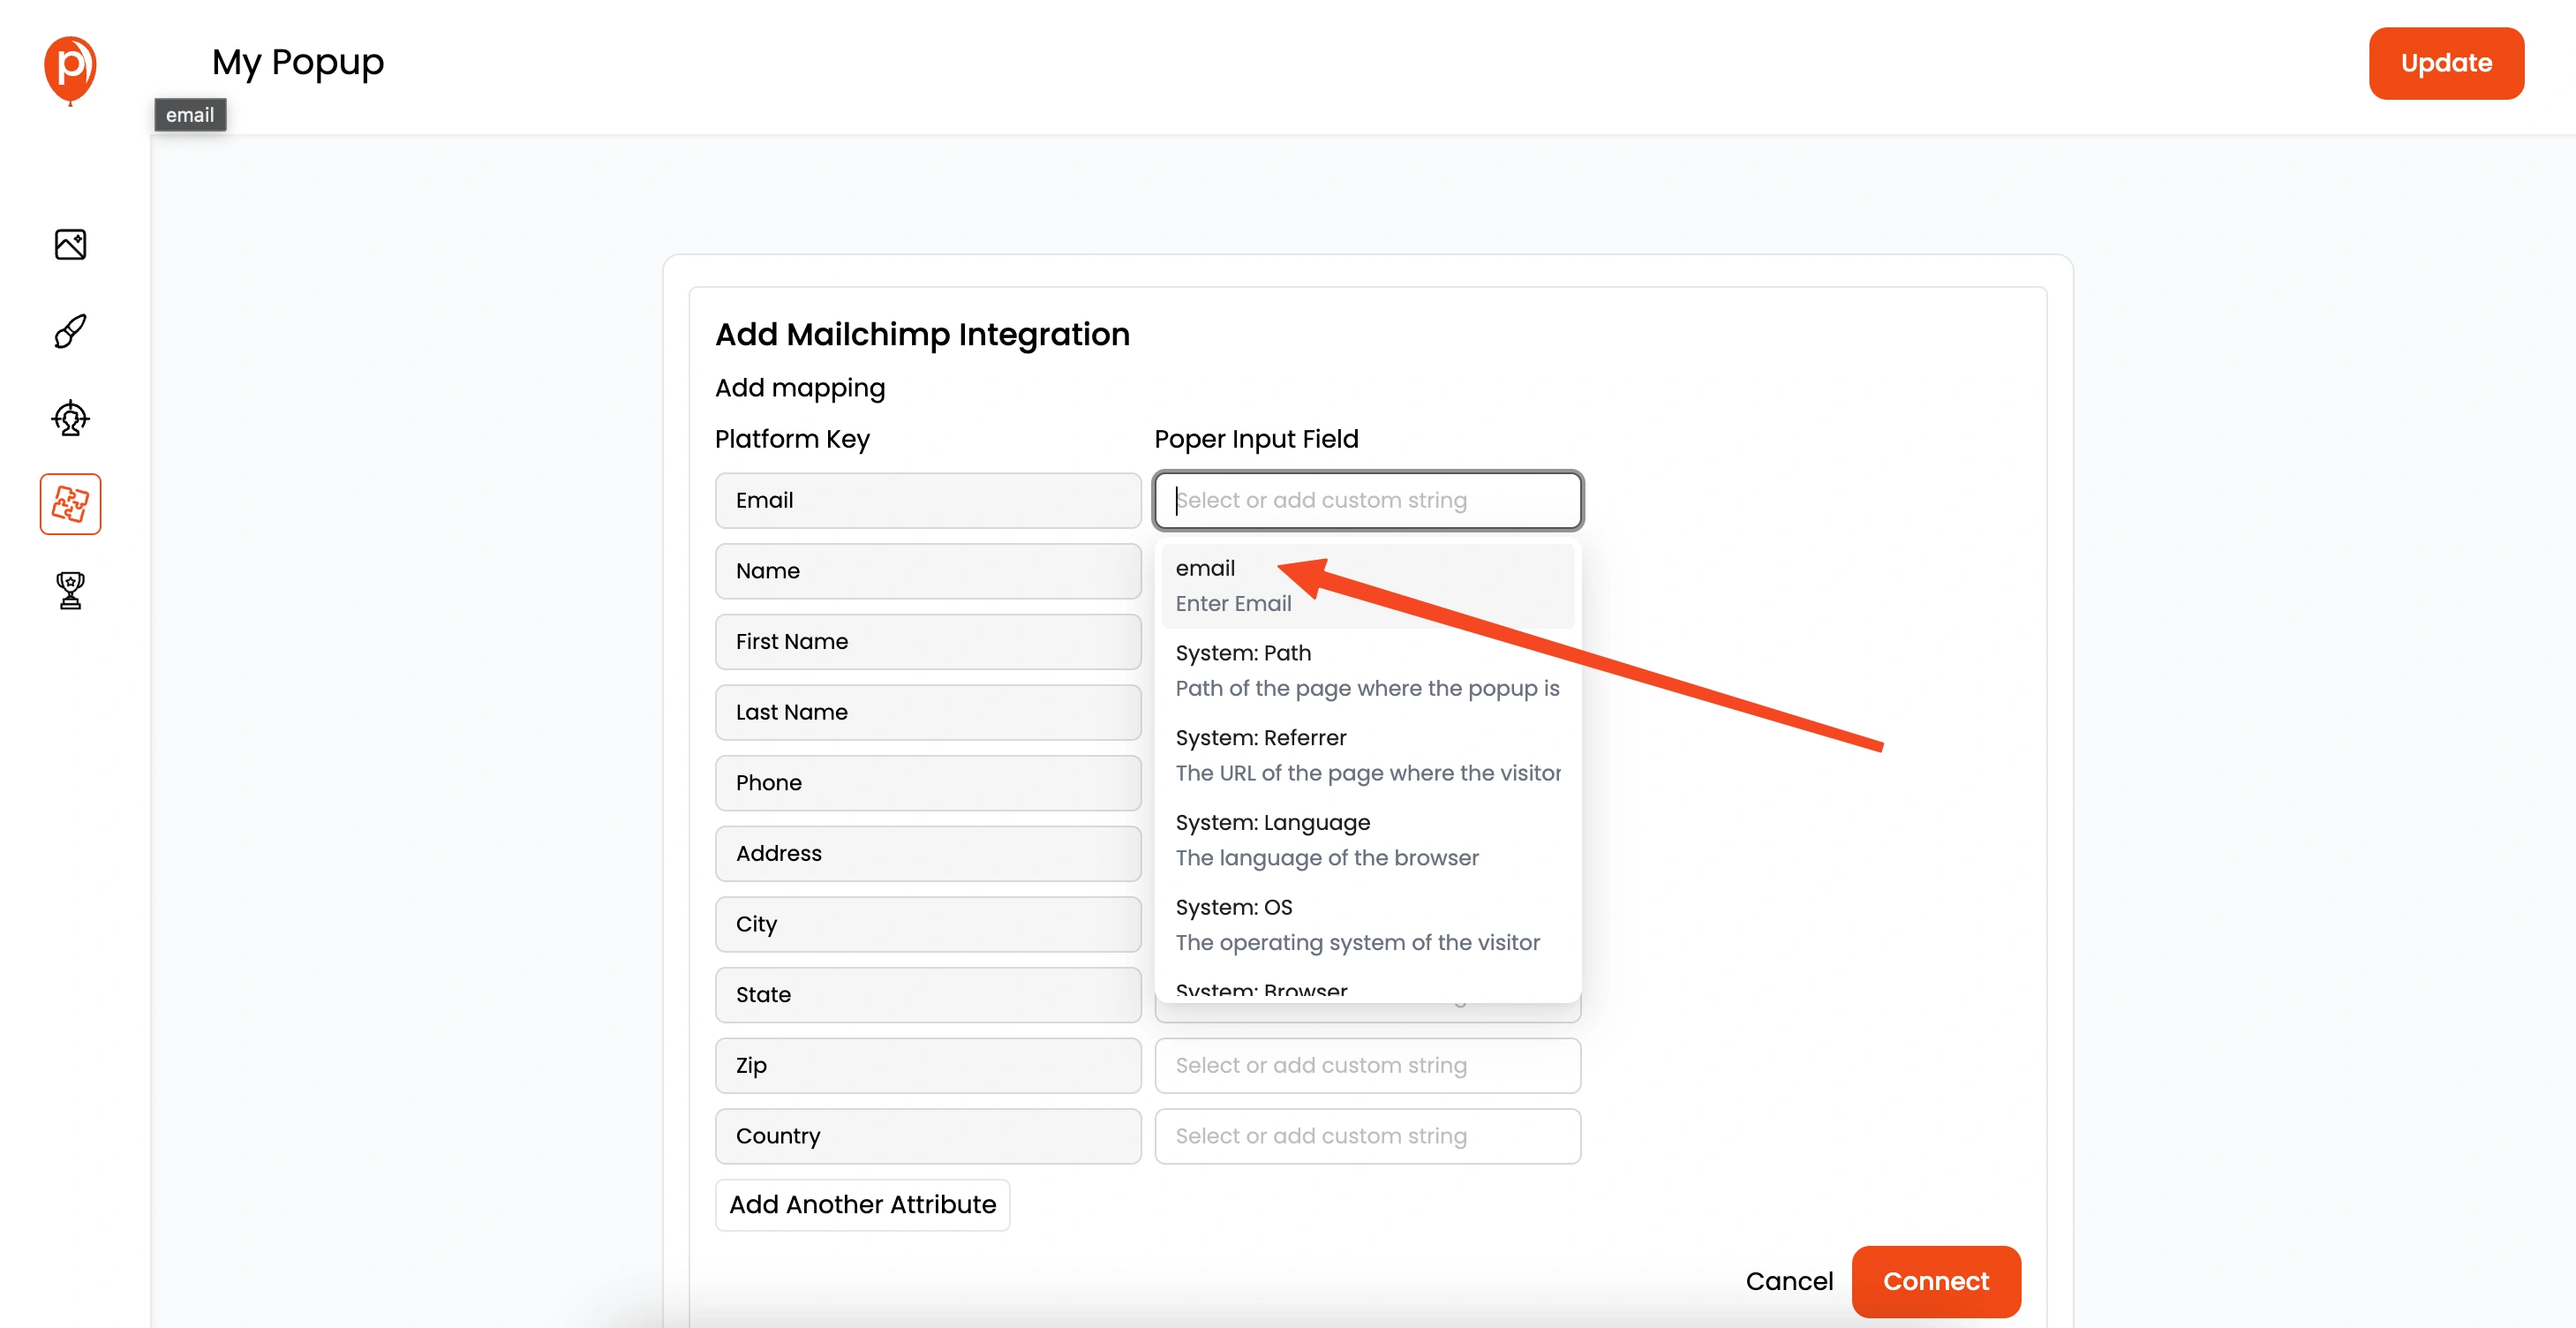
Map the fields from Poper to your Mailchimp list. For a more in-depth guide on Mailchimp integration, you can check out this article: Mailchimp Integration
12. Connect Poper to WordPress
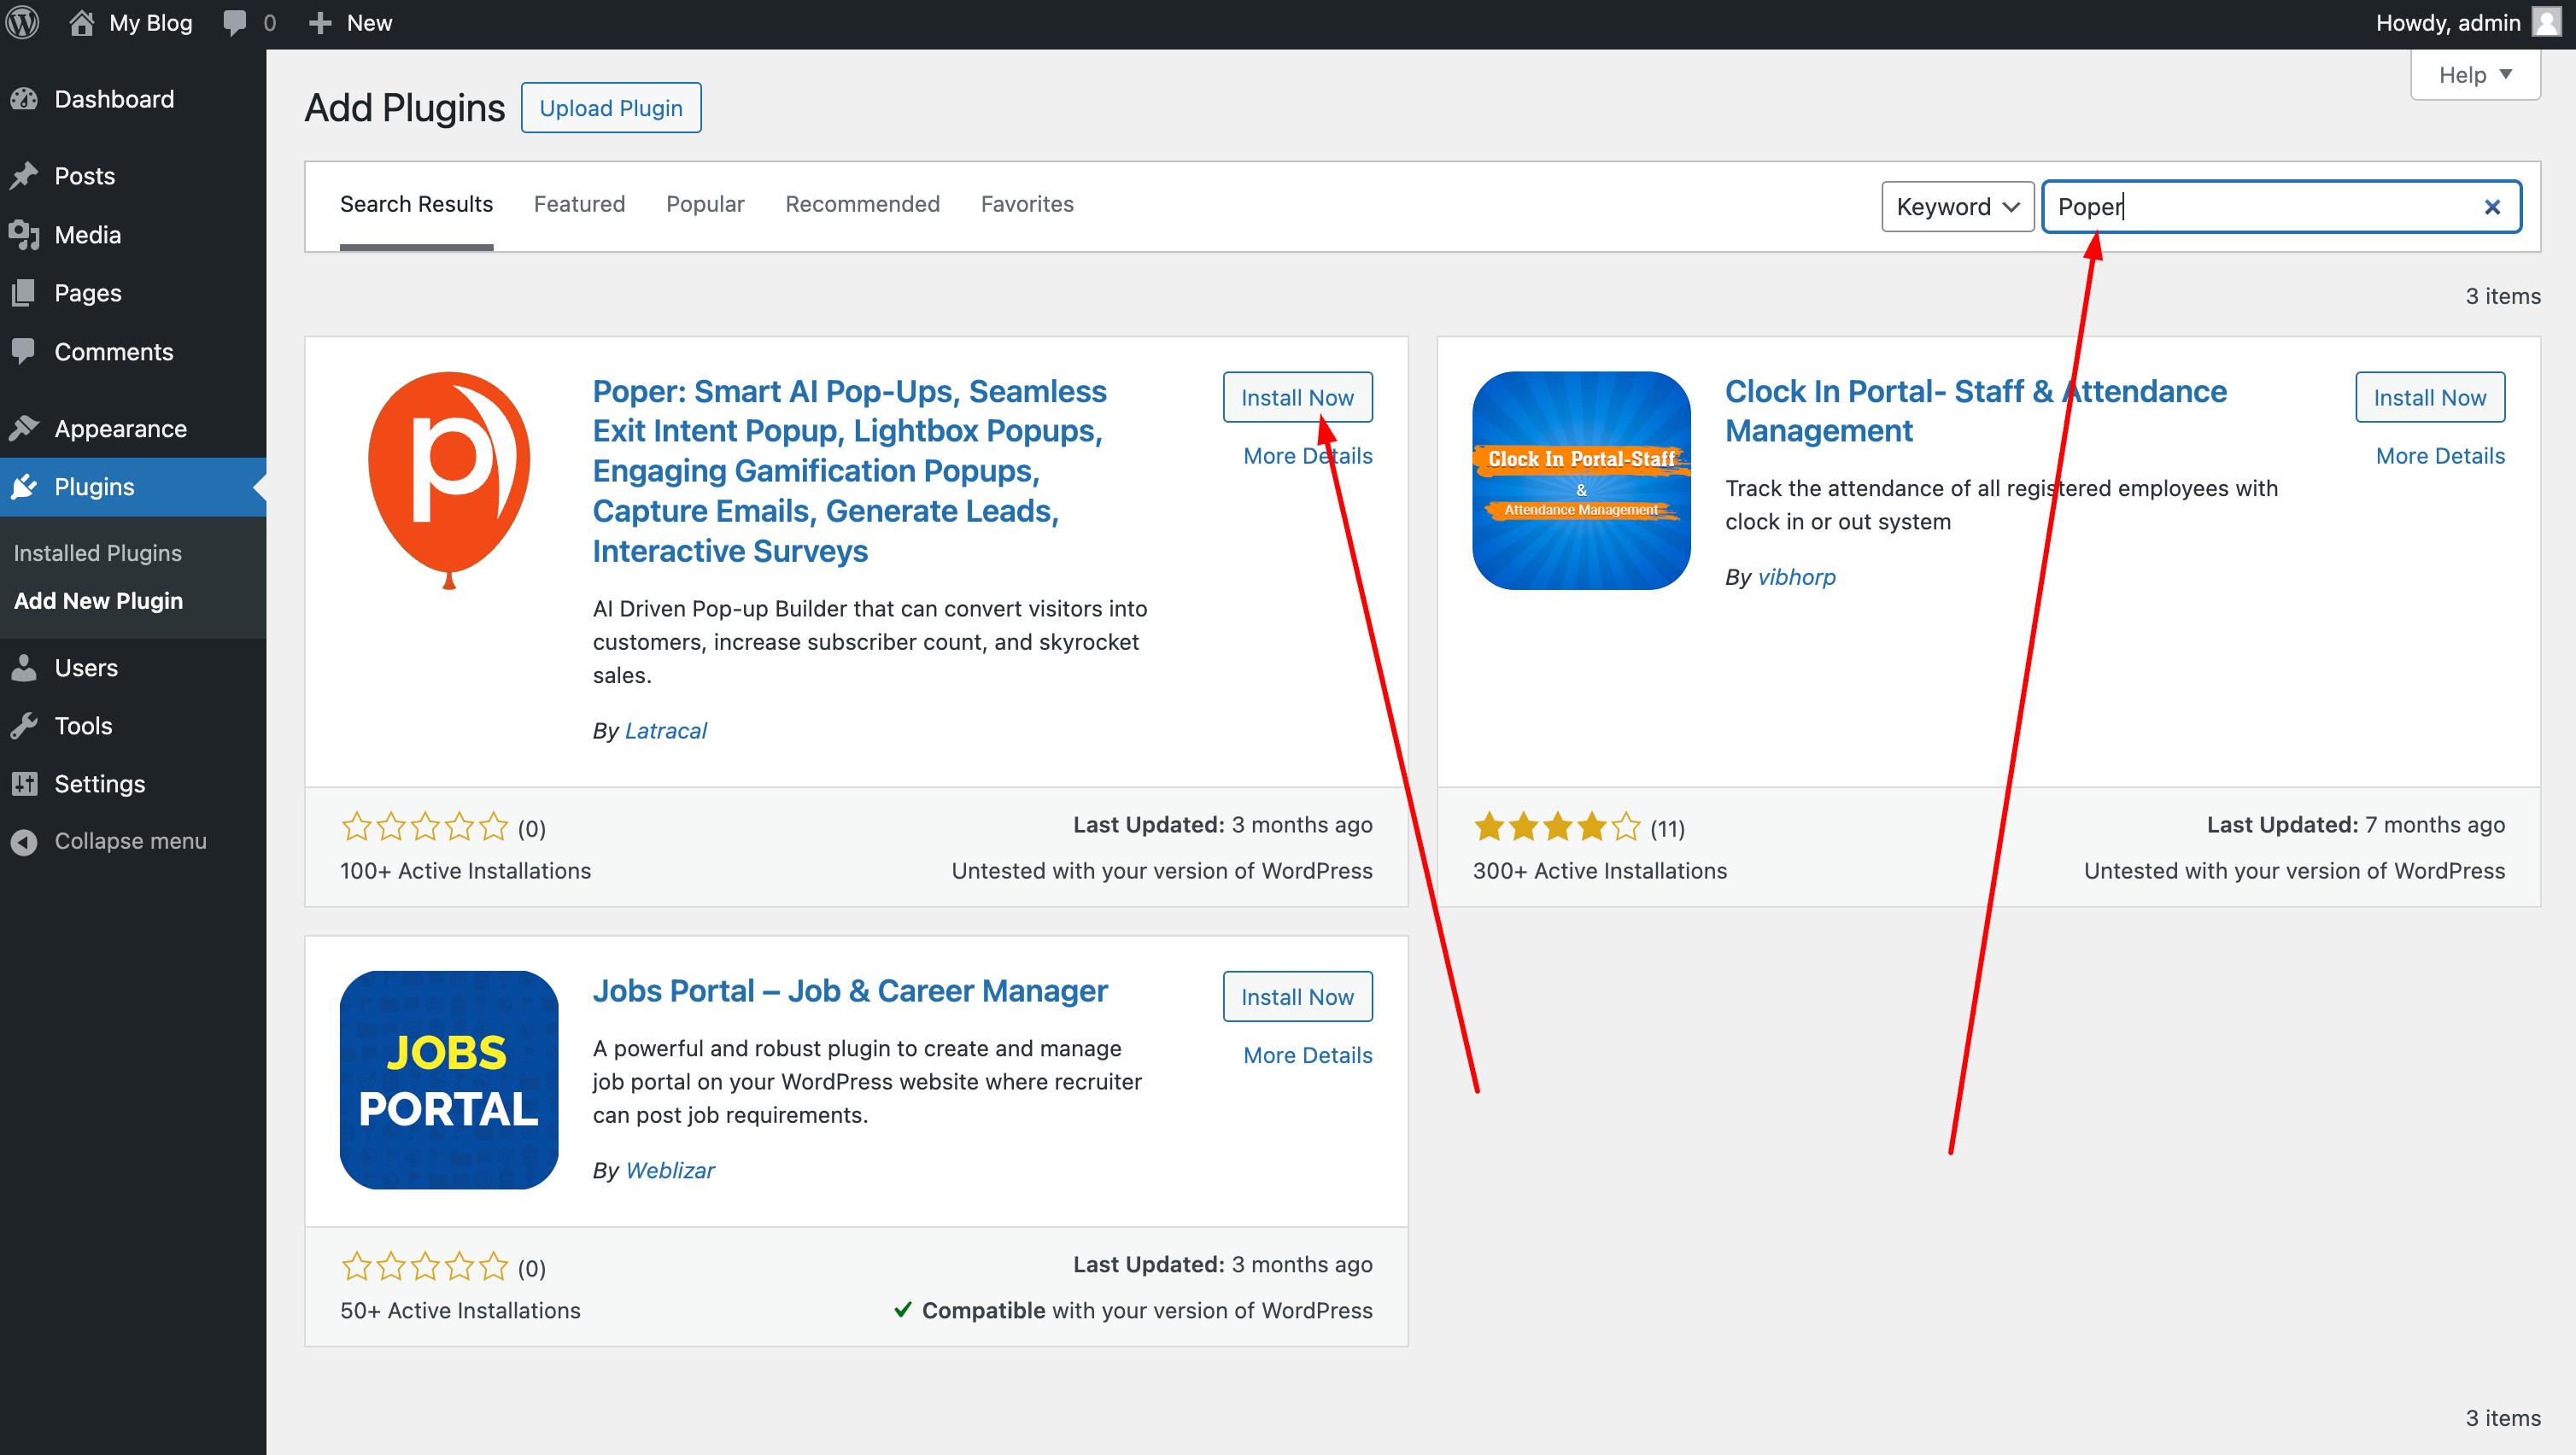
Now, let’s get Poper working on your WordPress site. Go to your WordPress dashboard, then navigate to "Plugins" > "Add New." Search for "Poper" and install the plugin. After installation, you’ll see a new "Poper" menu in your sidebar.
Click on it and enter the same email address you used to sign up for Poper, and click on Connect. That’s it! For a detailed guide on connecting to WordPress, refer to this article: WordPress Installation
And that's all there is to it! Now, your newsletter popups created with Poper will be displayed on your WordPress site. Every new contact you collect will automatically sync to your Mailchimp list with the tags you assigned.
Adding a Mailchimp Popup Directly Through Mailchimp
While this method is also an option, it's not as flexible or customizable as using Poper. Here's how you can do it:
1. Access Mailchimp Signup Forms
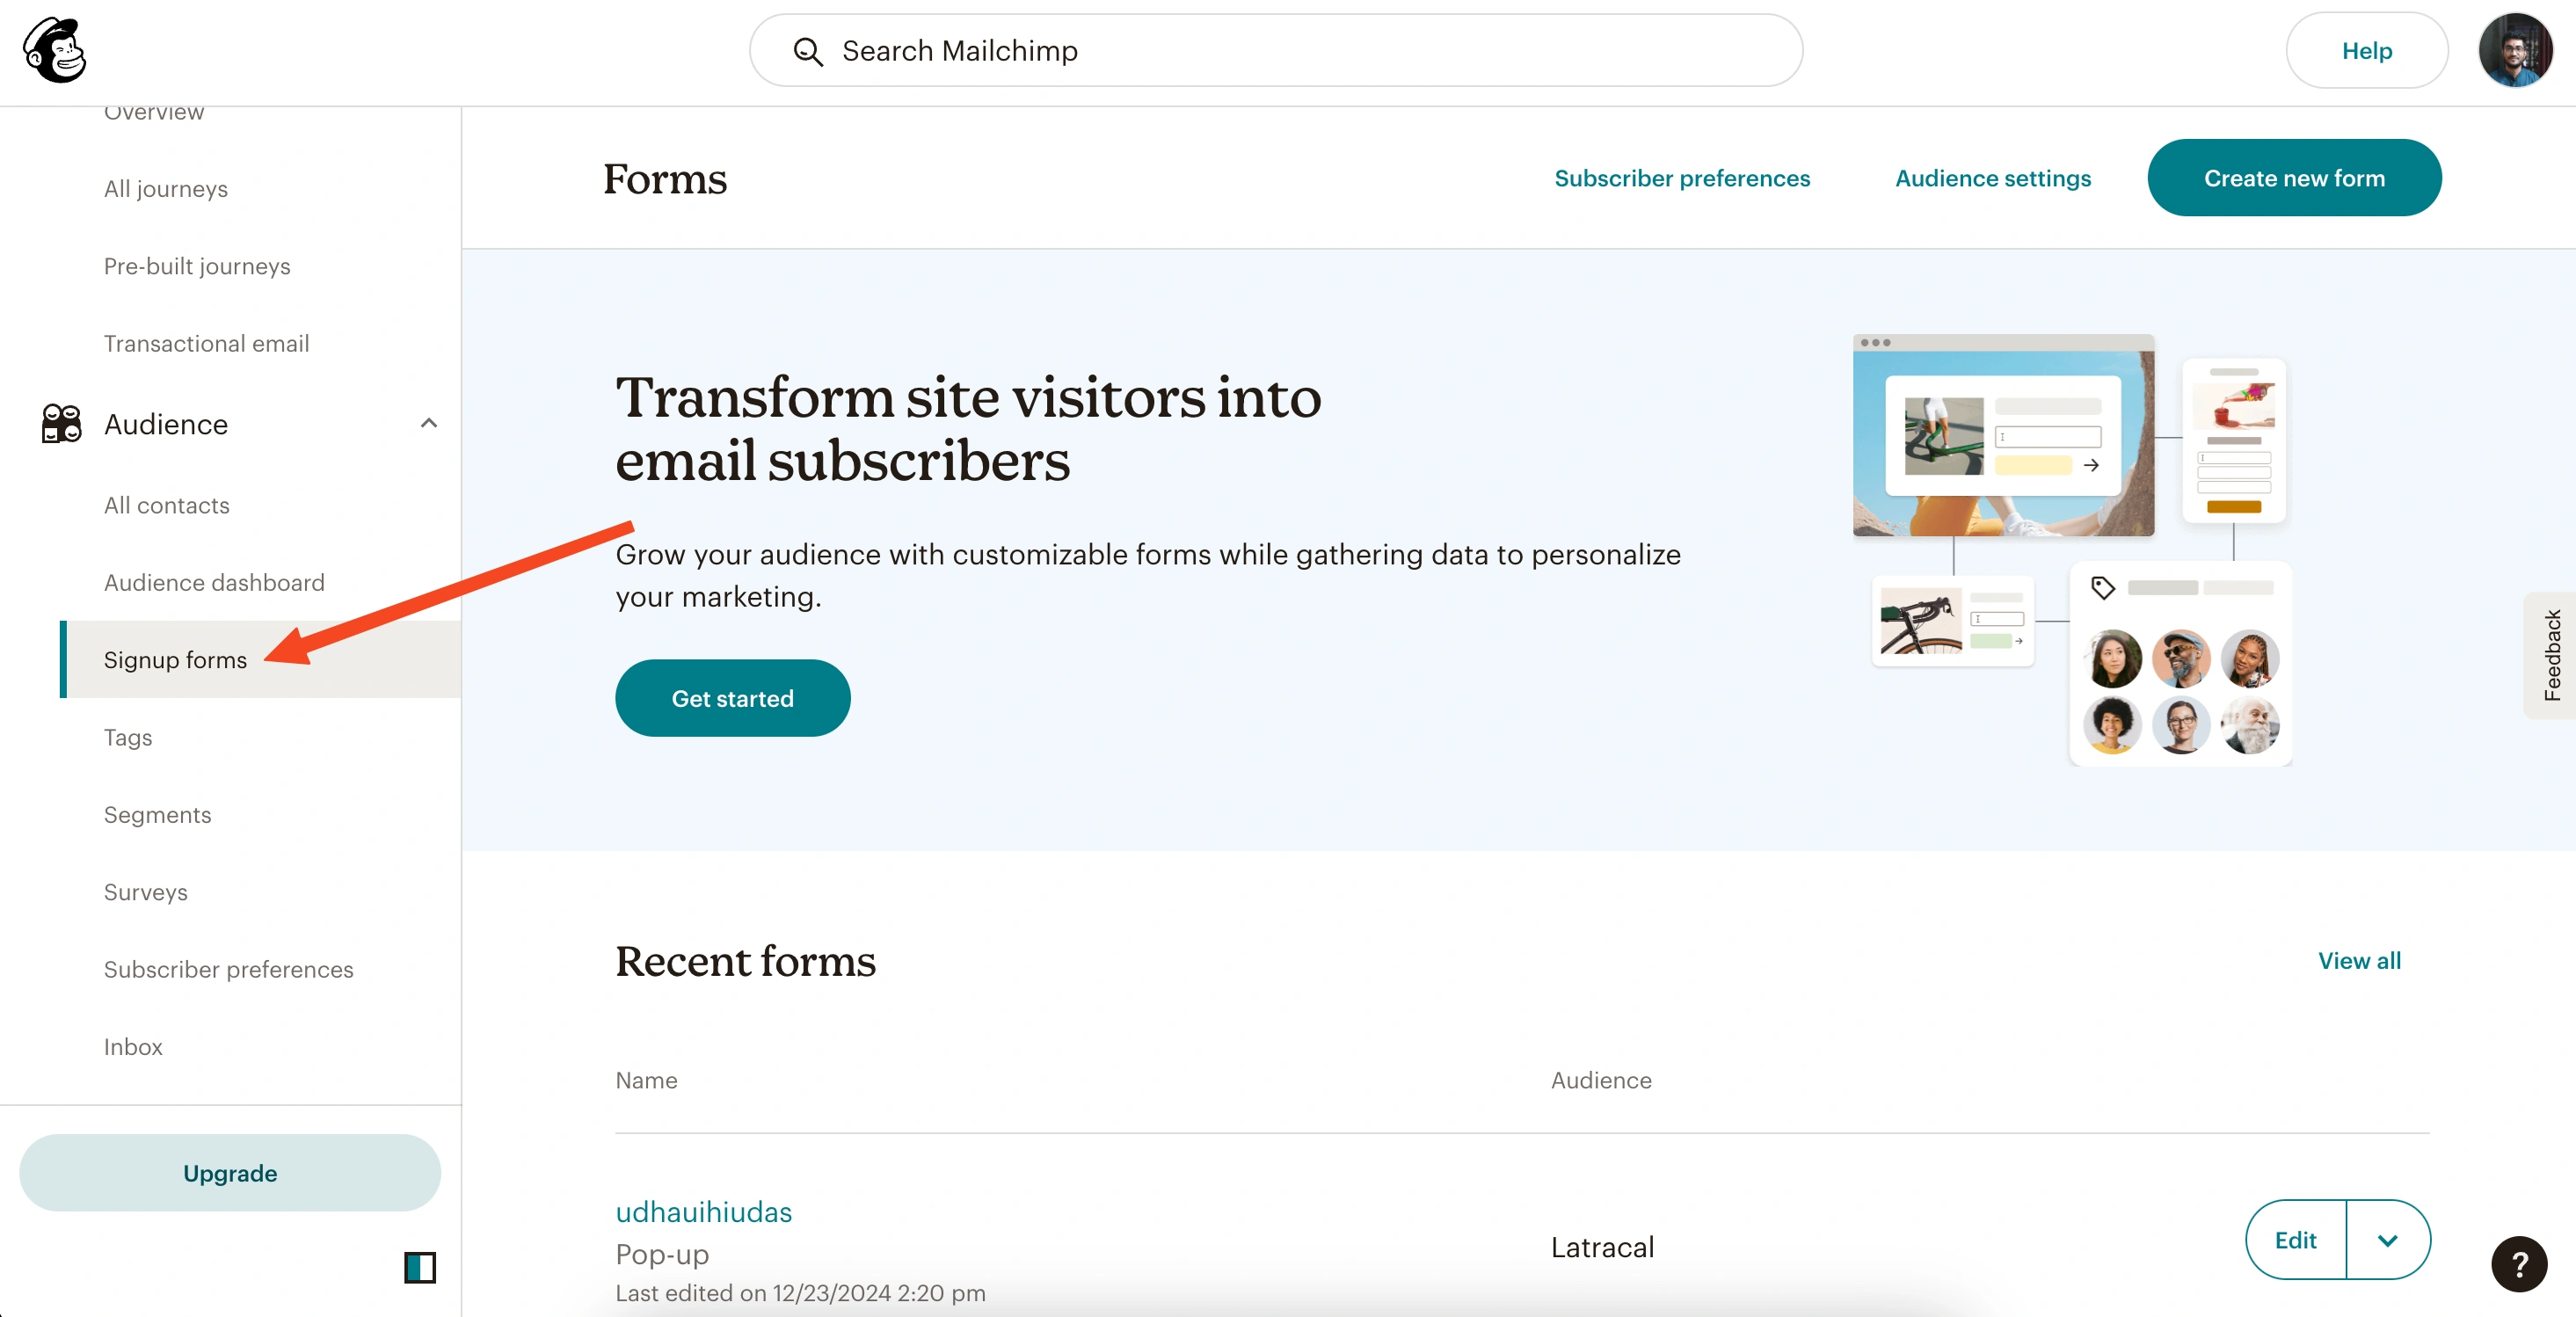
Go to your Mailchimp dashboard, then click "Audience" > "Signup forms."
2. Create a New Popup Form
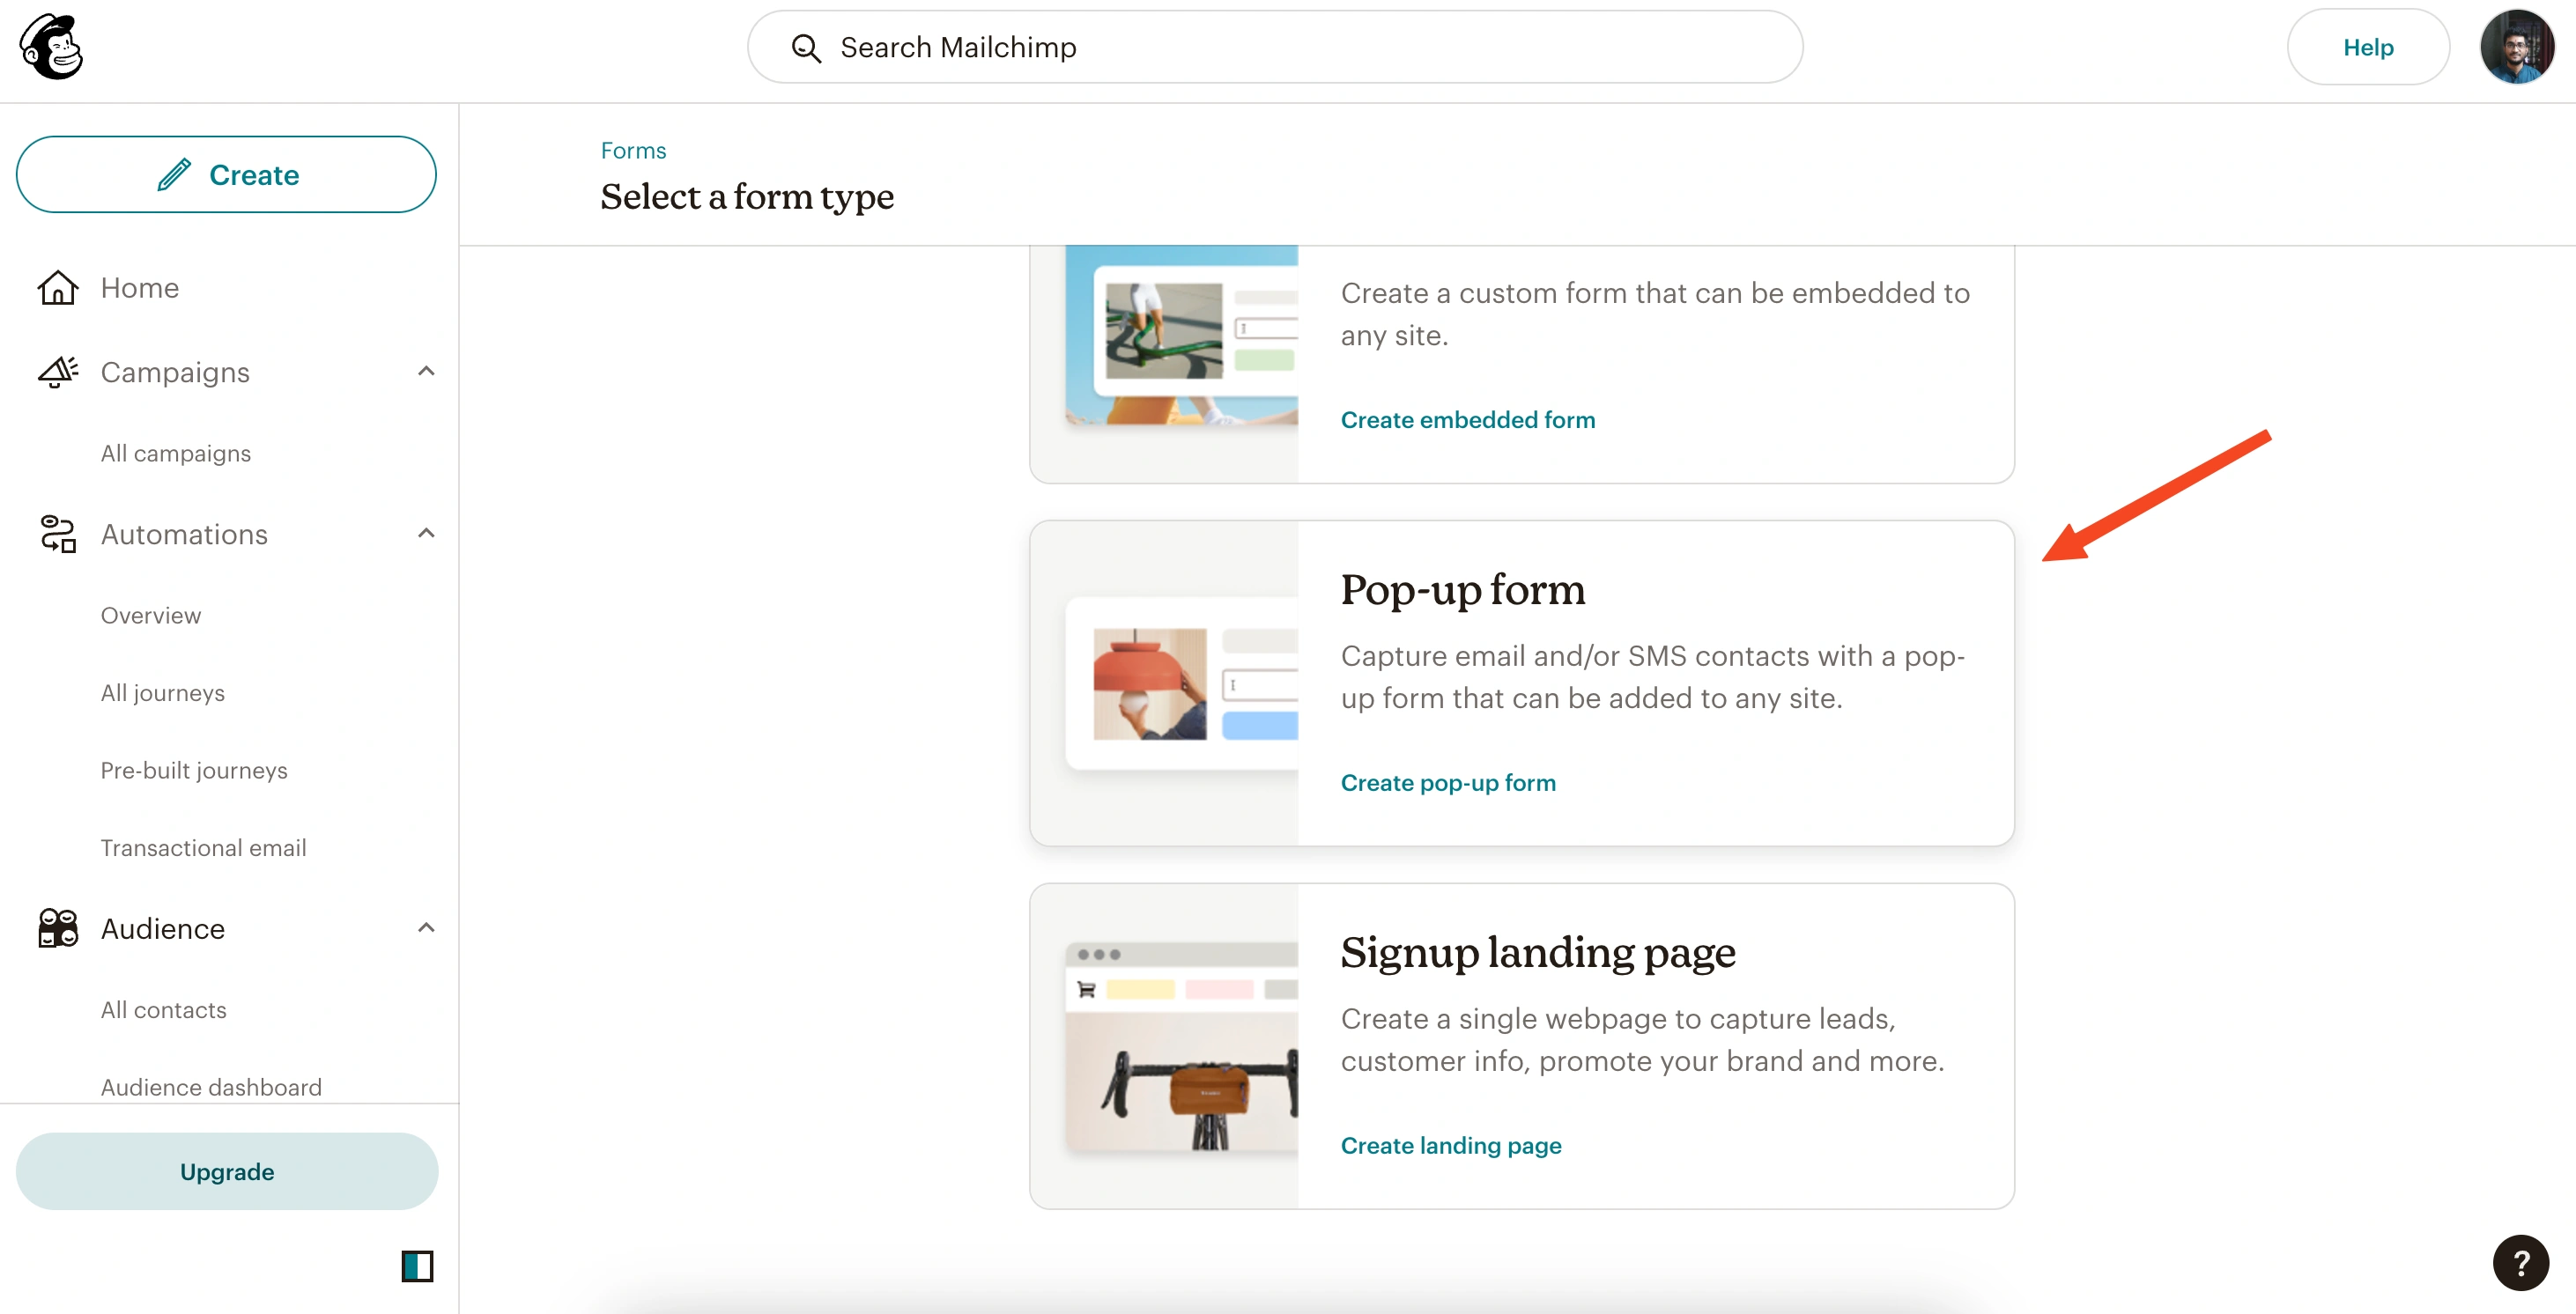
Click on "Add New" and choose the "Popup Forms" option.
3. Name Your Popup and Select Your Audience
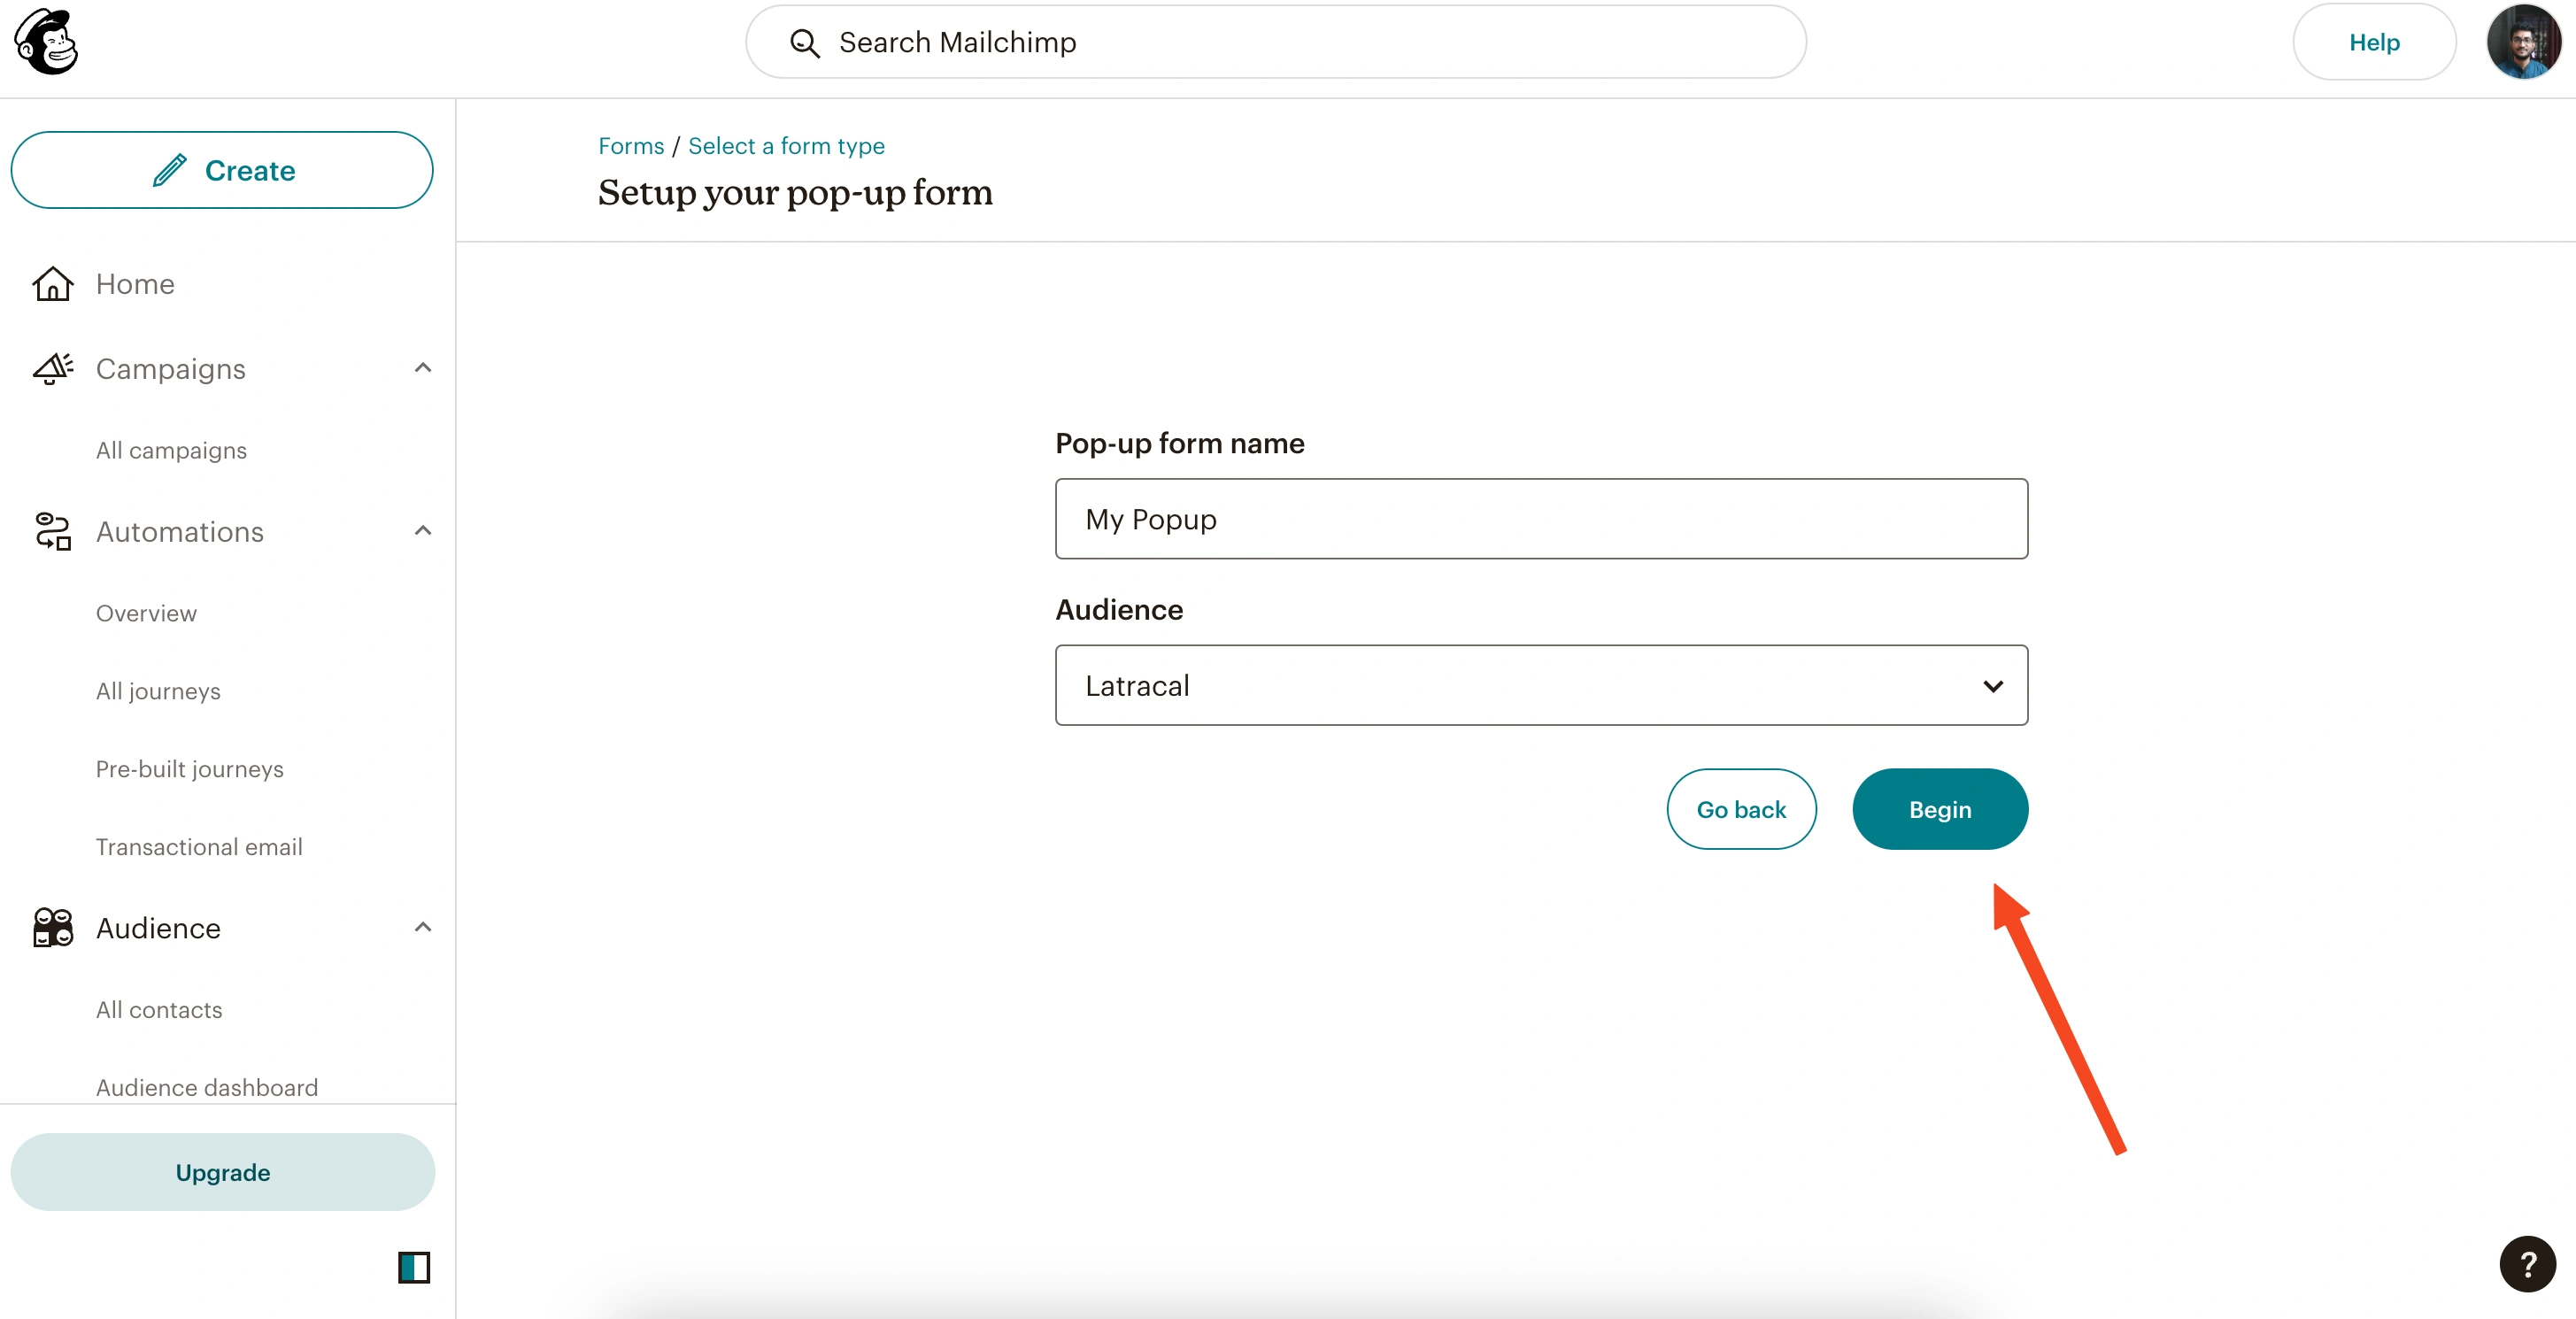
Enter a name for your popup and choose the audience list where you want your subscribers to be added.
4. Customize Your Popup in the Editor
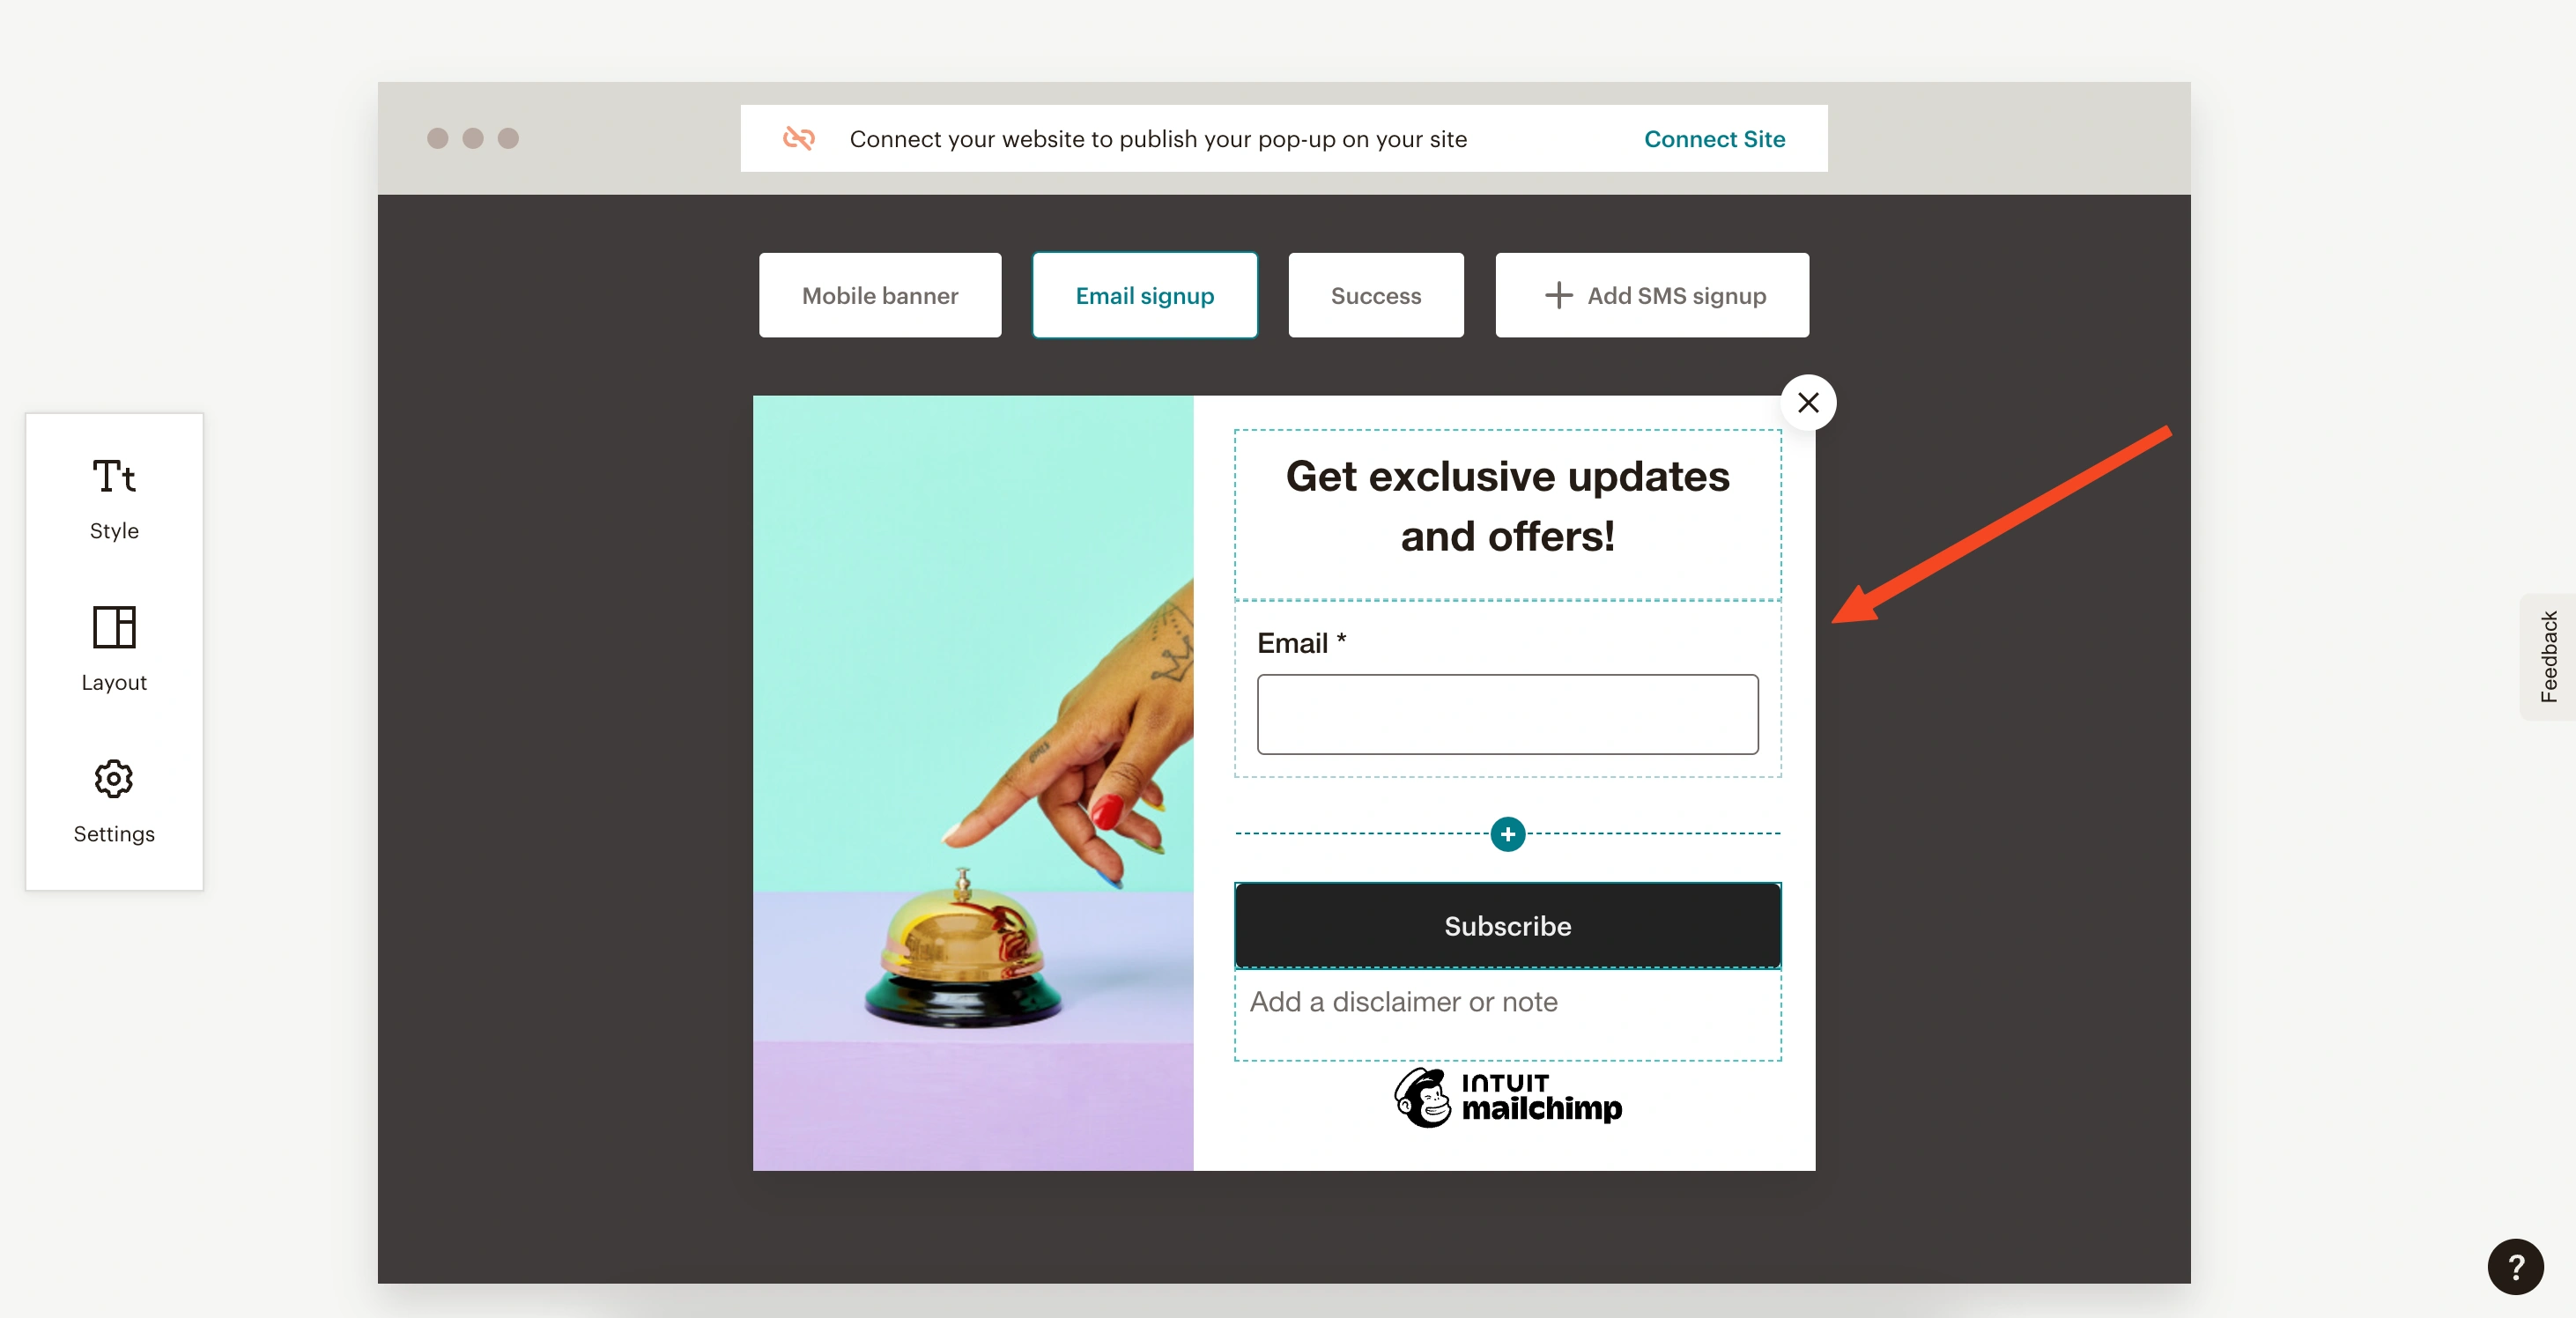
This will open a popup editor where you can add input fields and customize colors and styles.
5. Connect to Your Website
Once you’re done customizing, click the "Continue" button in the top-right corner and connect to your website.
6. Copy the Mailchimp Code
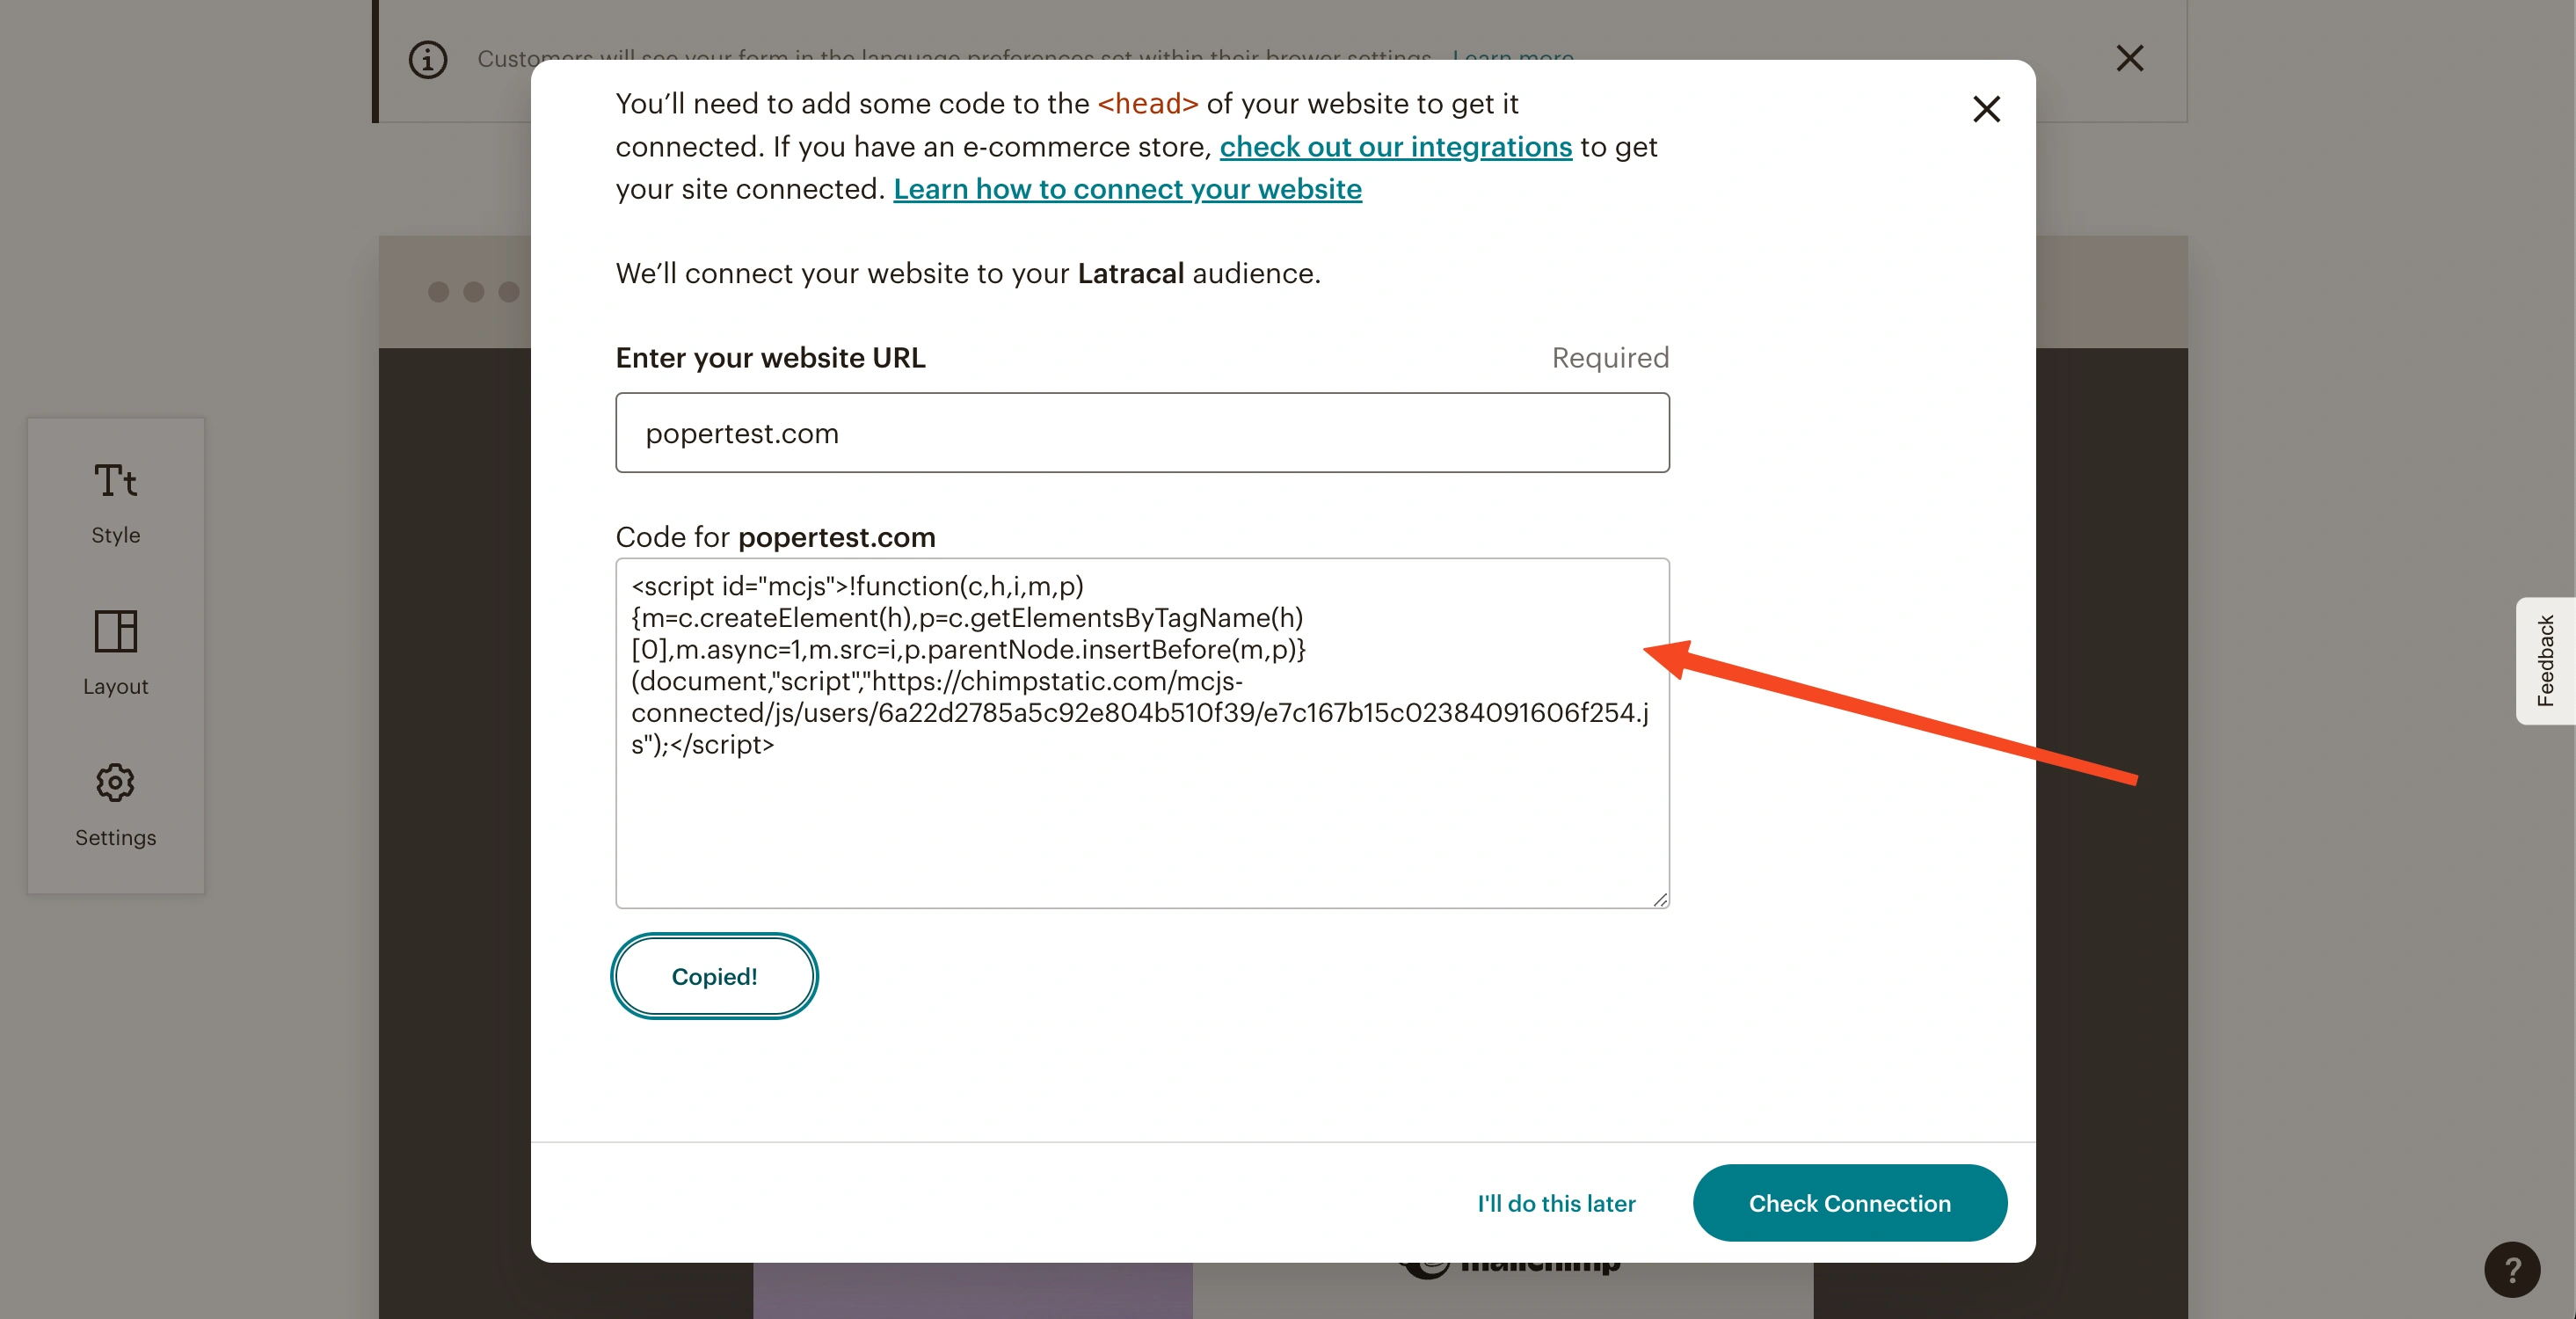
You'll need to add your domain to Mailchimp and then copy the code that Mailchimp provides.
7. Add the Code to Your WordPress Website
Go to your WordPress dashboard, install the "WPCode – Insert Headers and Footers" plugin, and paste the Mailchimp code into the header section.
8. Your Popup Will Be Visible
Now your Mailchimp sign-up popup will appear on your website.
Important Note: Mailchimp popups lack a lot of customization options, and some users may find them less appealing. Think about it this way: if you saw two different popups, which one would you rather subscribe to?
By choosing Poper you can create professional and engaging popups that enhance the user experience and increase your conversion rate. I hope this helps and if you have any questions, please let me know.


