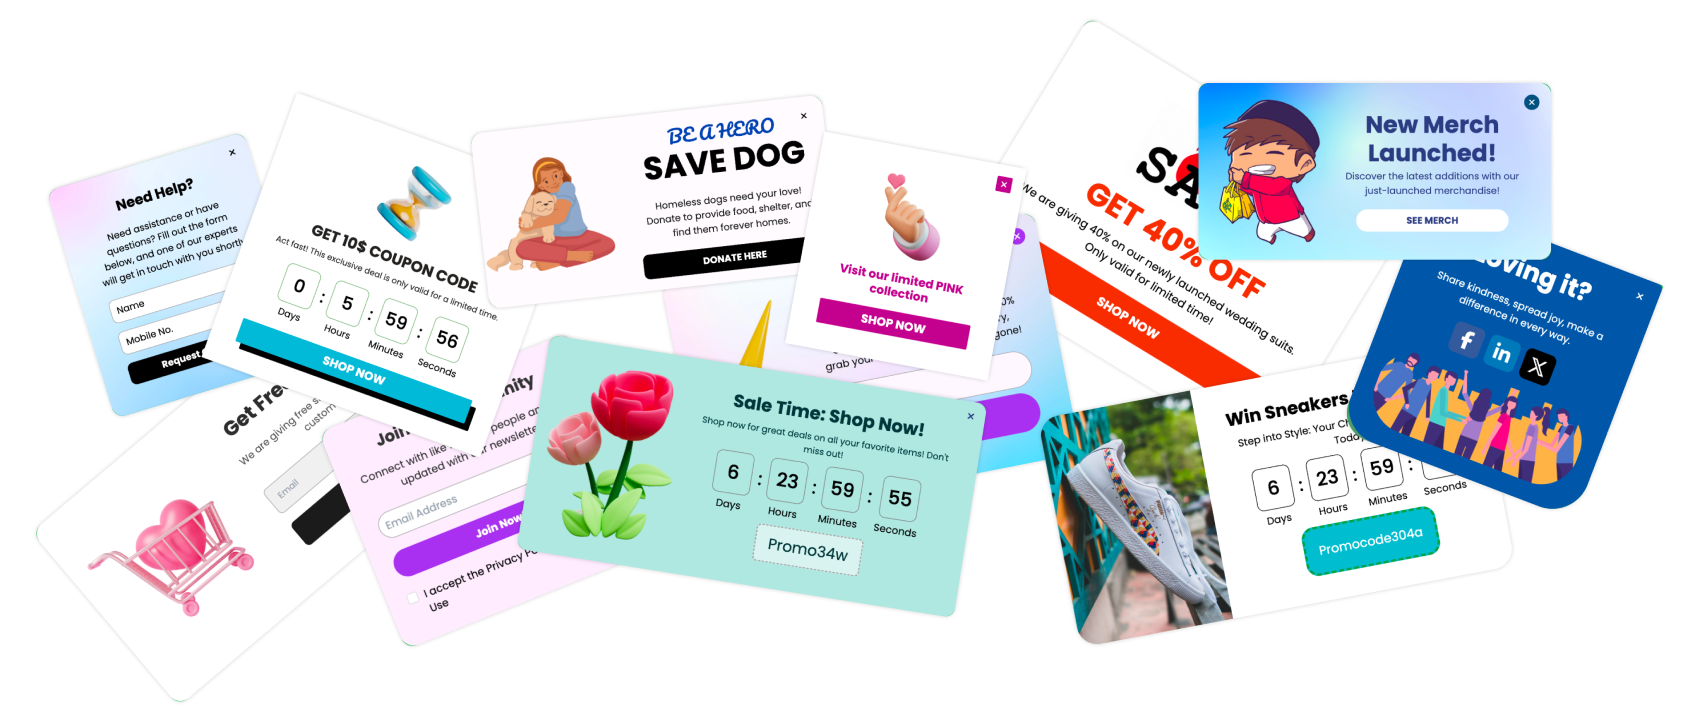
Spotify is an excellent platform for sharing your podcasts and audio content. With Poper, you can easily embed Spotify widgets as floating elements or inline popups to increase user engagement. This guide walks you through the process of adding a Spotify widget using Poper step-by-step. Follow along to enhance your website with engaging audio content.
Here's How To Add Spotify Widget:
Step 1: Sign Up and Add Your Website to Poper
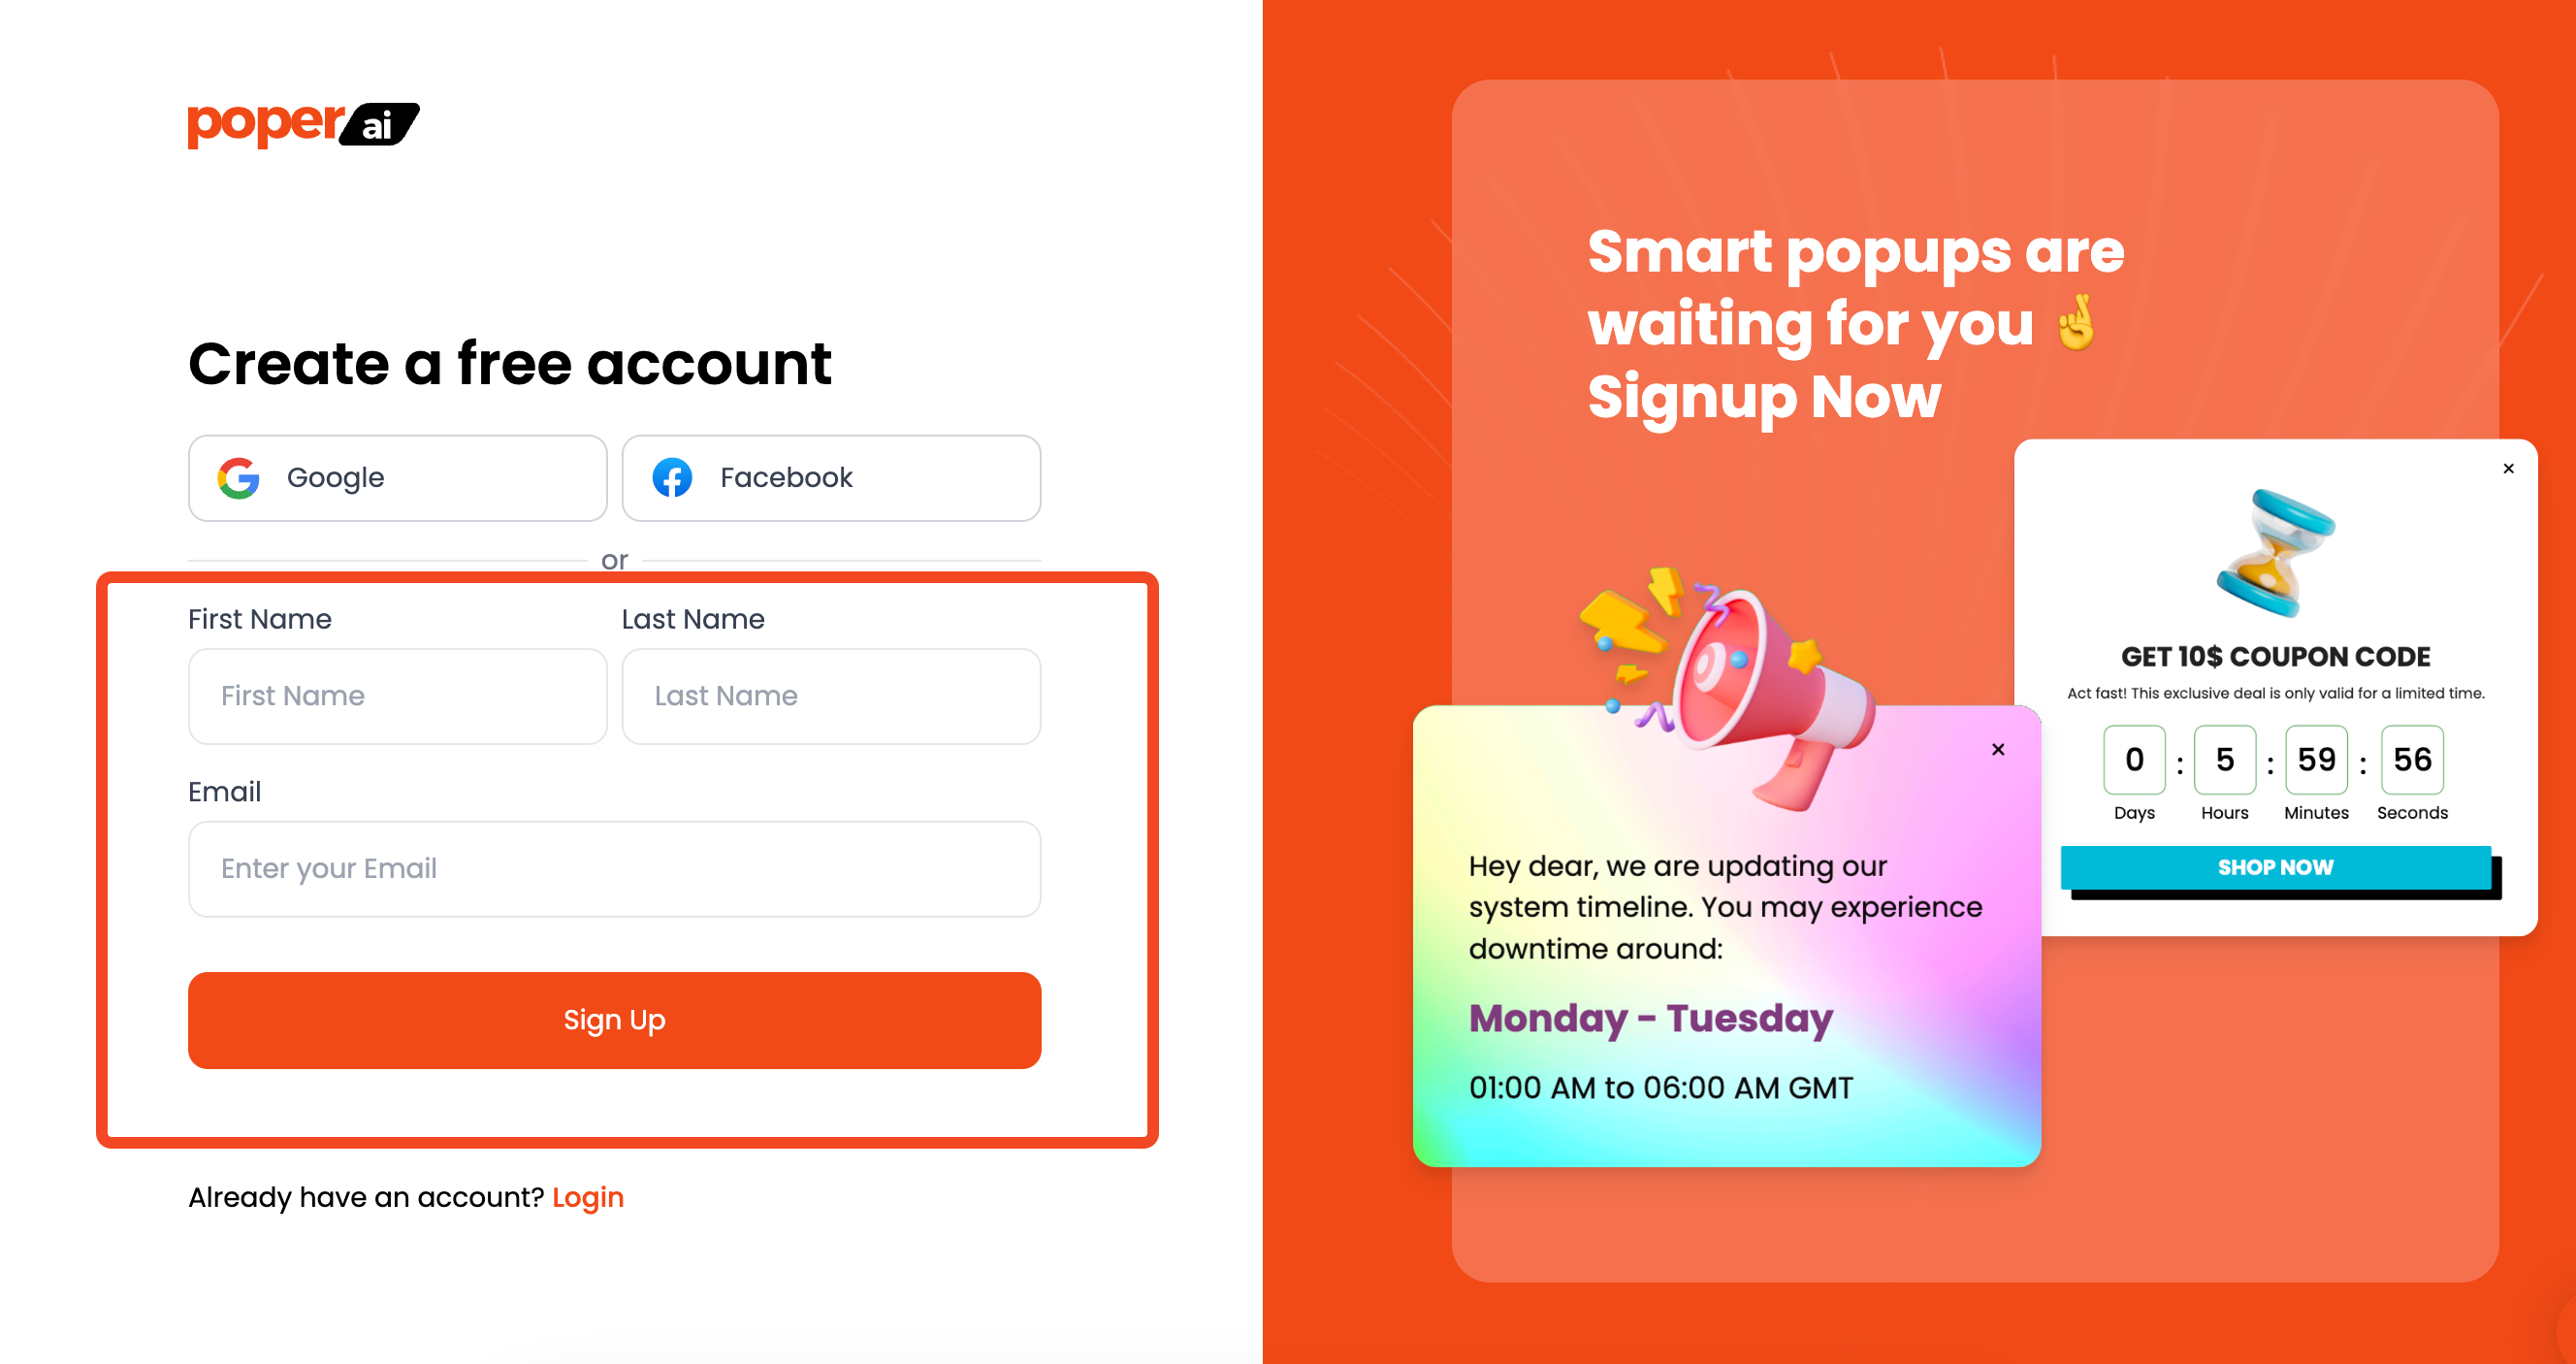
First, you'll need a Poper account. Sign up at Poper to get started. Once you're in, add your website domain. This connects Poper to your site so you can deploy your widgets.
Step 2: Create a New Widget / Popup from Scratch
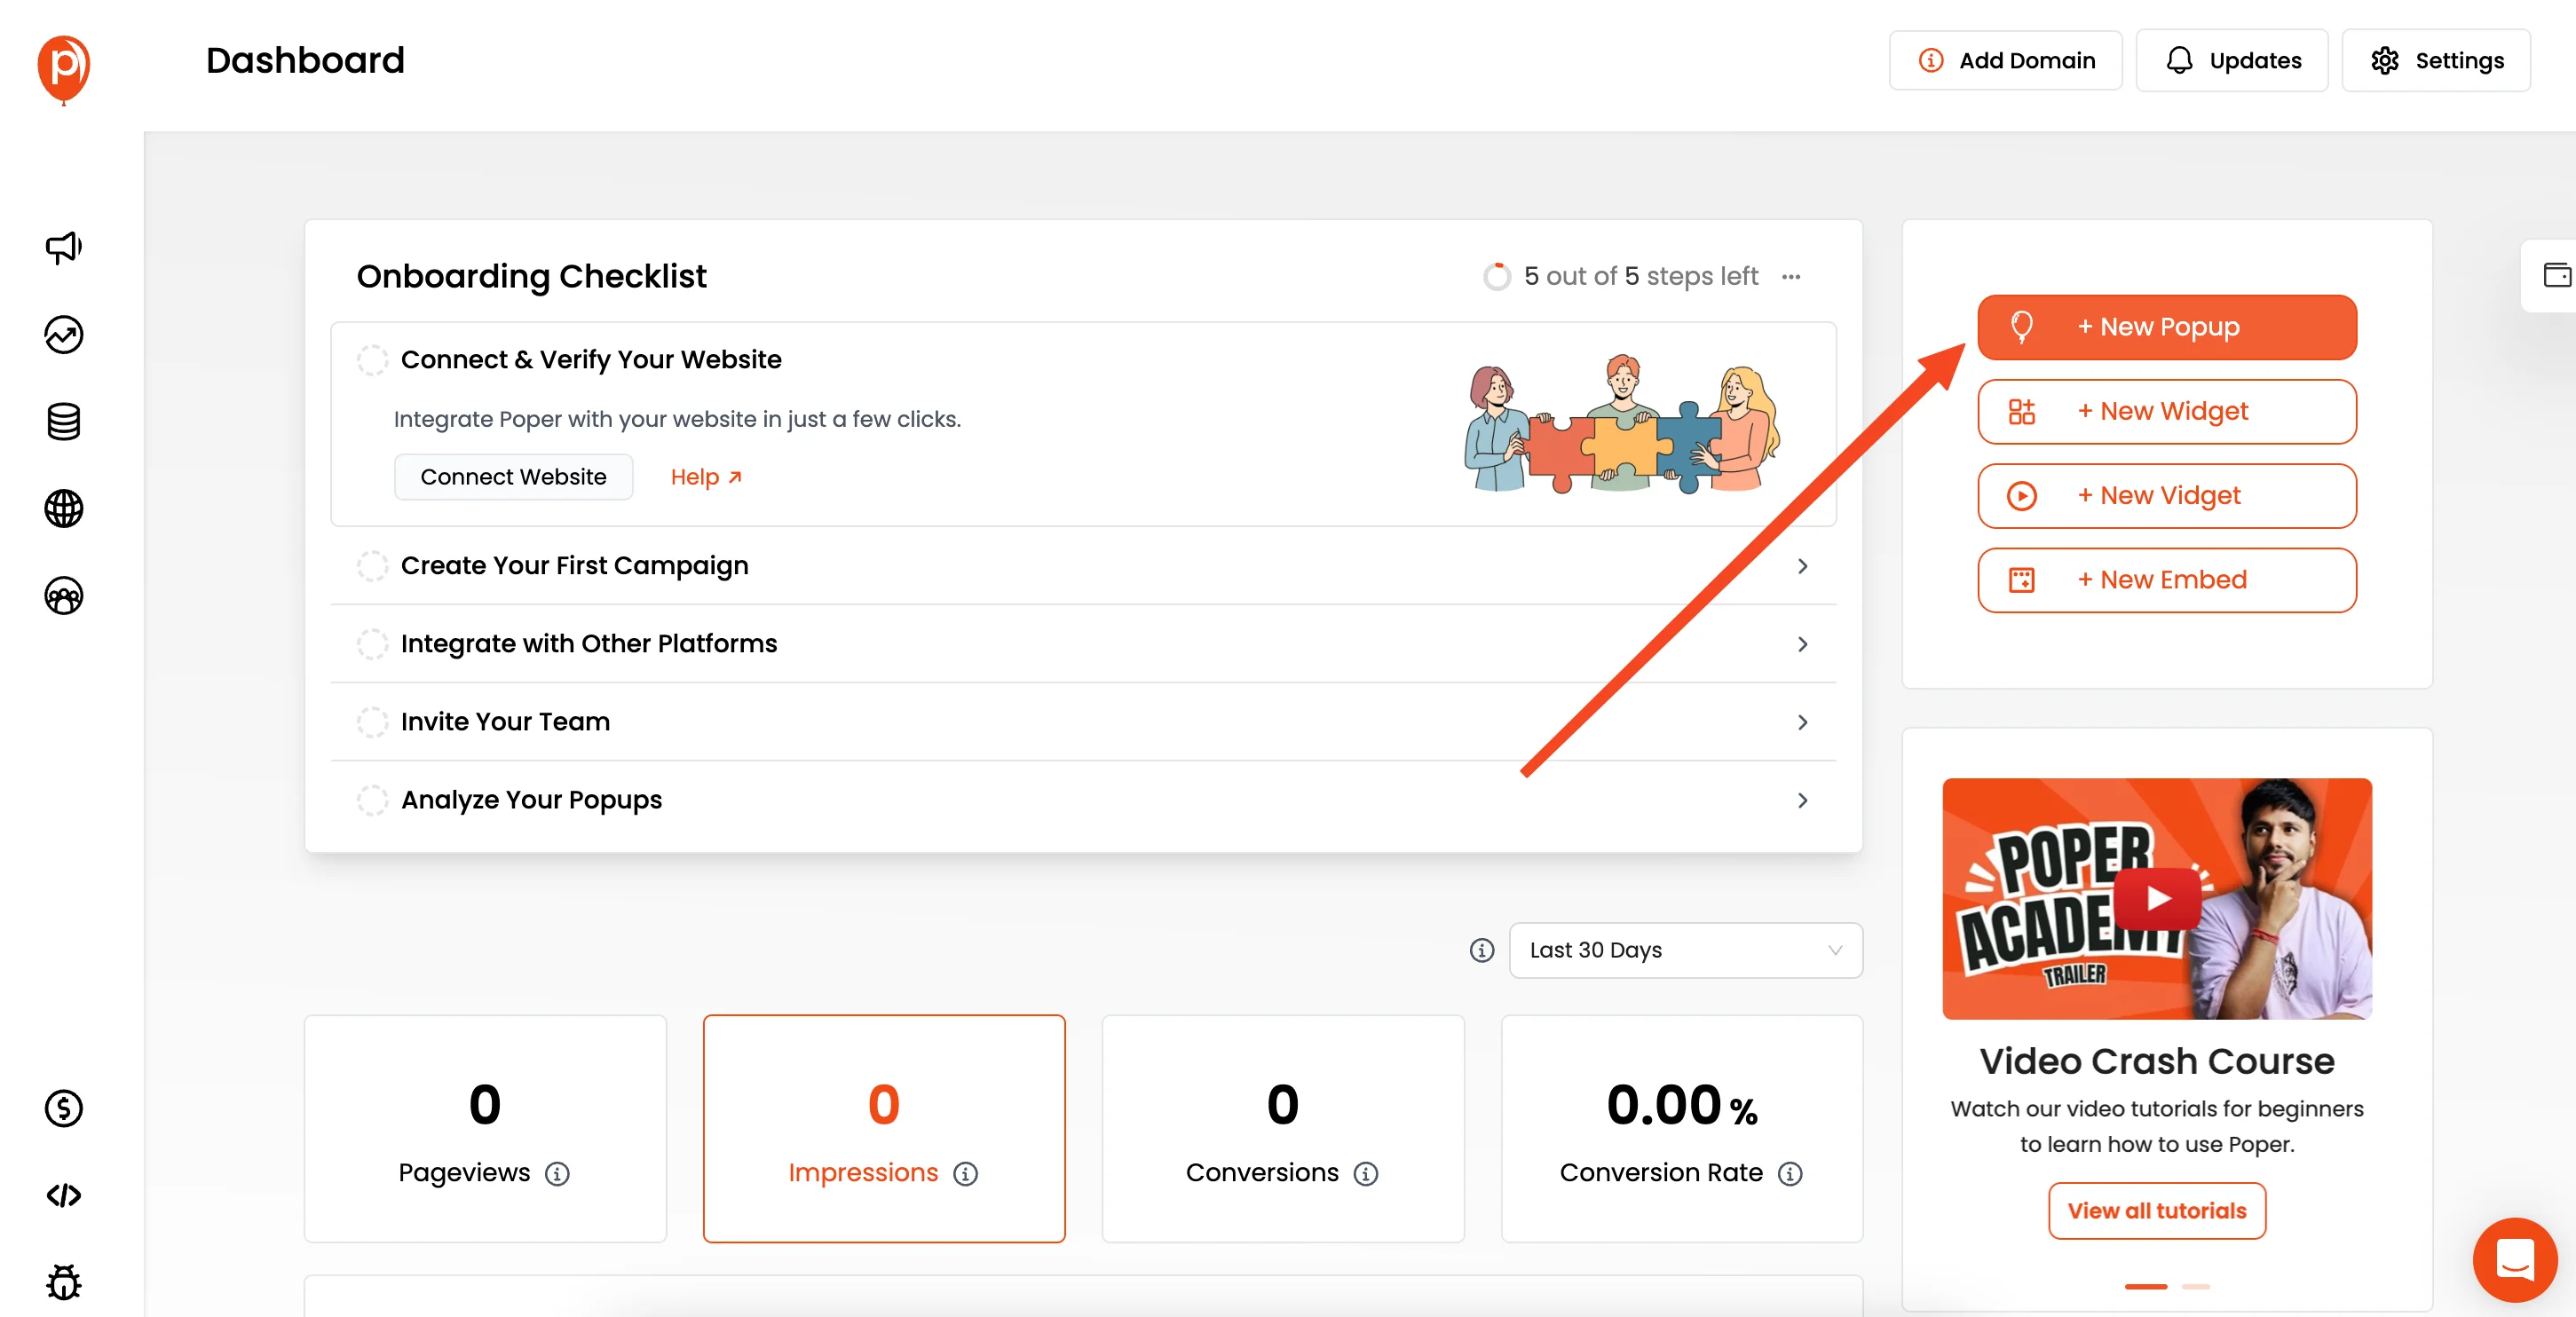
Click the "New Popup" button and select "Start from Scratch." This gives you a blank canvas to build your Spotify widget exactly how you want it. Starting from scratch allows for full customization.
Note: You can convert your Popup to Widget later using Remove Background setting.
Step 3: Grab the Spotify Embed Code
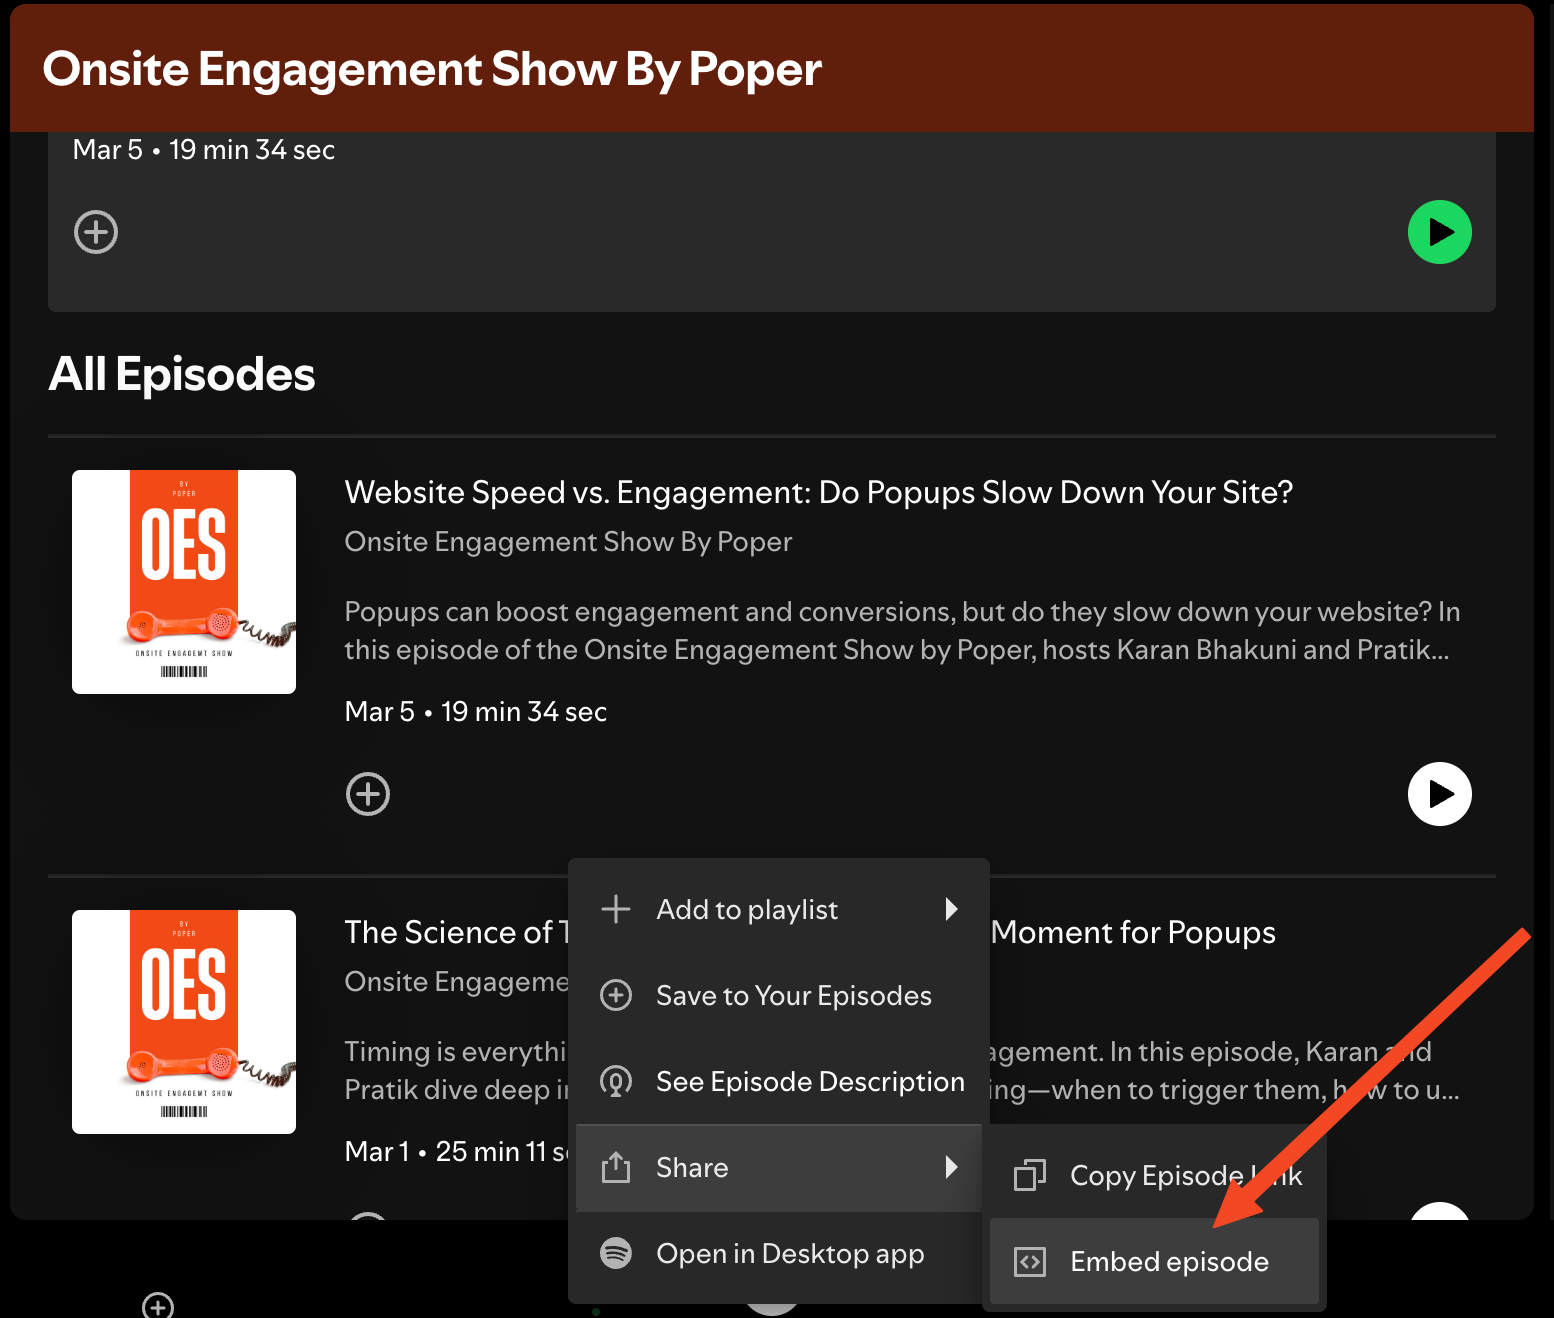
Open your Spotify audio or podcast in a new tab. Click the "Share" button and choose the "Embed" option.
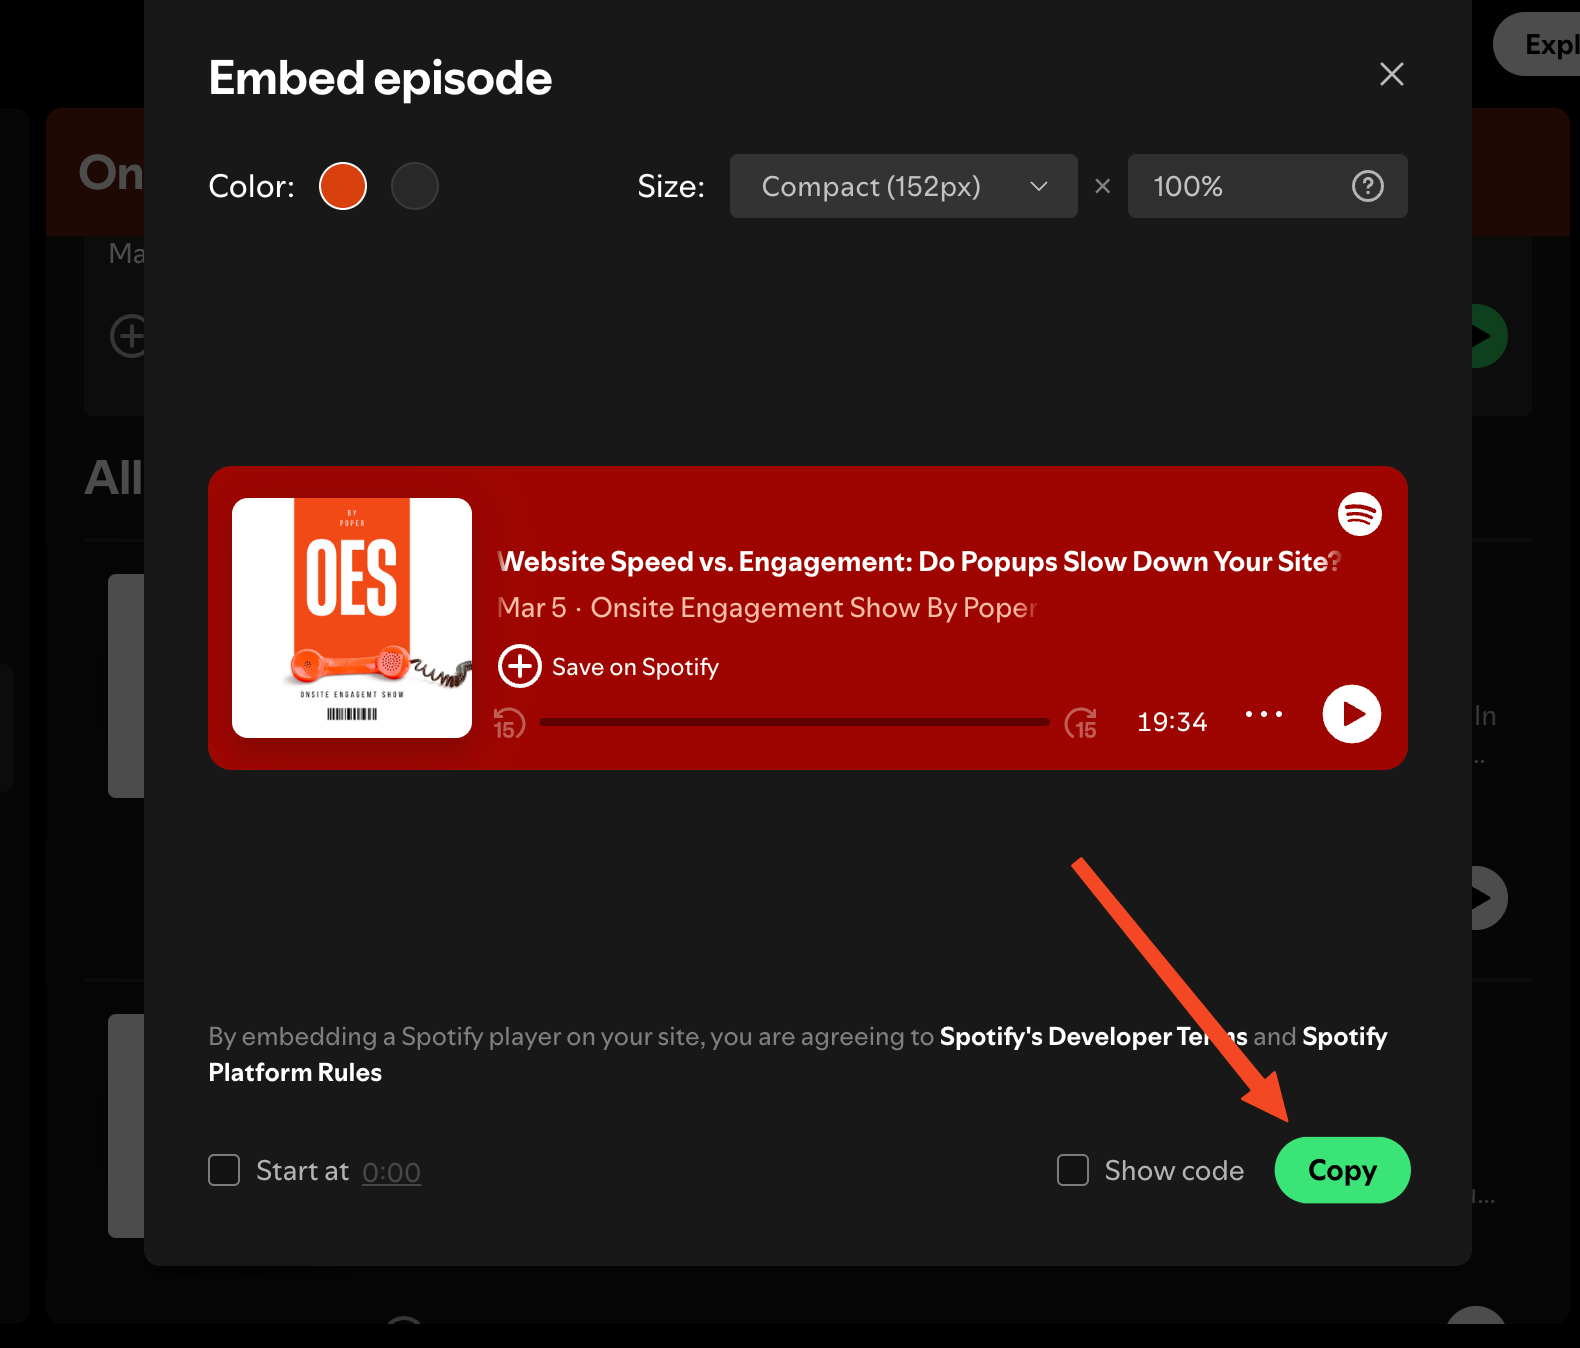
Copy the embed code that Spotify provides. This code is what we'll use to display the player in Poper.
Step 4: Add an HTML Element in Poper
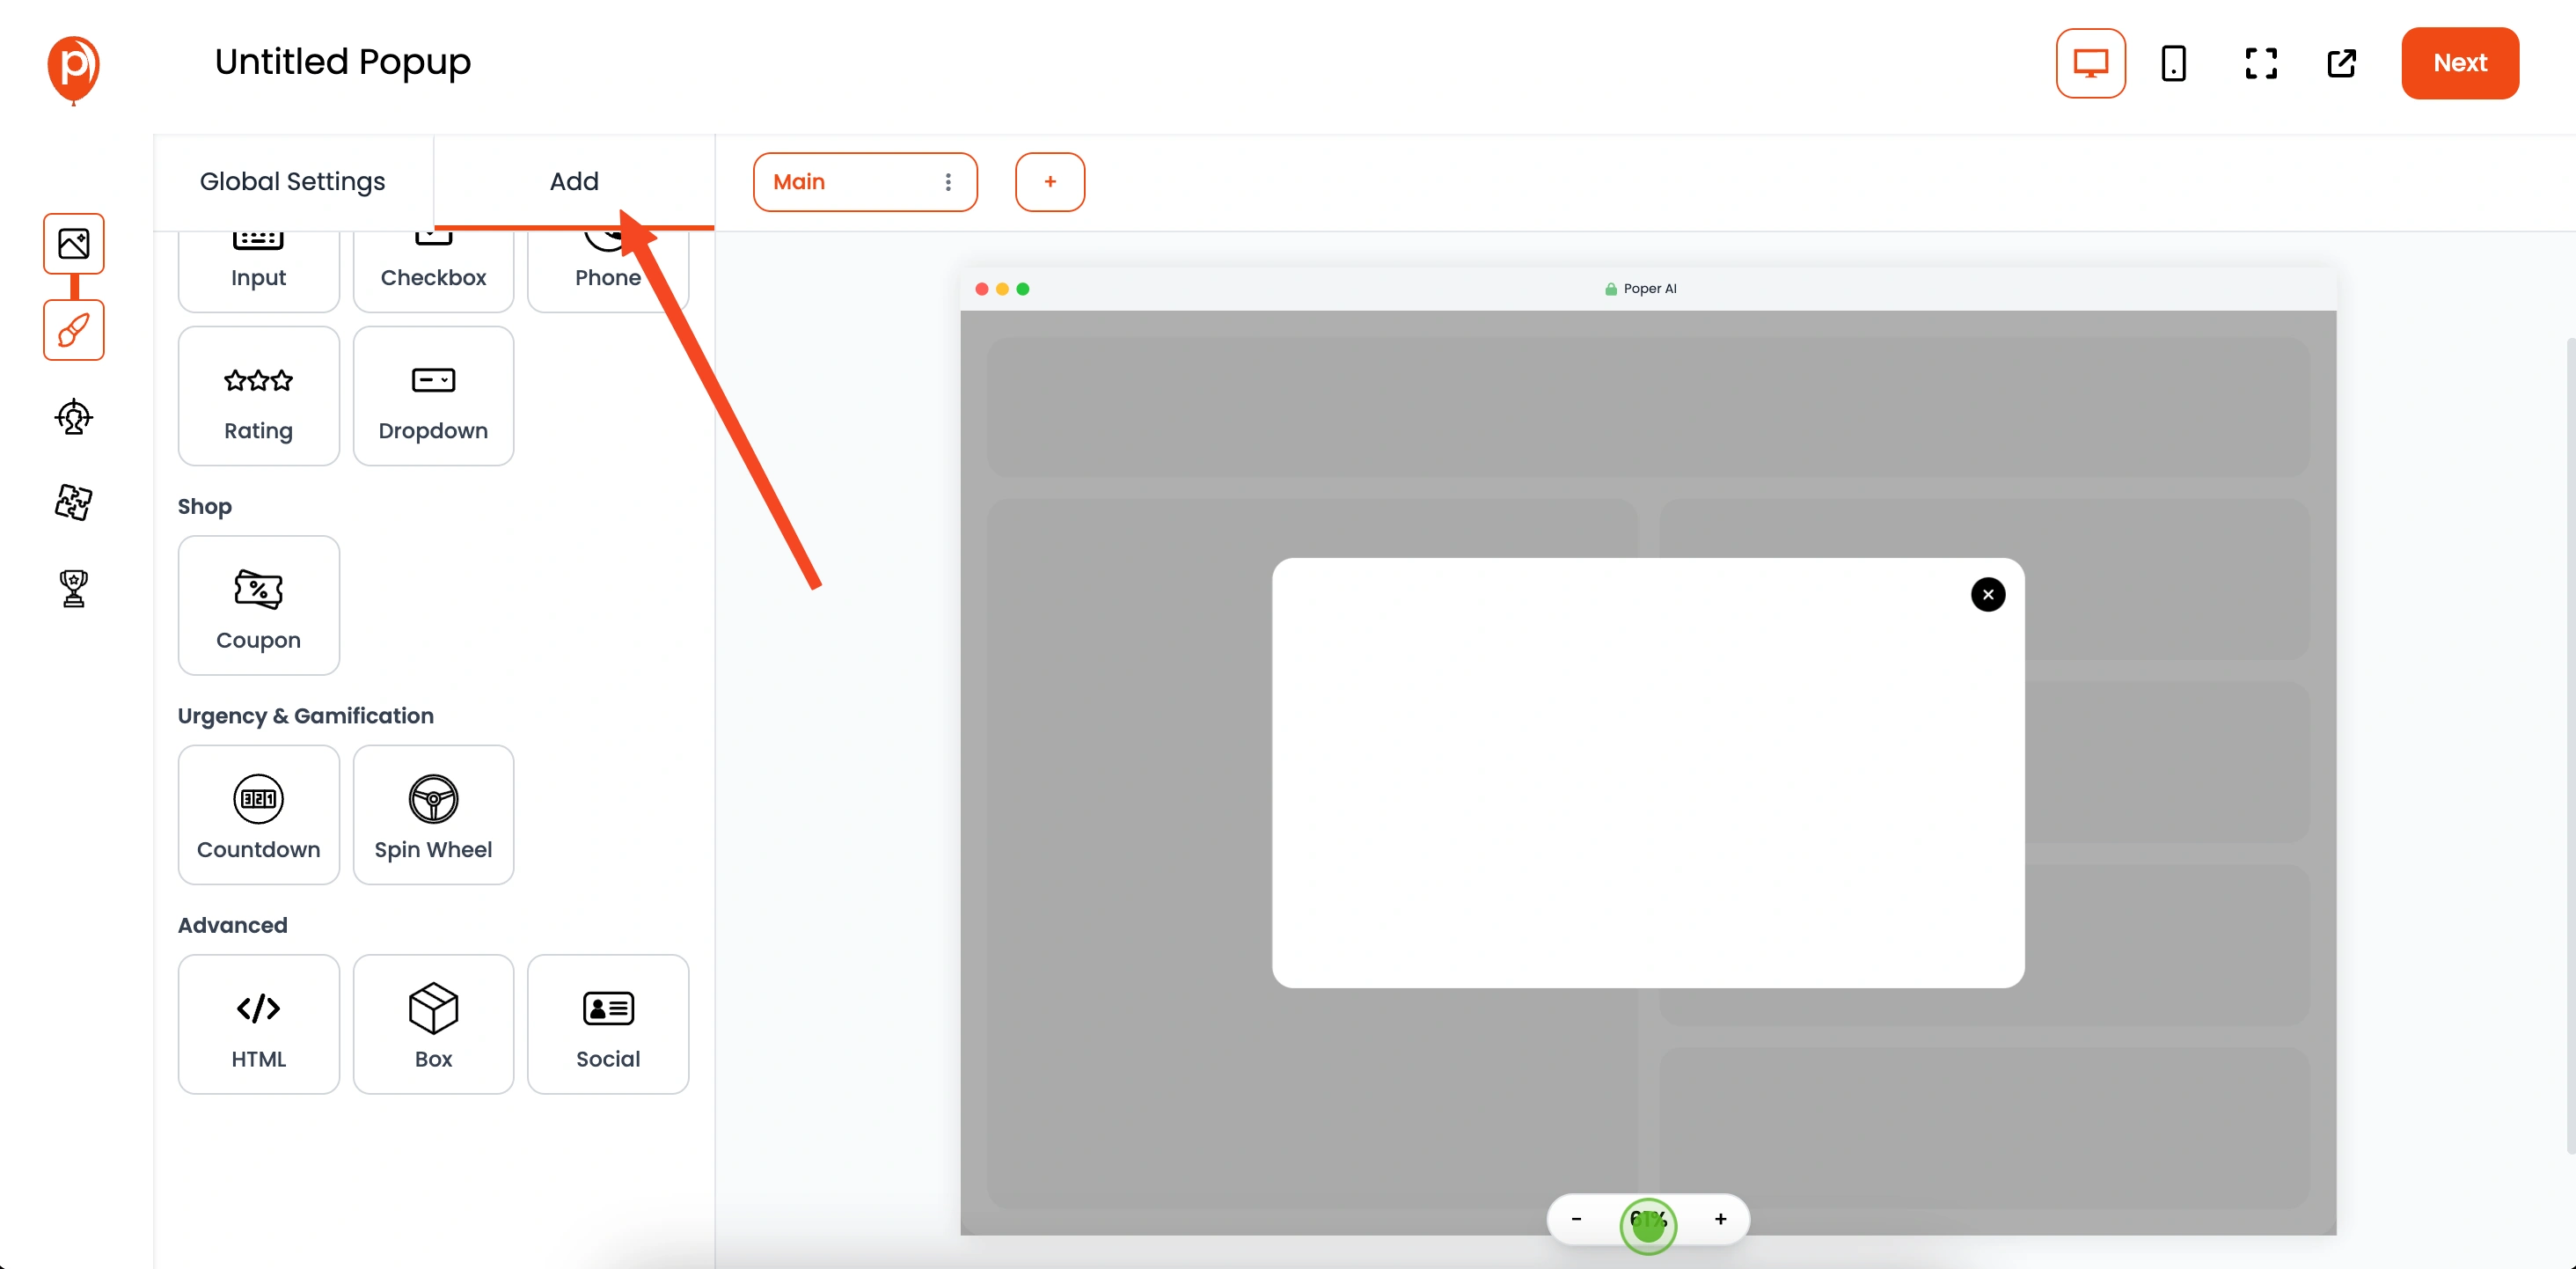
In Poper's popup editor, look for the "Add" tab on the left sidebar. This shows all the elements you can include.
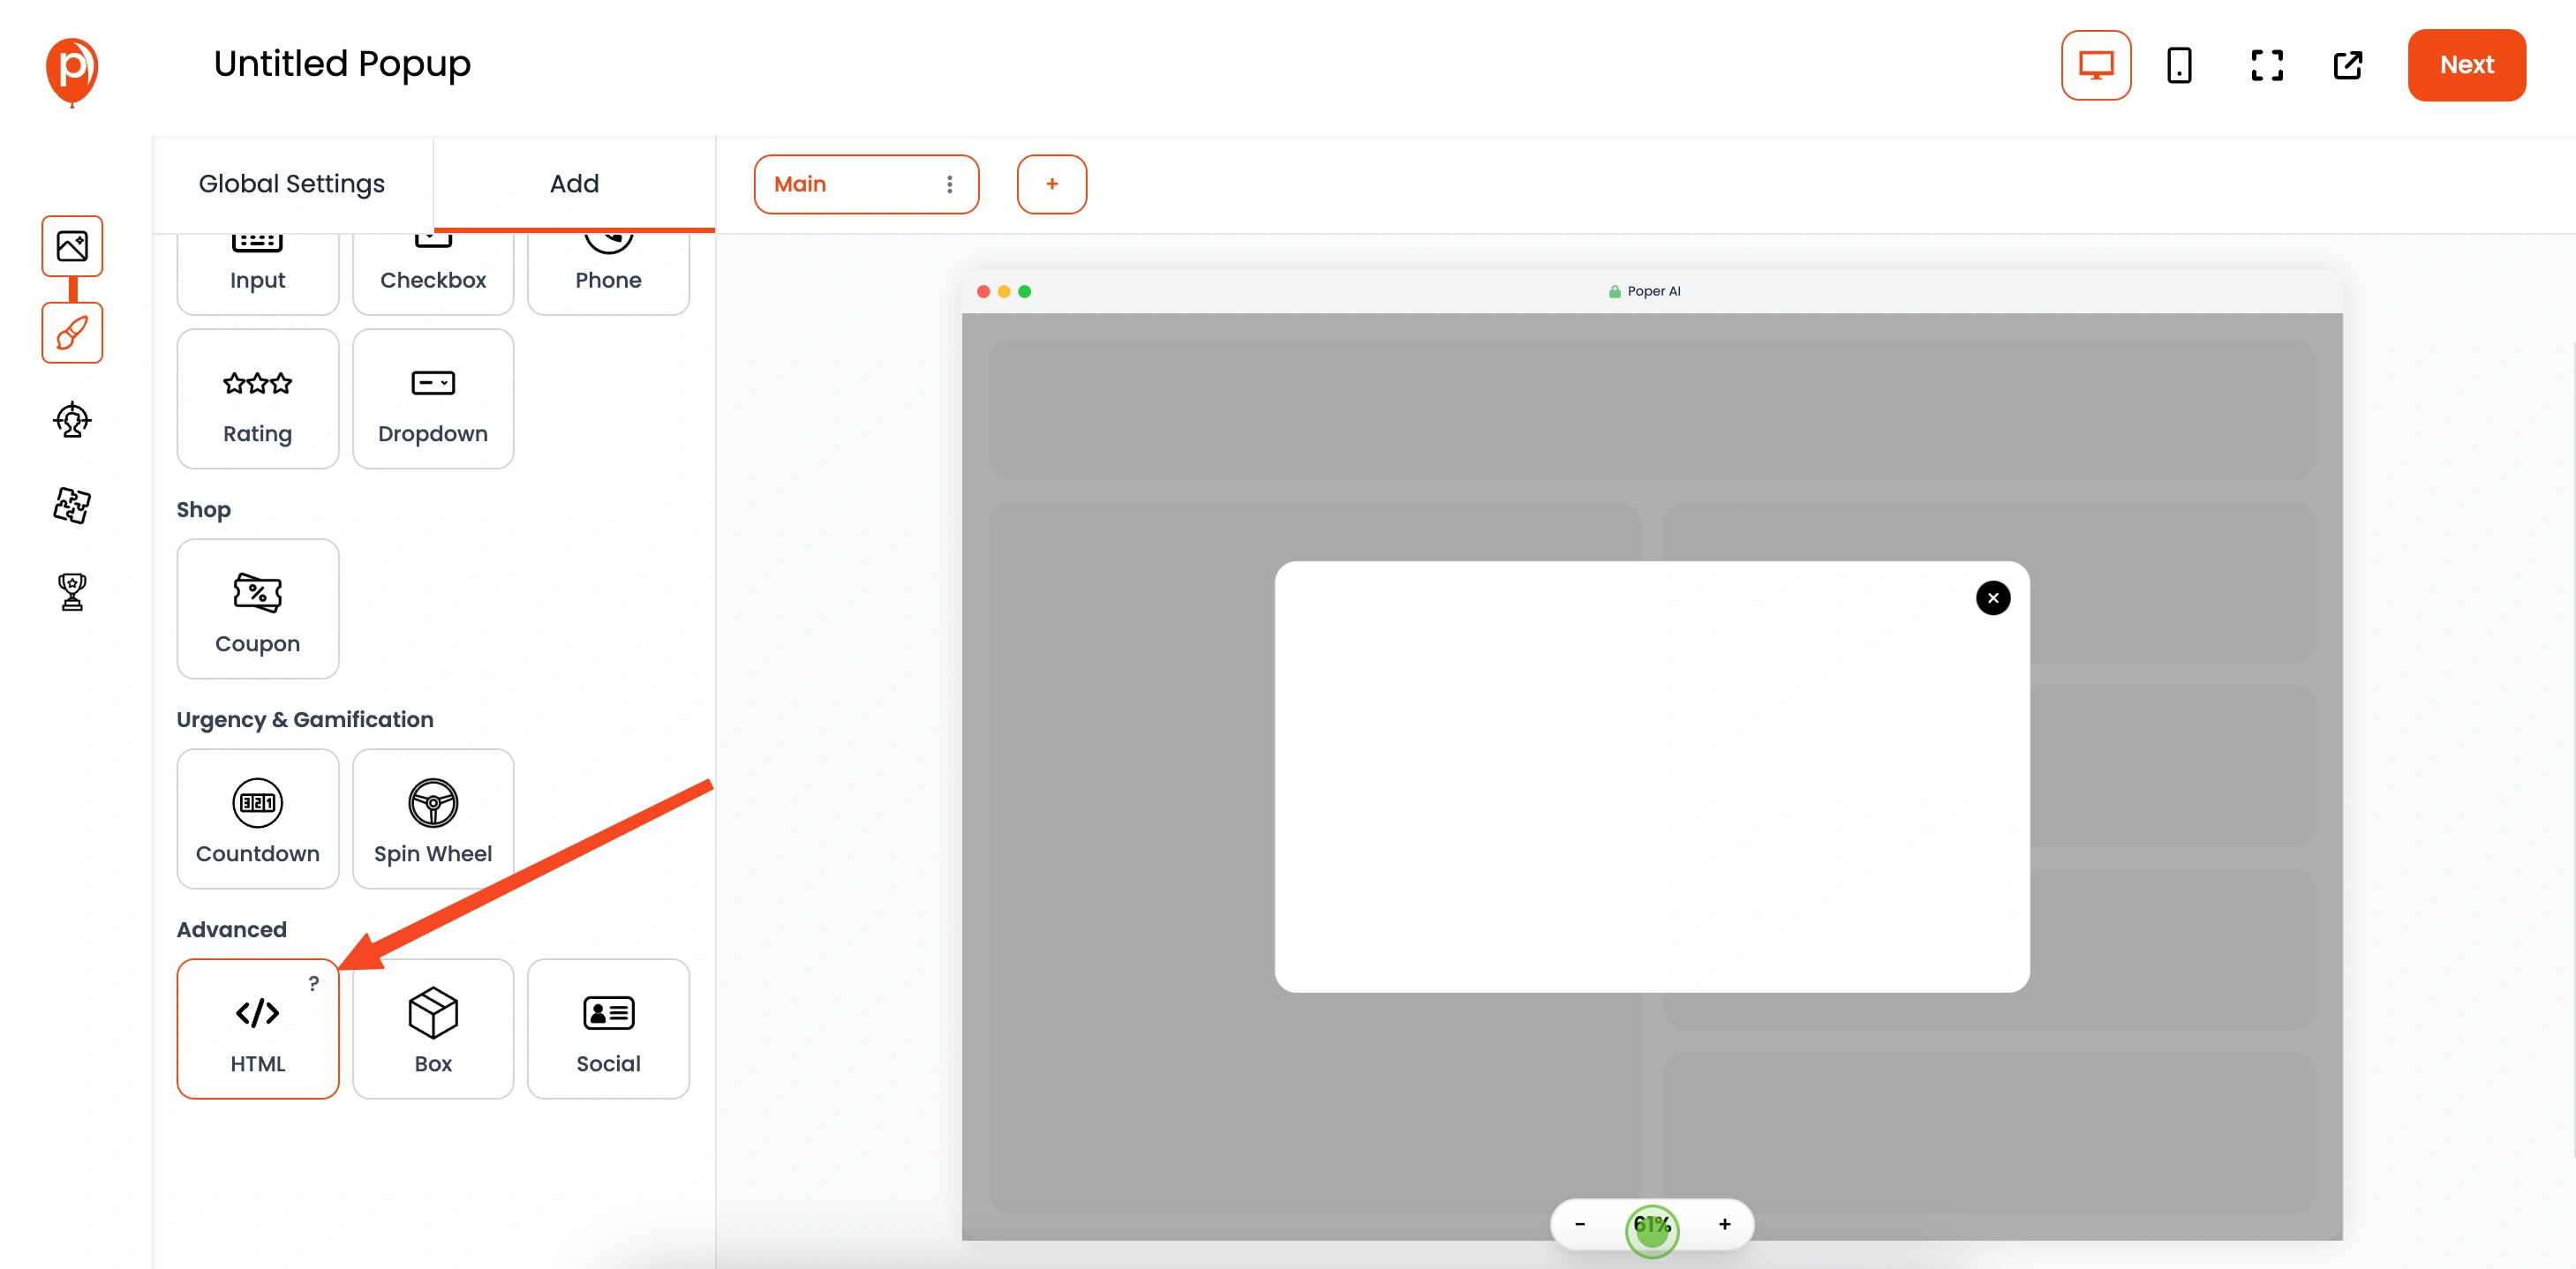
Click on "HTML." This element lets you insert any custom HTML, which is perfect for the Spotify embed.
Step 5: Paste the Spotify Embed Code
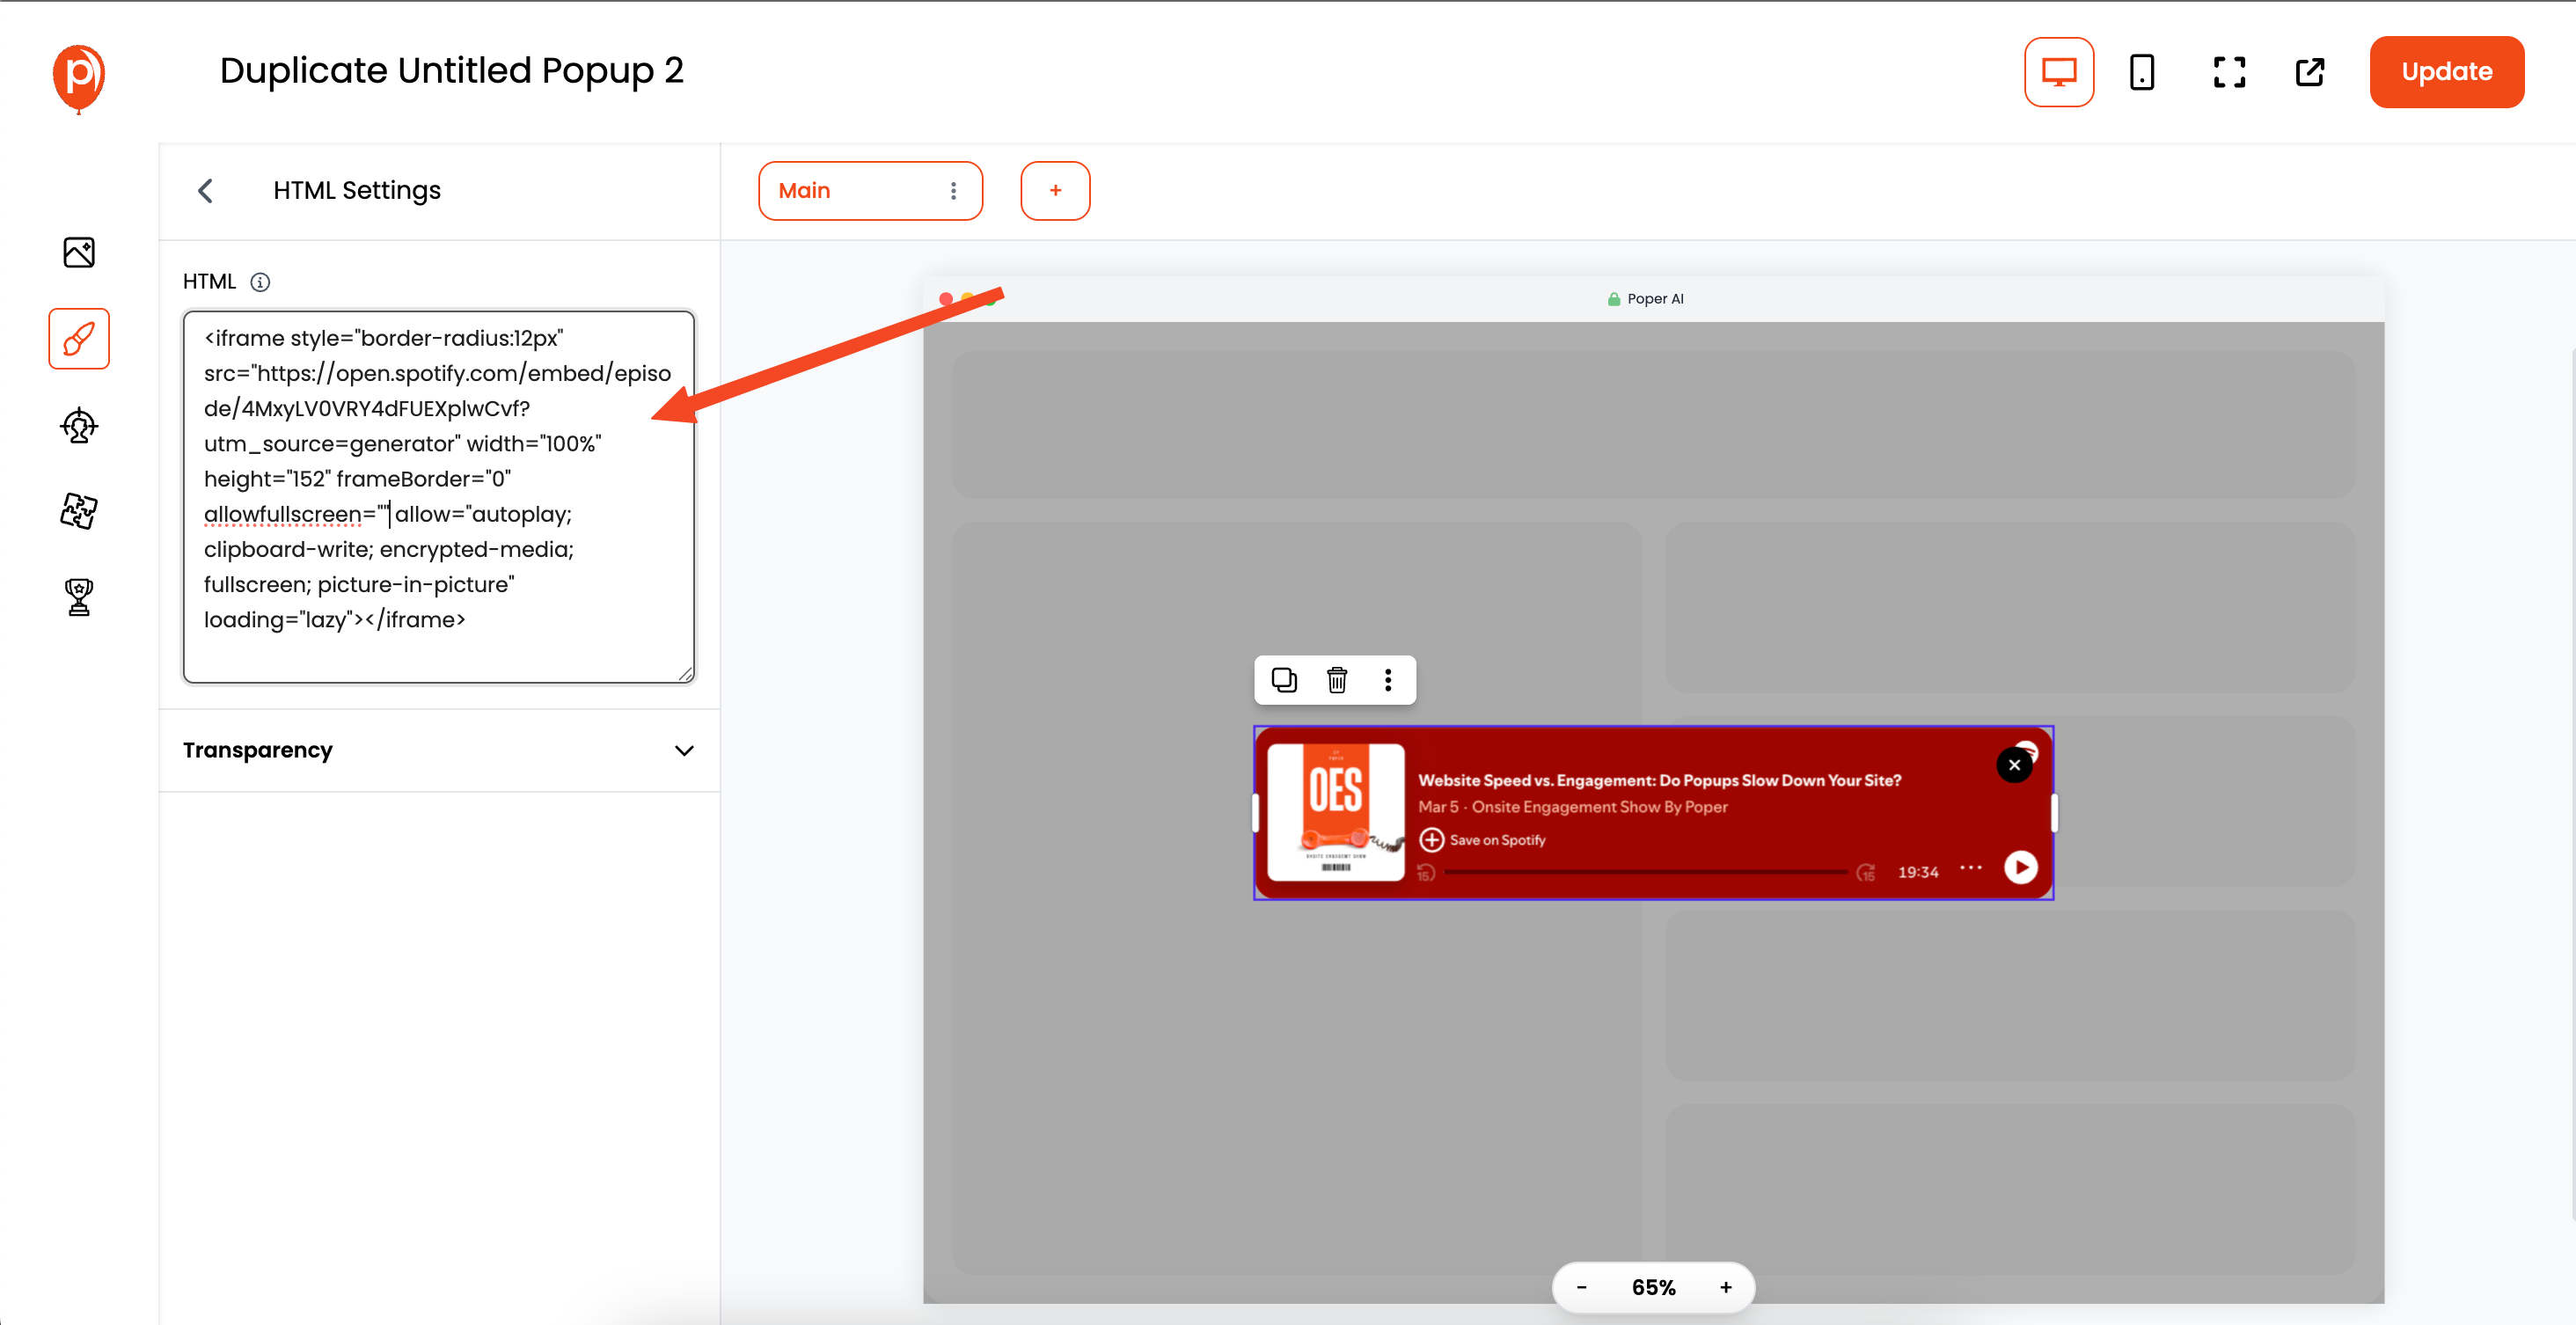
Paste the embed code you copied from Spotify into the HTML element's settings on the left sidebar. This will bring the Spotify player into your Poper popup.
Step 6: Adjust the Widget Size
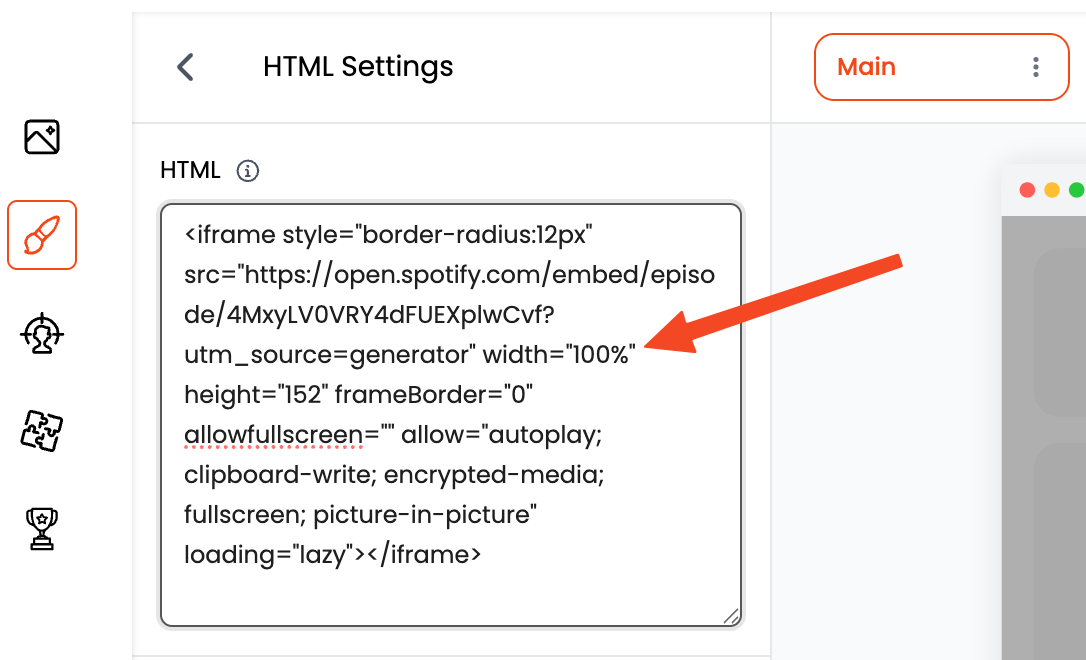
Inside the HTML code, change width="400px" to width="100%" and remove the height attribute. This makes the widget responsive and automatically adjust to the container's width. Removing the height allows it to adjust automatically.
Step 7: Center the Spotify Embed
Drag and drop the Spotify embed element to the center of your popup or widget. Make sure it looks good within the space you've created.
Step 8: Round the Corners (Optional)
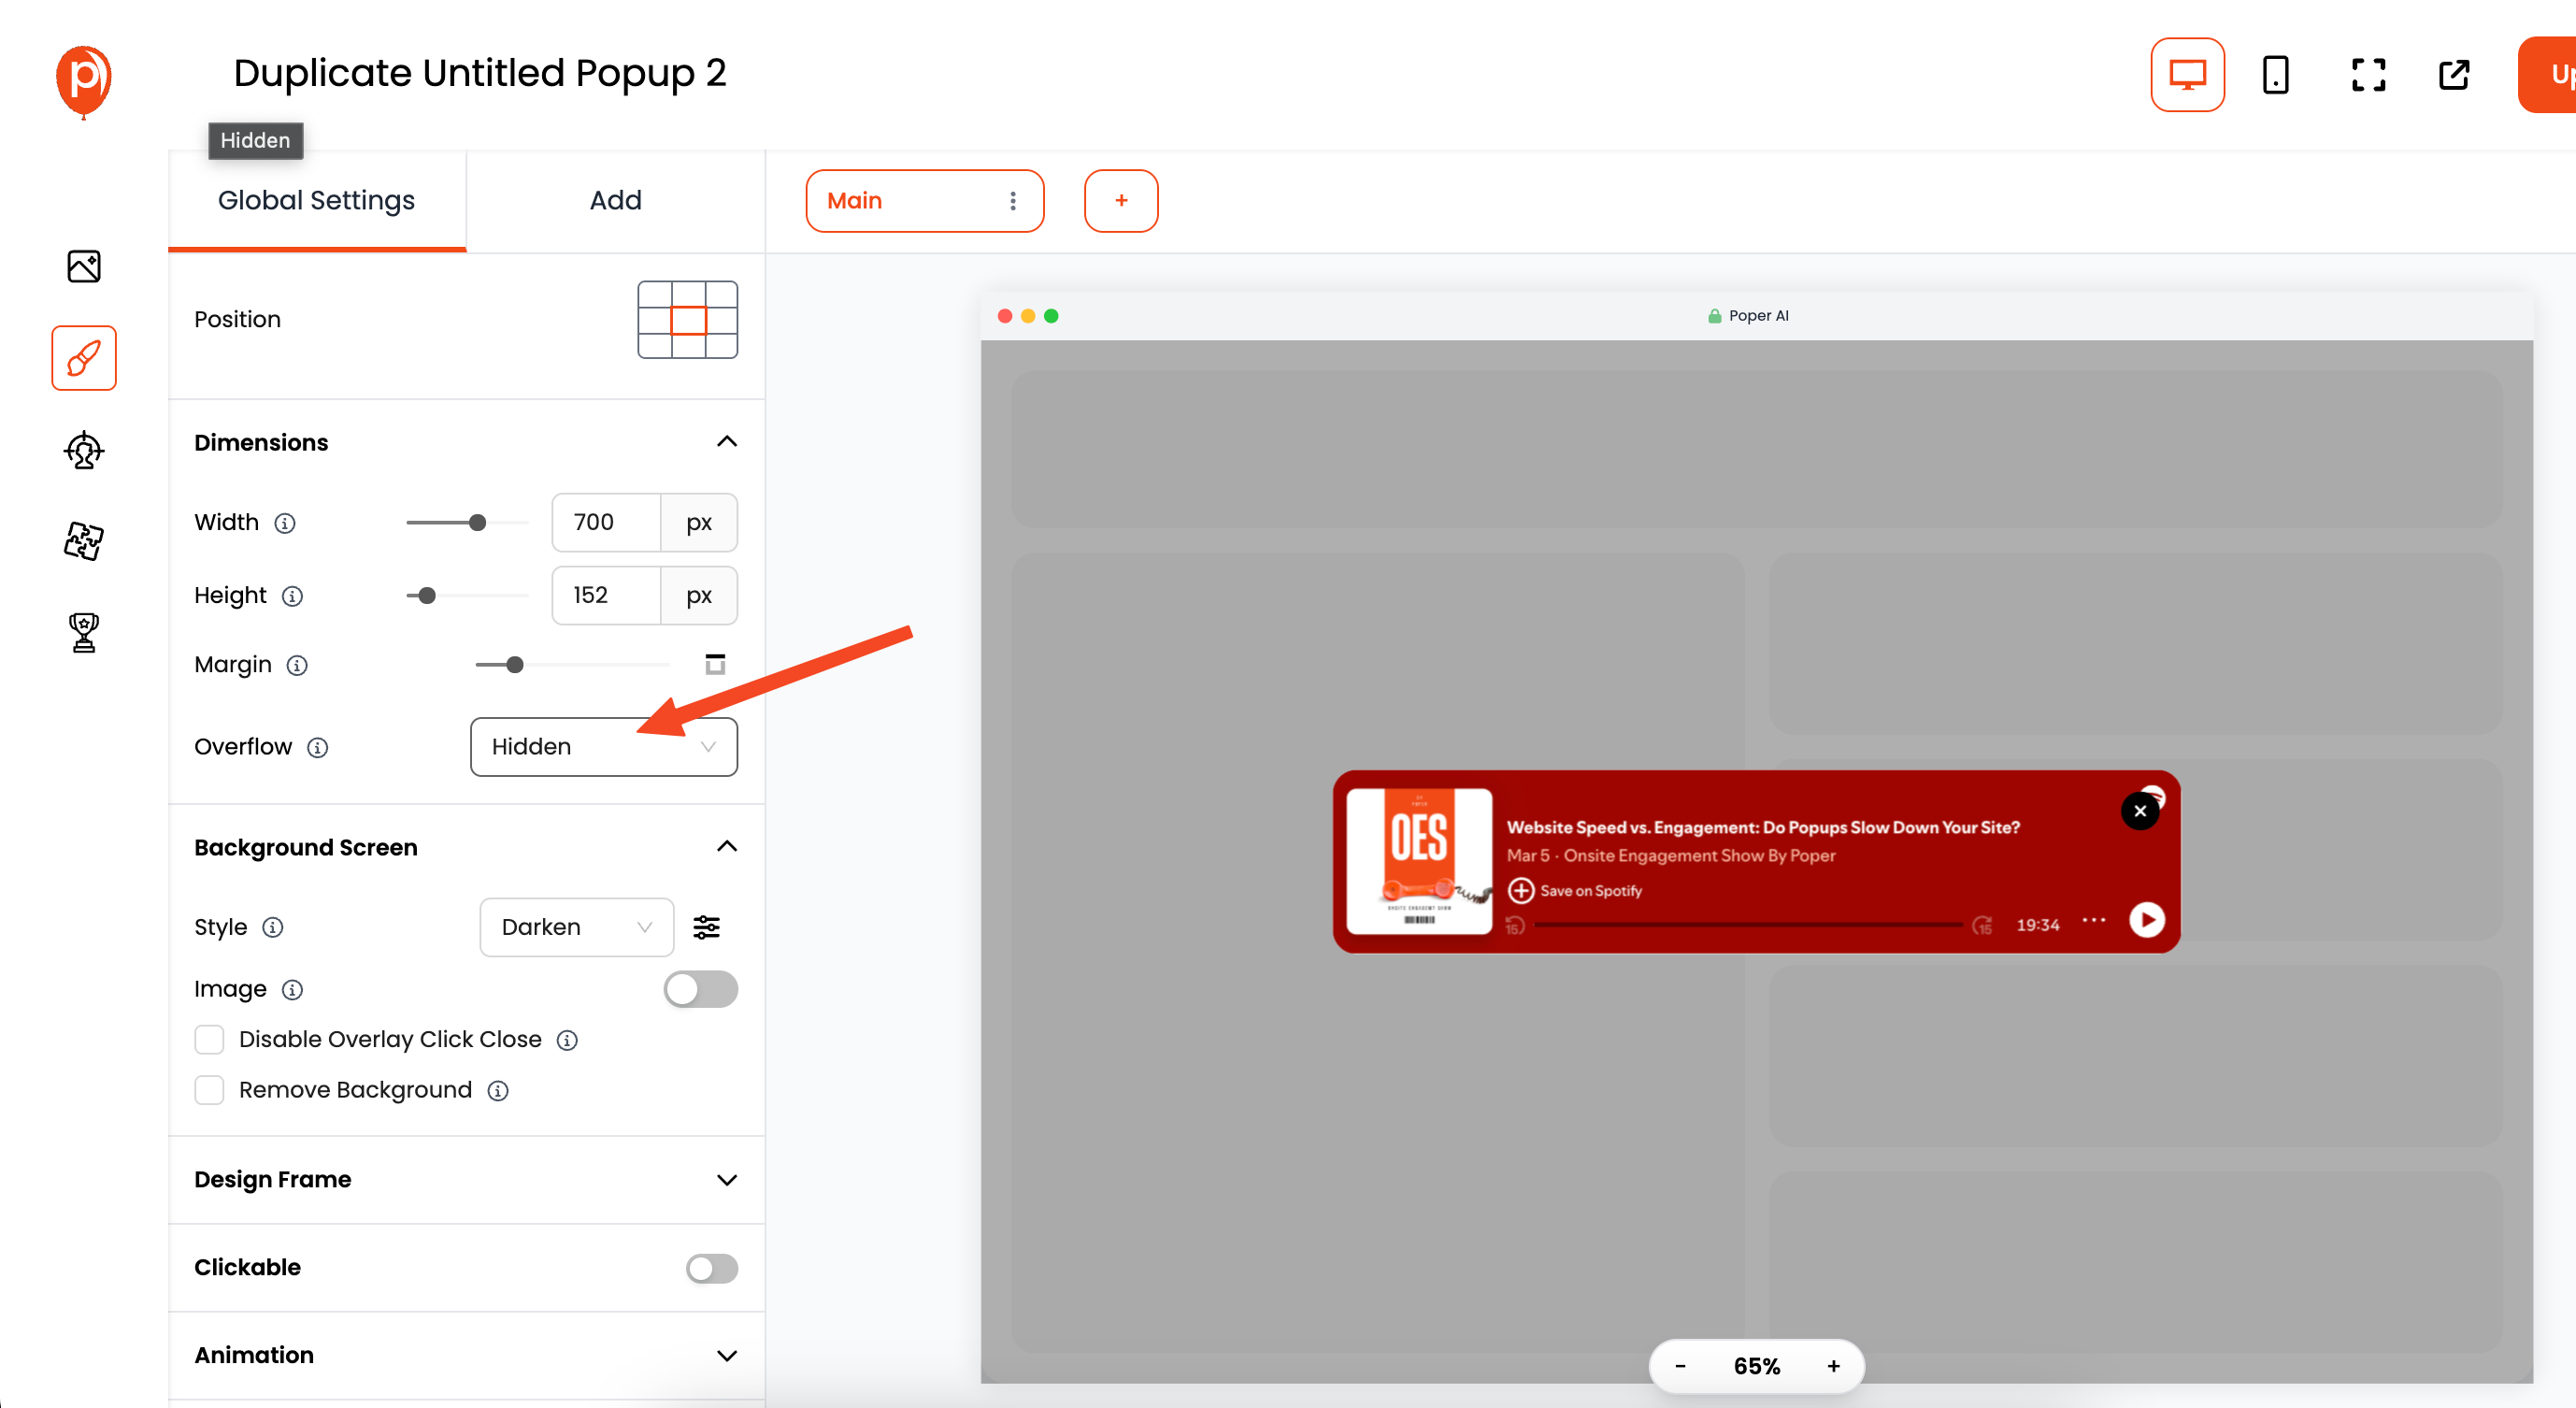
If you want rounded corners, go to "Global Settings" > "Dimensions" > "Overflow" and set it to "Hidden." This visually rounds off the corners of your widget for a smoother look.
You can turn on "Remove Background" in Background Screen settings to make it floating widget type and then place it below.
Step 9: Set Display Conditions
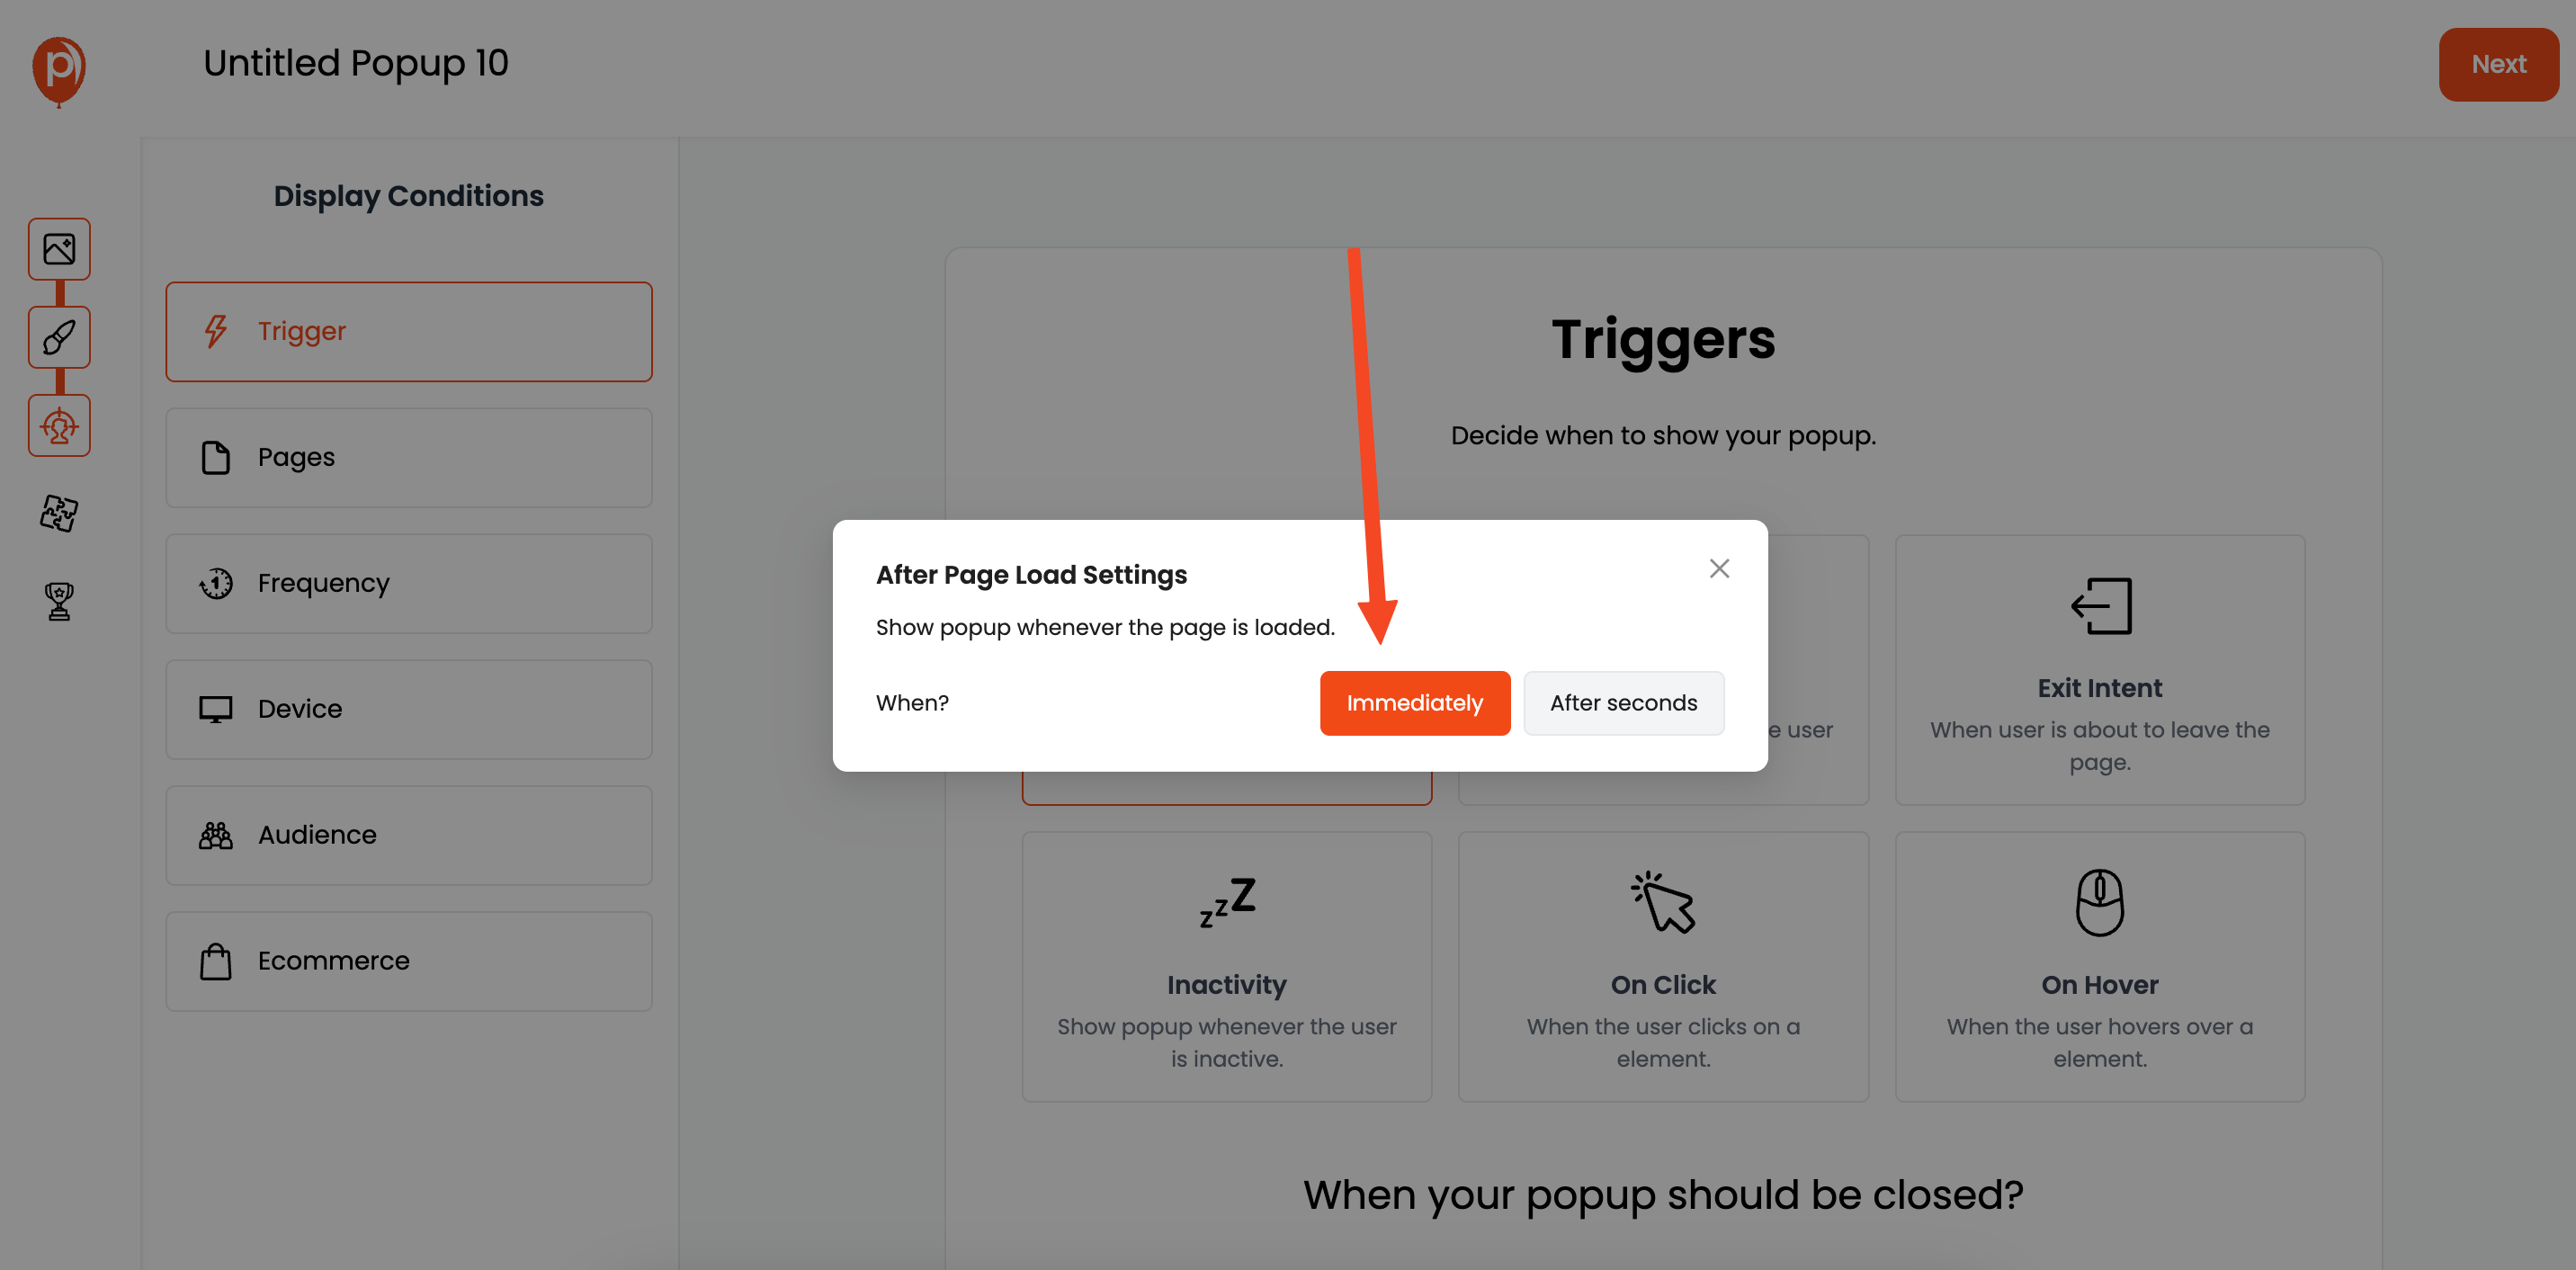
Click "Next" to go to the "Display Conditions" page. Here, you can choose when and where your popup appears (e.g., on page load). We offer various triggers like scroll, load, and more. This step ensures your widget appears at the right moment.
Step 10: Target Your Audience (Optional)
On the "Display Conditions" page, you can also target specific pages or audience demographics. This ensures your widget reaches the most relevant users.
Step 11: Save and Publish
Once you're happy with your settings, click "Save & Publish." Your widget is now ready to go live!
Step 12: Add the Poper Code to Your Website
Go to the "Code" section in Poper's left navigation bar. Select your website platform (e.g., HTML) and follow the instructions to copy and paste the Poper code into your website's HTML. This connects your website to Poper, allowing the widget to display.
Step 13: Test and Deploy
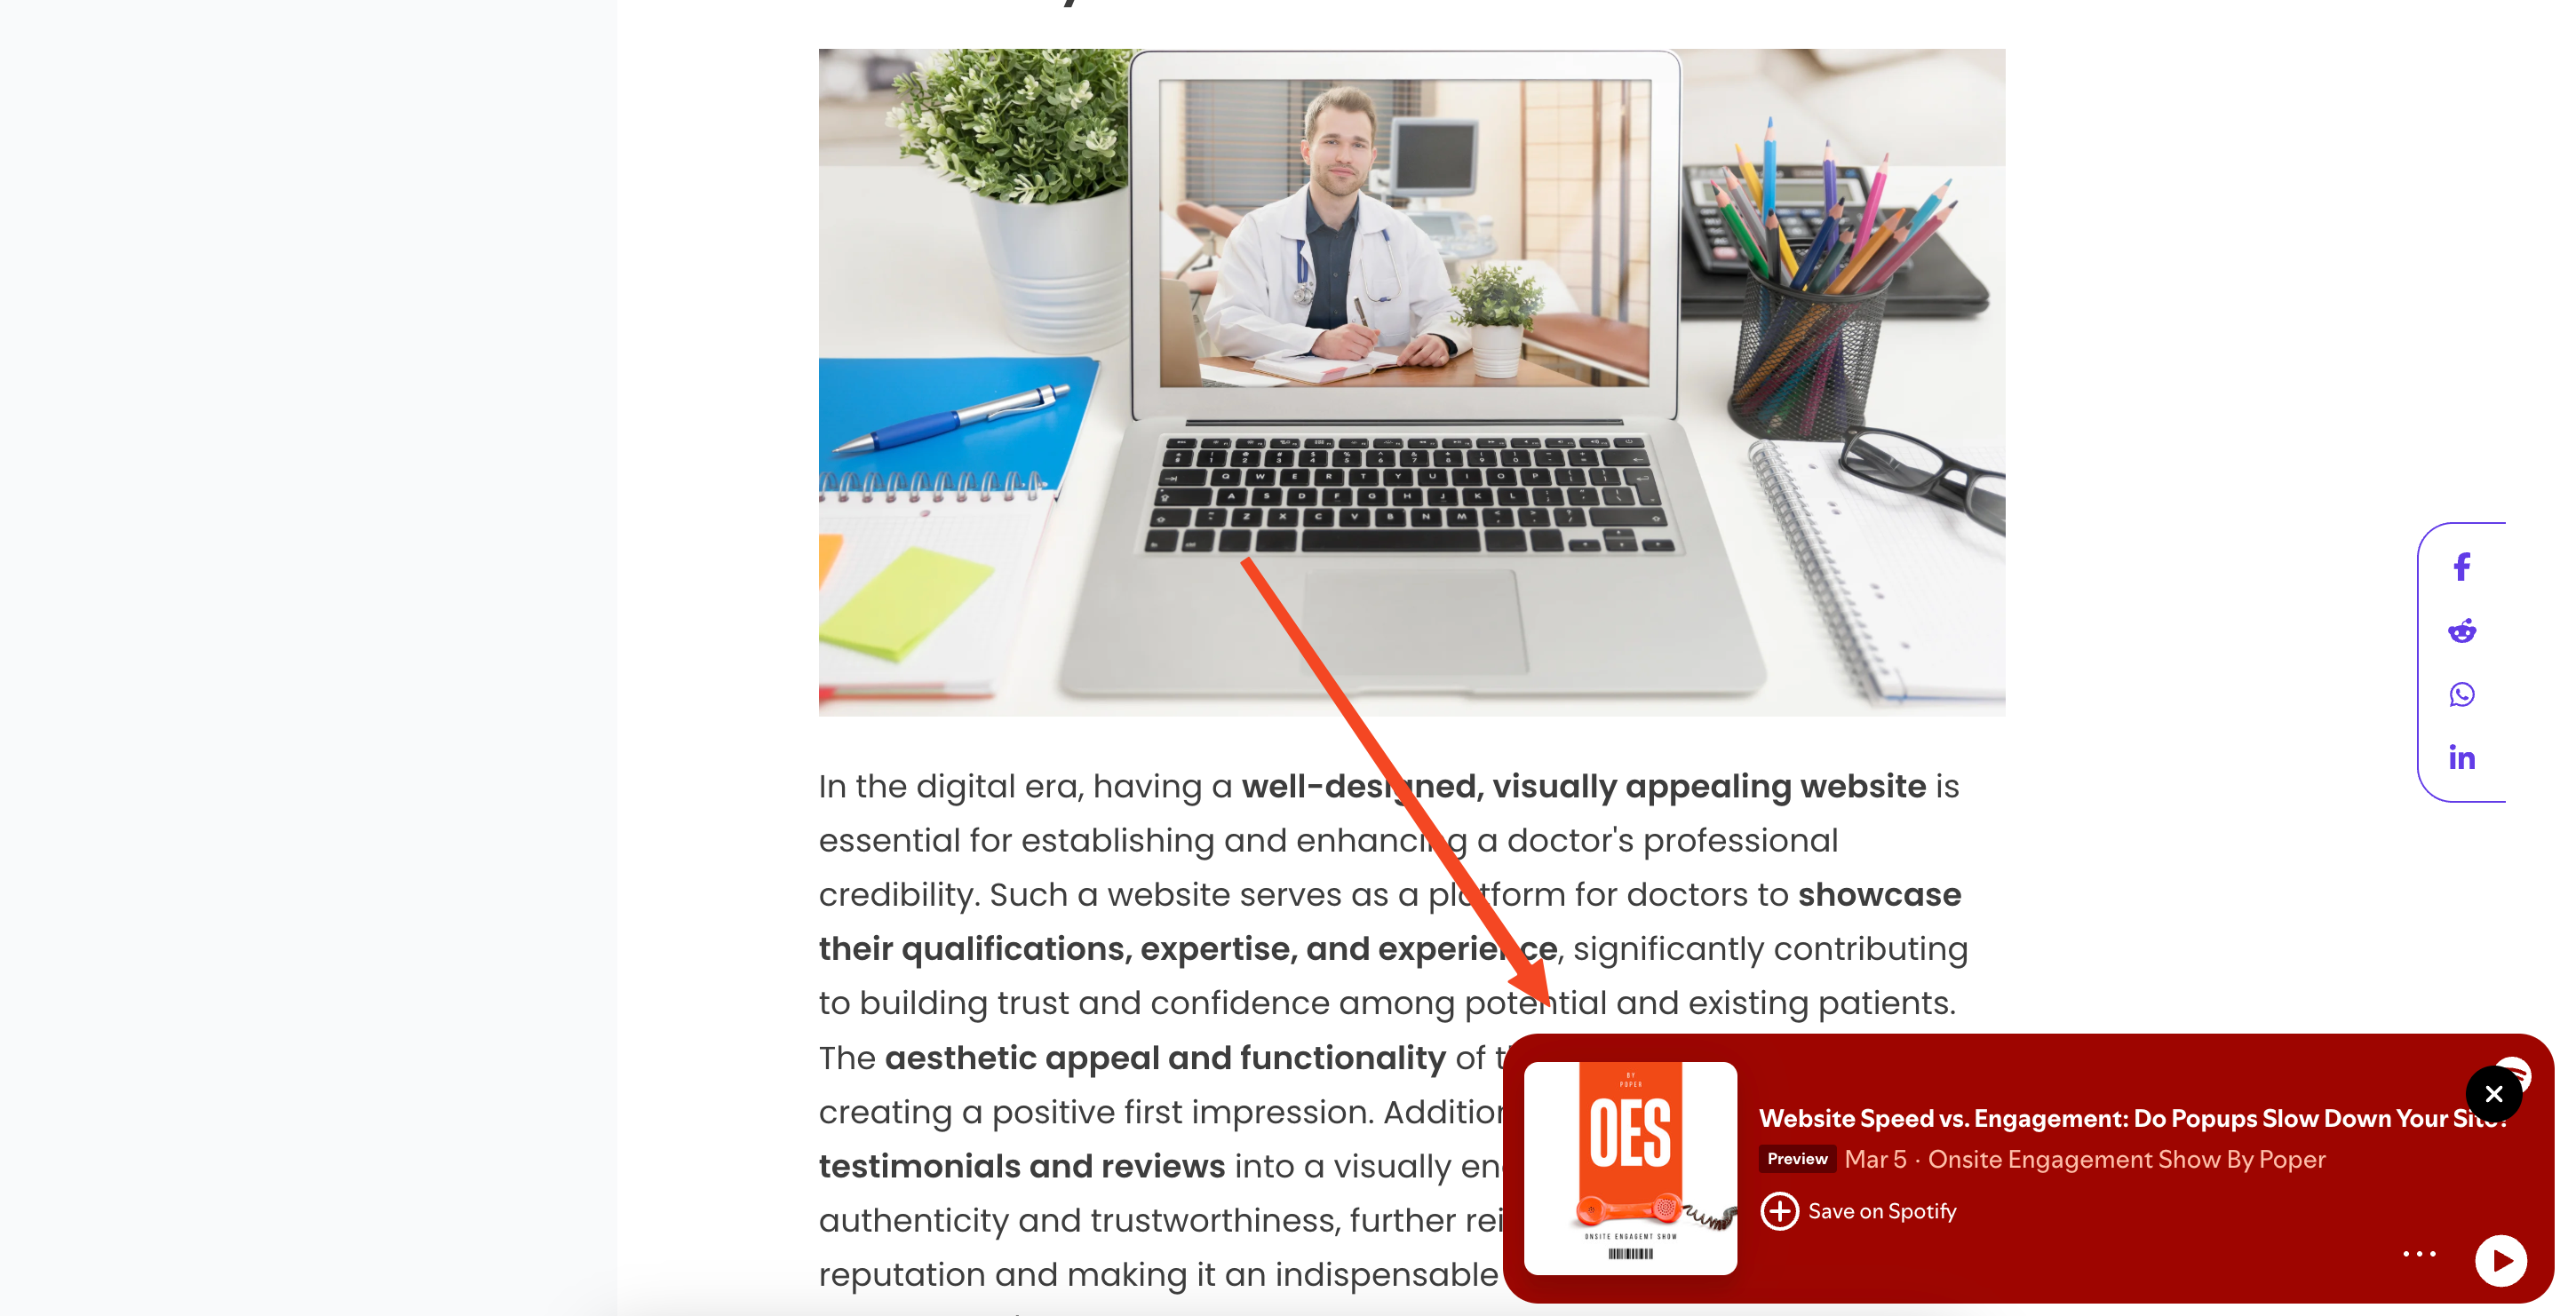
Deploy the changes to your website and test to make sure the Spotify widget appears correctly and functions as expected.
That's it! You've successfully embedded a Spotify widget on your website using Poper.
Benefits of Embedding Spotify Widgets
Embedding a Spotify widget directly on your website keeps users engaged and encourages them to explore your content. Here’s why you should add a Spotify widget with Poper:
✅ Increased Engagement: Audio content captures users' attention, keeping them on your website longer.
✅ Better Content Accessibility: Visitors can listen to your podcasts or audio clips without leaving the page.
✅ Enhanced Brand Authority: Sharing relevant content builds trust and authority in your niche.
✅ Higher Retention Rates: Interactive widgets increase user retention and return visits.
Comparison Table: Poper vs. Other Embed Tools
| Feature | Poper | Other Embed Tools |
|---|---|---|
| Ease of Use | ✅ Drag-and-drop, no coding | ❗️ Requires technical knowledge |
| Customization Options | ✅ Full control over widget design | ❗️ Limited styling options |
| Floating Widget Capability | ✅ Yes | ❗️ Not supported by most tools |
| Display Conditions | ✅ Advanced targeting options | ❗️ Basic trigger settings |
| Integration with Platforms | ✅ Works seamlessly with HTML, WordPress, and more | ❗️ Limited compatibility |
FAQs
How do I embed a Spotify widget using Poper?
To embed a Spotify widget, grab the Spotify embed code, paste it into the HTML element in Poper’s popup editor, and publish it to your site.
Can I customize the Spotify widget design in Poper?
Yes! Poper allows you to customize widget dimensions, apply rounded corners, and modify background settings to match your website’s design.
Does Poper allow me to display the Spotify widget as a floating element?
Absolutely! You can enable 'Remove Background' in the Background Screen settings to create a floating Spotify widget that stays visible as users scroll.
Do I need coding knowledge to embed the Spotify widget?
No coding required! Poper offers a drag-and-drop interface that makes embedding Spotify widgets seamless.

