Do you need popups on your WordPress site but are worried about the performance impact of plugins? I understand, and I've got a solution for you.
WordPress doesn't have built-in popup or modal options like some other platforms. While Gutenberg has improved, it still doesn't have a native popup block. Even if it will (in future), customizing settings like display pages and triggers would be difficult.
There are two ways you can do this:
Using Poper without a plugin (simple and easy)
Using custom HTML from scratch
Let's dive into both methods.
Using Poper
Let's start with the easiest method first. Here’s how you can use Poper to add popups to your WordPress site without needing a plugin:
1. Create a Poper Account
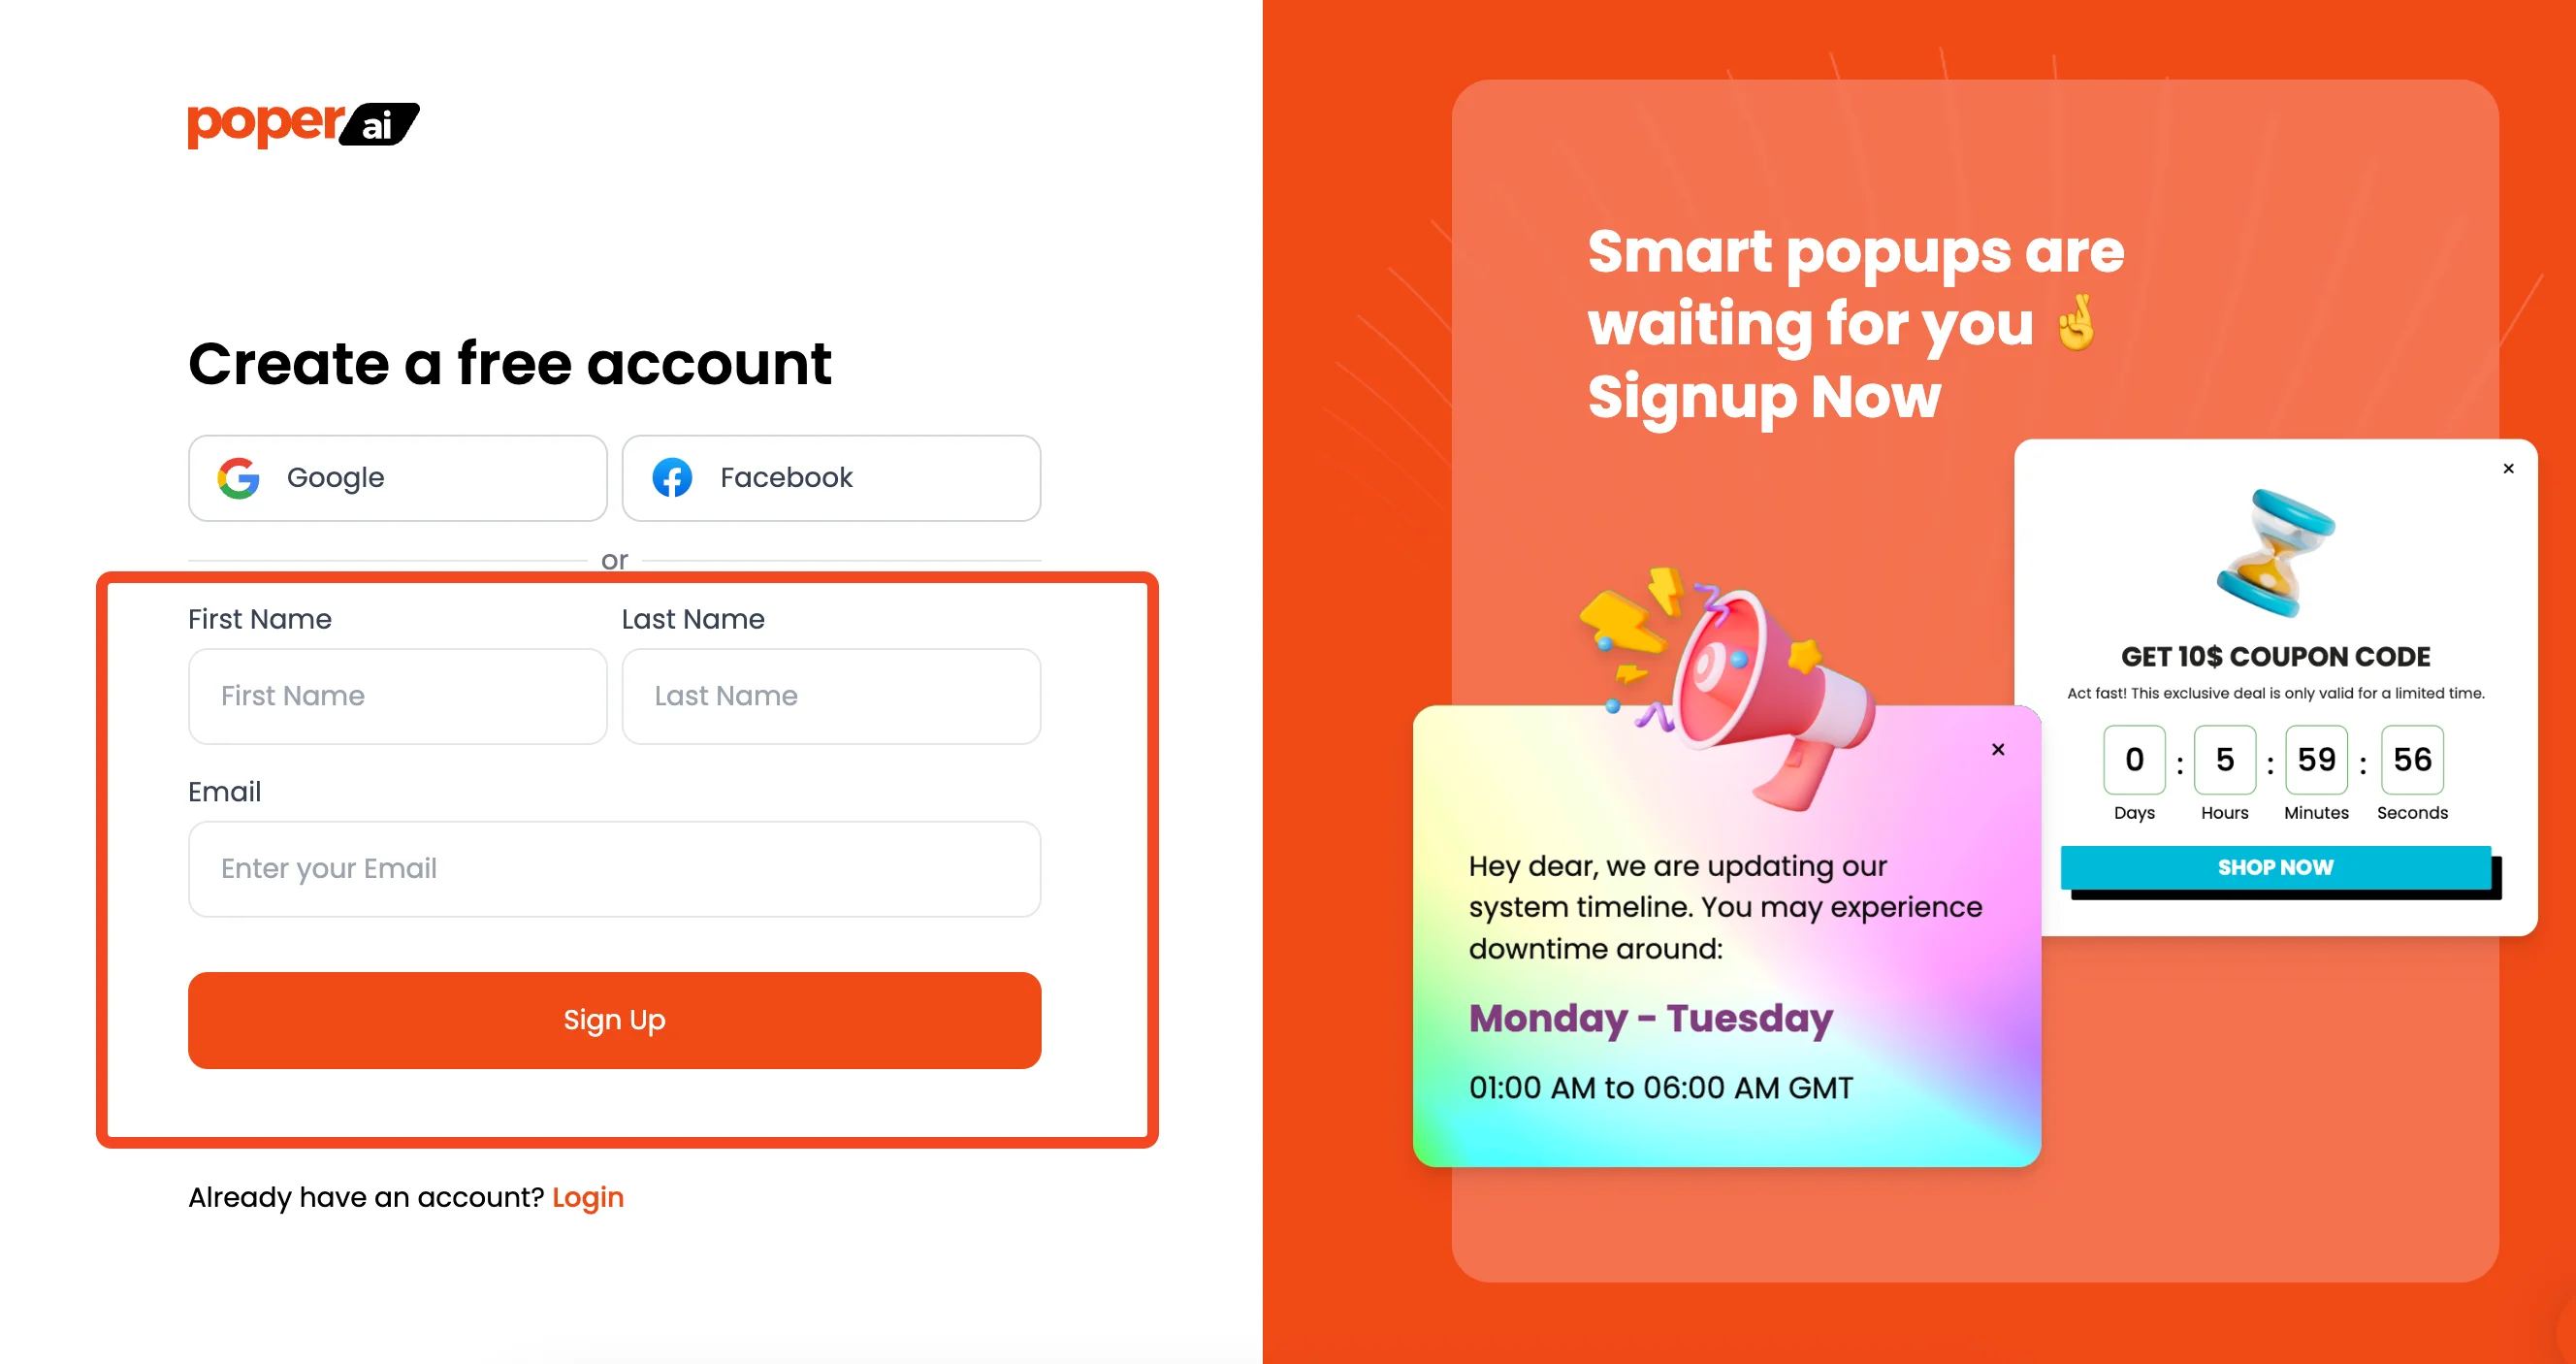
First, you'll need to sign up for a Poper account. Poper allows you to create popups and connect them to your WordPress website, along with other platforms.
2. Add Your WordPress Website
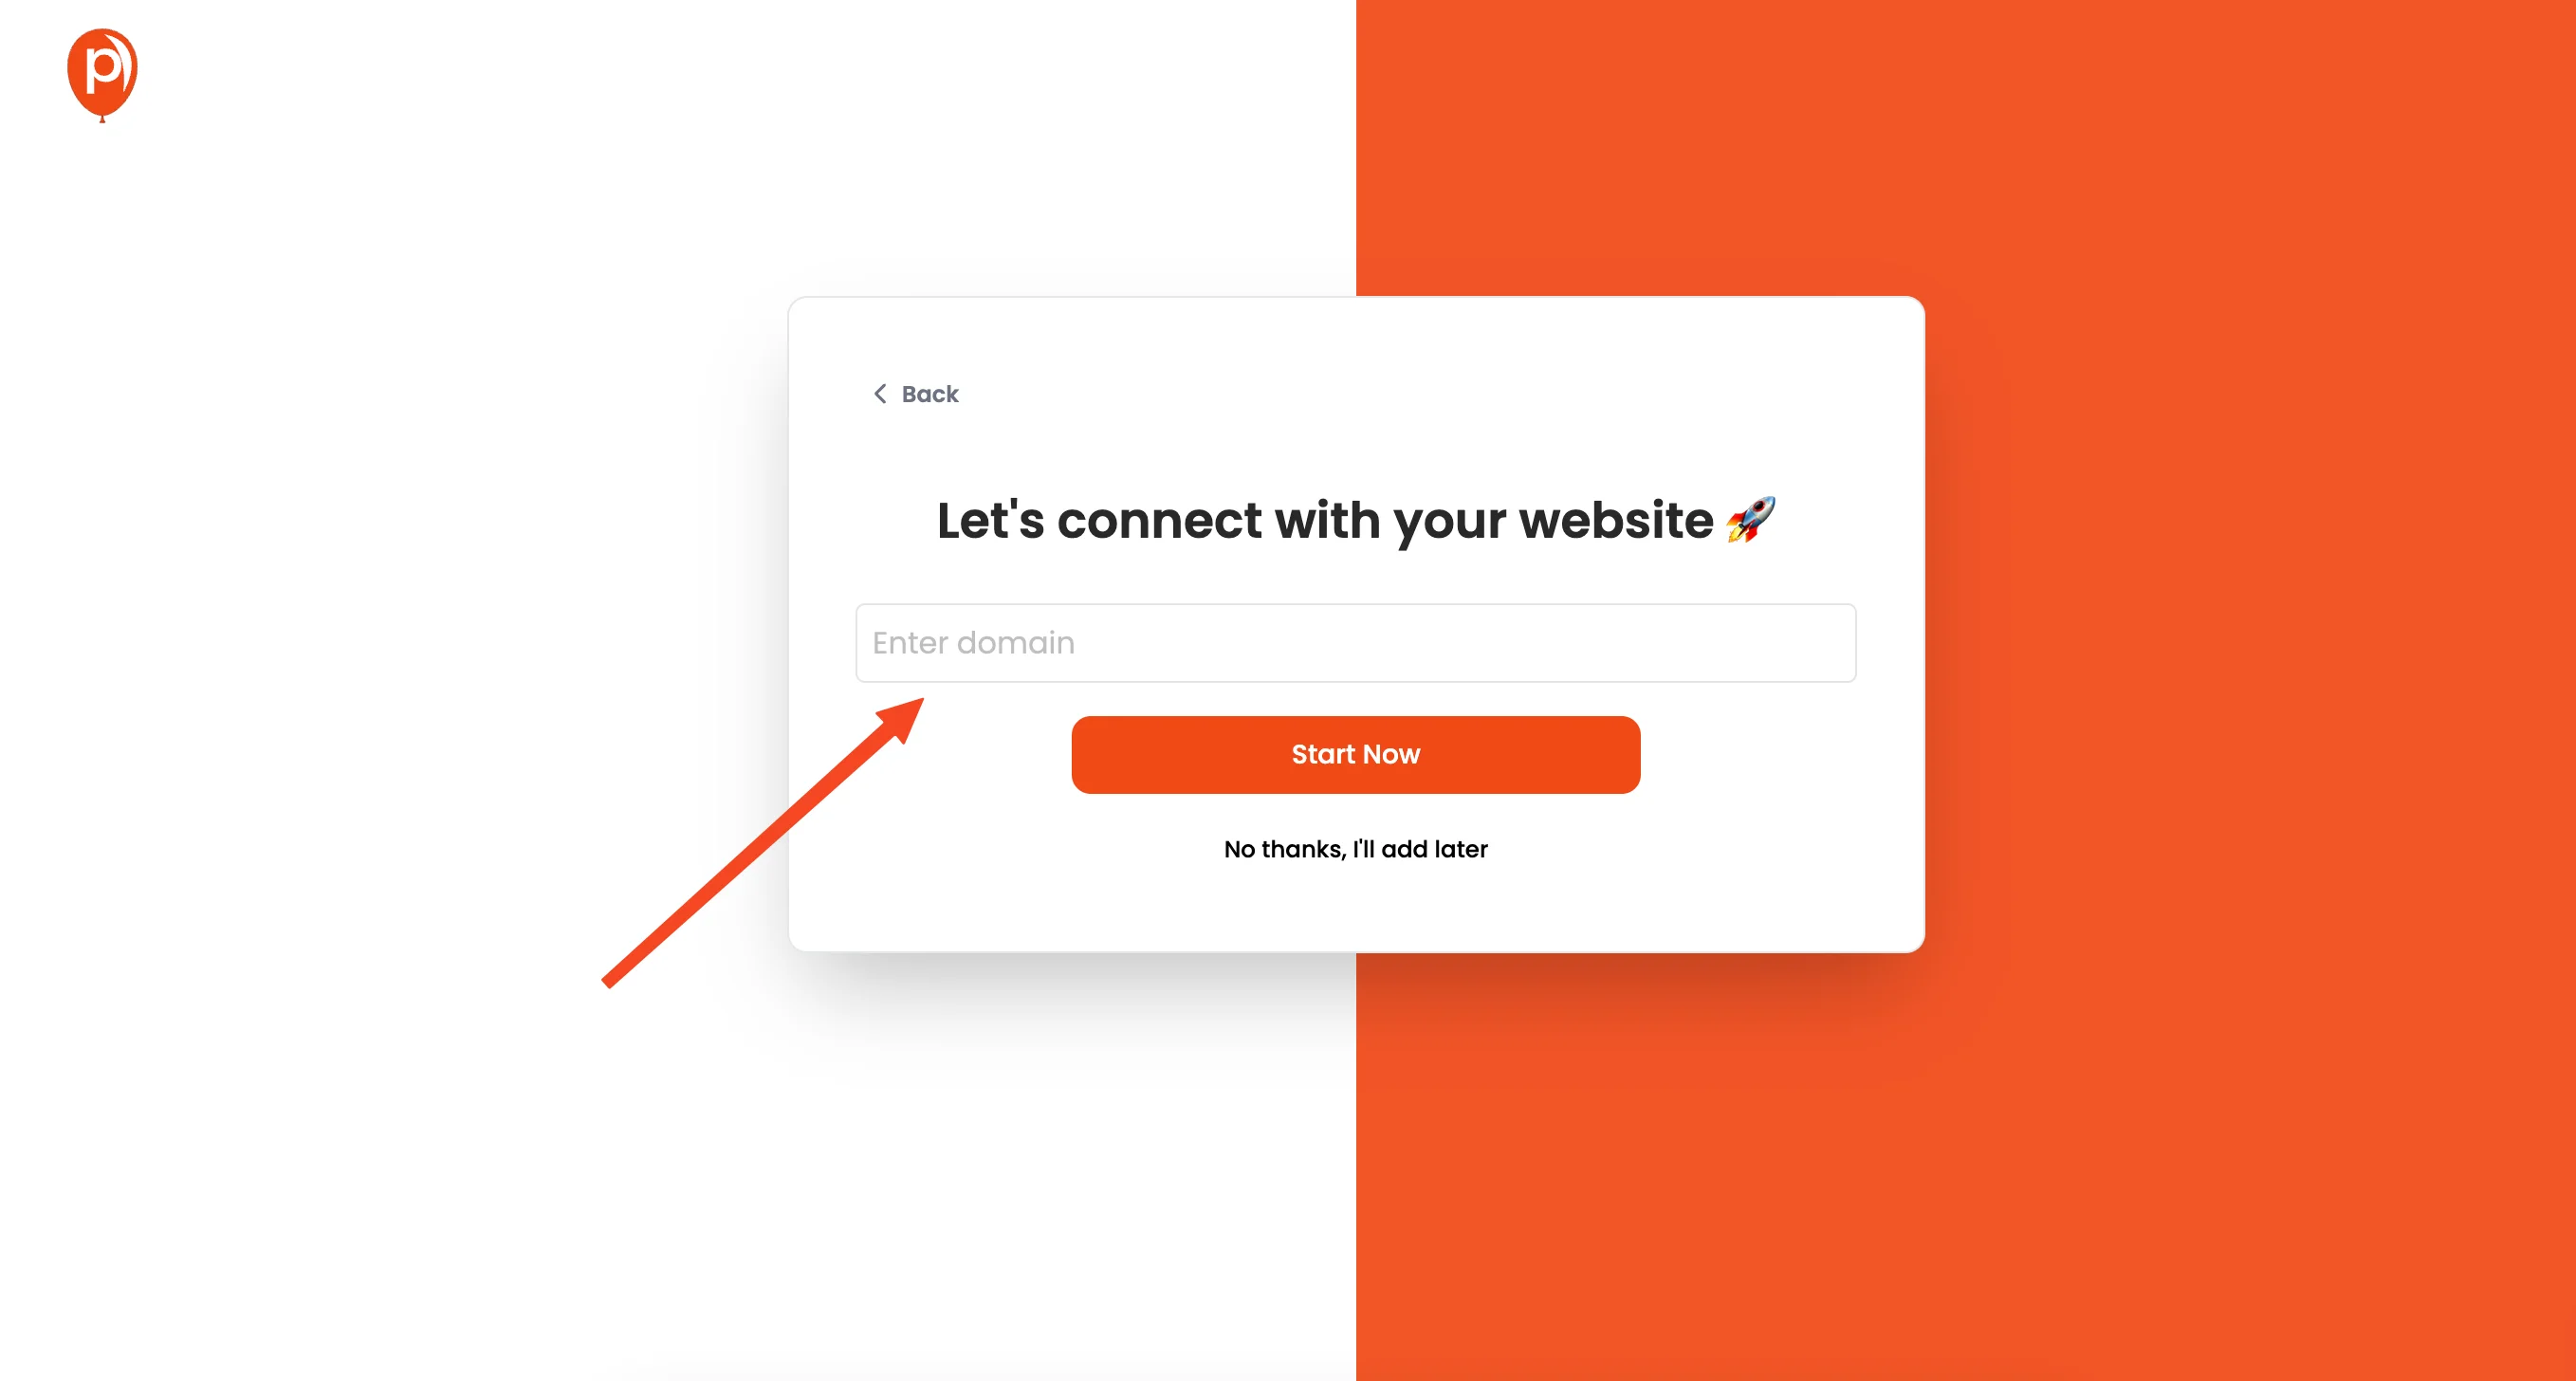
Once you're logged in, add your WordPress website's domain to your Poper account. This step lets Poper know where to display the popups you'll create.
3. Create a New Popup
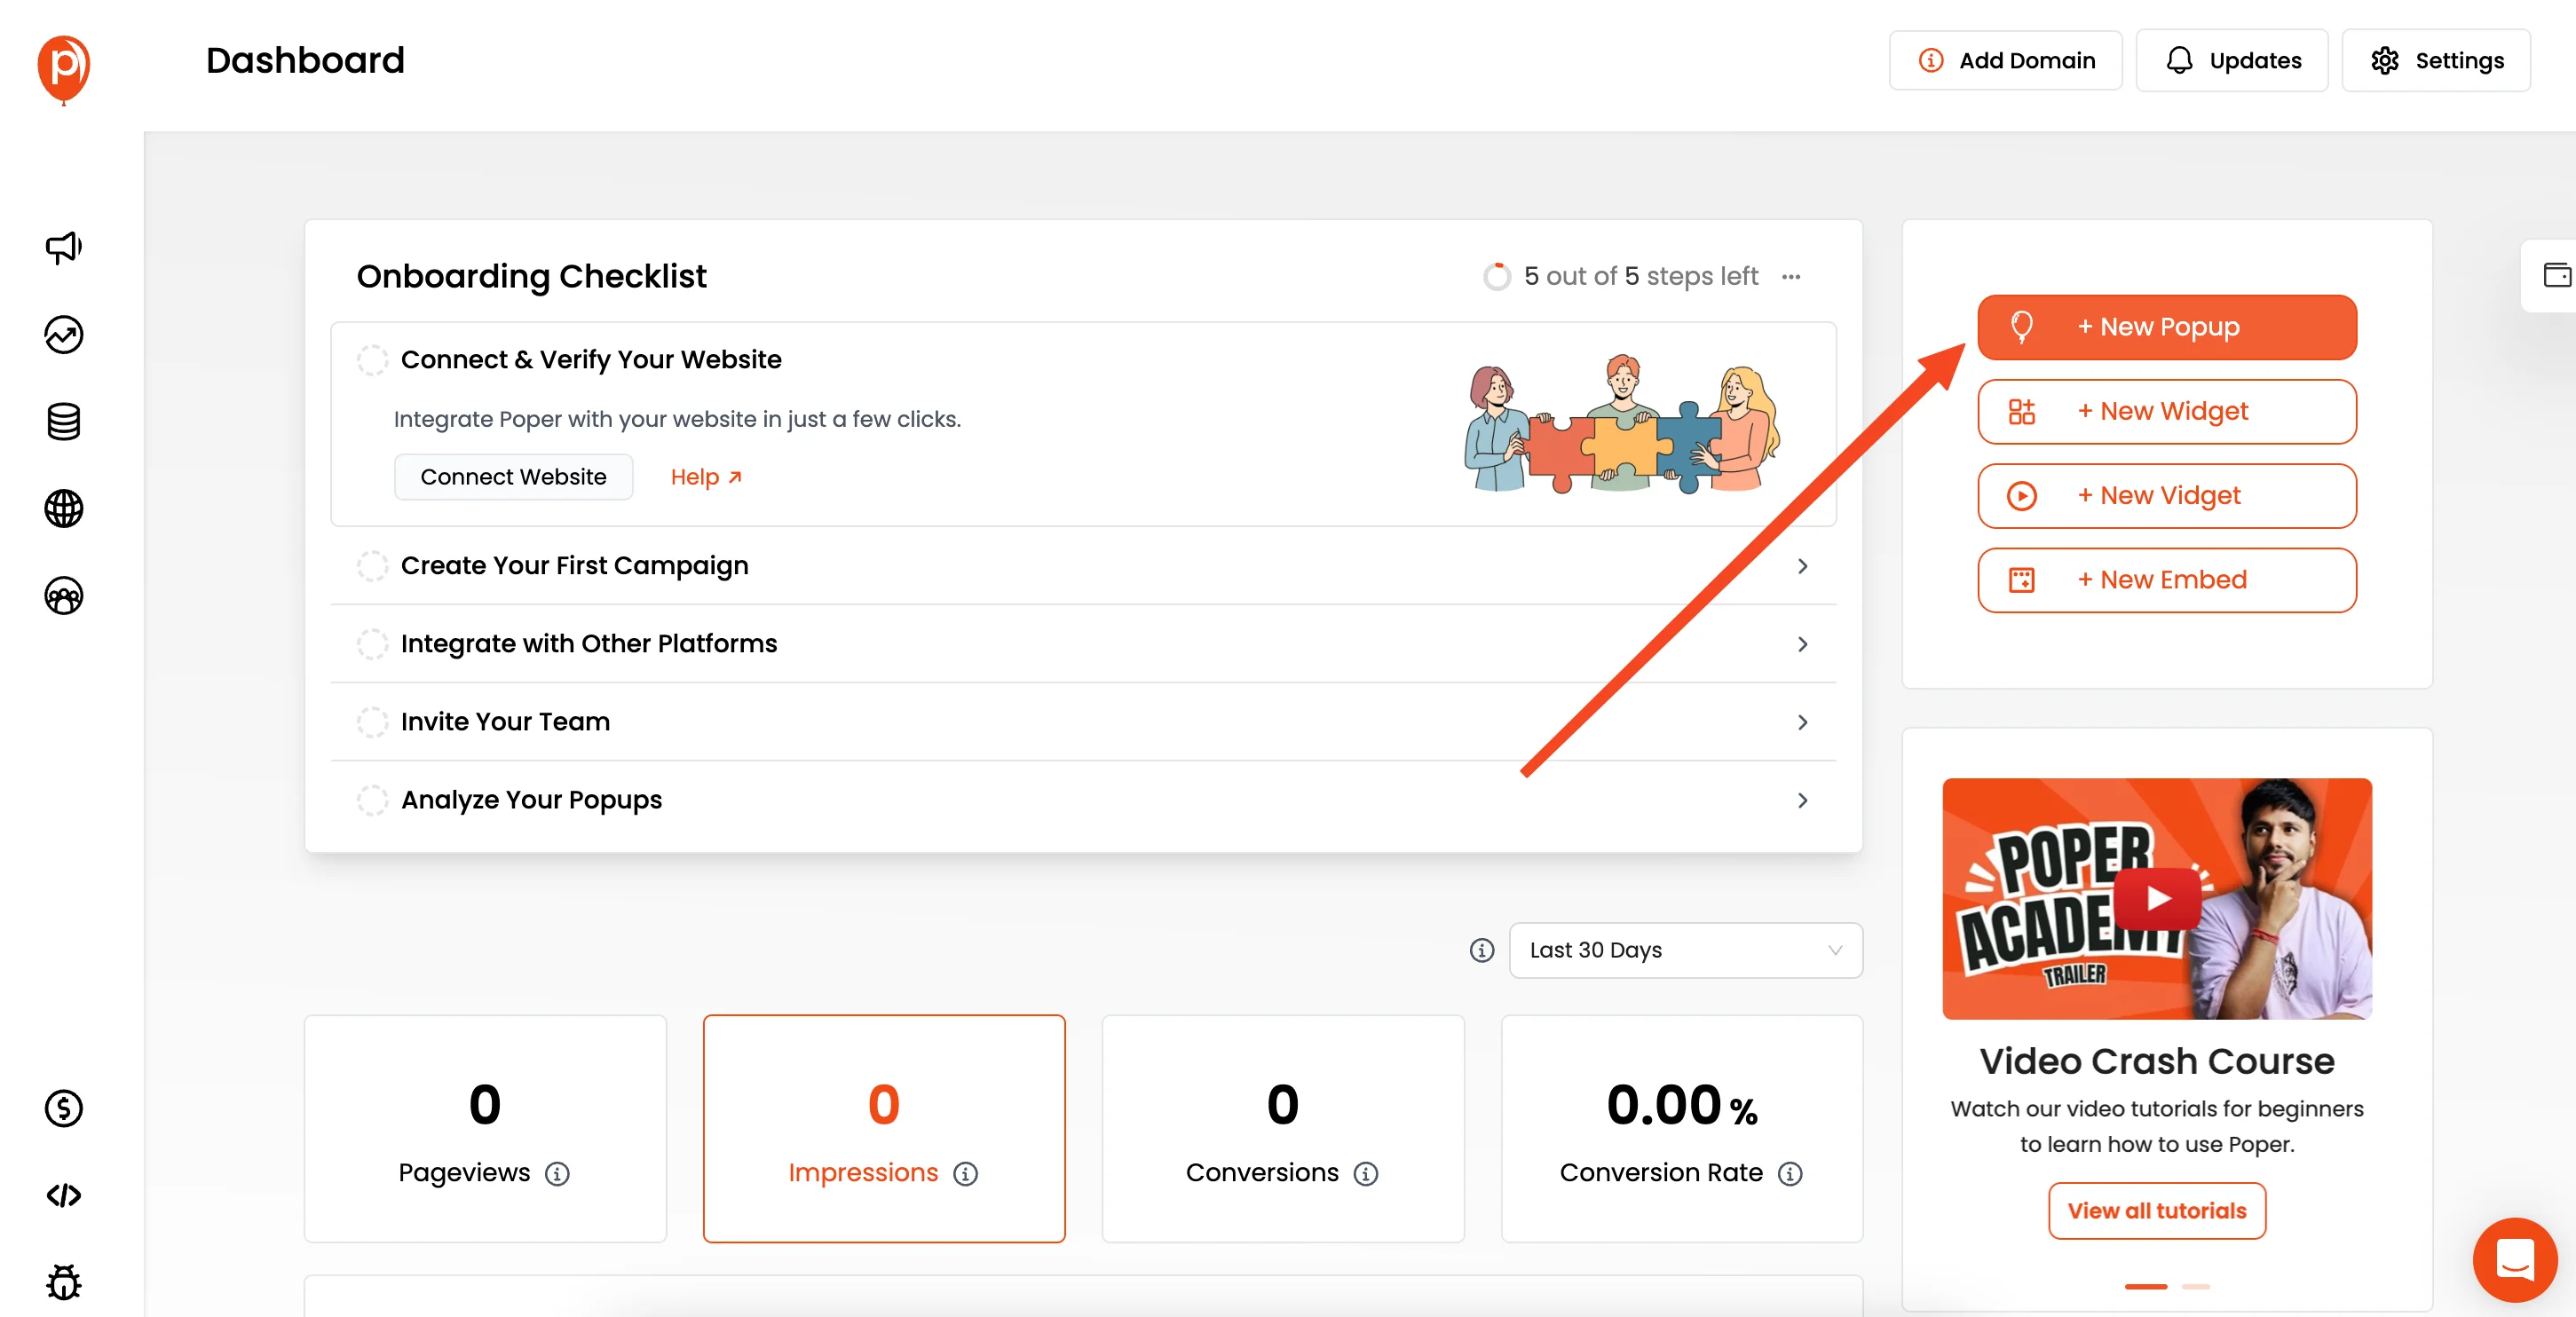
Next, click the "New Popup" button. You'll then see an option to "Choose from Templates."
4. Select a Template
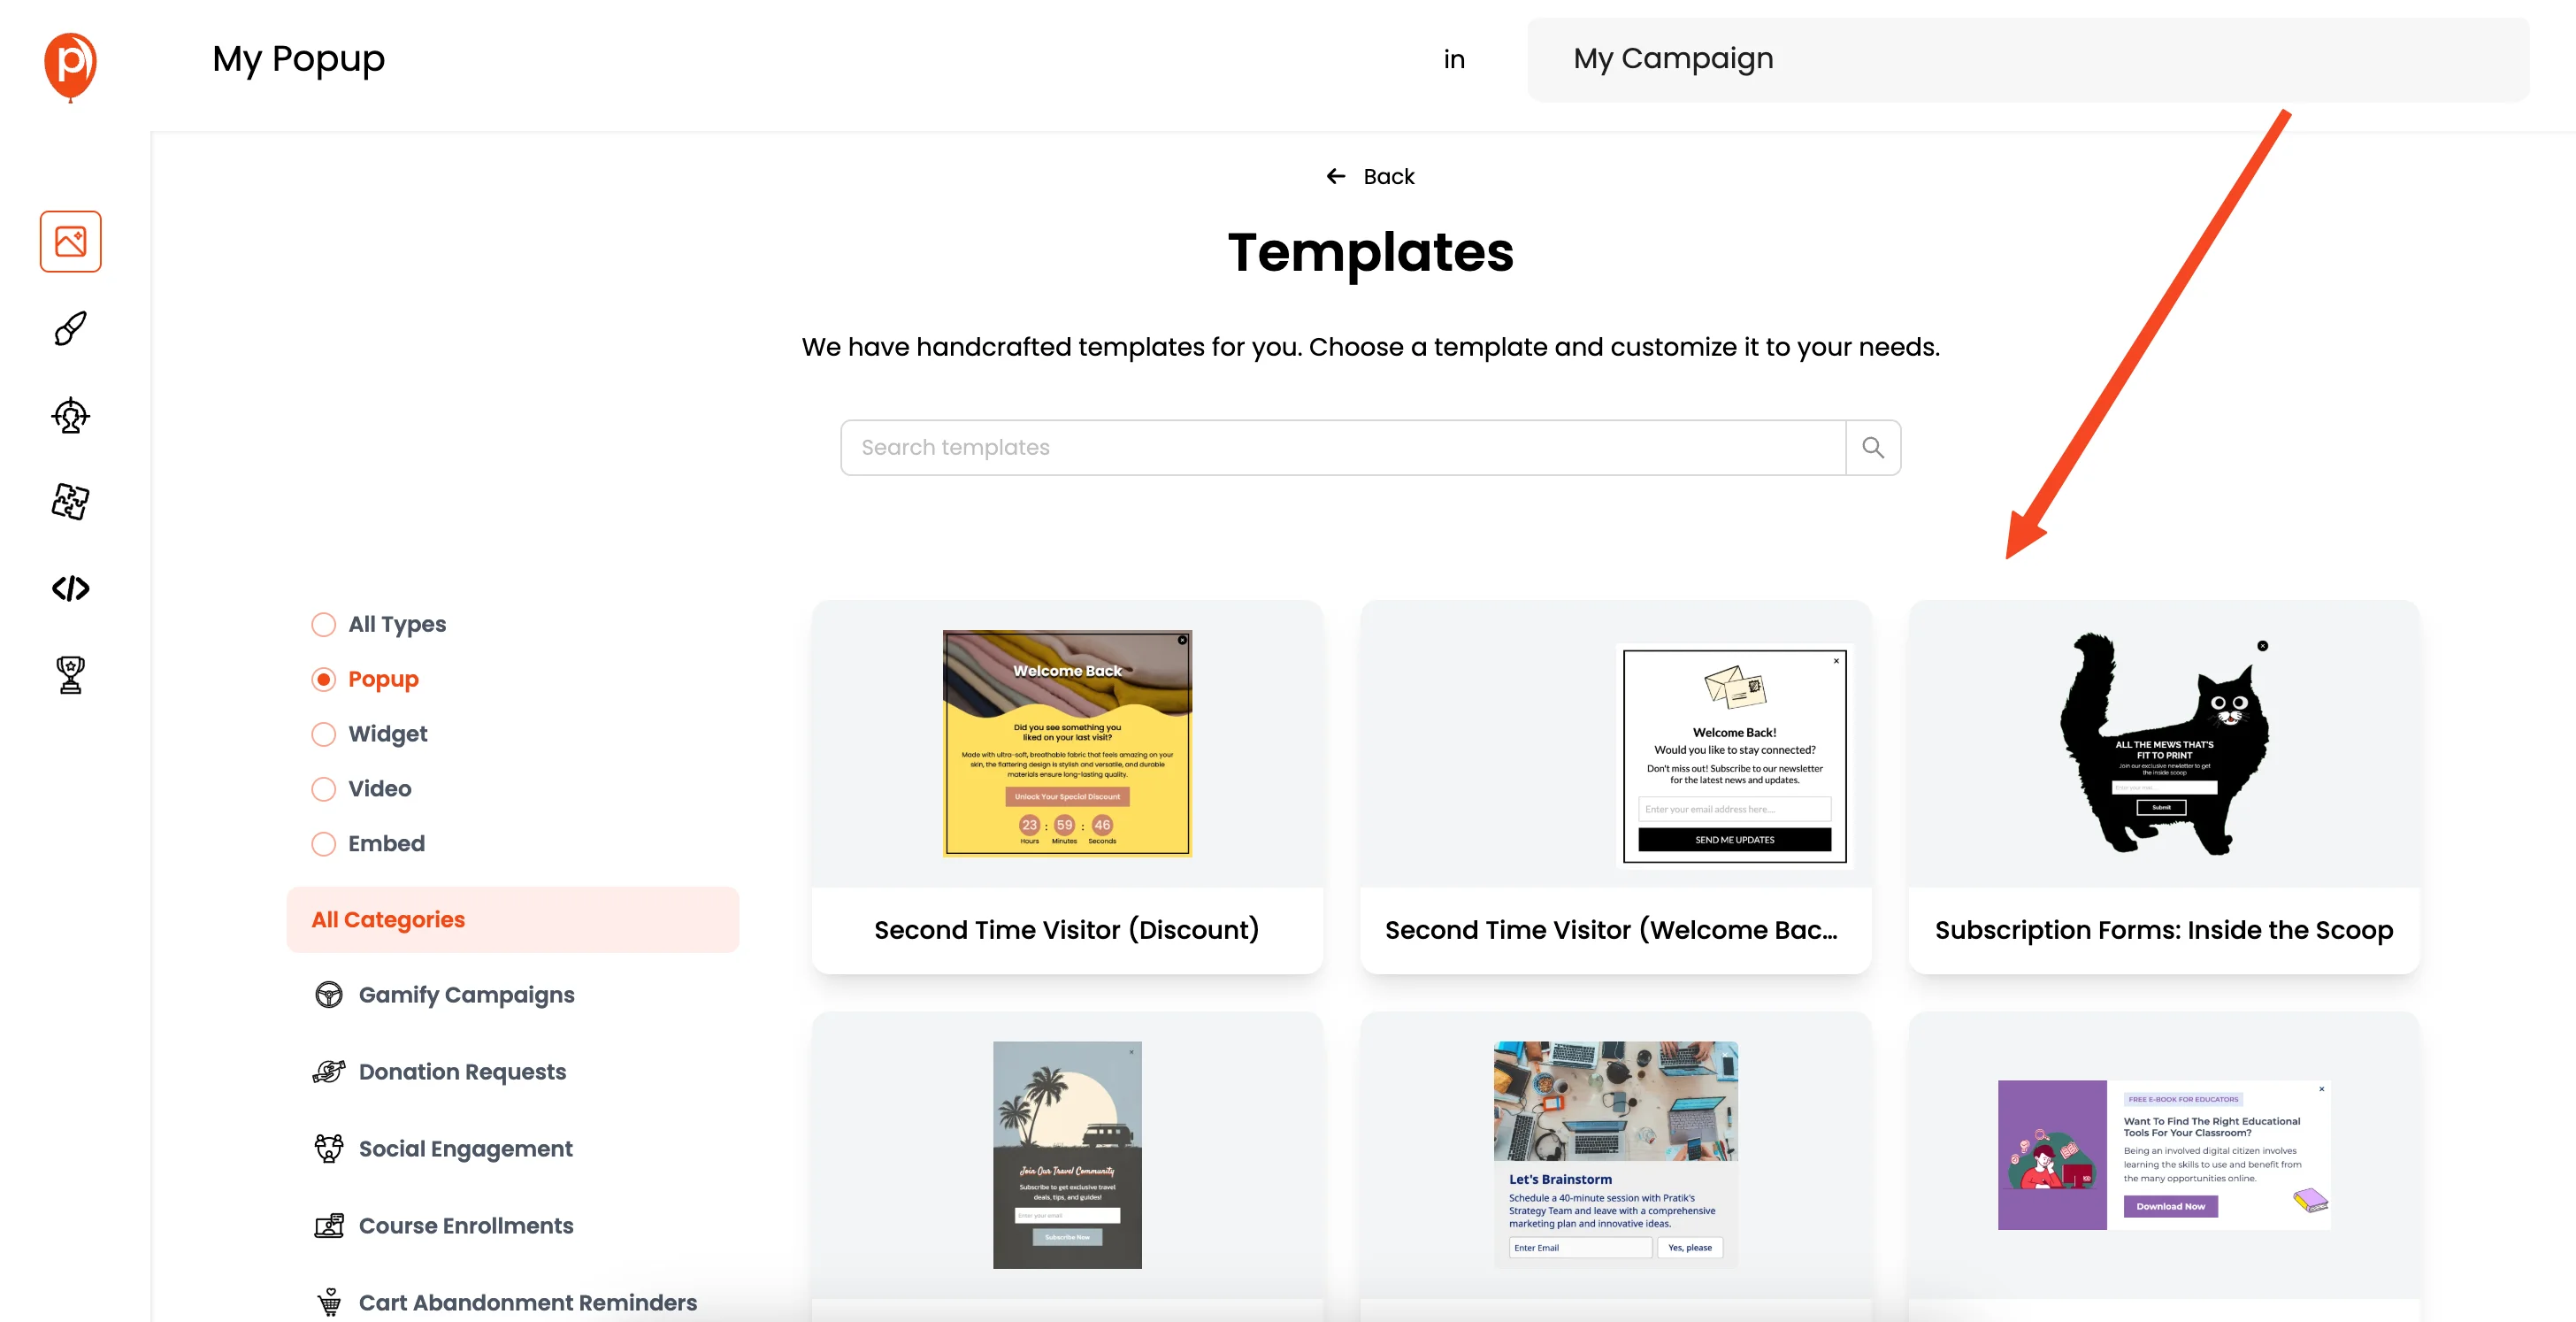
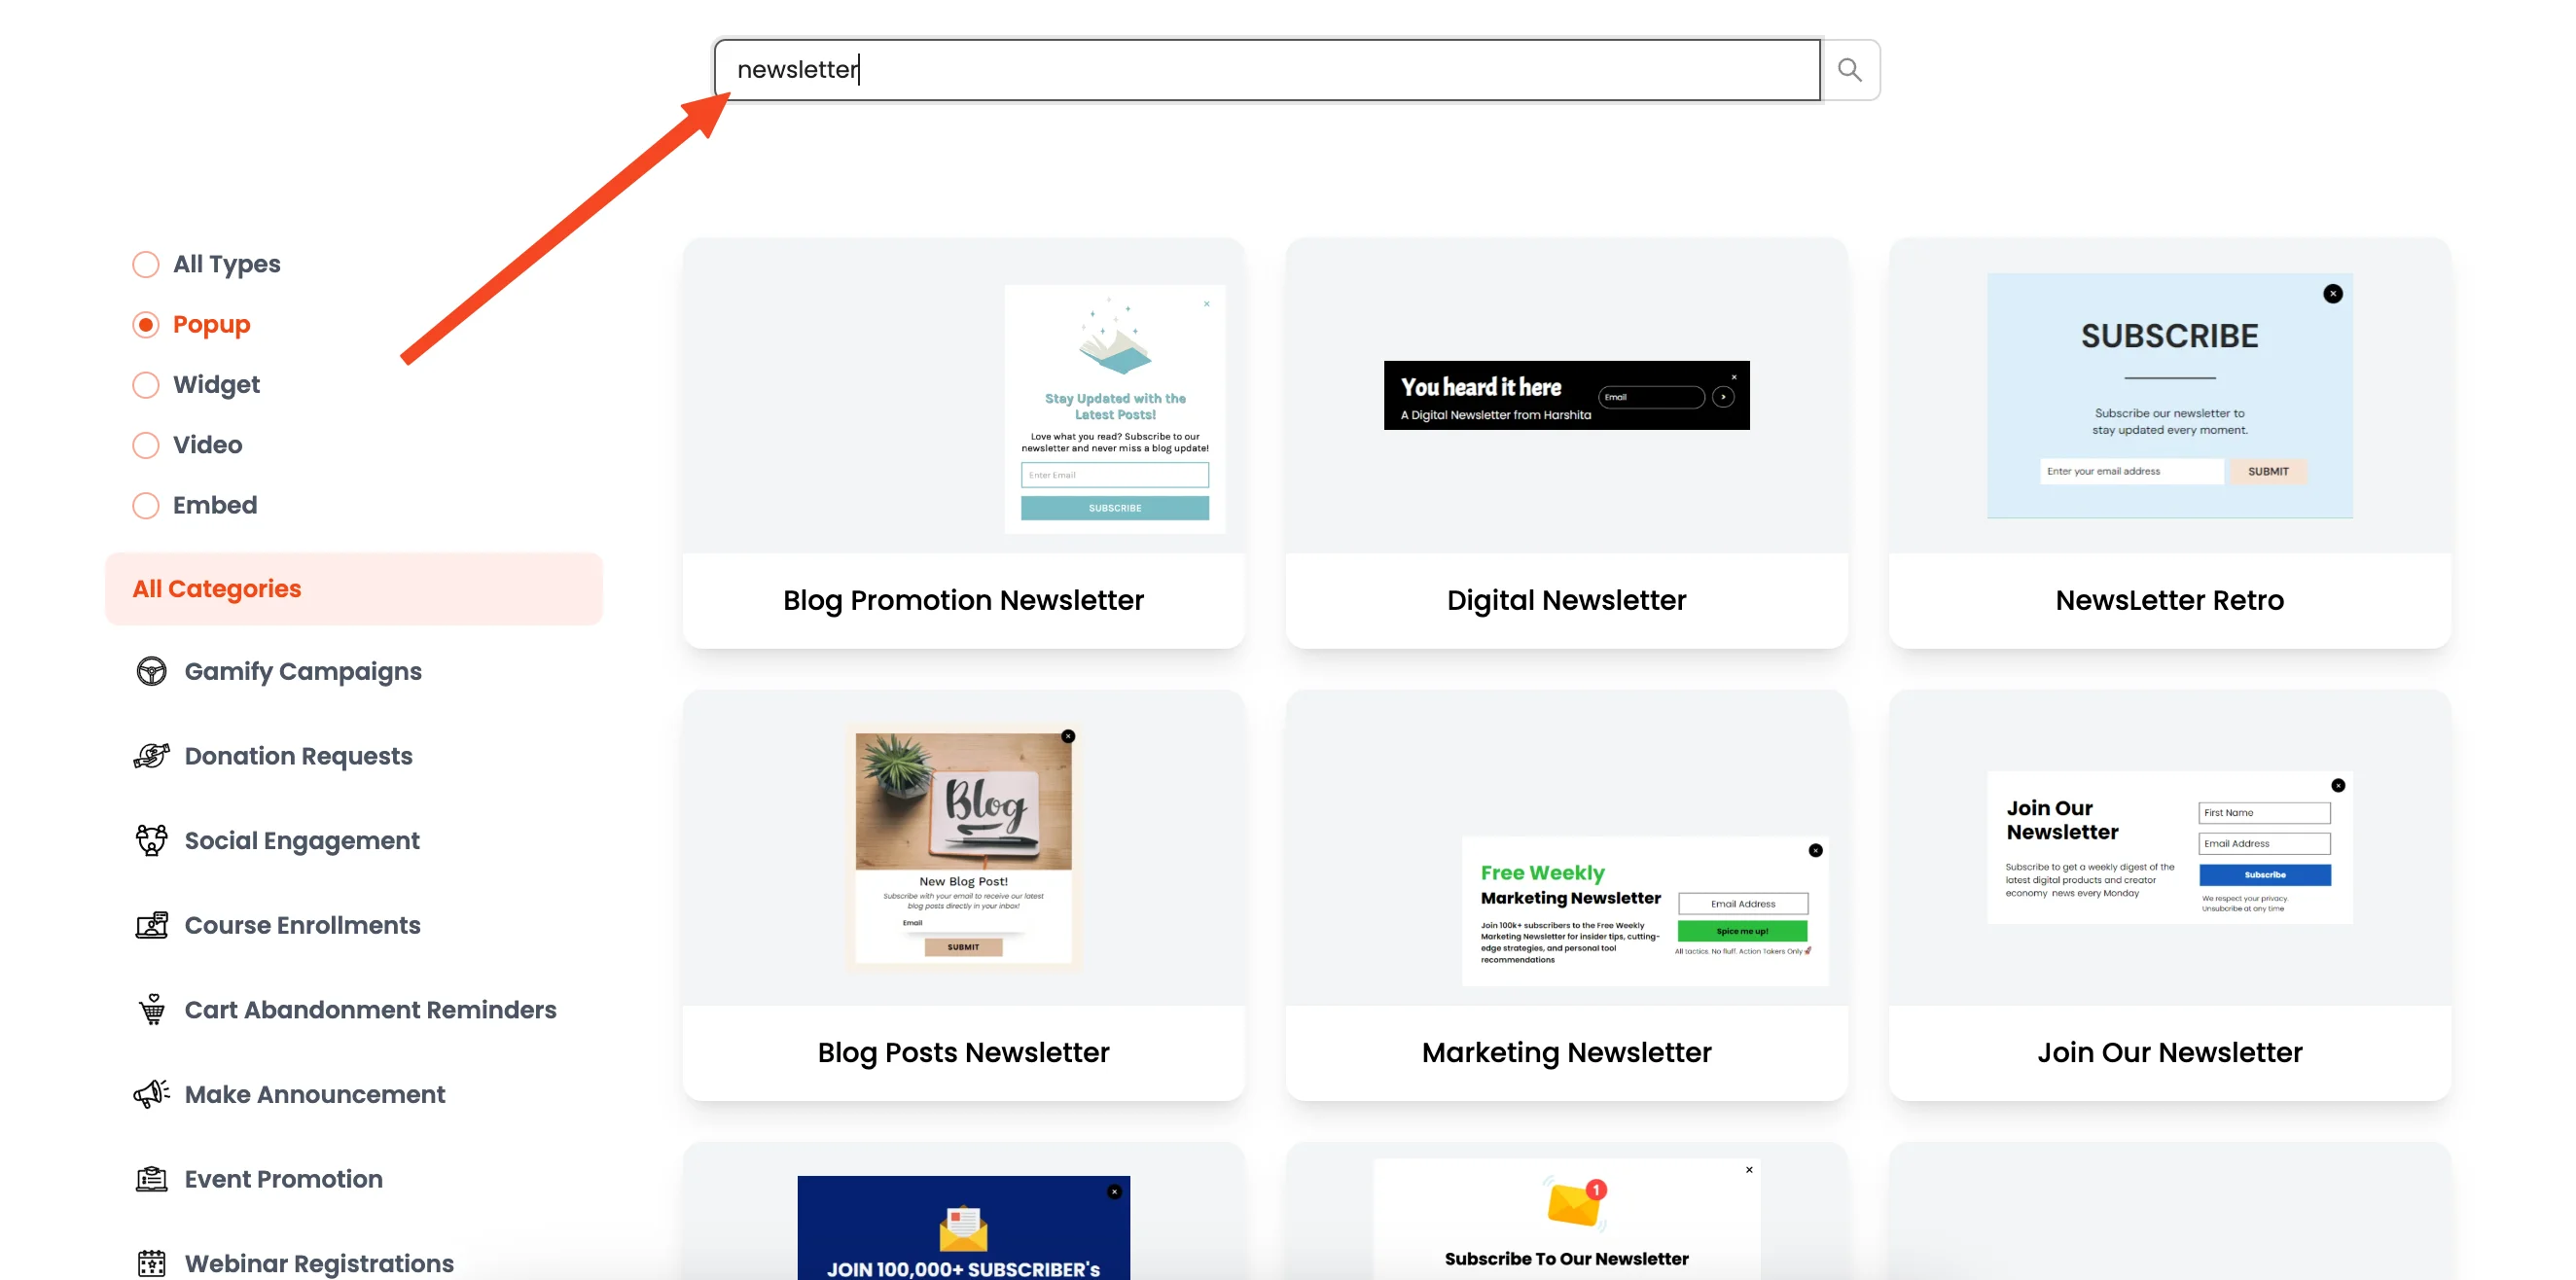
Search for "newsletter" in the template library. You'll find many newsletter templates. Pick one that fits your website's style and design.
5. Customize Your Popup
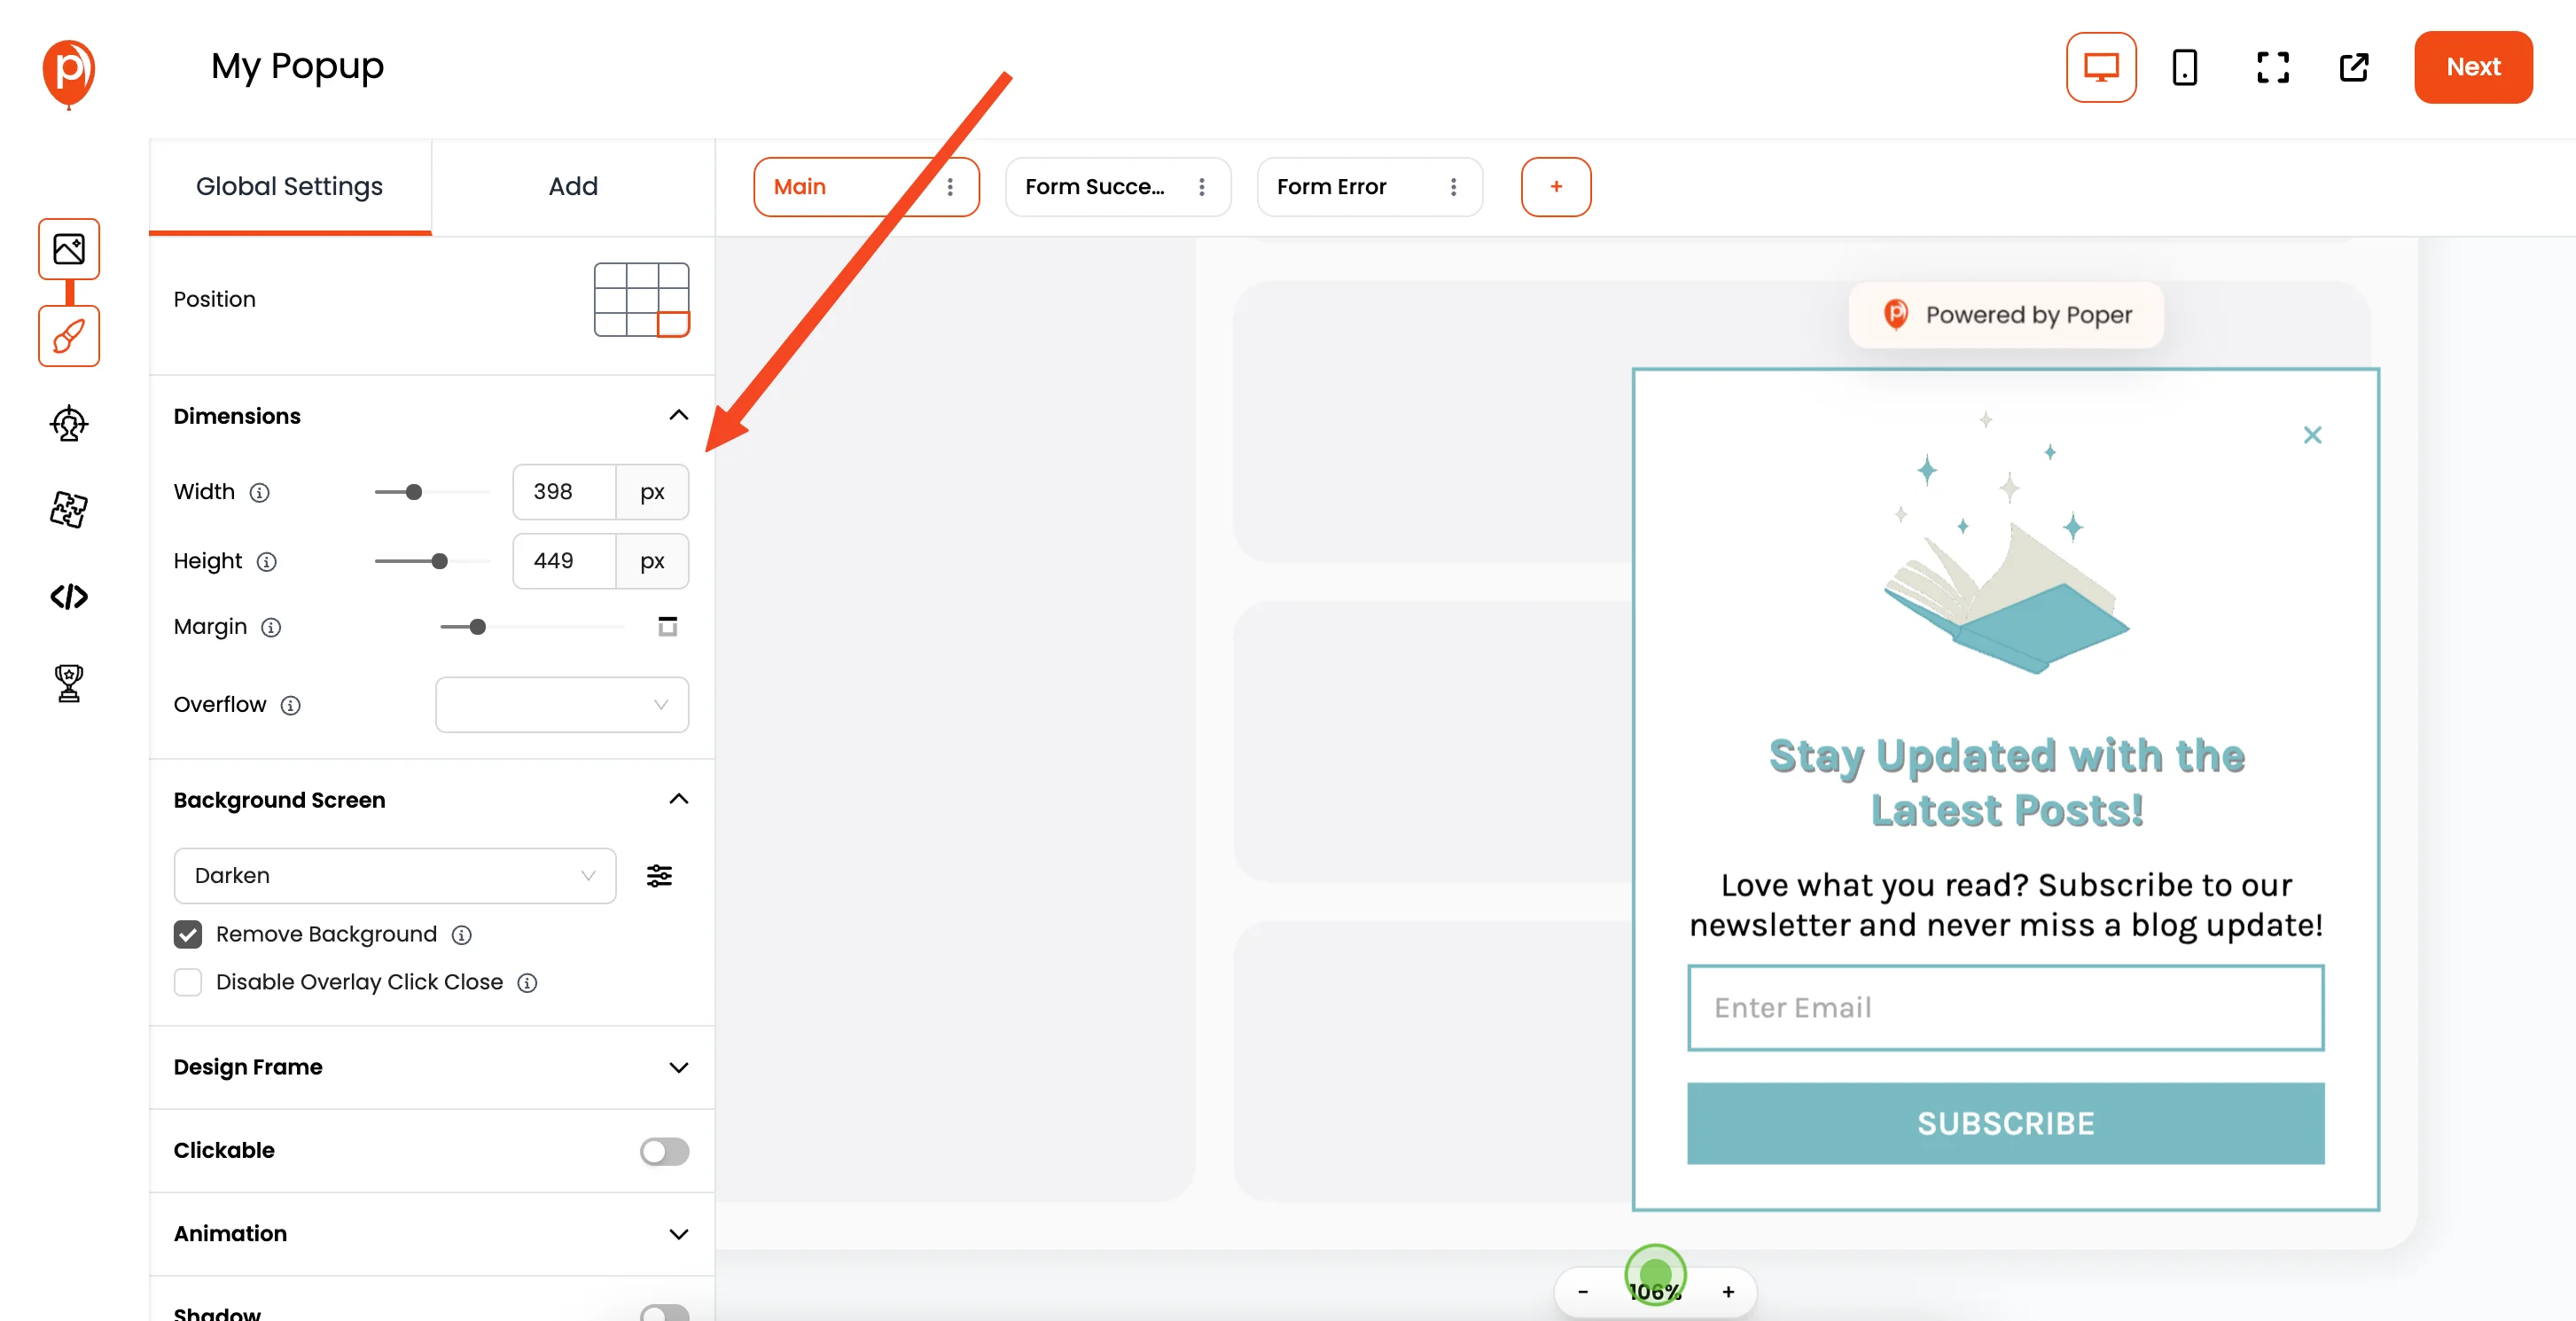
After selecting a template, you'll enter the popup editor. Here, you can customize your popup’s fonts, colors, and more. When you are happy with your design, move on to the next step.
6. Set Display Conditions
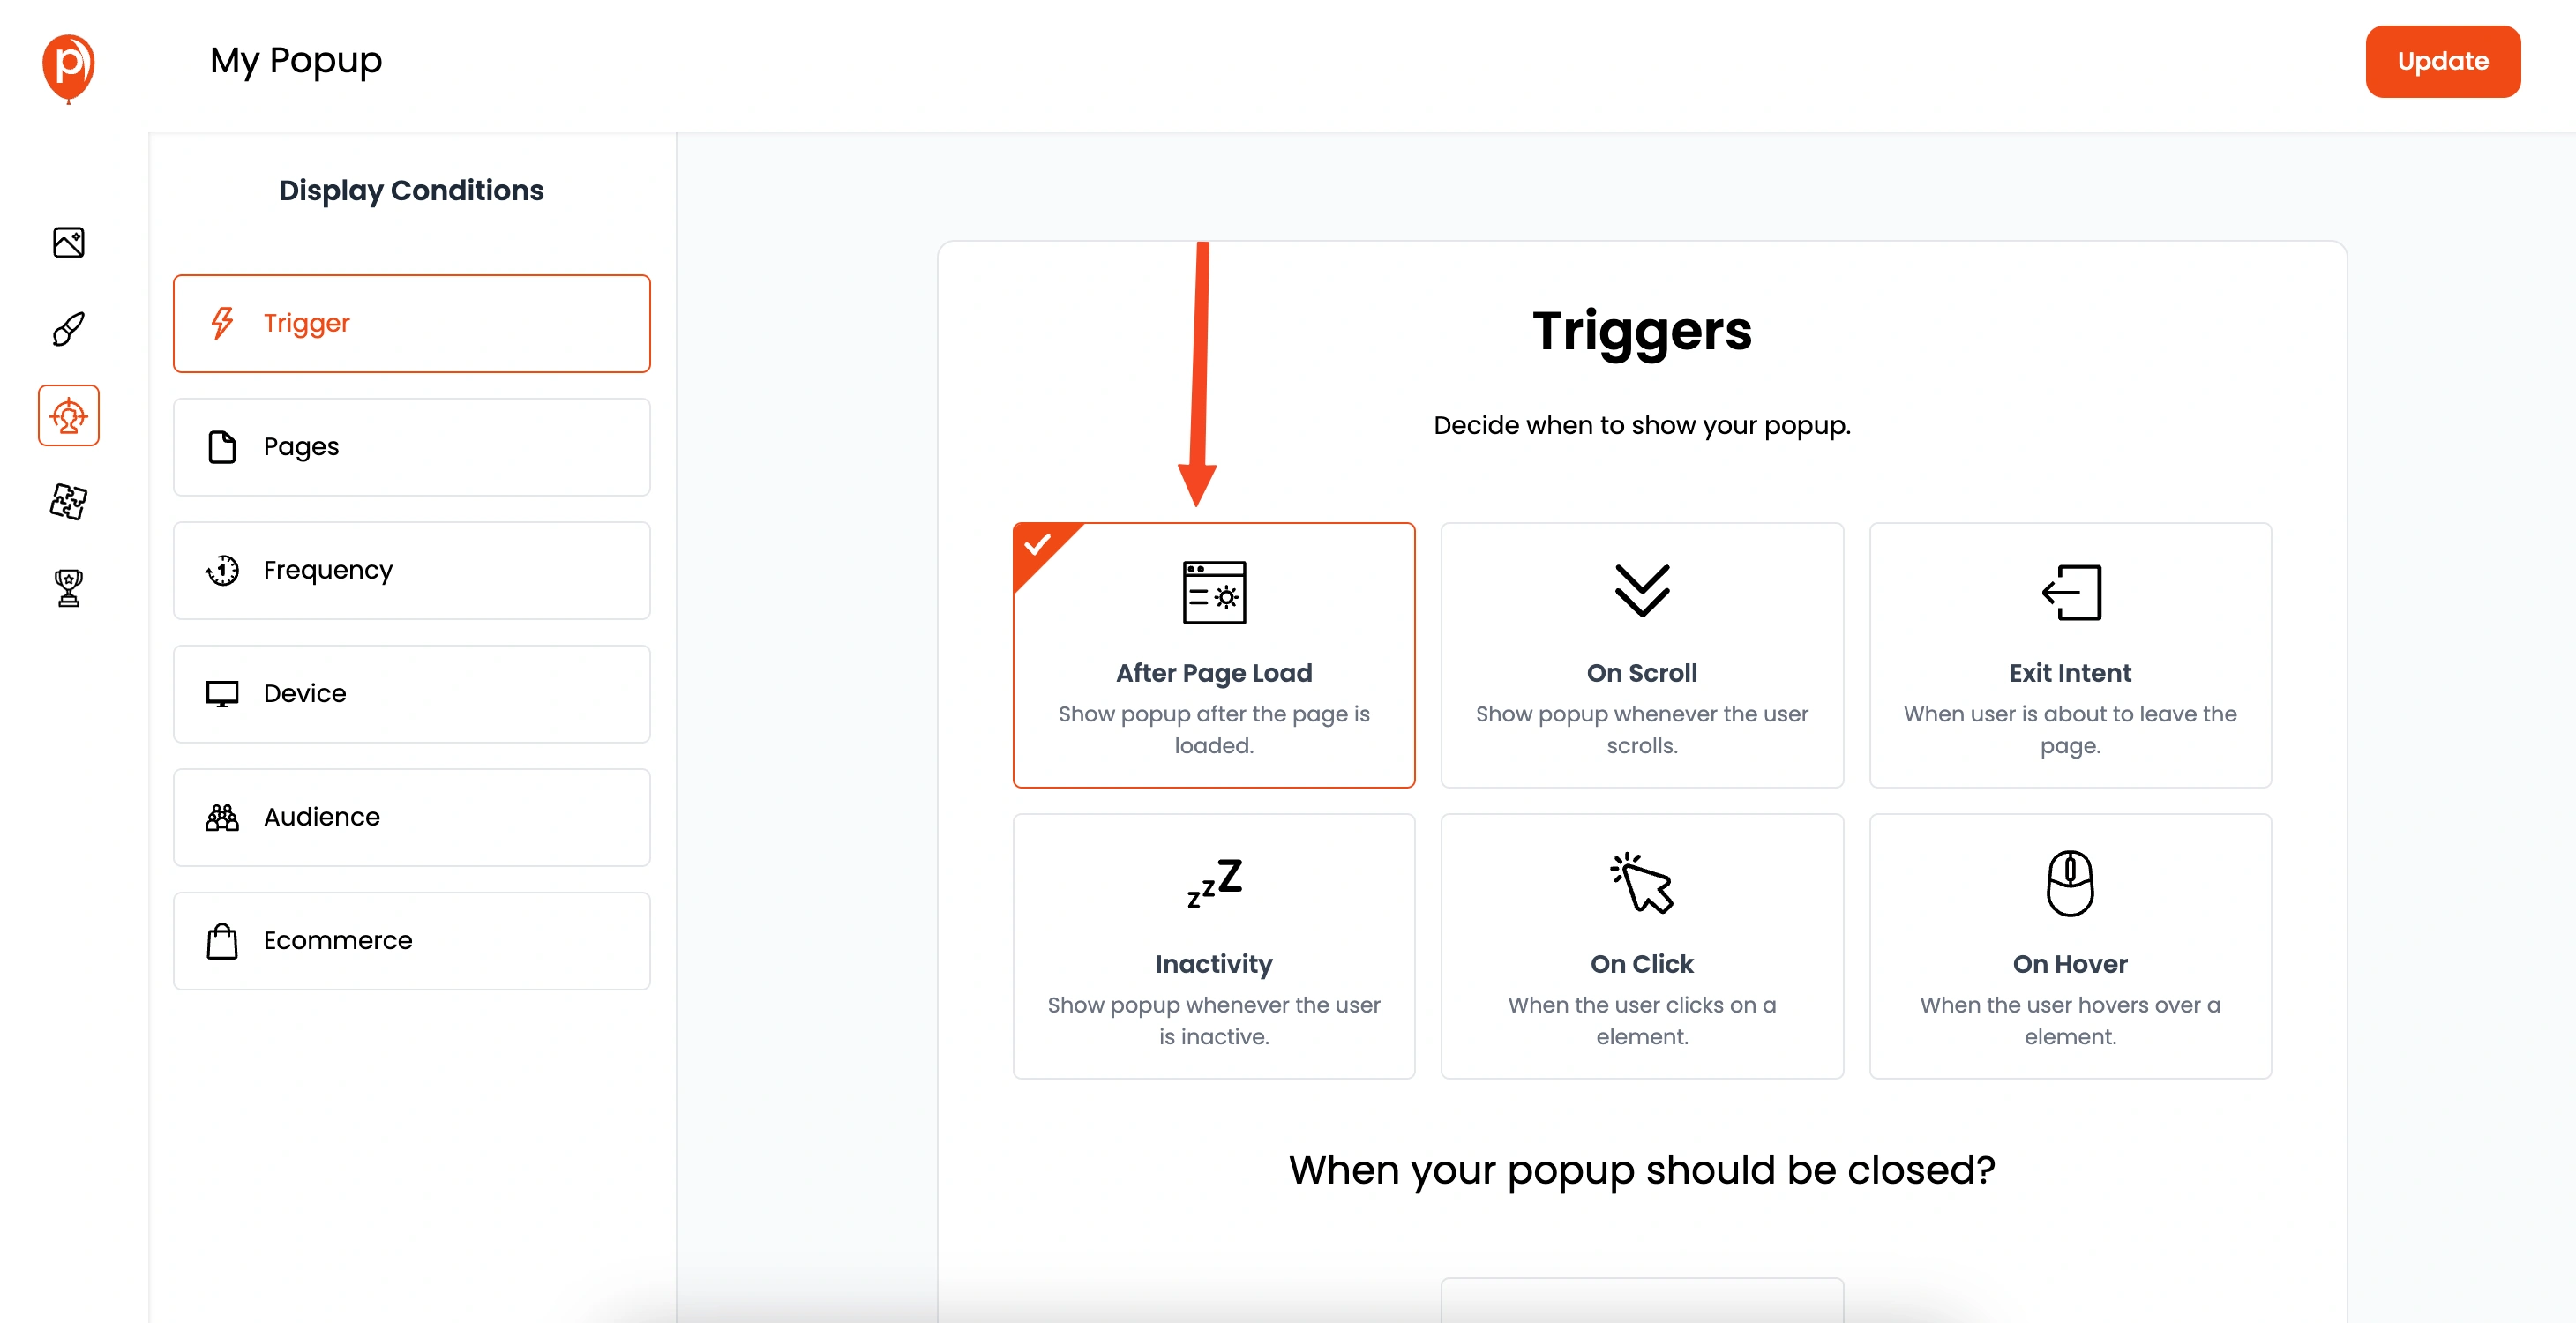
Click "Next" to go to the "Display Conditions" page. Here, you can target specific pages, user demographics, and more, ensuring your popups only show to the right audience.
7. Connect Integrations
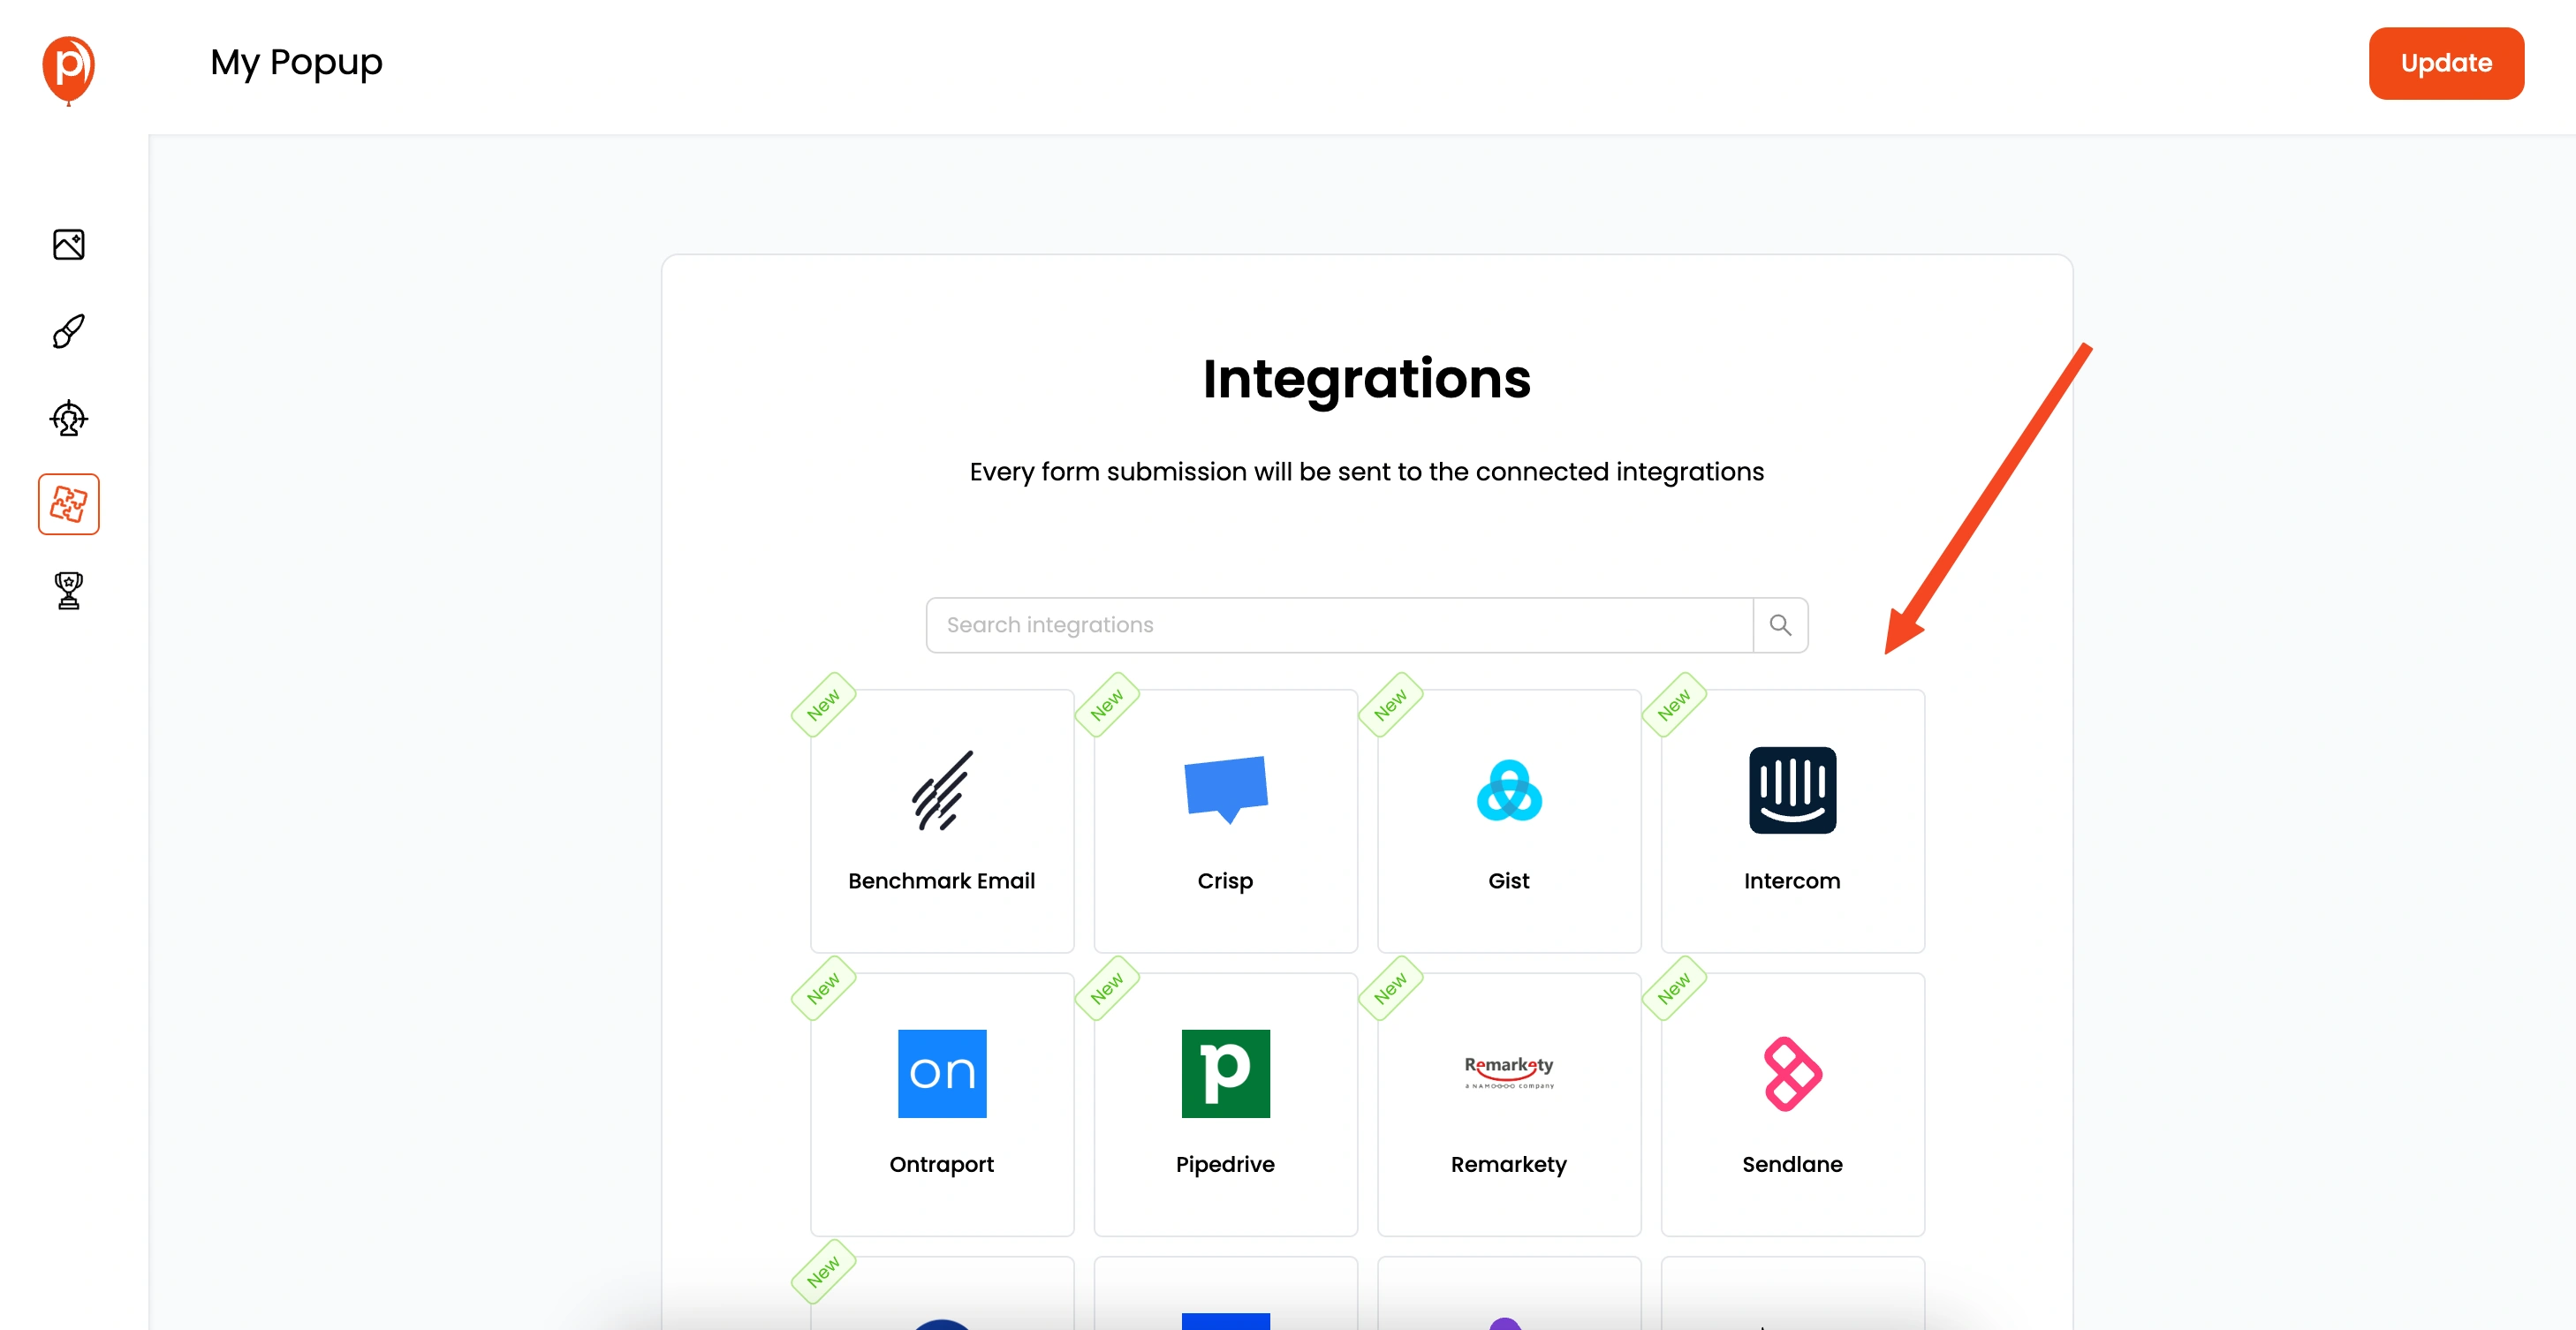
Click "Next" again to set up any integrations. This step allows you to connect your popup to email marketing tools, CRMs, and other services.
8. Connect Poper to WordPress
Now, let's connect Poper to your WordPress website. This is where you will be using Poper without a plugin.
9. Copy the Poper Embed Code
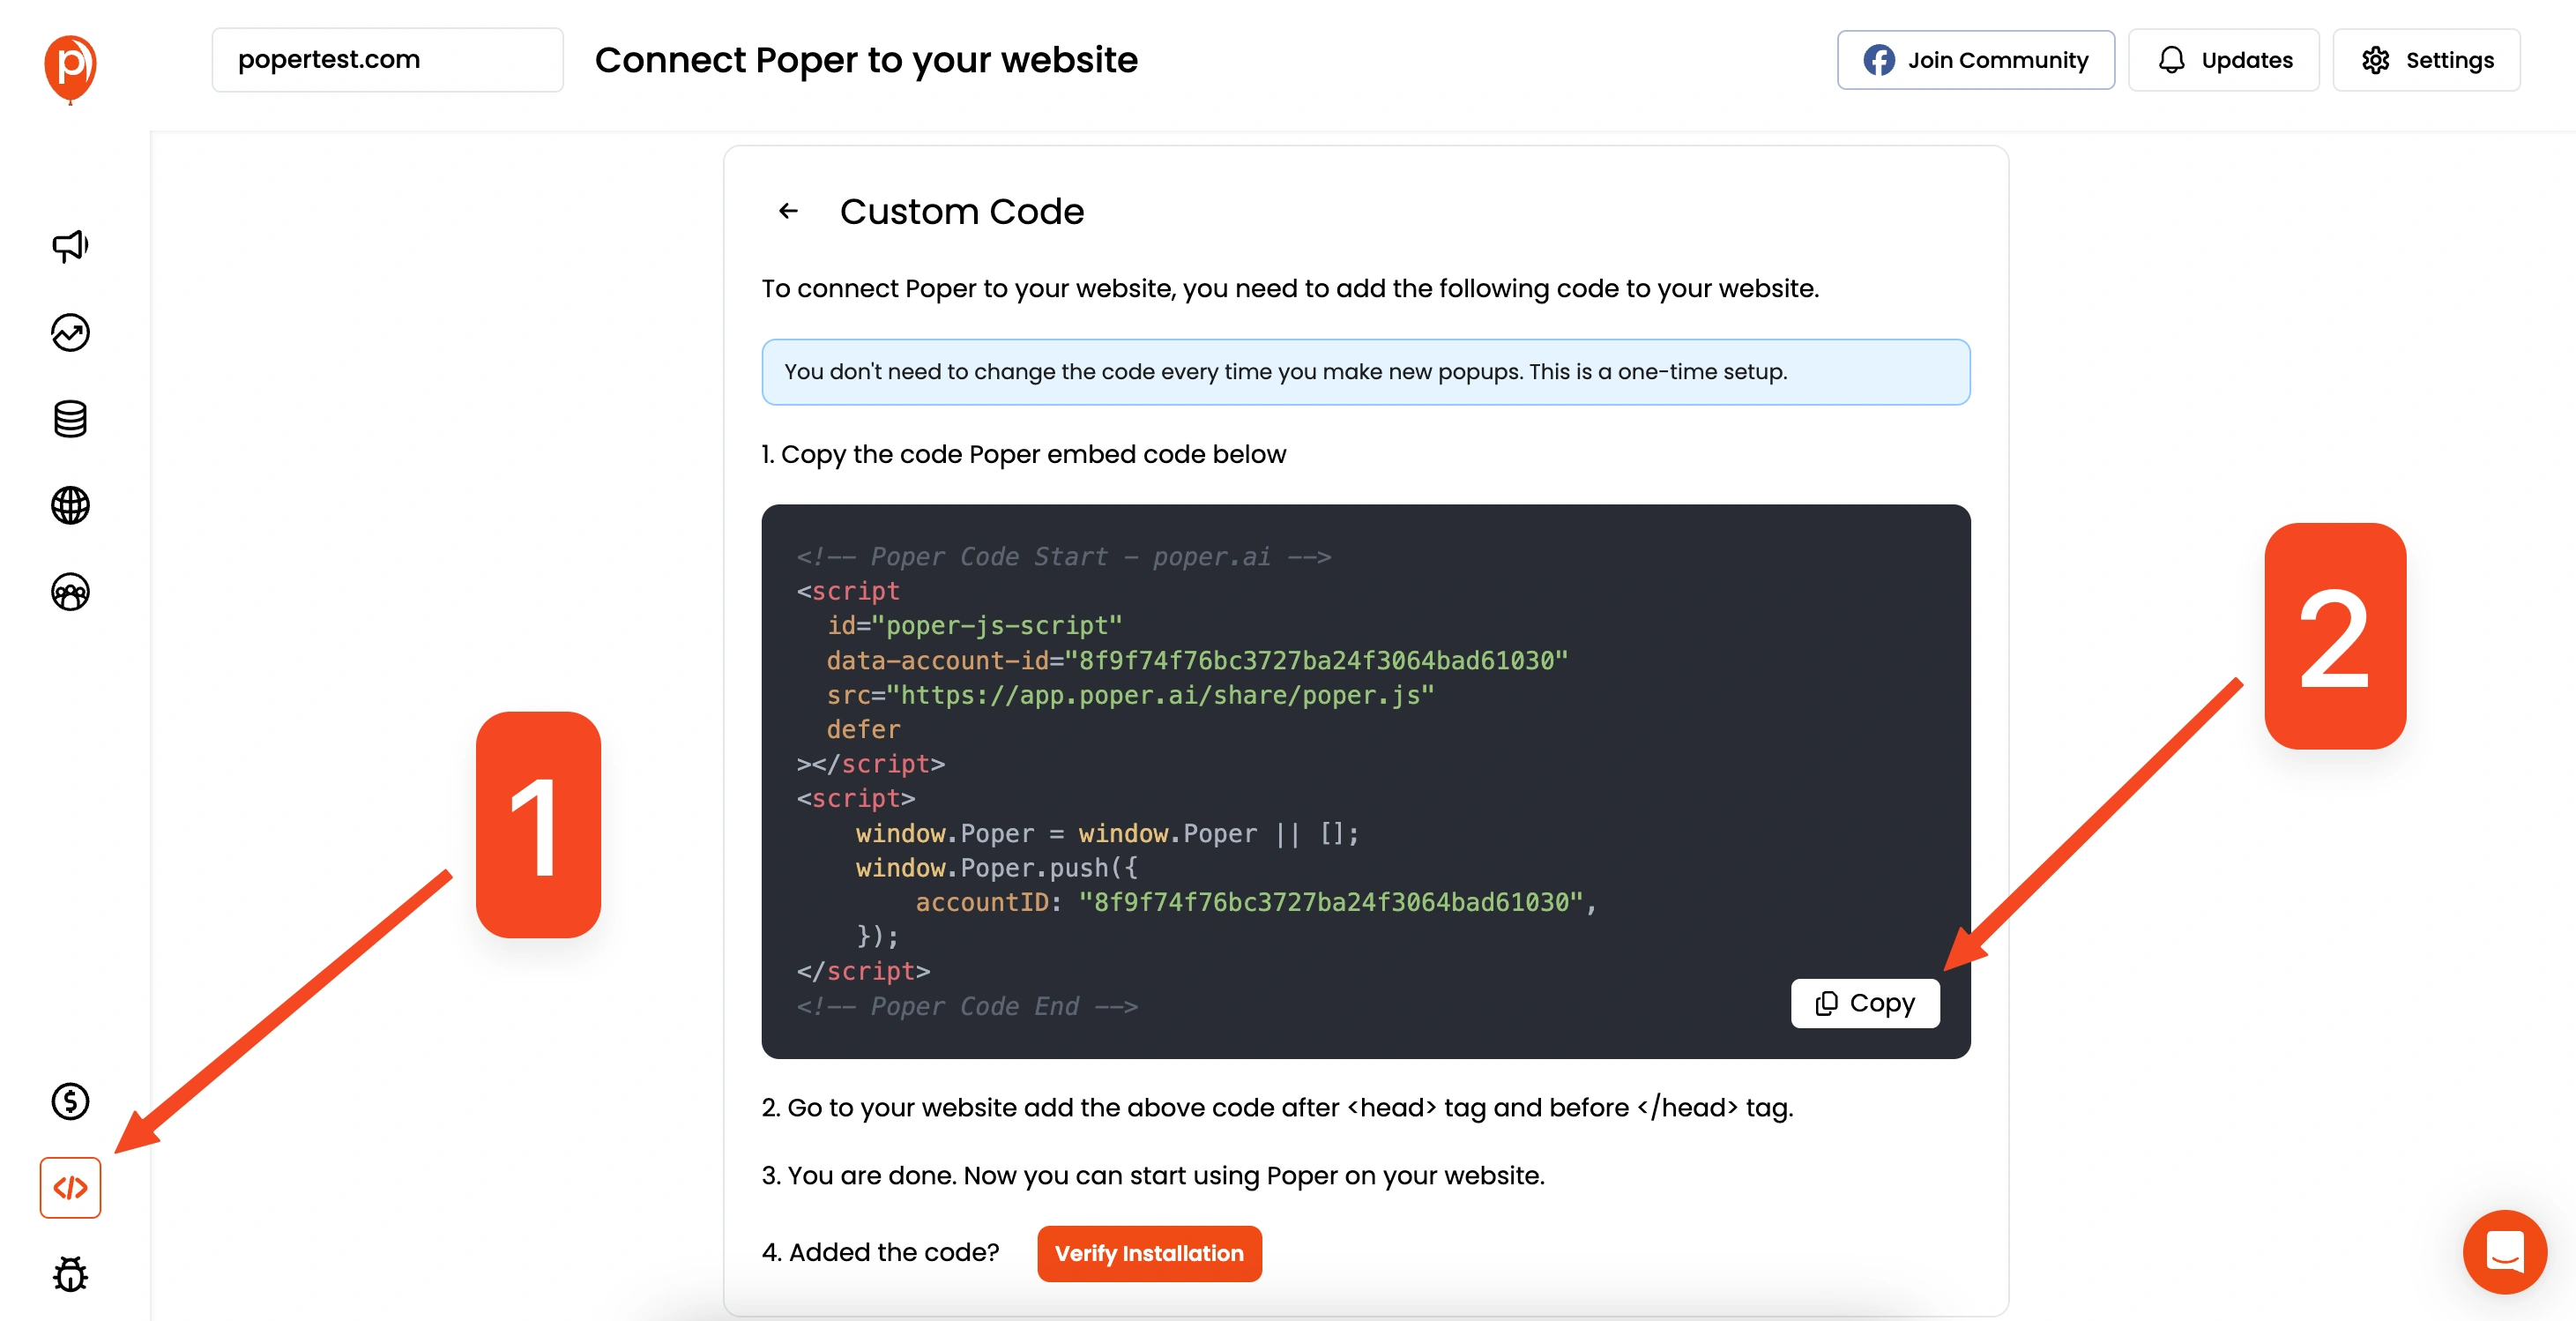
Go to your Poper dashboard, then "Code" in the left navigation bar, and then "Custom Code". Copy the provided embed code.
10. Add the Code to Your WordPress Theme
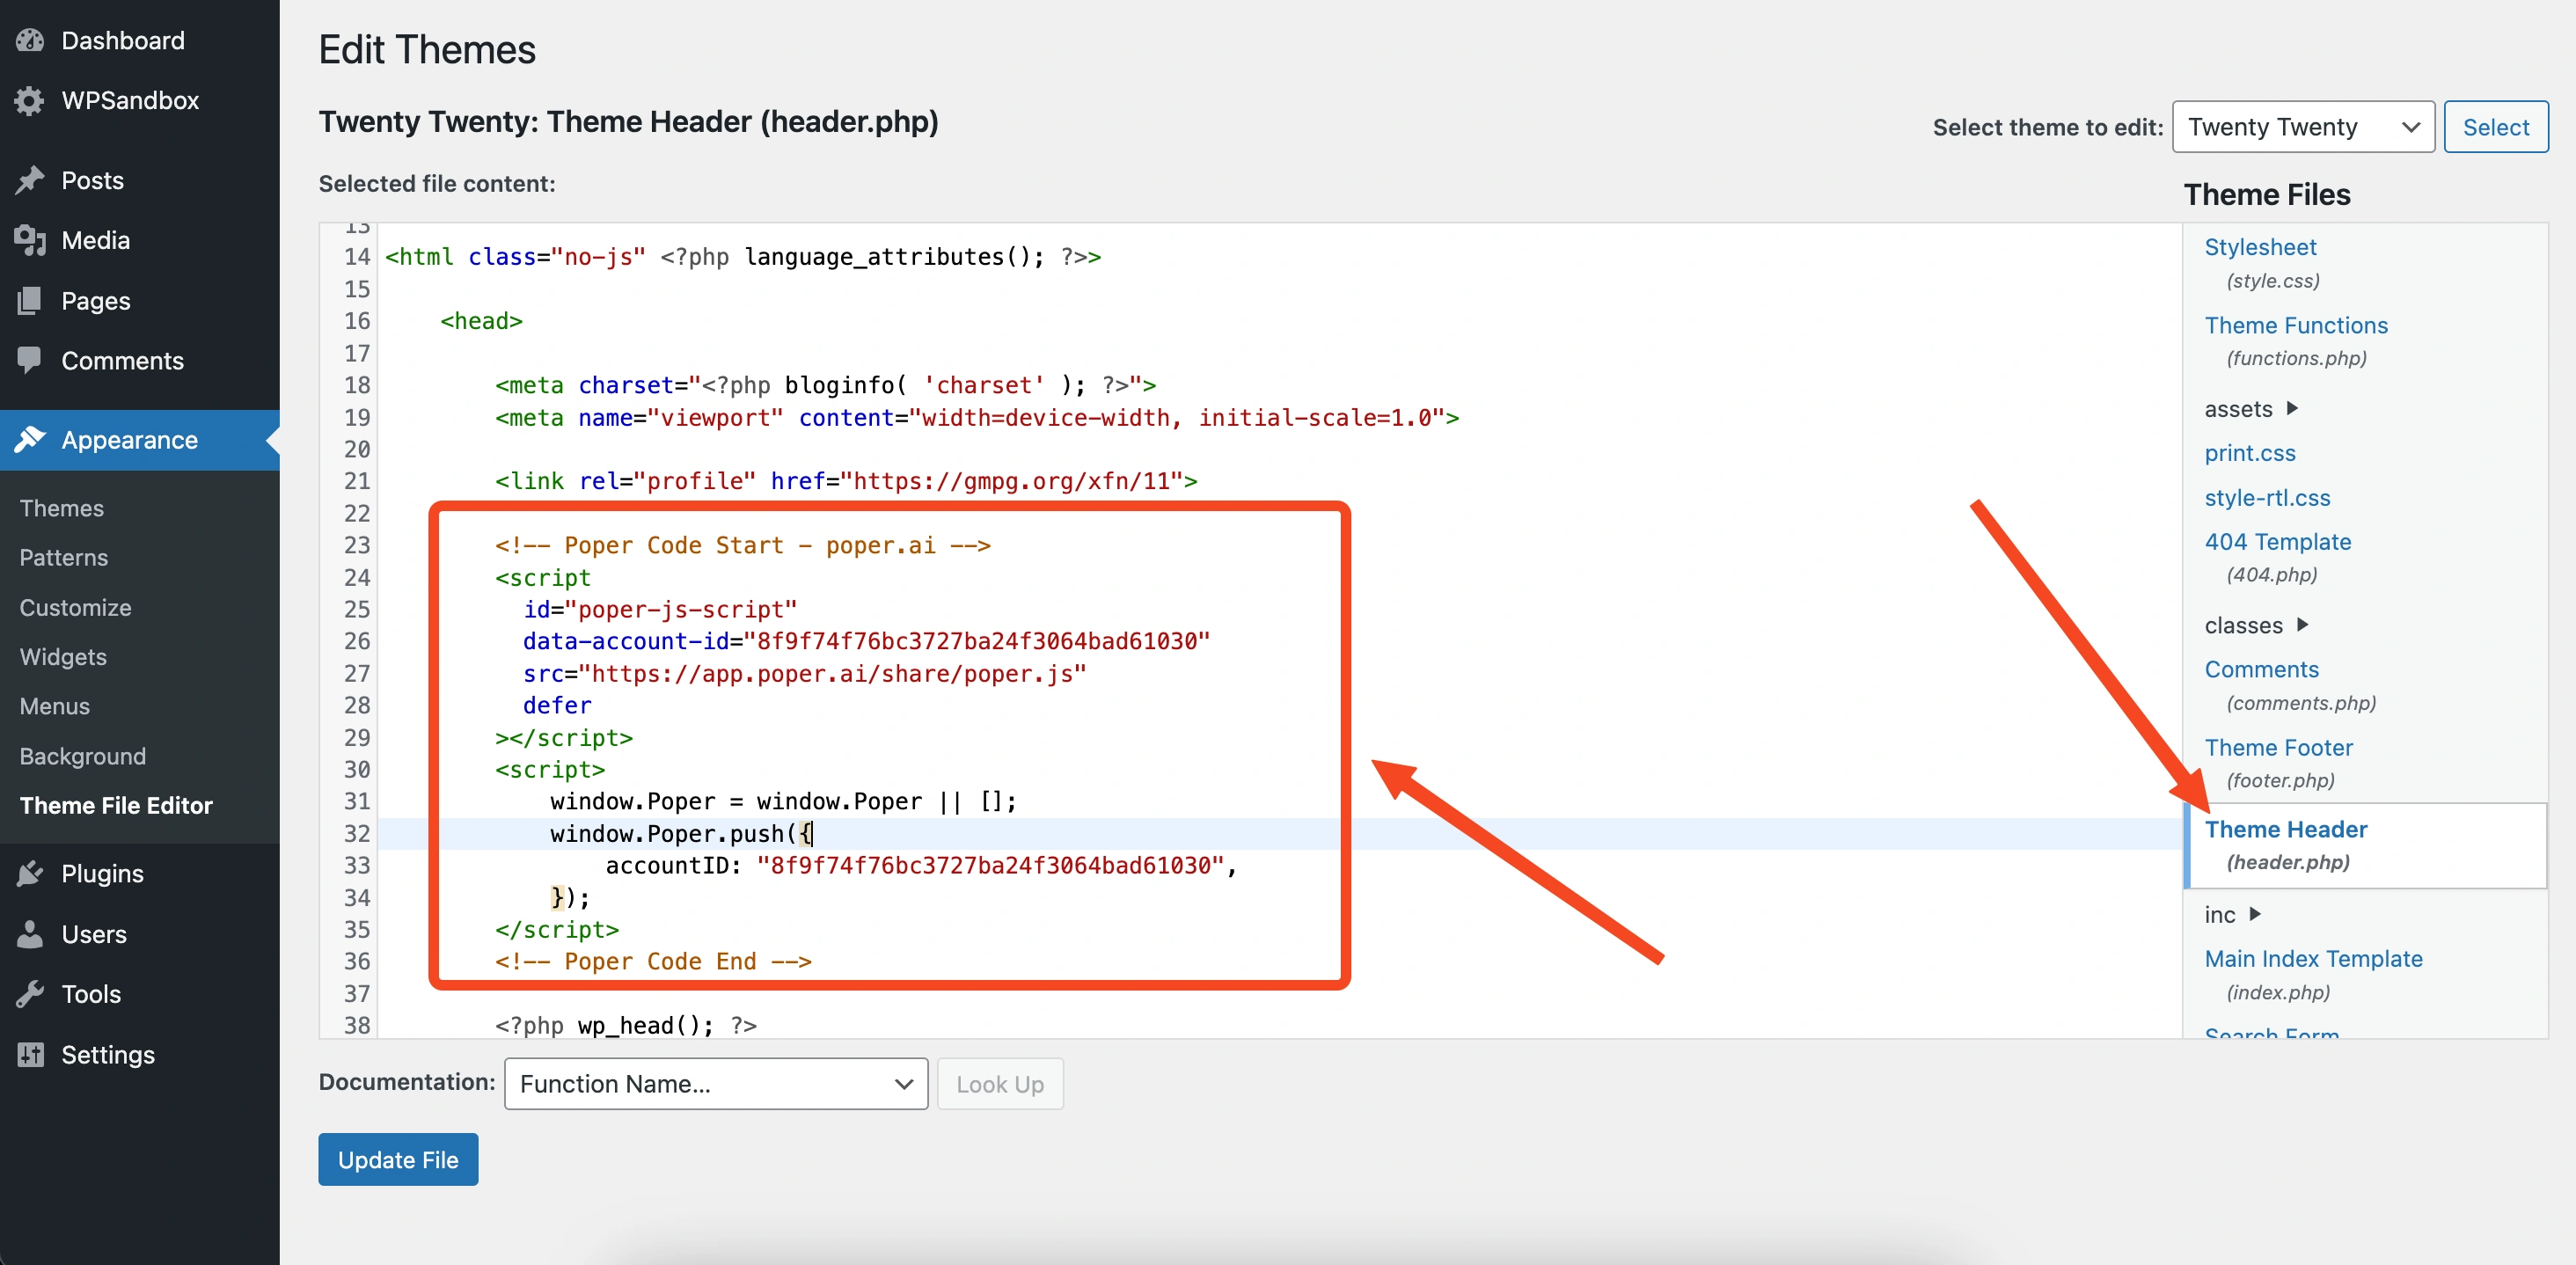
In your WordPress dashboard, go to "Tools" and then "Theme File Editor." Find header.html or header.php. (This might be slightly different depending on your theme). Paste the embed code you copied from Poper and click "Update File."
That’s it! Your popups from Poper will now appear on your WordPress website without any plugins.
Using Custom Code
Now, let's explore how to create a simple exit-intent popup using custom code. This method is more hands-on, but gives you full control over your popup.
1. Add Code to functions.php
First, copy the following code and paste it into your WordPress dashboard under "Appearance" > "Theme File Editor" > functions.php.
// Add scripts and styles
function exit_popup_enqueue_scripts() {
// Ensure jQuery is loaded
wp_enqueue_script('jquery');
}
add_action('wp_enqueue_scripts', 'exit_popup_enqueue_scripts');
// Register Ajax handler
function handle_exit_popup_submission() {
// Verify nonce for security
check_ajax_referer('exit_popup_nonce', 'nonce');
$name = sanitize_text_field($_POST['name']);
$email = sanitize_email($_POST['email']);
// Get WordPress upload directory
$upload_dir = wp_upload_dir();
$csv_dir = $upload_dir['basedir'] . '/popup-submissions/';
// Create directory if it doesn't exist
if (!file_exists($csv_dir)) {
wp_mkdir_p($csv_dir);
}
$csv_file = $csv_dir . 'submissions.csv';
$data = array(
array(
date('Y-m-d H:i:s'),
$name,
$email
)
);
$fp = fopen($csv_file, 'a');
foreach ($data as $row) {
fputcsv($fp, $row);
}
fclose($fp);
wp_send_json_success('Submission saved successfully');
wp_die();
}
add_action('wp_ajax_exit_popup_submission', 'handle_exit_popup_submission');
add_action('wp_ajax_nopriv_exit_popup_submission', 'handle_exit_popup_submission');
// Add popup HTML, CSS, and JavaScript to footer
function add_exit_popup_html() {
$nonce = wp_create_nonce('exit_popup_nonce');
?>
<div id="exit-popup" class="exit-popup">
<div class="exit-popup-content">
<span class="close-popup">×</span>
<h2>Wait! Before you go...</h2>
<p>Subscribe to our newsletter for exclusive updates!</p>
<form id="exit-popup-form">
<input type="hidden" id="exit_popup_nonce" value="<?php echo $nonce; ?>">
<input type="text" name="name" placeholder="Your Name" required>
<input type="email" name="email" placeholder="Your Email" required>
<button type="submit">Subscribe</button>
</form>
</div>
</div>
<style>
.exit-popup {
display: none;
position: fixed;
top: 0;
left: 0;
width: 100%;
height: 100%;
background-color: rgba(0, 0, 0, 0.5);
z-index: 9999;
}
.exit-popup-content {
position: absolute;
top: 50%;
left: 50%;
transform: translate(-50%, -50%);
background-color: white;
padding: 30px;
border-radius: 5px;
max-width: 500px;
width: 90%;
}
.close-popup {
position: absolute;
top: 10px;
right: 15px;
font-size: 24px;
cursor: pointer;
}
#exit-popup-form input {
width: 100%;
padding: 10px;
margin: 10px 0;
border: 1px solid #ddd;
border-radius: 4px;
}
#exit-popup-form button {
width: 100%;
padding: 12px;
background-color: #4CAF50;
color: white;
border: none;
border-radius: 4px;
cursor: pointer;
}
#exit-popup-form button:hover {
background-color: #45a049;
}
</style>
<script>
(function($) {
$(document).ready(function() {
let showPopup = true;
let mouseY = 0;
// Check if popup was shown in the last 7 days
if (localStorage.getItem('exitPopupShown')) {
const lastShown = new Date(parseInt(localStorage.getItem('exitPopupShown')));
const now = new Date();
const daysSinceShown = (now - lastShown) / (1000 * 60 * 60 * 24);
if (daysSinceShown < 7) {
showPopup = false;
}
}
// Track mouse movement
$(document).mousemove(function(e) {
mouseY = e.clientY;
});
// Detect exit intent
$(document).mouseleave(function(e) {
if (showPopup && mouseY < 100) {
$('#exit-popup').fadeIn();
localStorage.setItem('exitPopupShown', Date.now());
}
});
// Close popup
$('.close-popup').click(function() {
$('#exit-popup').fadeOut();
});
// Handle form submission
$('#exit-popup-form').submit(function(e) {
e.preventDefault();
$.ajax({
url: '<?php echo admin_url('admin-ajax.php'); ?>',
type: 'POST',
data: {
action: 'exit_popup_submission',
nonce: $('#exit_popup_nonce').val(),
name: $('input[name="name"]').val(),
email: $('input[name="email"]').val()
},
success: function(response) {
if (response.success) {
$('#exit-popup-form').html('<p>Thank you for subscribing!</p>');
setTimeout(function() {
$('#exit-popup').fadeOut();
}, 2000);
}
}
});
});
});
})(jQuery);
</script>
<?php
}
add_action('wp_footer', 'add_exit_popup_html');This code adds the necessary HTML, CSS, and JavaScript to your site. It includes an exit-intent trigger, form submission handling, and basic styling.
2. Explanation of the Code
Let's break down what this code does:
Enqueue jQuery: Ensures jQuery is loaded, which the popup script depends on.
Ajax Handler: Manages form submissions, saving them to a CSV file in your uploads directory.
Nonce Verification: Adds a layer of security to prevent unauthorized form submissions.
Popup HTML: Sets up the basic structure of the popup, including form and close button.
Popup CSS: Provides minimal styling to make the popup look presentable.
Popup JavaScript:
- Manages the display of the popup on exit intent.
- Checks if the popup was shown within the last 7 days to avoid annoying visitors.
- Handles the popup close event.
- Submits the form using AJAX without refreshing the page.
Manages the display of the popup on exit intent.
Checks if the popup was shown within the last 7 days to avoid annoying visitors.
Handles the popup close event.
Submits the form using AJAX without refreshing the page.
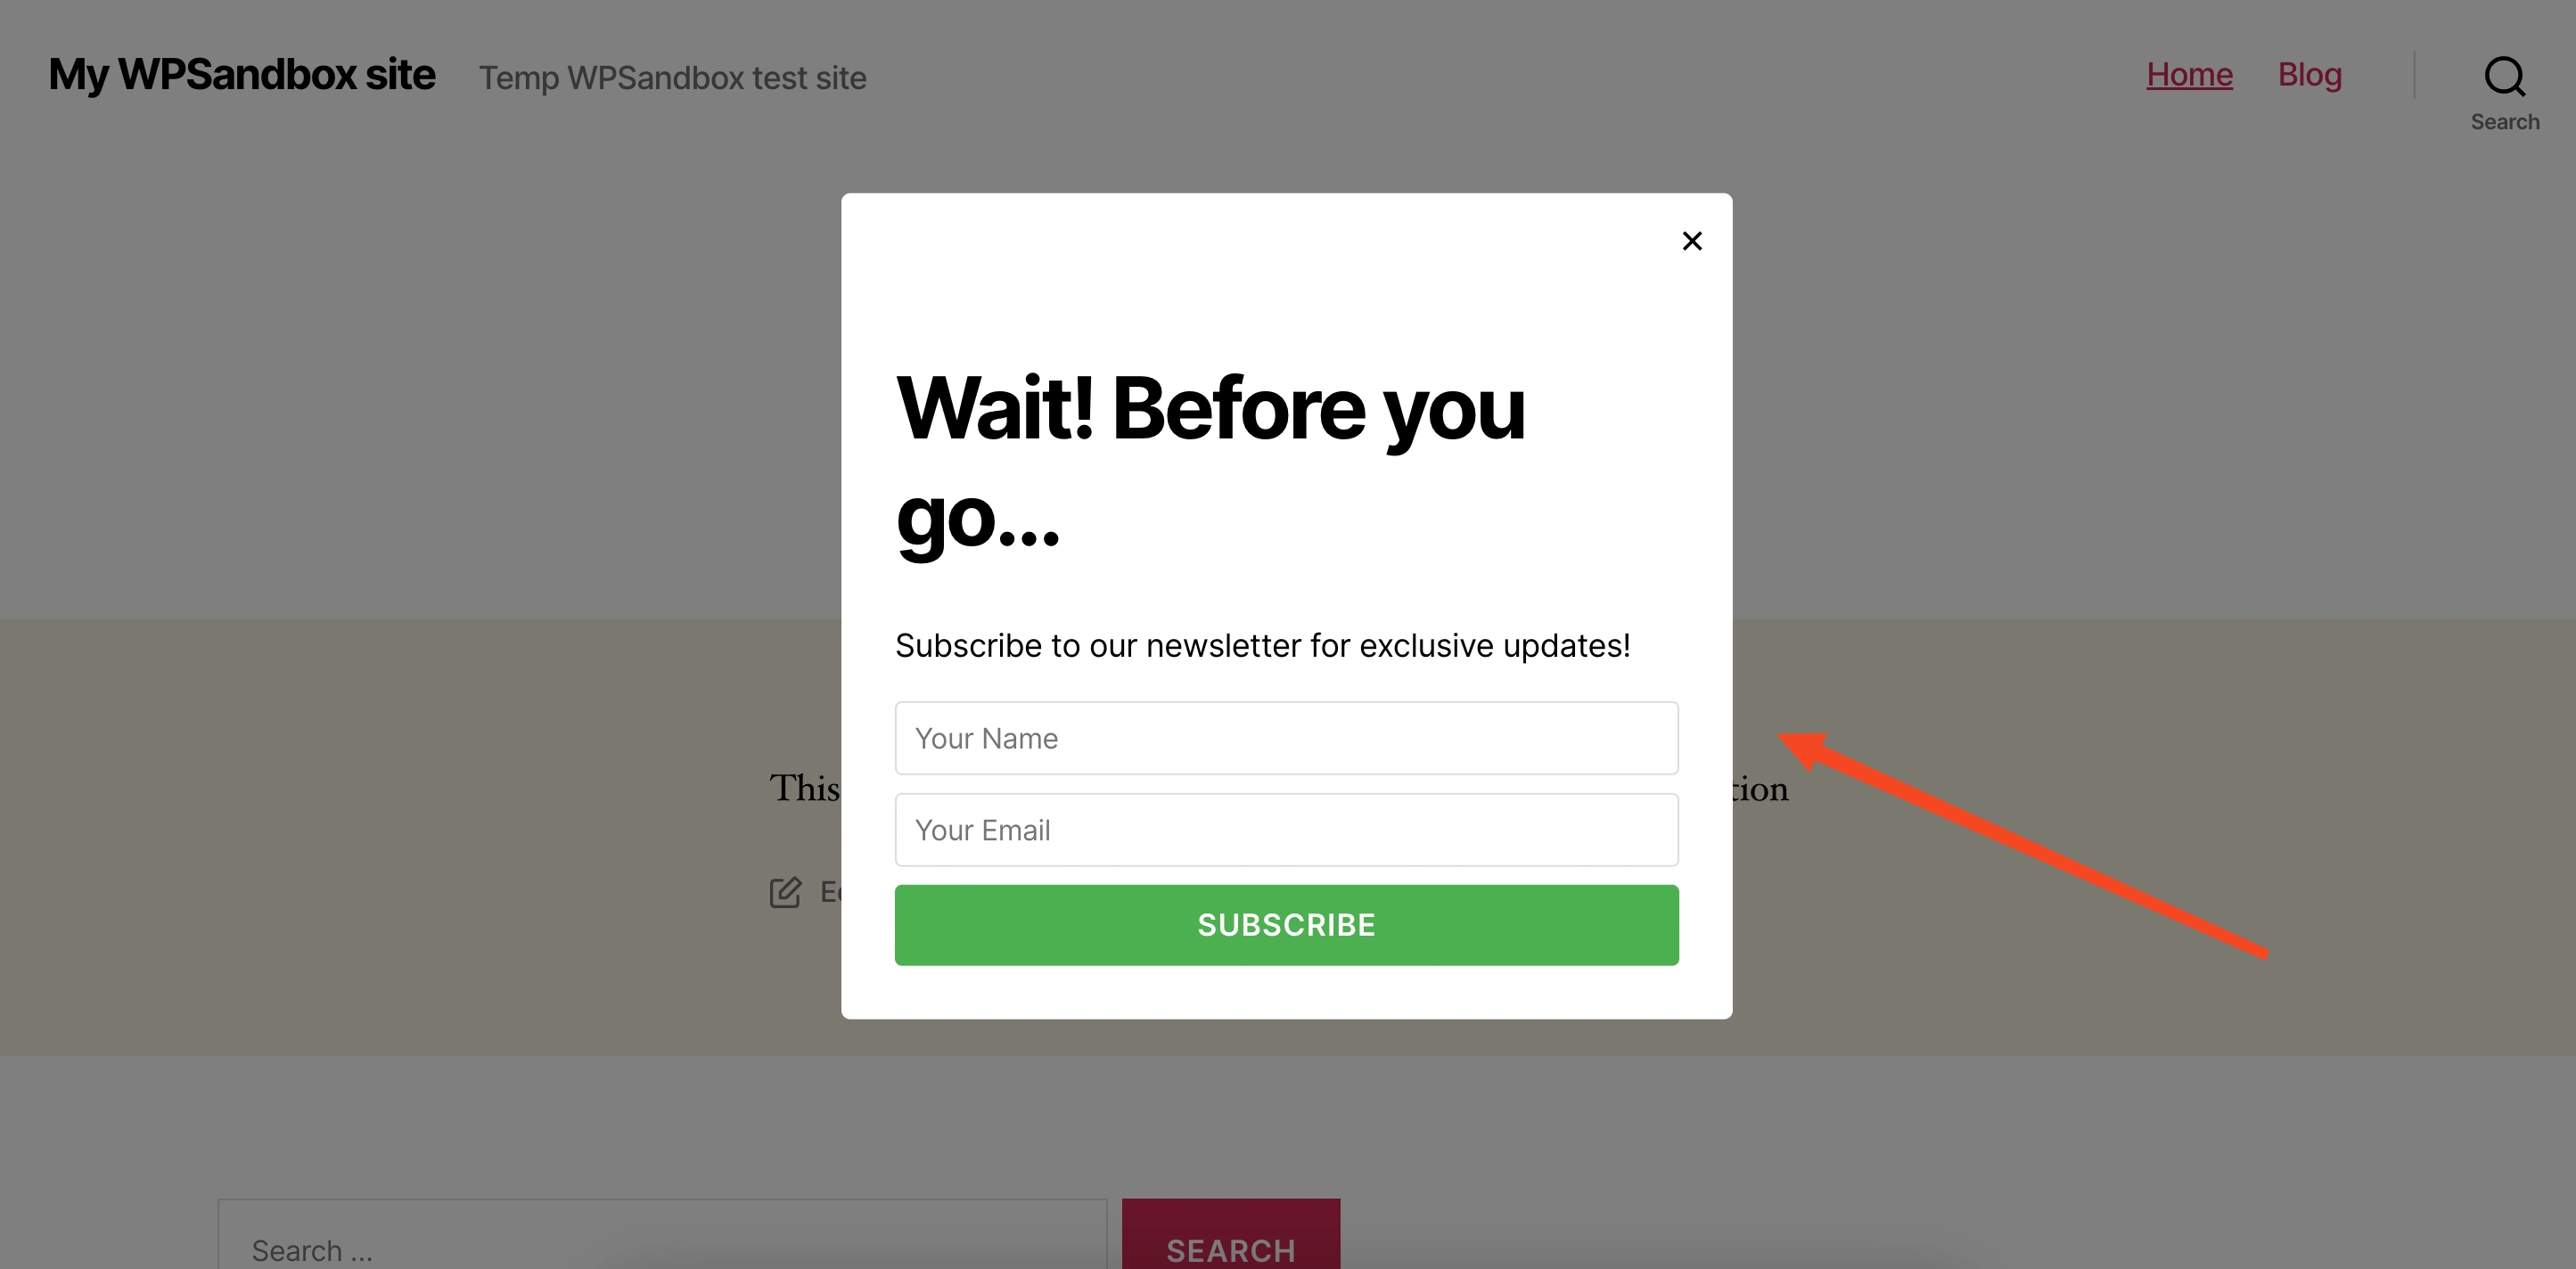
And that's it! You can now display popups on your WordPress site without using any plugins. Whether you choose Poper or the custom code method, I hope this guide has been helpful to you.
Why Should You Avoid Popup Plugins in WordPress?

Many WordPress users rely on plugins to add popups, but they come with drawbacks:
Performance Impact: Some popup plugins load unnecessary scripts, slowing down your website.
Compatibility Issues: Plugins can conflict with your theme or other installed plugins, leading to site errors.
Limited Customization: Many free popup plugins have restricted features unless you upgrade to a paid version.
Security Risks: Poorly maintained plugins can introduce security vulnerabilities to your WordPress site.
By using Poper or custom HTML, you can avoid these issues and maintain full control over your website’s performance.
Benefits of Using Poper for WordPress Popups

If you're looking for a hassle-free, lightweight solution, Poper is your best choice. Here’s why:
🚀 Fast & Lightweight: No heavy scripts, ensuring your website speed isn’t affected.
🎯 Advanced Targeting: Show popups to specific users based on location, device, or behavior.
🔗 Seamless Integrations: Connect with email marketing tools like Mailchimp, HubSpot, and more.
📊 Detailed Analytics: Track impressions, clicks, and conversions directly from the Poper dashboard.
🎨 Customizable Templates: Choose from pre-designed popup templates to match your brand style.
SEO Best Practices for Popups on WordPress
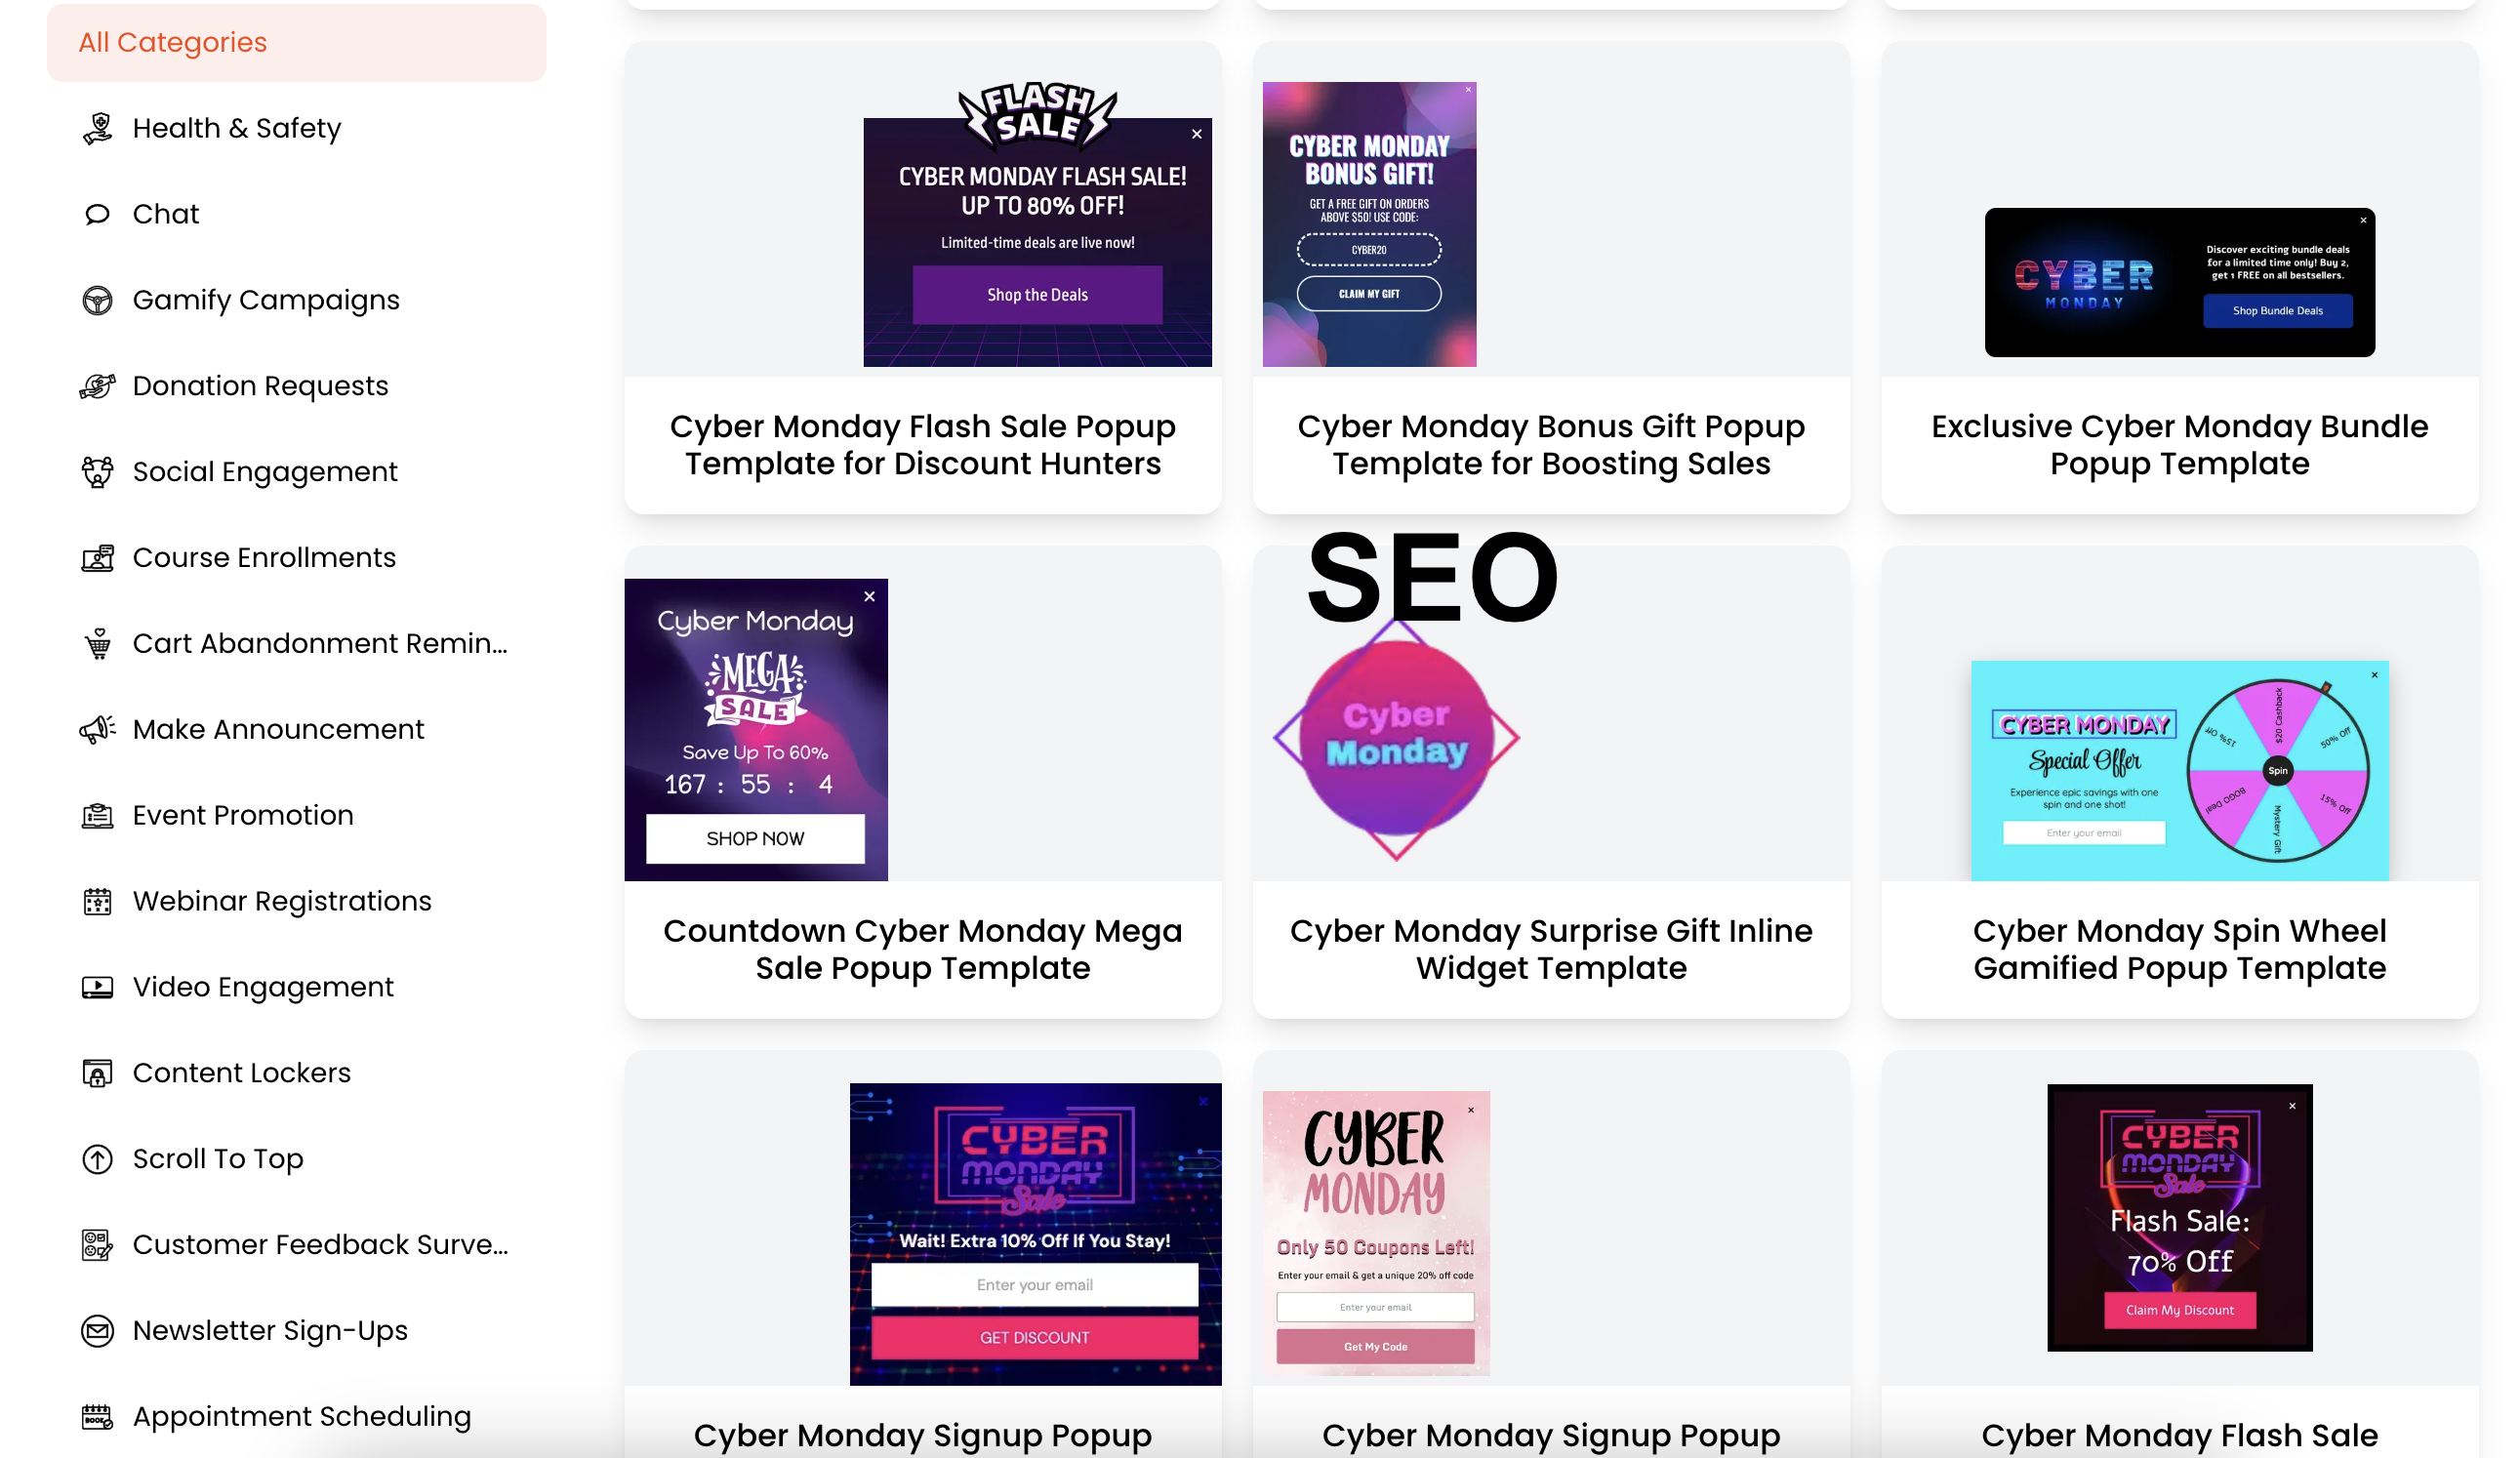
To ensure your popups don’t hurt your search engine rankings, follow these Google-friendly best practices:
✅ Use Exit-Intent Popups – Avoid interrupting users when they first land on your site.
✅ Make Popups Mobile-Friendly – Google penalizes intrusive mobile popups. Ensure they are easy to close.
✅ Delay Popups for Better UX – Show popups after a user spends a few seconds on your page.
✅ Keep Content Accessible – Ensure users can easily access the main content without being blocked by popups.
✅ Monitor Bounce Rate – Track user behavior to adjust popup triggers for better engagement.
FAQs
Can I create popups in WordPress without using a plugin?
Yes! You can create popups in WordPress without a plugin by using Poper (an external popup builder) or by adding custom HTML, CSS, and JavaScript manually to your WordPress theme files.
How does Poper work with WordPress without a plugin?
Poper generates an embed code that you can copy and paste into your WordPress theme’s header.php or use a custom script insertion method. This allows you to display popups without installing any additional plugins, helping improve site performance.
Will adding popups slow down my WordPress website?
If you use heavy plugins, popups can slow down your site. However, using Poper or a lightweight custom code solution minimizes performance impact compared to traditional popup plugins.
Can I show popups on specific pages in WordPress without a plugin?
Yes! With Poper, you can define display rules to show popups on specific pages, to certain users, or based on triggers like exit intent. With custom code, you can use conditional PHP statements to load popups only on selected pages.
Is it safe to add custom popup code to WordPress?
Yes, but you should follow best practices:
Use WordPress functions (e.g.,wp_enqueue_script) to load scripts properly.
Verify form submissions with nonces to prevent spam and security risks.
Test on a staging site before adding code to a live website.


