
Creating a popup from scratch using JavaScript can be quite tricky. You'll find many libraries out there, but getting the logic right for targeting the correct users and setting up triggers can take a lot of effort. In this guide, I'll show you two ways to create popups:
Using Poper
Using HTML/CSS and JavaScript Code
Let's dive in!
Using Poper
If your website is built with HTML and hosted on a domain, you can use Poper to display smart popups. Here's how:
1. Create a Poper Account
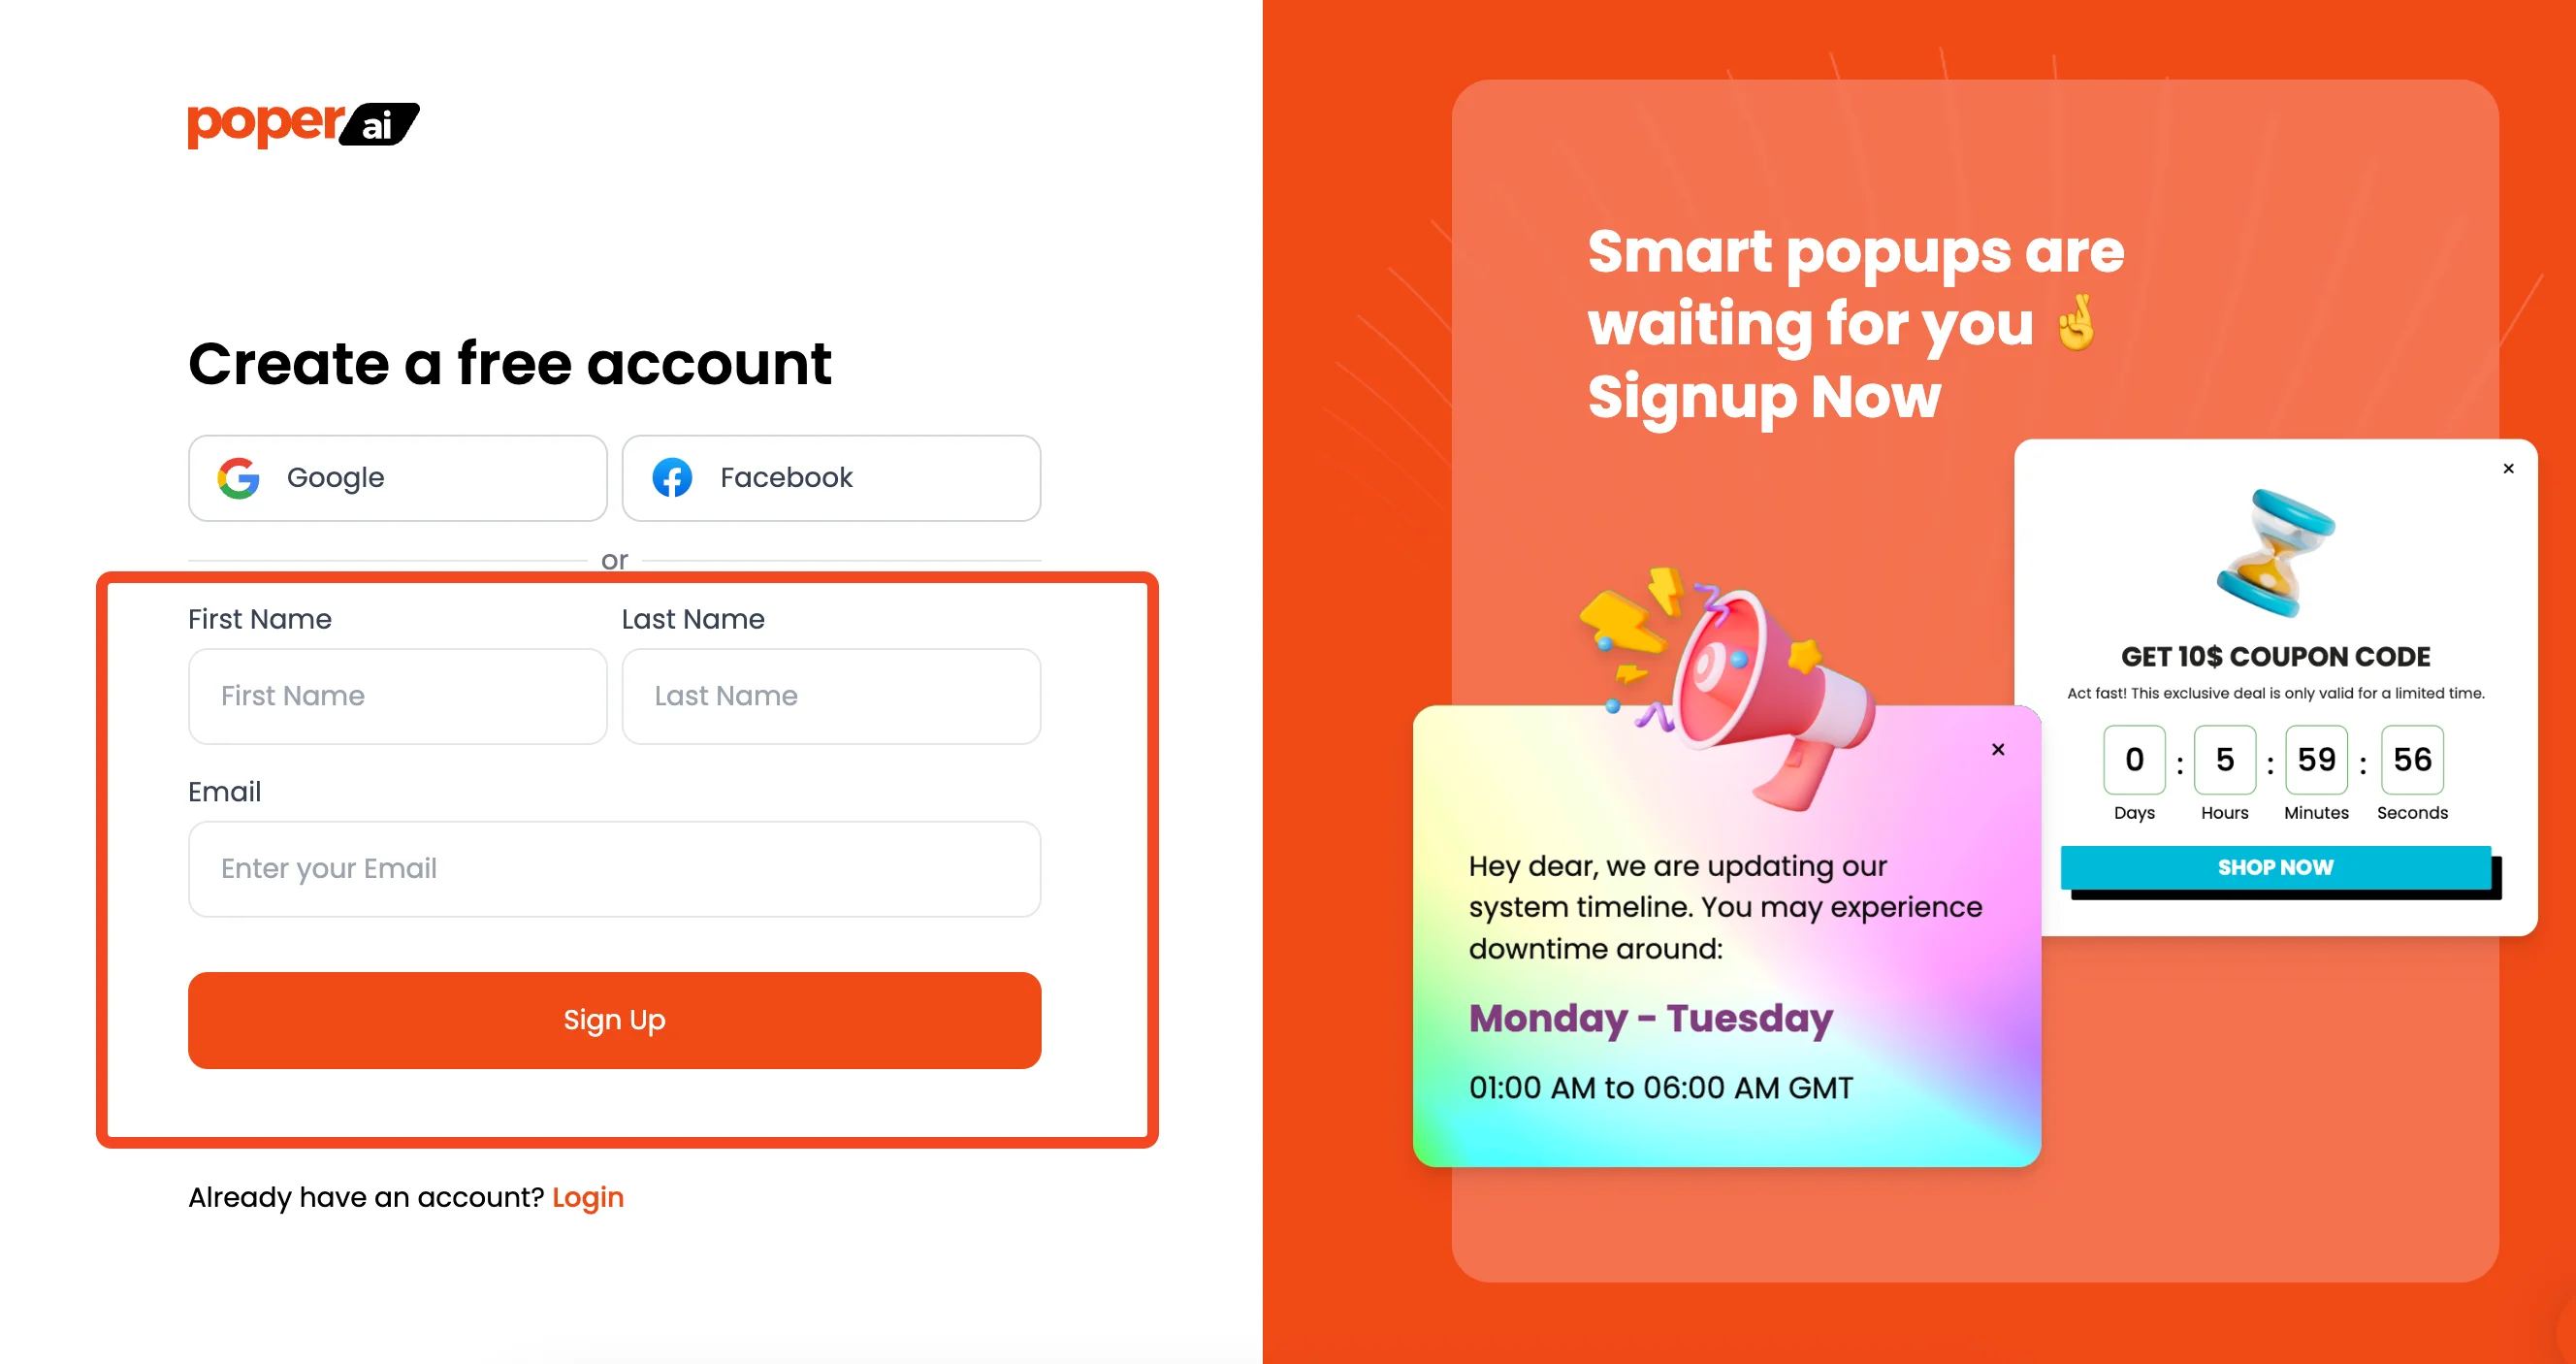
First, you'll need to sign up for a Poper account. This is where you'll create and manage your popups for your HTML website.
2. Add Your Domain and Start a New Popup
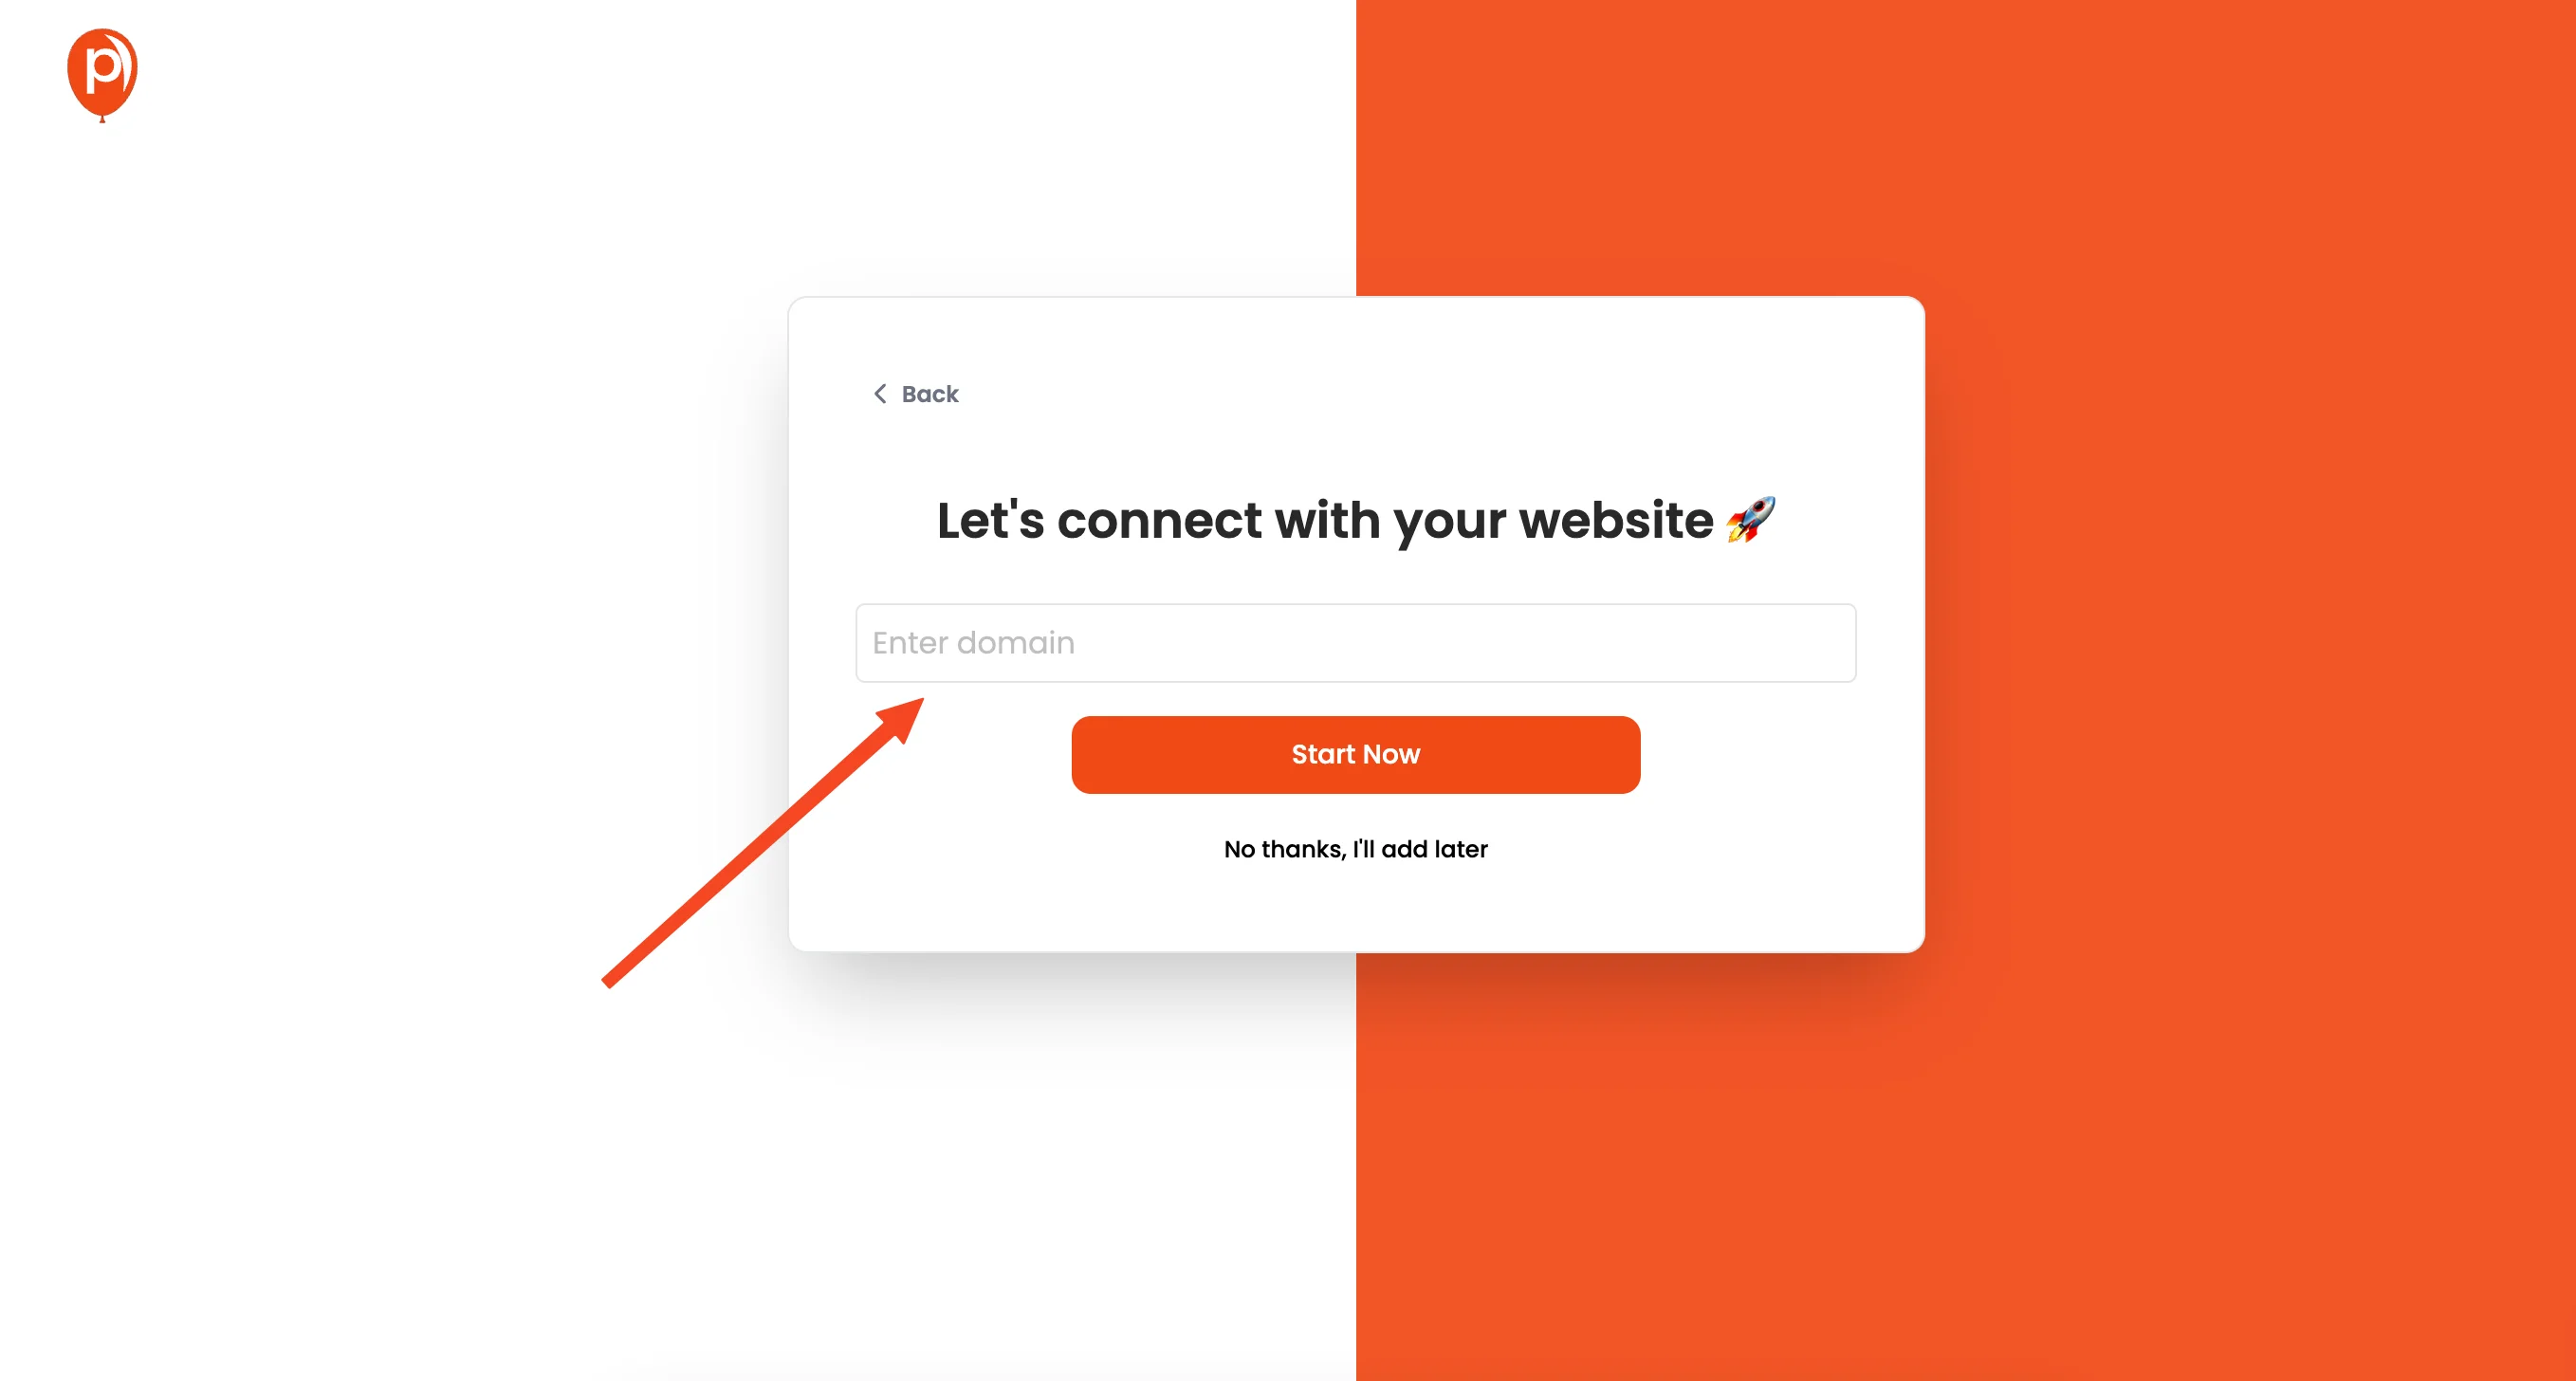
Once you're logged in, add your website's domain. Then, start by creating a new popup.
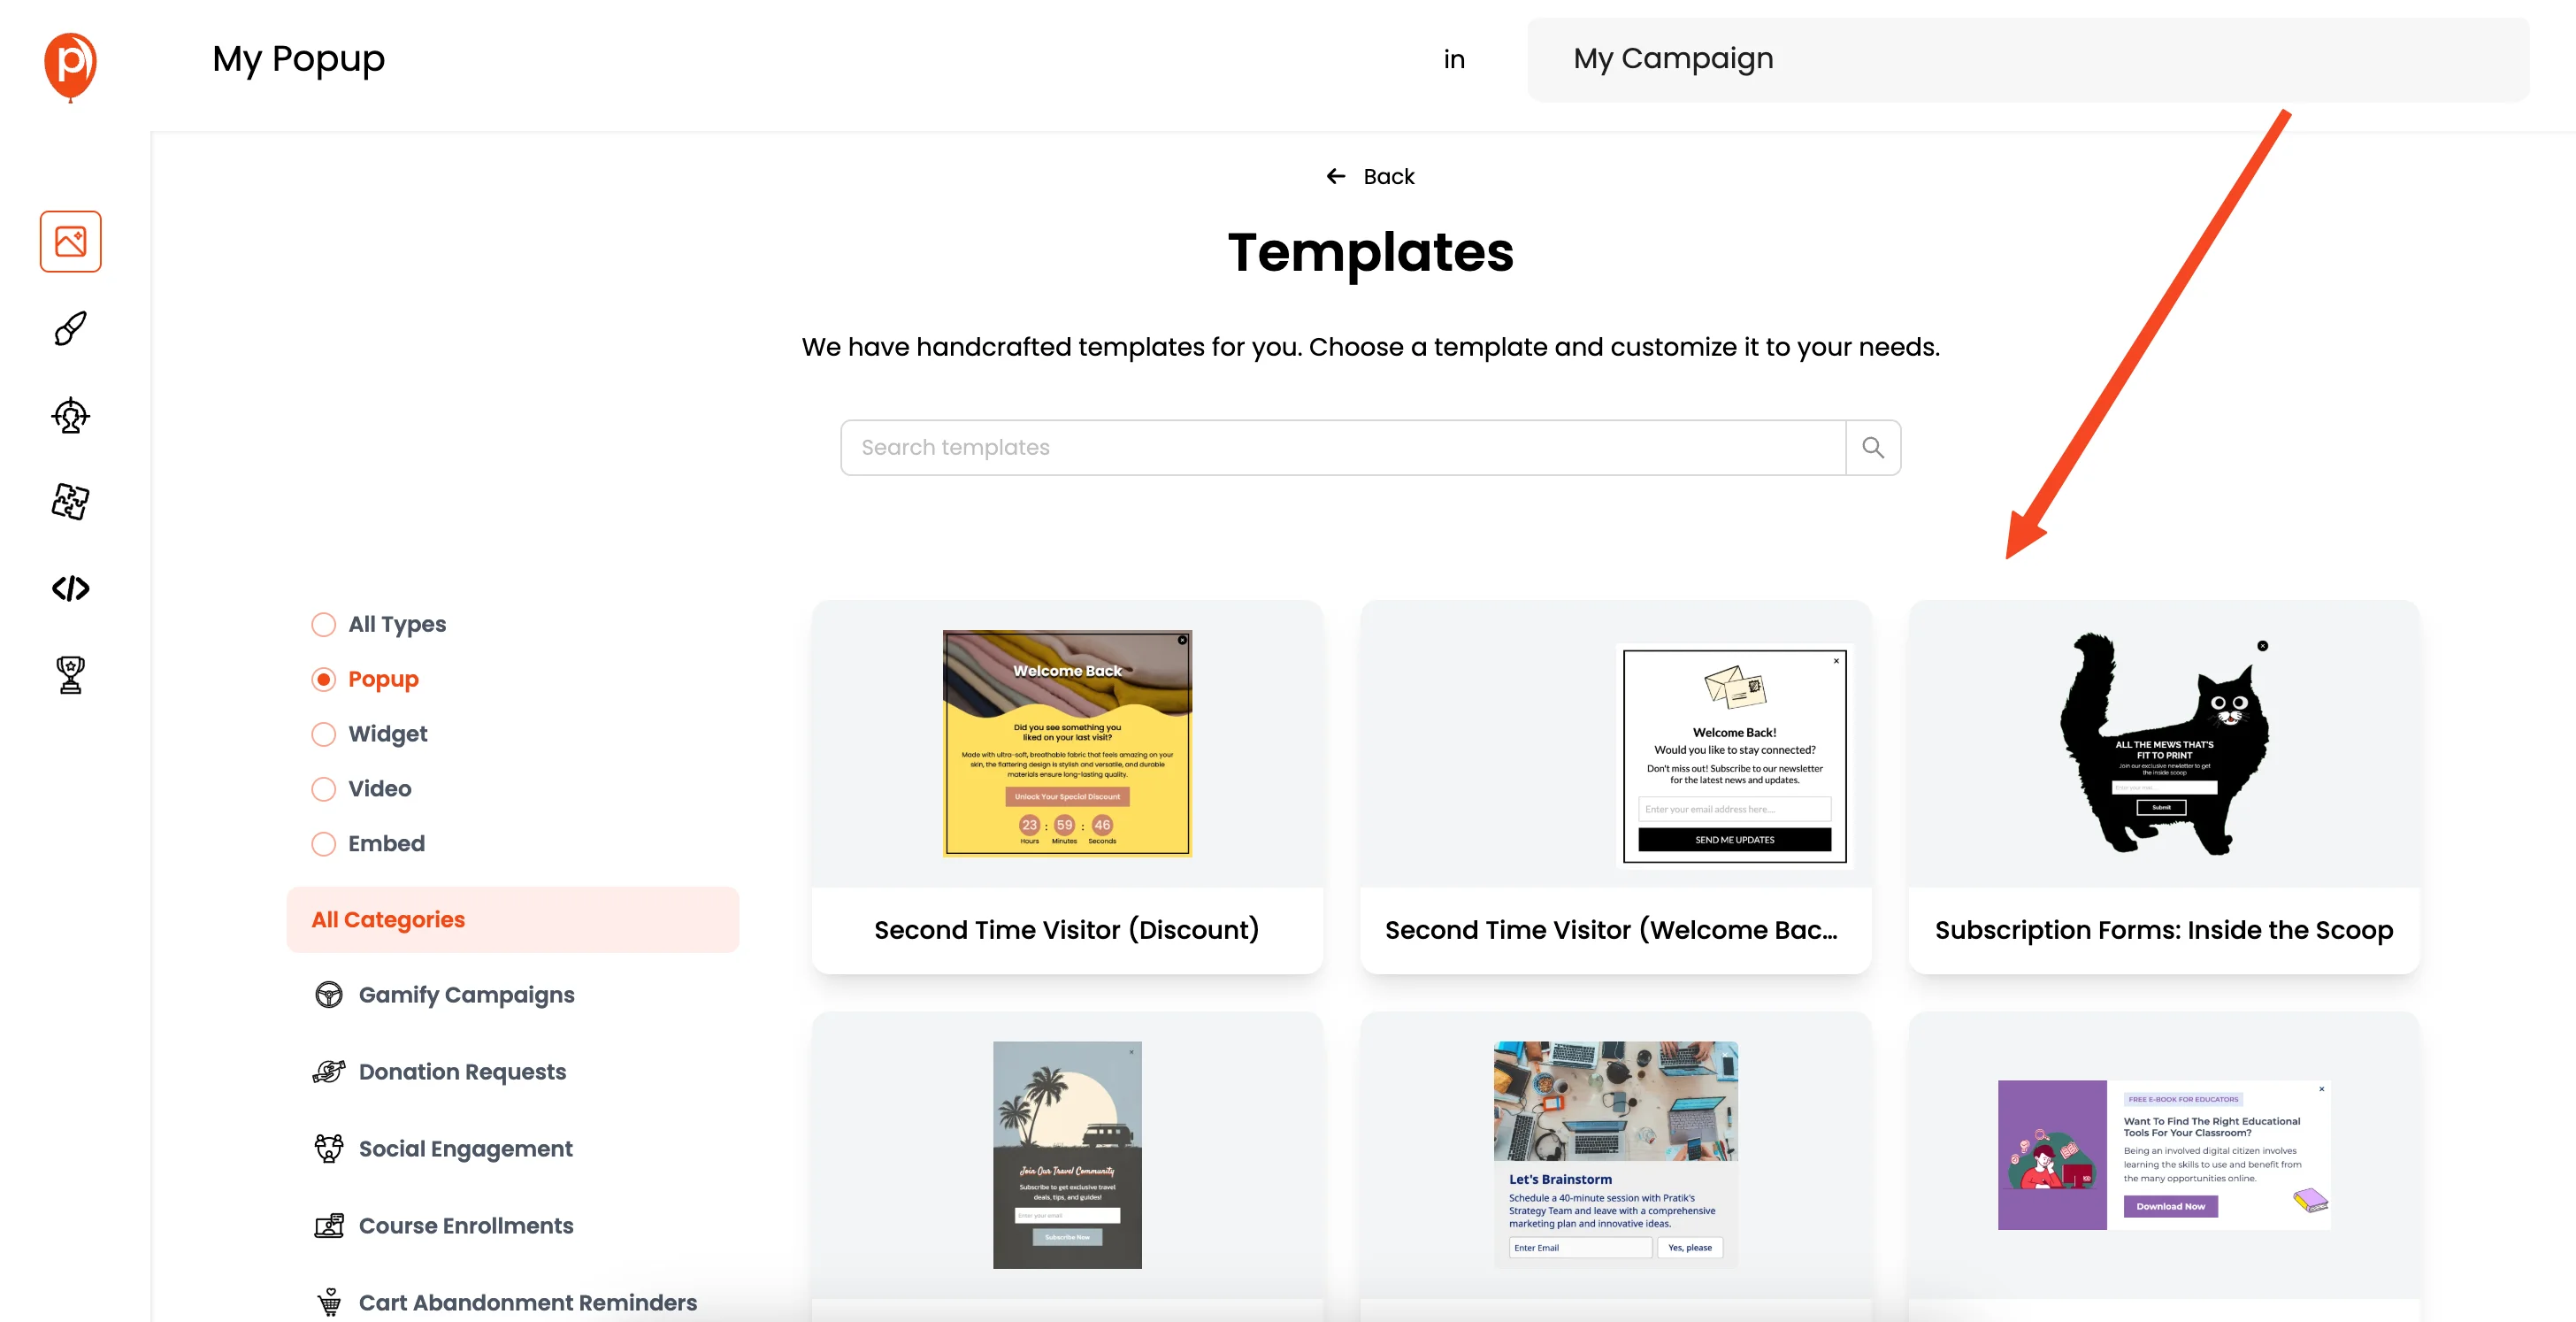
3. Choose a Template
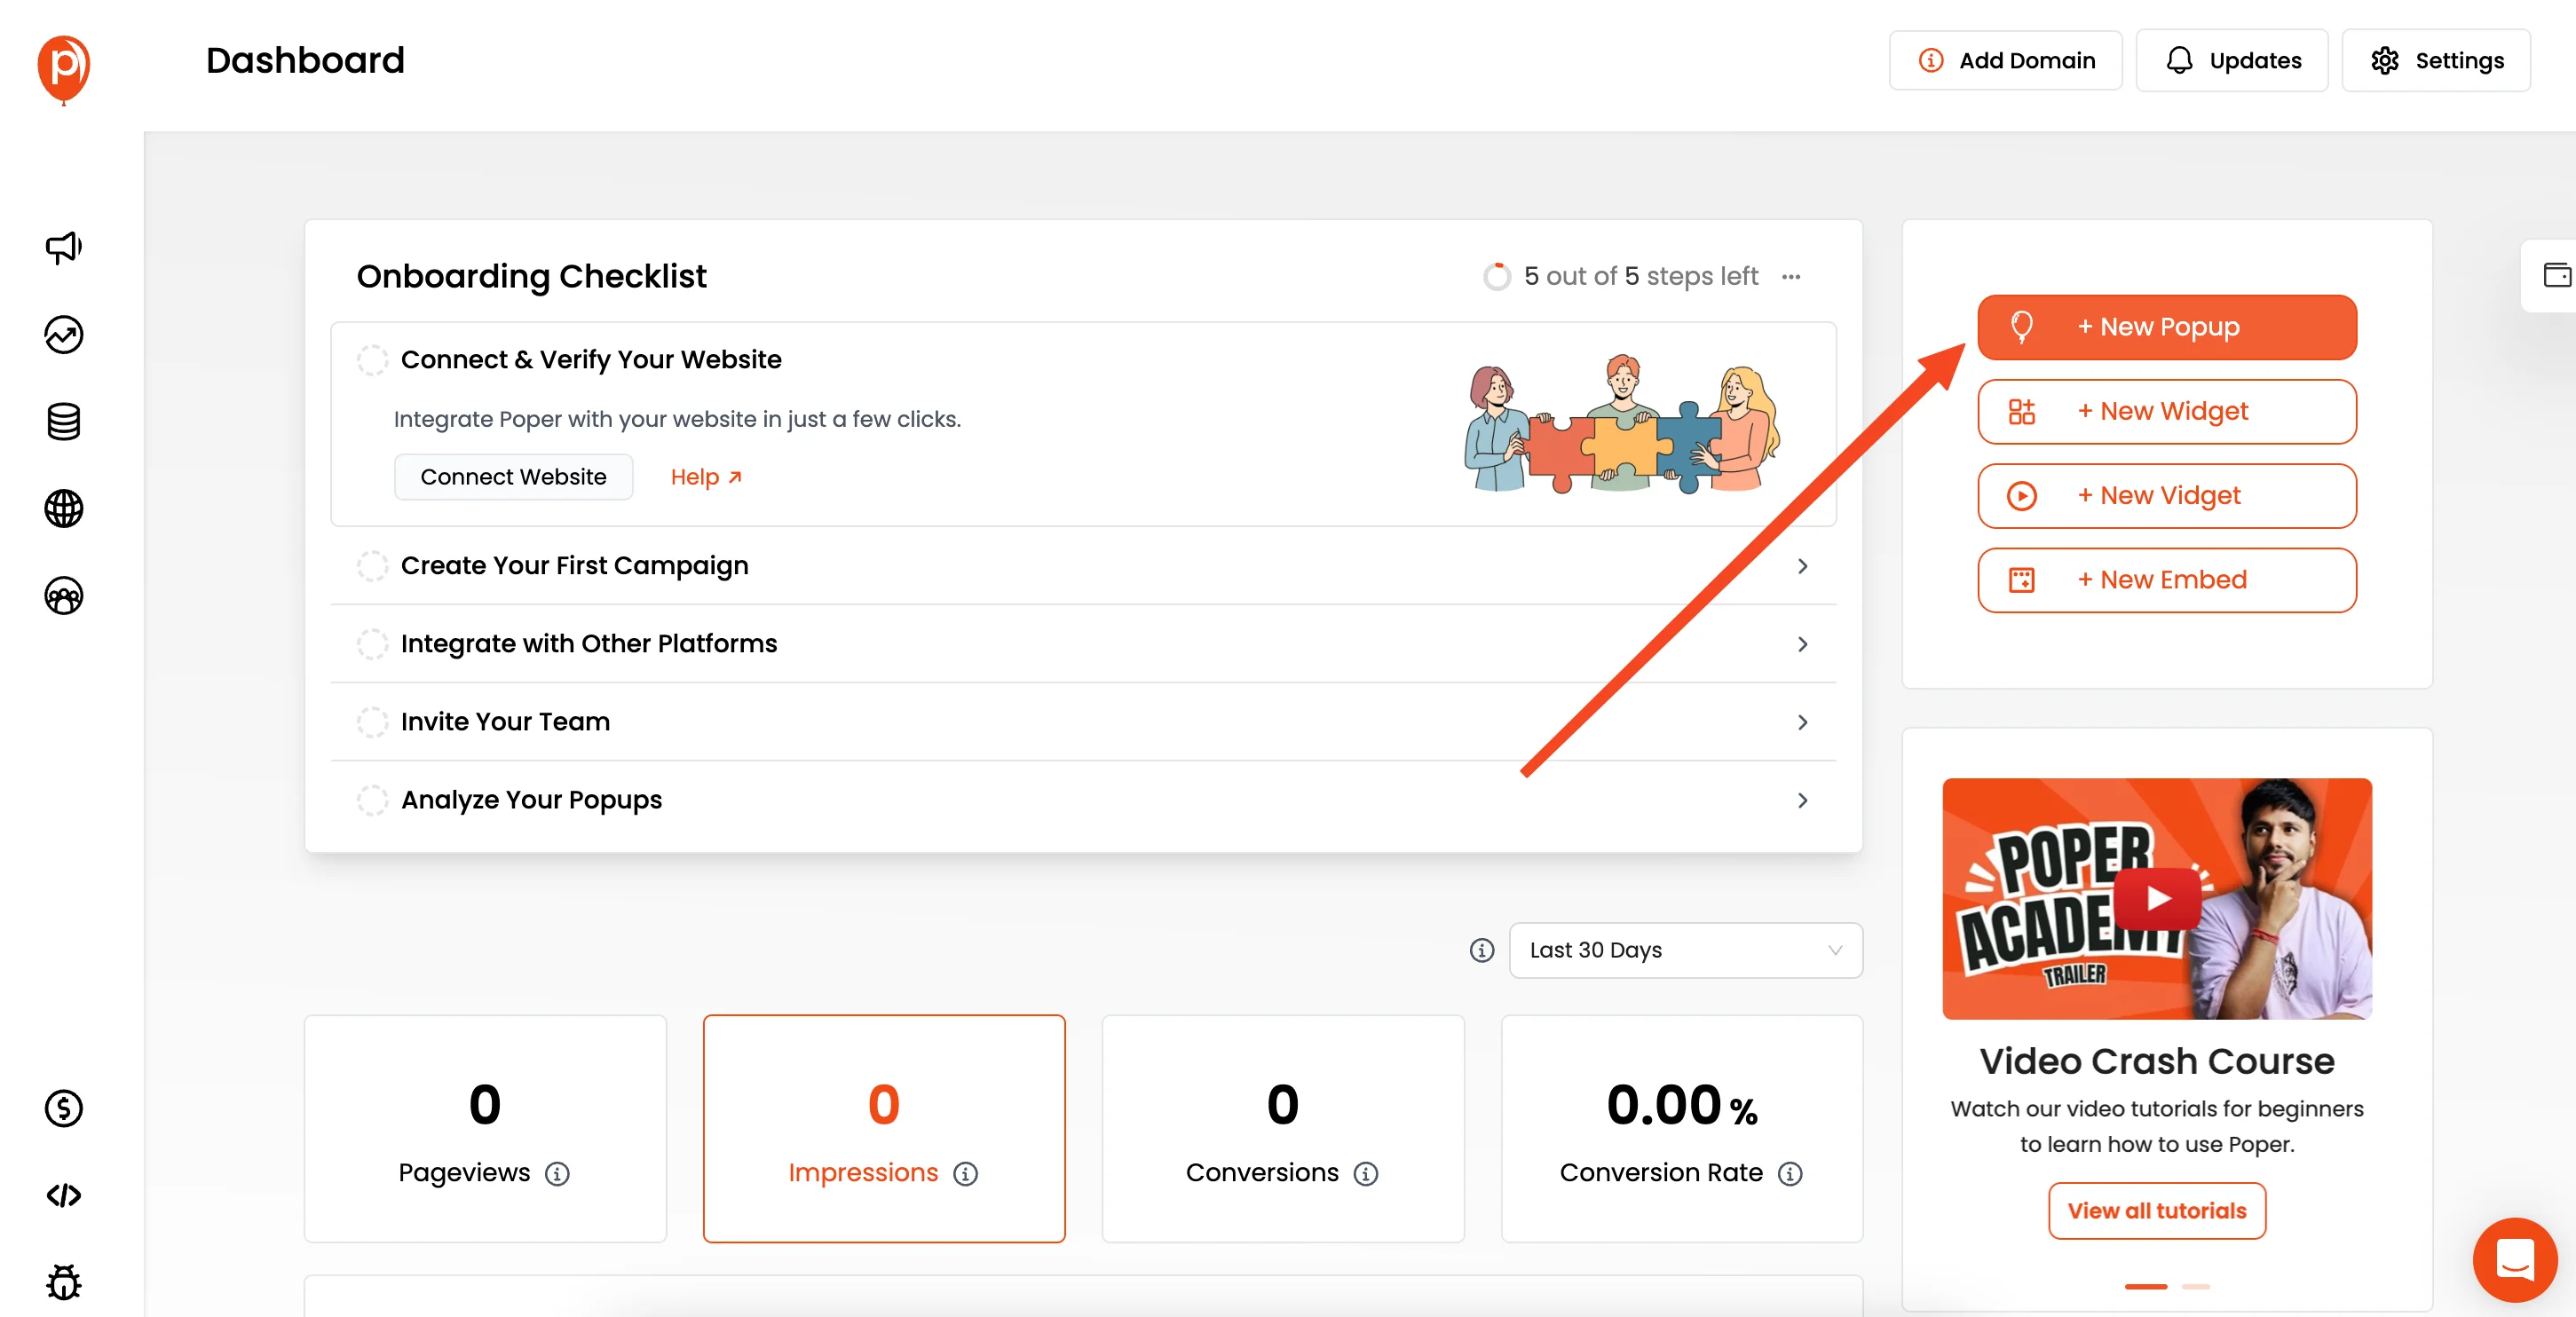
Click the "New Popup" button and choose from the available templates. You can also create a custom popup from scratch if you like.
4. Customize Your Popup
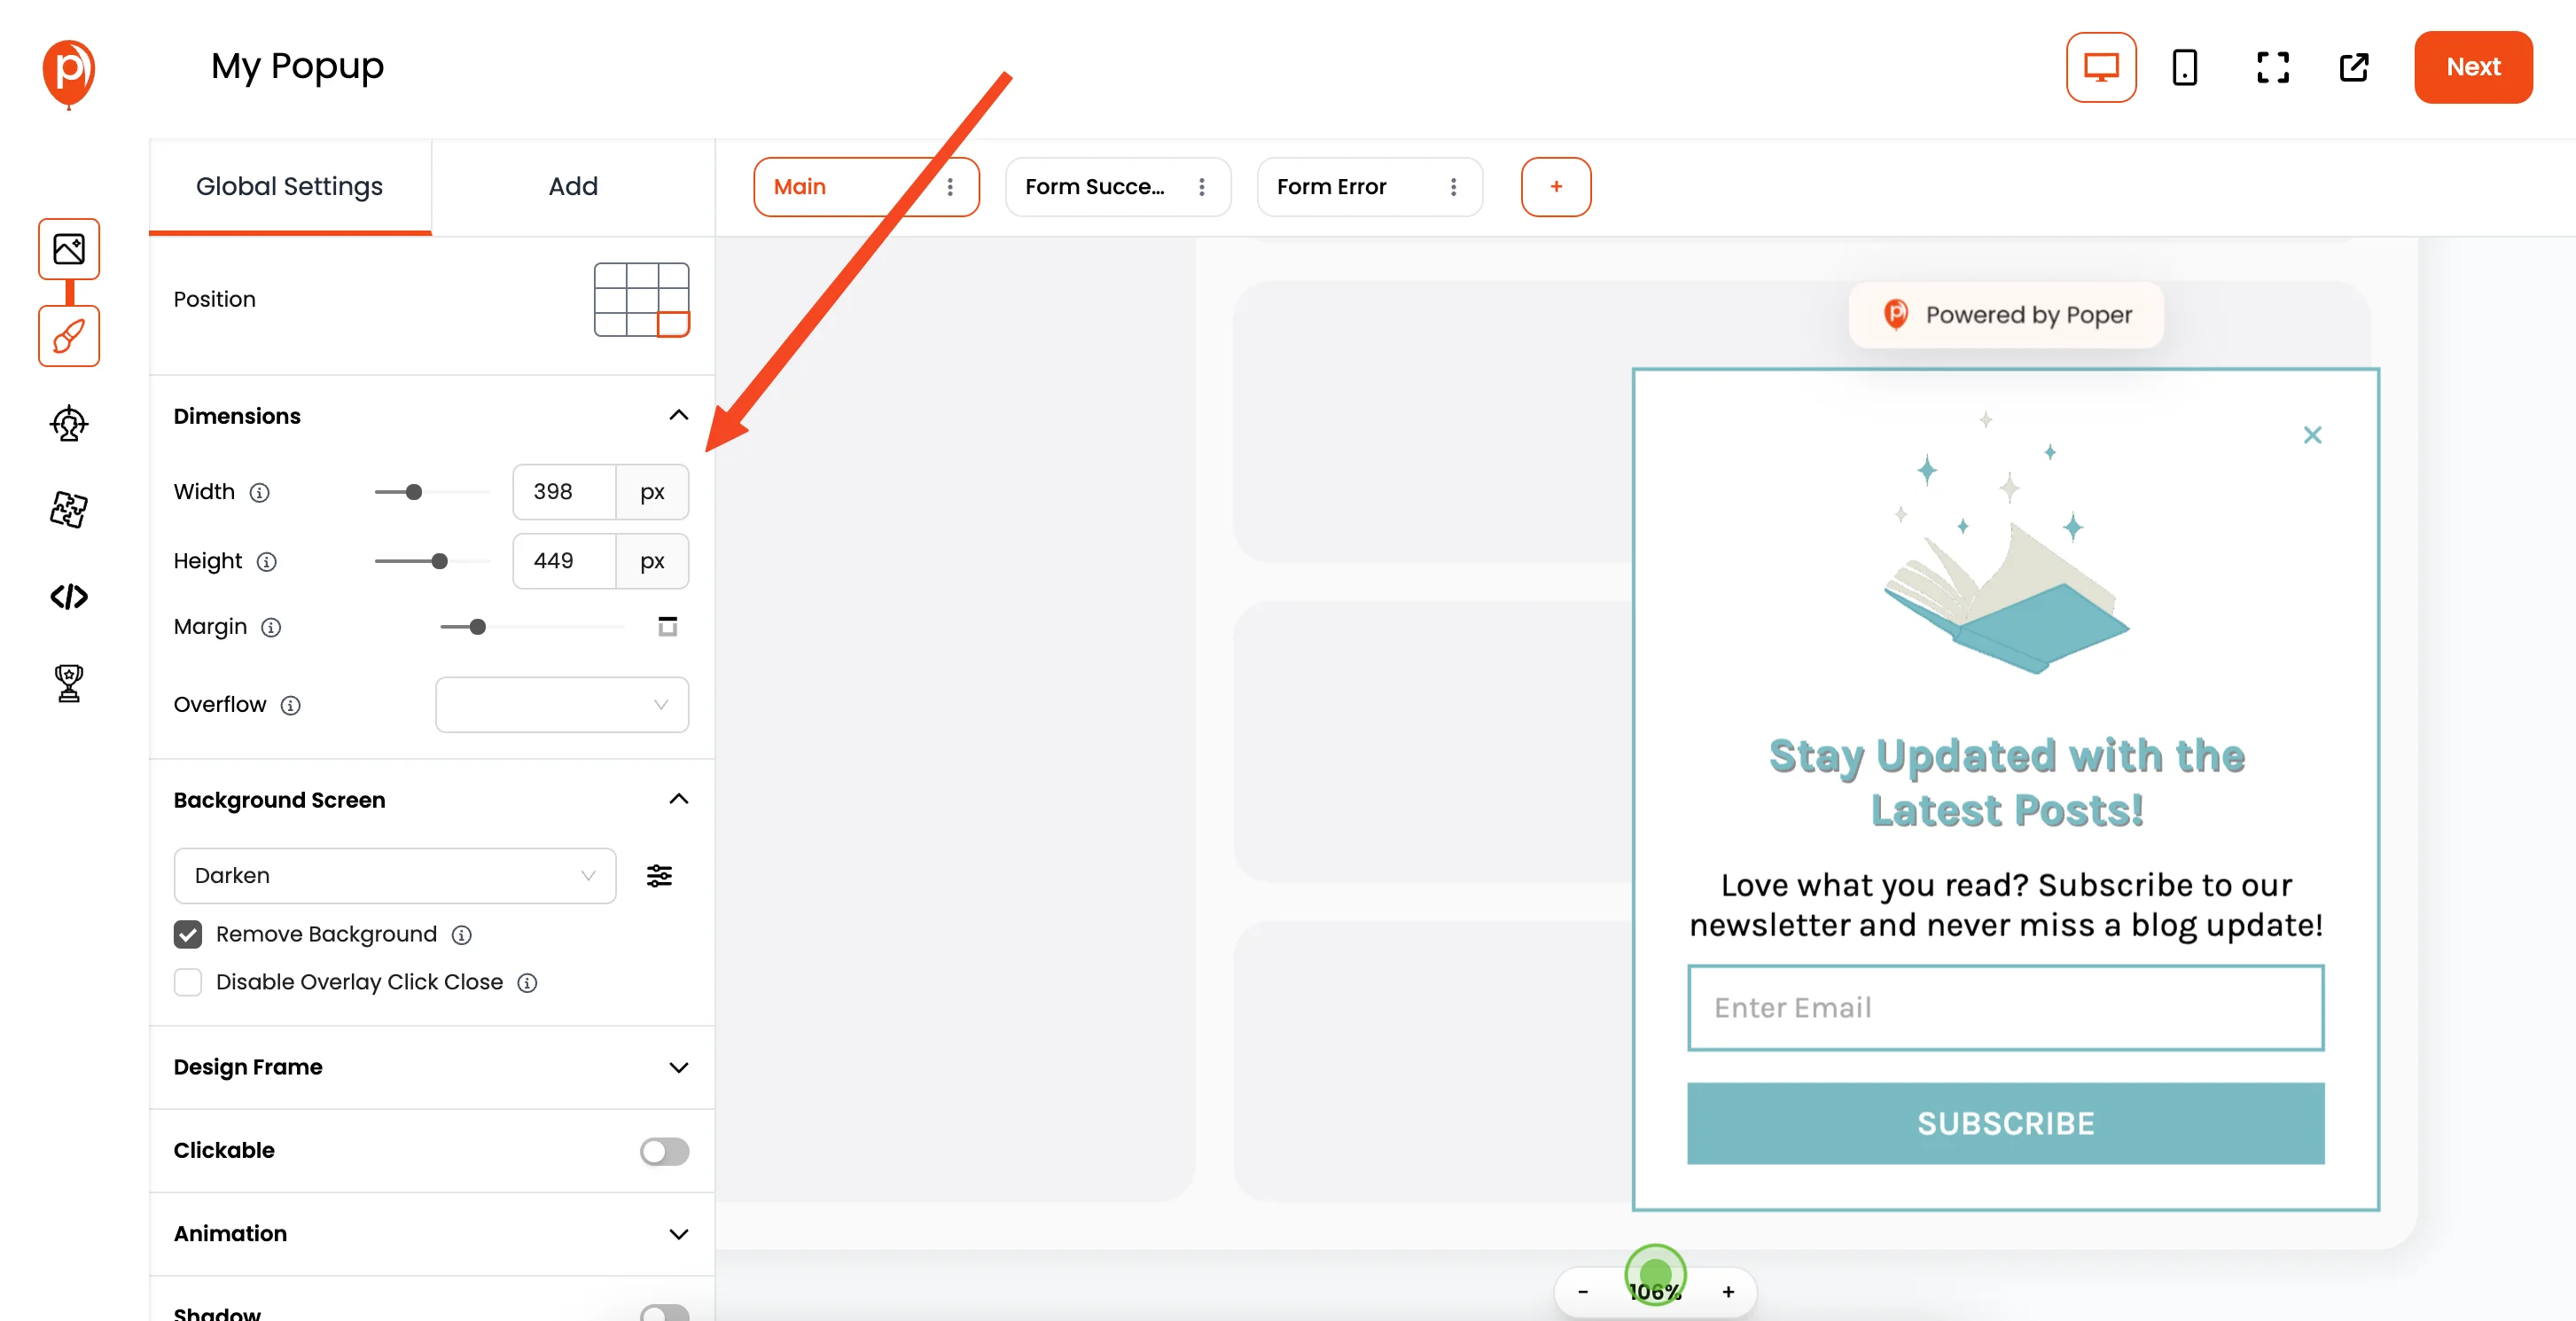
This opens the popup editor where you can customize fonts, colors, and more. Take your time to make it look exactly how you want.
5. Set Display Conditions
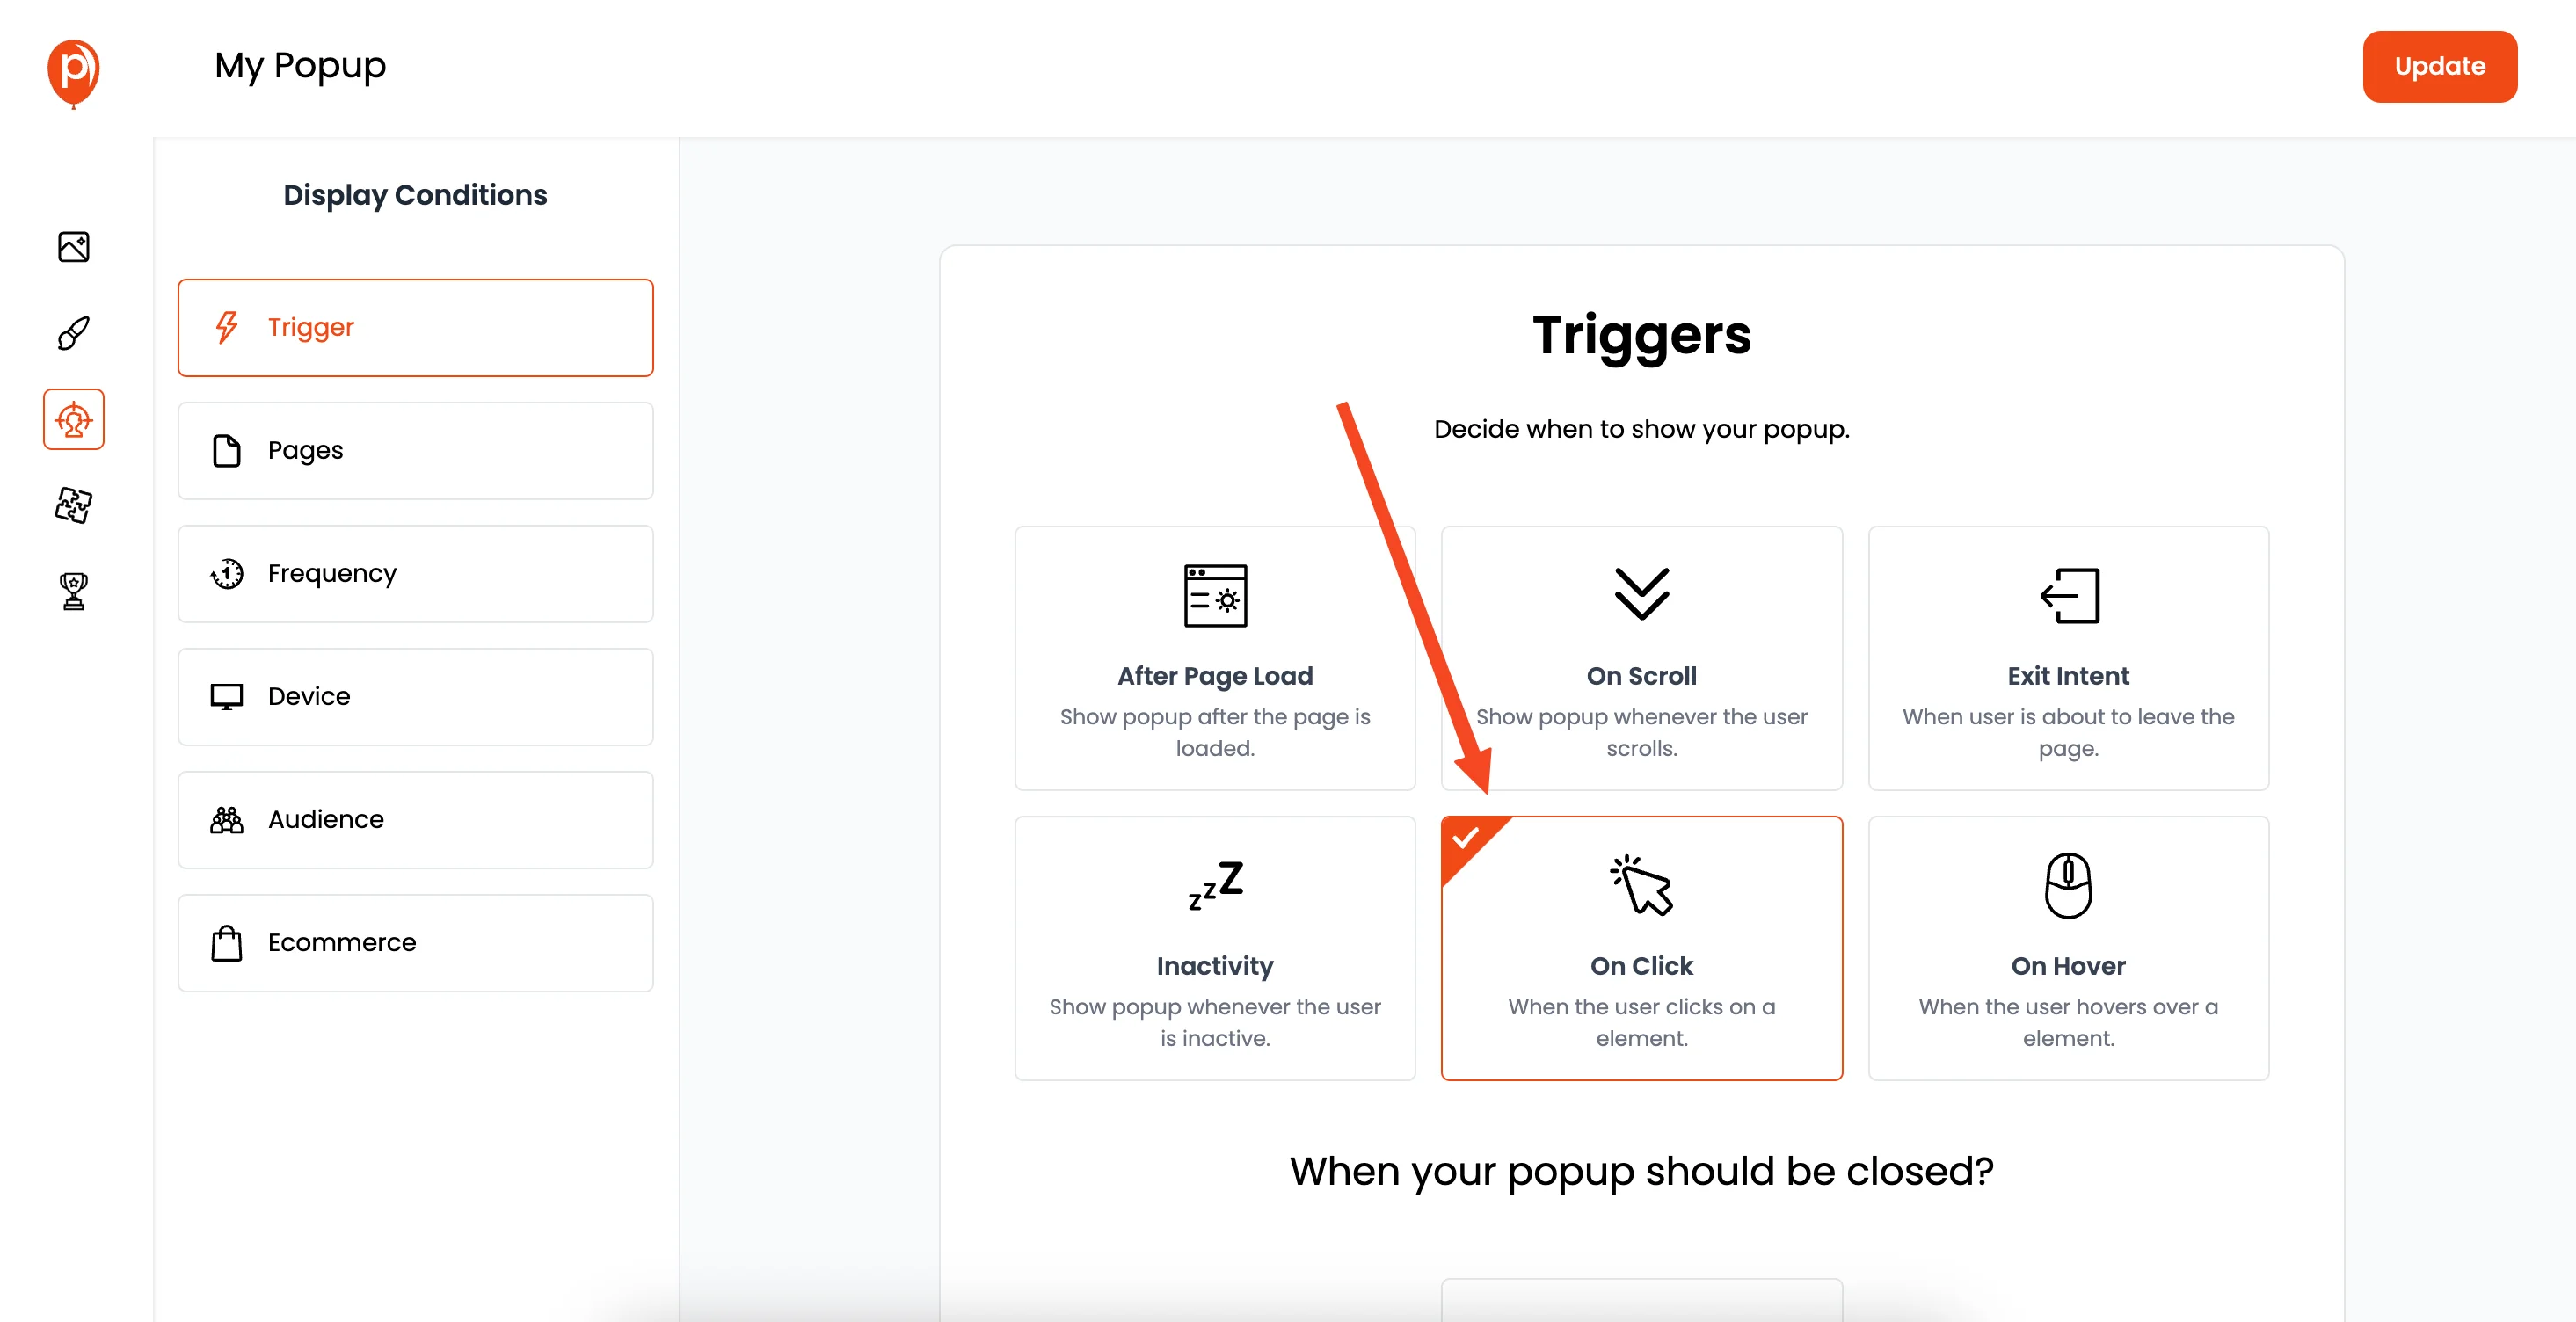
Once you're happy with the design, click "Next". Here, in the Display Conditions page, you can set when the popup should appear. For example, to trigger the popup on a button click, add a CSS selector, such as .my-action-button.
Then, add the class my-action-button to your button in your HTML. The popup will now open when someone clicks this button. You can also set conditions for pages, audience demographics and more.
6. Connect with Integrations
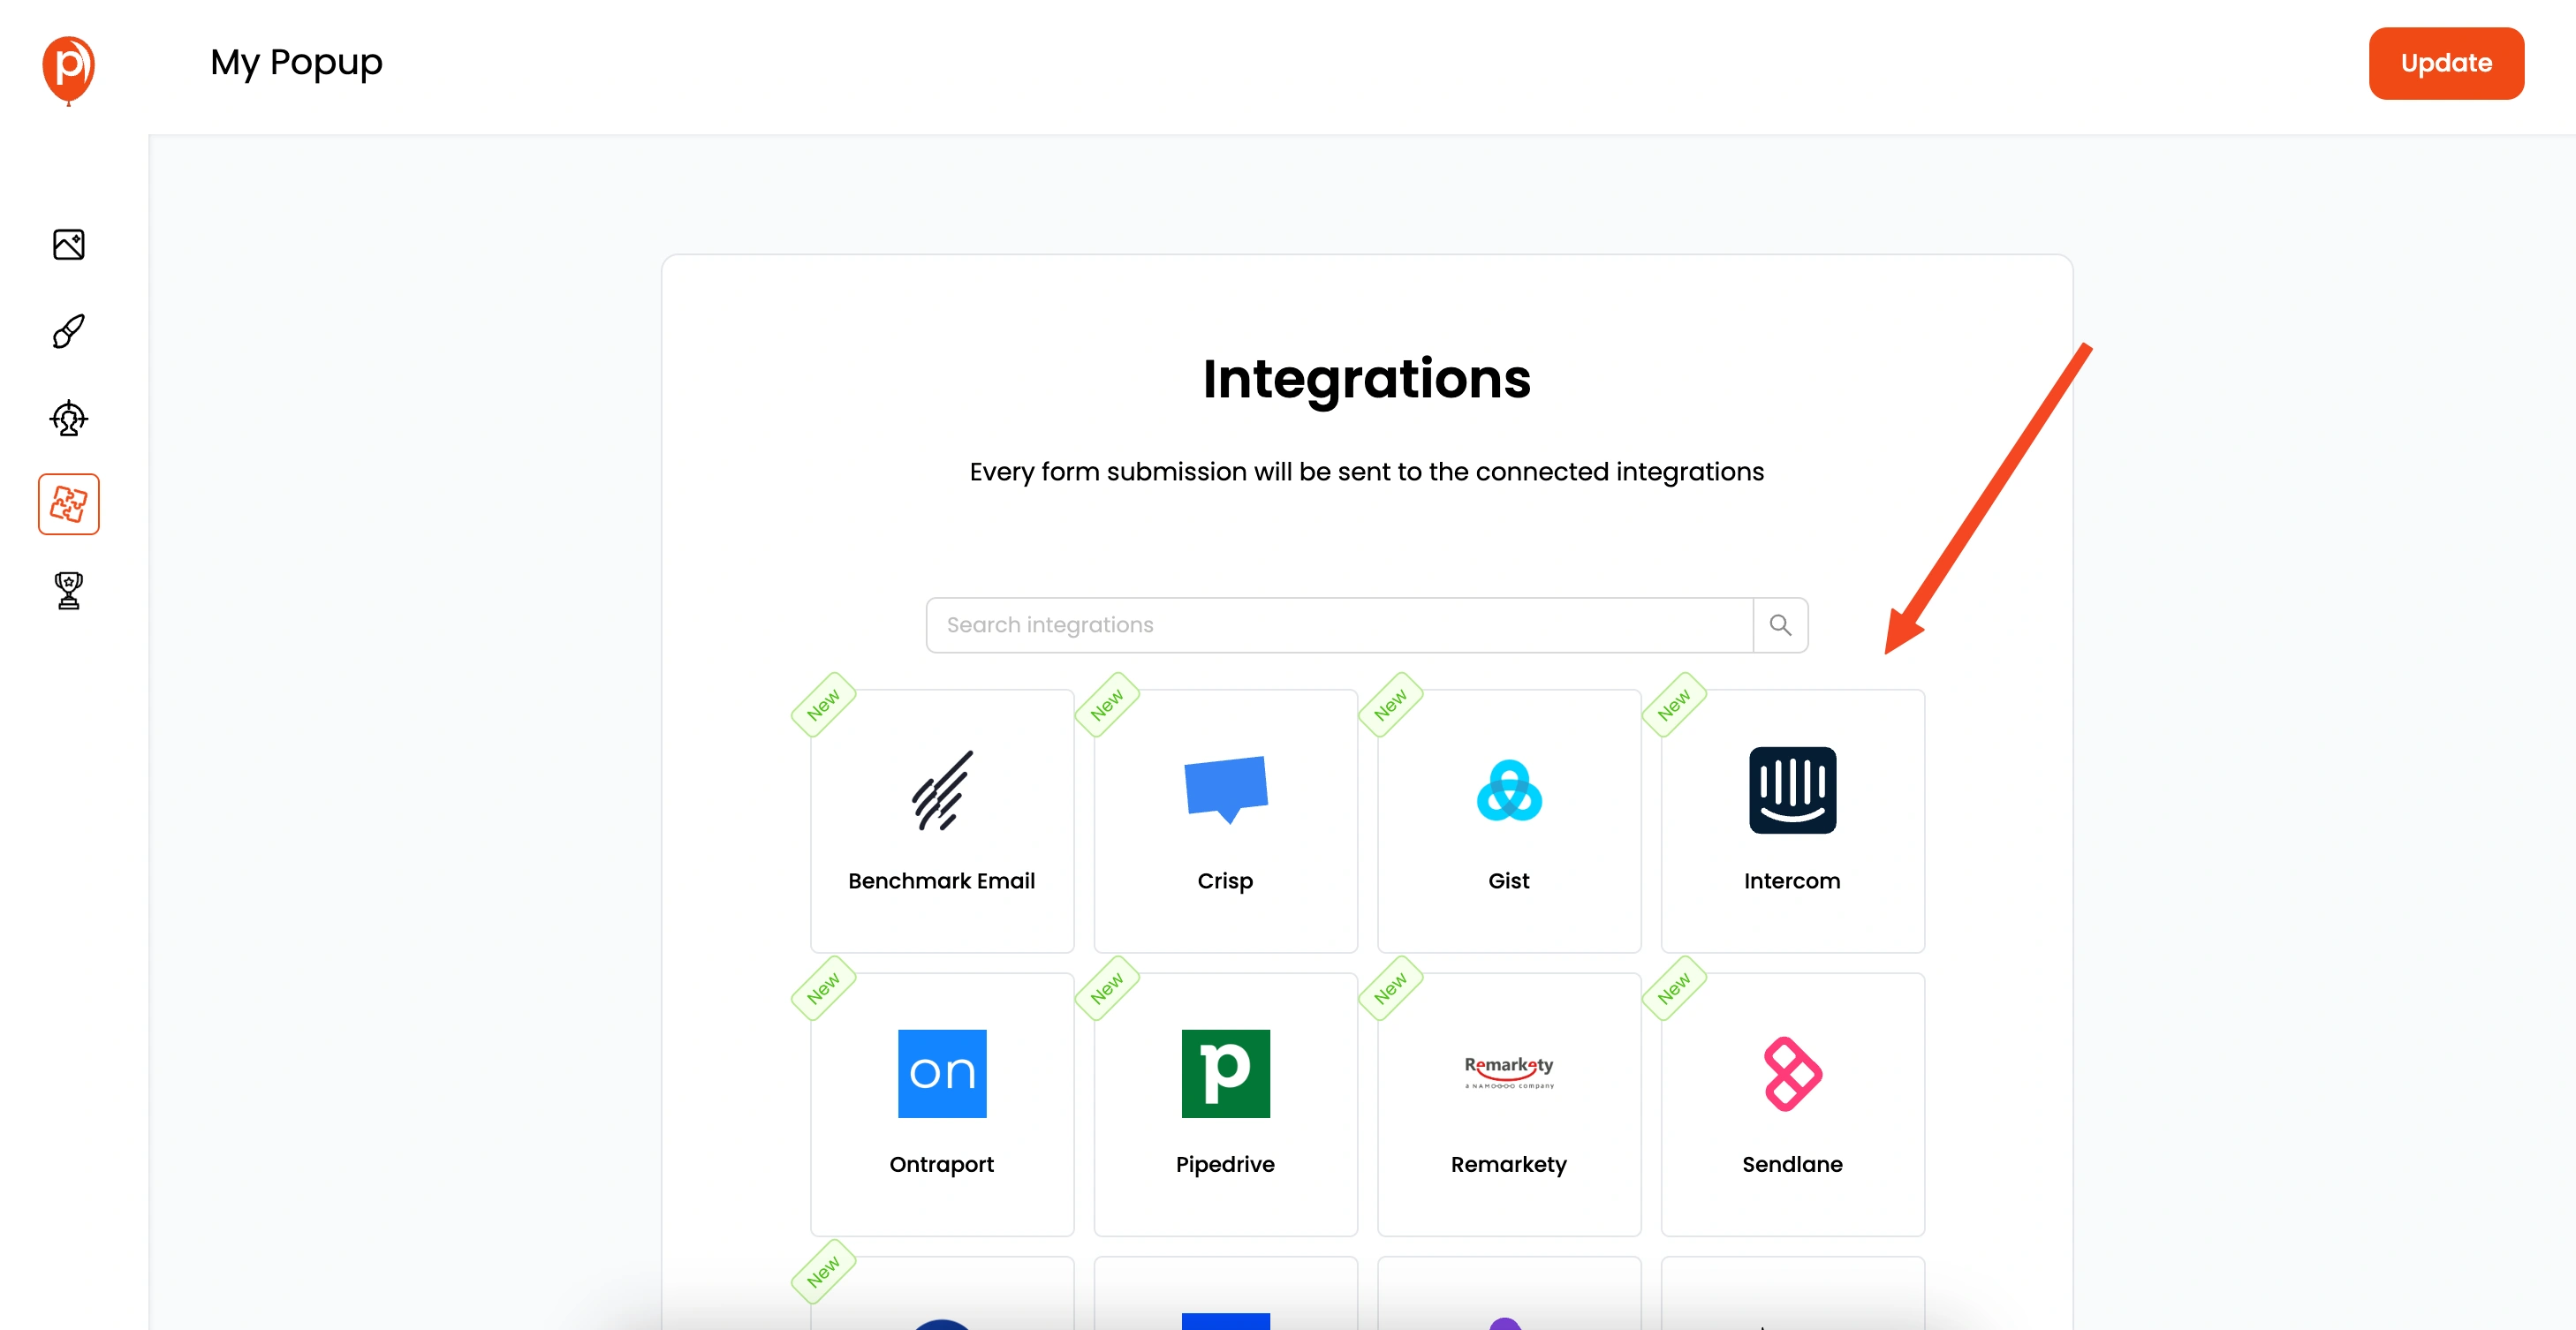
Click "Next" again to move to the Integrations page. Here, you can connect with your favorite email marketing tools like Mailchimp, Klaviyo, and more. Follow the steps to connect your tools.
7. Save and Publish

Save and publish your popup.
8. Get Your Poper Code
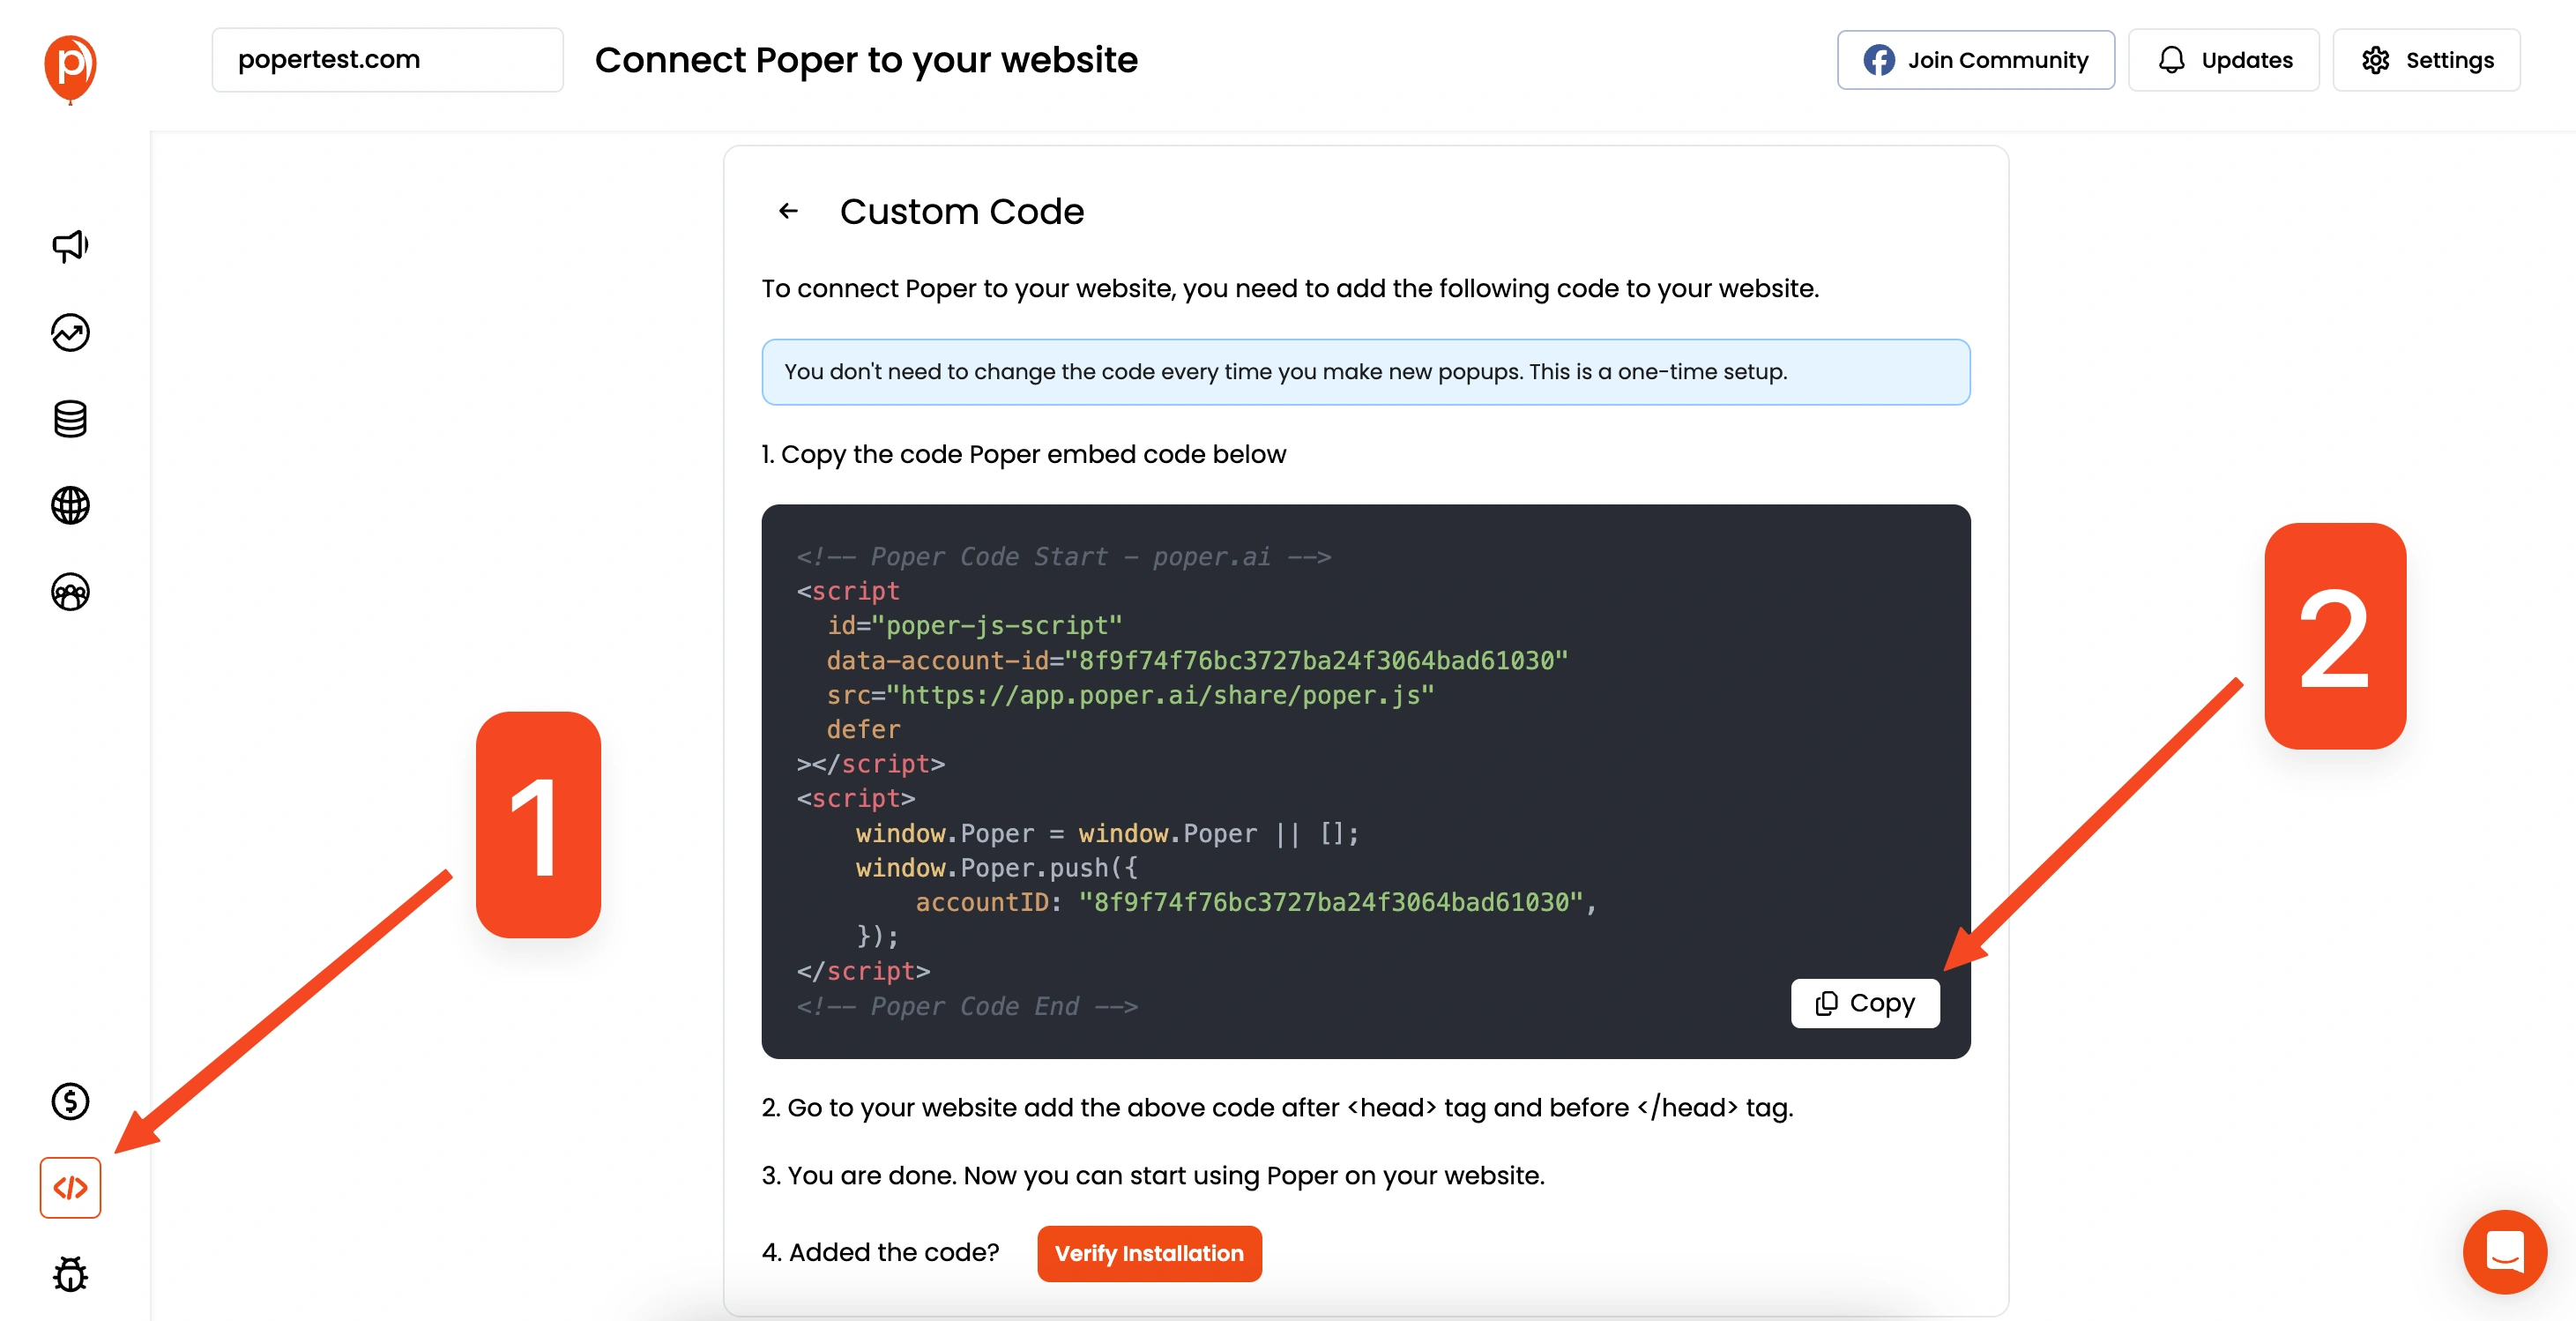
Now, you'll need to add the custom code from your Poper workspace to your HTML website. Go to the "Code" section in the left navigation bar. Select the "Custom Code" option and copy the code provided.
9. Paste the Code in Your HTML
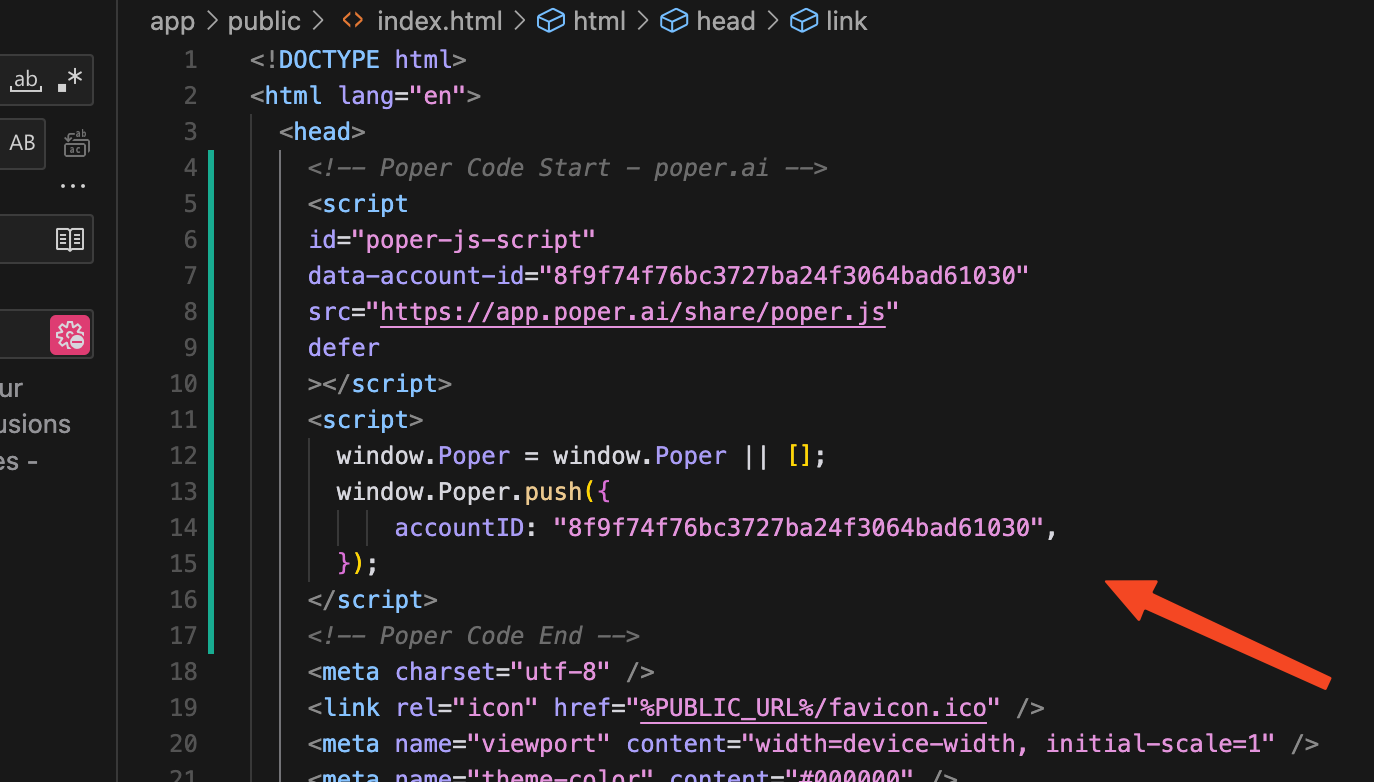
Go to your website's HTML code and paste the copied custom code into the <head></head> section. If you have a common header file (like header.php), add the code there. Otherwise, add it to the <head> of each index.html file.
10. Save and Test
Save the changes, deploy your website, and test your new popup.
Using Custom Code (The Hard Way)
You can create a popup from scratch using HTML, CSS, and JavaScript. Here's how to do it:
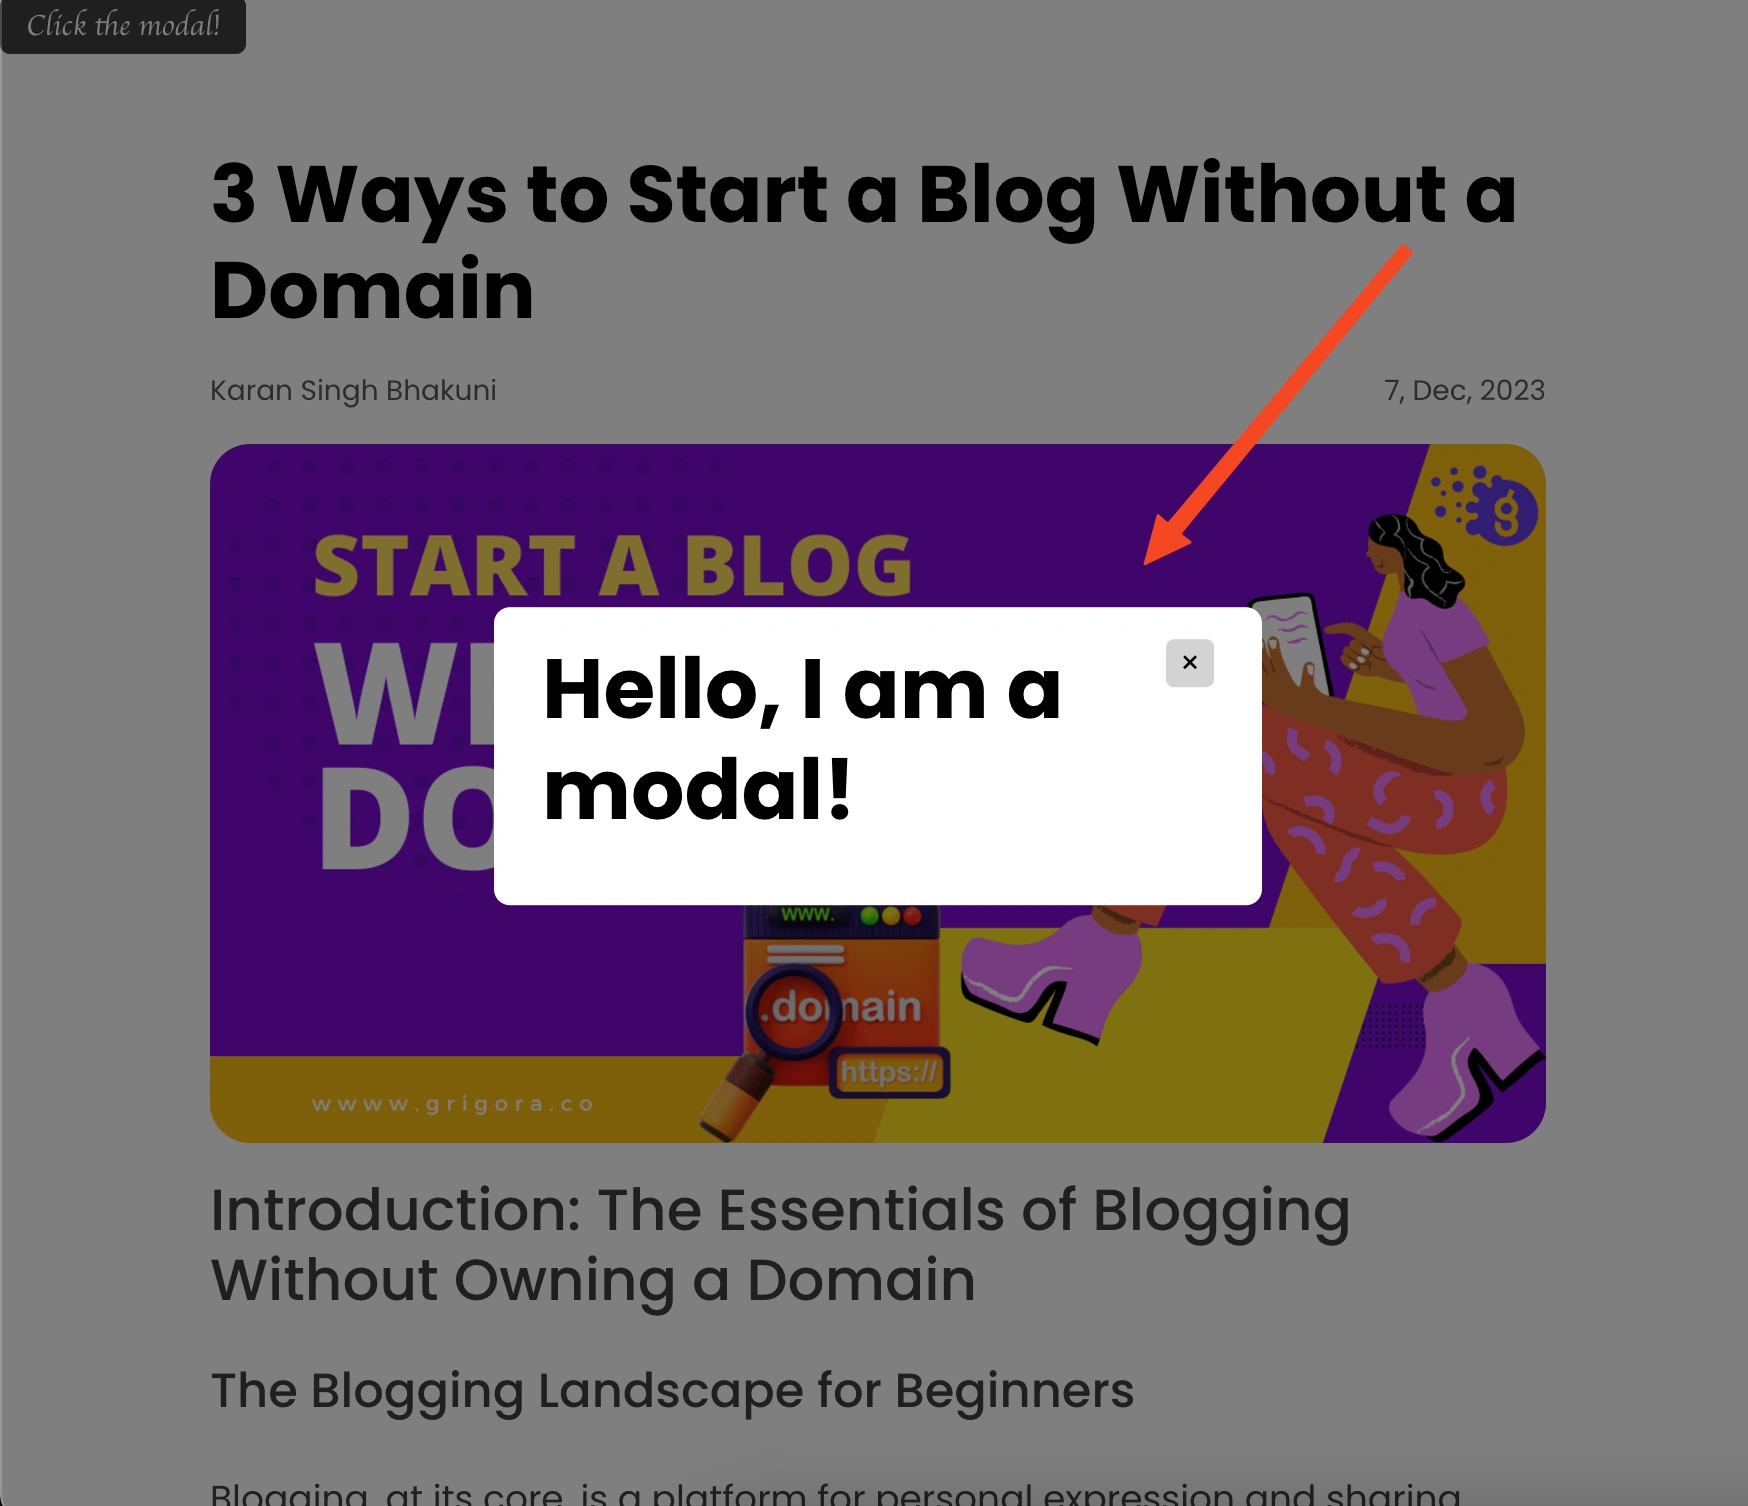
1. HTML Structure
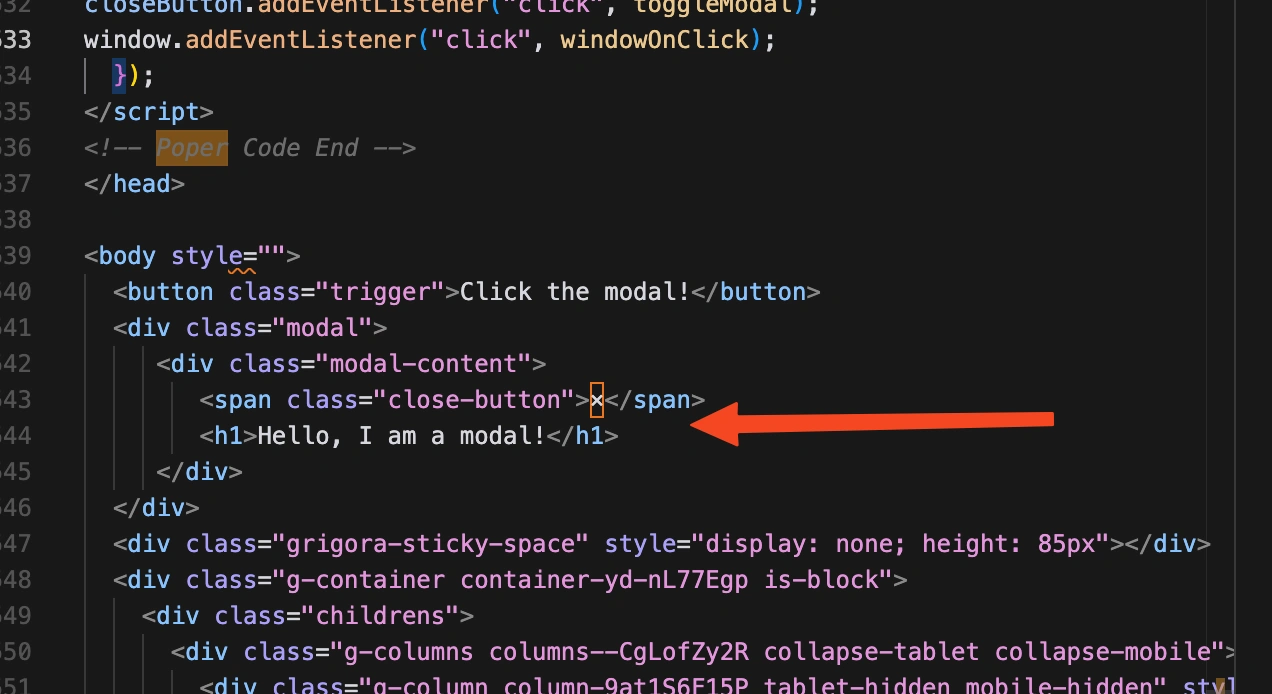
Here's the basic HTML code for a button that triggers the popup and the popup itself:
<button class="trigger">Click the modal!</button> <div class="modal"> <div class="modal-content"> <span class="close-button">×</span> <h1>Hello, I am a modal!</h1> </div></div>2. CSS Styling
Now, add some CSS to style the button and the popup:
.trigger { text-align: center; padding: 7px 13px; background: #3e3e3e; color: #fff; font-size: 15px; outline: none; border: none; border-radius: 5px; font-family: cursive;} .modal { position: fixed; left: 0; top: 0; width: 100%; height: 100%; background-color: rgba(0, 0, 0, 0.5); opacity: 0; visibility: hidden; transform: scale(1.1); transition: visibility 0s linear 0.25s, opacity 0.25s 0s, transform 0.25s;} .modal-content { position: absolute; top: 50%; left: 50%; transform: translate(-50%, -50%); background-color: white; padding: 1rem 1.5rem; width: 24rem; border-radius: 0.5rem;} .close-button { float: right; width: 1.5rem; line-height: 1.5rem; text-align: center; cursor: pointer; border-radius: 0.25rem; background-color: lightgray;} .close-button:hover { background-color: darkgray;} .show-modal { opacity: 1; visibility: visible; transform: scale(1.0); transition: visibility 0s linear 0s, opacity 0.25s 0s, transform 0.25s;}3. JavaScript Logic
Finally, add the JavaScript to make the popup work:
var modal = document.querySelector(".modal");var trigger = document.querySelector(".trigger");var closeButton = document.querySelector(".close-button"); function toggleModal() { modal.classList.toggle("show-modal");} function windowOnClick(event) { if (event.target === modal) { toggleModal(); }} trigger.addEventListener("click", toggleModal);closeButton.addEventListener("click", toggleModal);window.addEventListener("click", windowOnClick);
This code adds a click event listener to the button, which toggles the show-modal class on the popup. This class is what makes the popup visible.
As you can see, creating popups from scratch requires a lot of manual effort, especially when it comes to adding animations, updating popups, and managing cookies to prevent repeated displays.
Troubleshooting Common Popup Problems
Popup Doesn’t Show: Ensure the button’s class (e.g.,
.trigger) matches the JavaScript selector. Check the browser console for errors.Popup Won’t Close: Confirm the
.close-buttonhas an event listener attached.Not Mobile-Friendly: Add media queries like
@media (max-width: 600px) { .modal-content { width: 90%; } }.
Poper vs. Custom Code: Which Should You Choose?
| Feature | Poper | Custom Code |
|---|---|---|
| Ease of Use | Beginner-friendly | Requires coding |
| Customization | Limited to templates | Fully customizable |
| Maintenance | Automatic updates | Manual updates |
| Advanced Features | Built-in integrations | Requires extra code |
Poper is ideal for quick setups and advanced features, while custom code suits developers who need unique designs.
My Recommendation
While you can create popups with custom code, I recommend using Poper. It's much easier to manage and update your popups, plus it offers more advanced features like targeting and integrations without all the extra coding. This will save you a lot of time and hassle in the long run.
Frequently Asked Questions
Can I use Poper with WordPress or Squarespace?
Yes, paste the Poper code into the
<head>section via your platform’s custom code settings.How do I make my popup accessible?
Add ARIA attributes (e.g.,
role="dialog") and ensure keyboard navigation withtabindex.Can I trigger the popup on scroll?
With custom code, use
window.onscrollto detect scroll position; Poper offers this natively.

