

Building your email list is fundamental for connecting with your audience, promoting content, and driving sales. Mailchimp is a popular choice for email marketing, but how do you effectively capture subscribers directly from your website? The answer often lies in embedding a signup form.
This guide explains exactly how to add a Mailchimp embed form to your website. We'll cover Mailchimp's built-in method first, and then show you how using Poper allows you to create highly customized, targeted signup forms that integrate perfectly with Mailchimp – giving you much more design freedom and engagement power.
What you'll learn:
How to find and customize Mailchimp's native embed forms.
How to add the standard Mailchimp form code to your website.
Limitations of Mailchimp's standard forms.
How to create beautiful, high-converting signup forms with Poper and integrate them with Mailchimp.
Tips for maximizing your signup form conversions.
Mailchimp Embed Form using Poper
Getting your Mailchimp list growing directly from your website is a key goal for many businesses. Here’s how I recommend setting it up using a Poper embed.
Step 1: Get Started with Poper
First things first, you'll need a Poper account. If you haven't already, head over and sign up. This gives you access to all our tools for creating embeds, popups, and more to engage your site visitors.
Step 2: Add Your Website and Start a New Embed
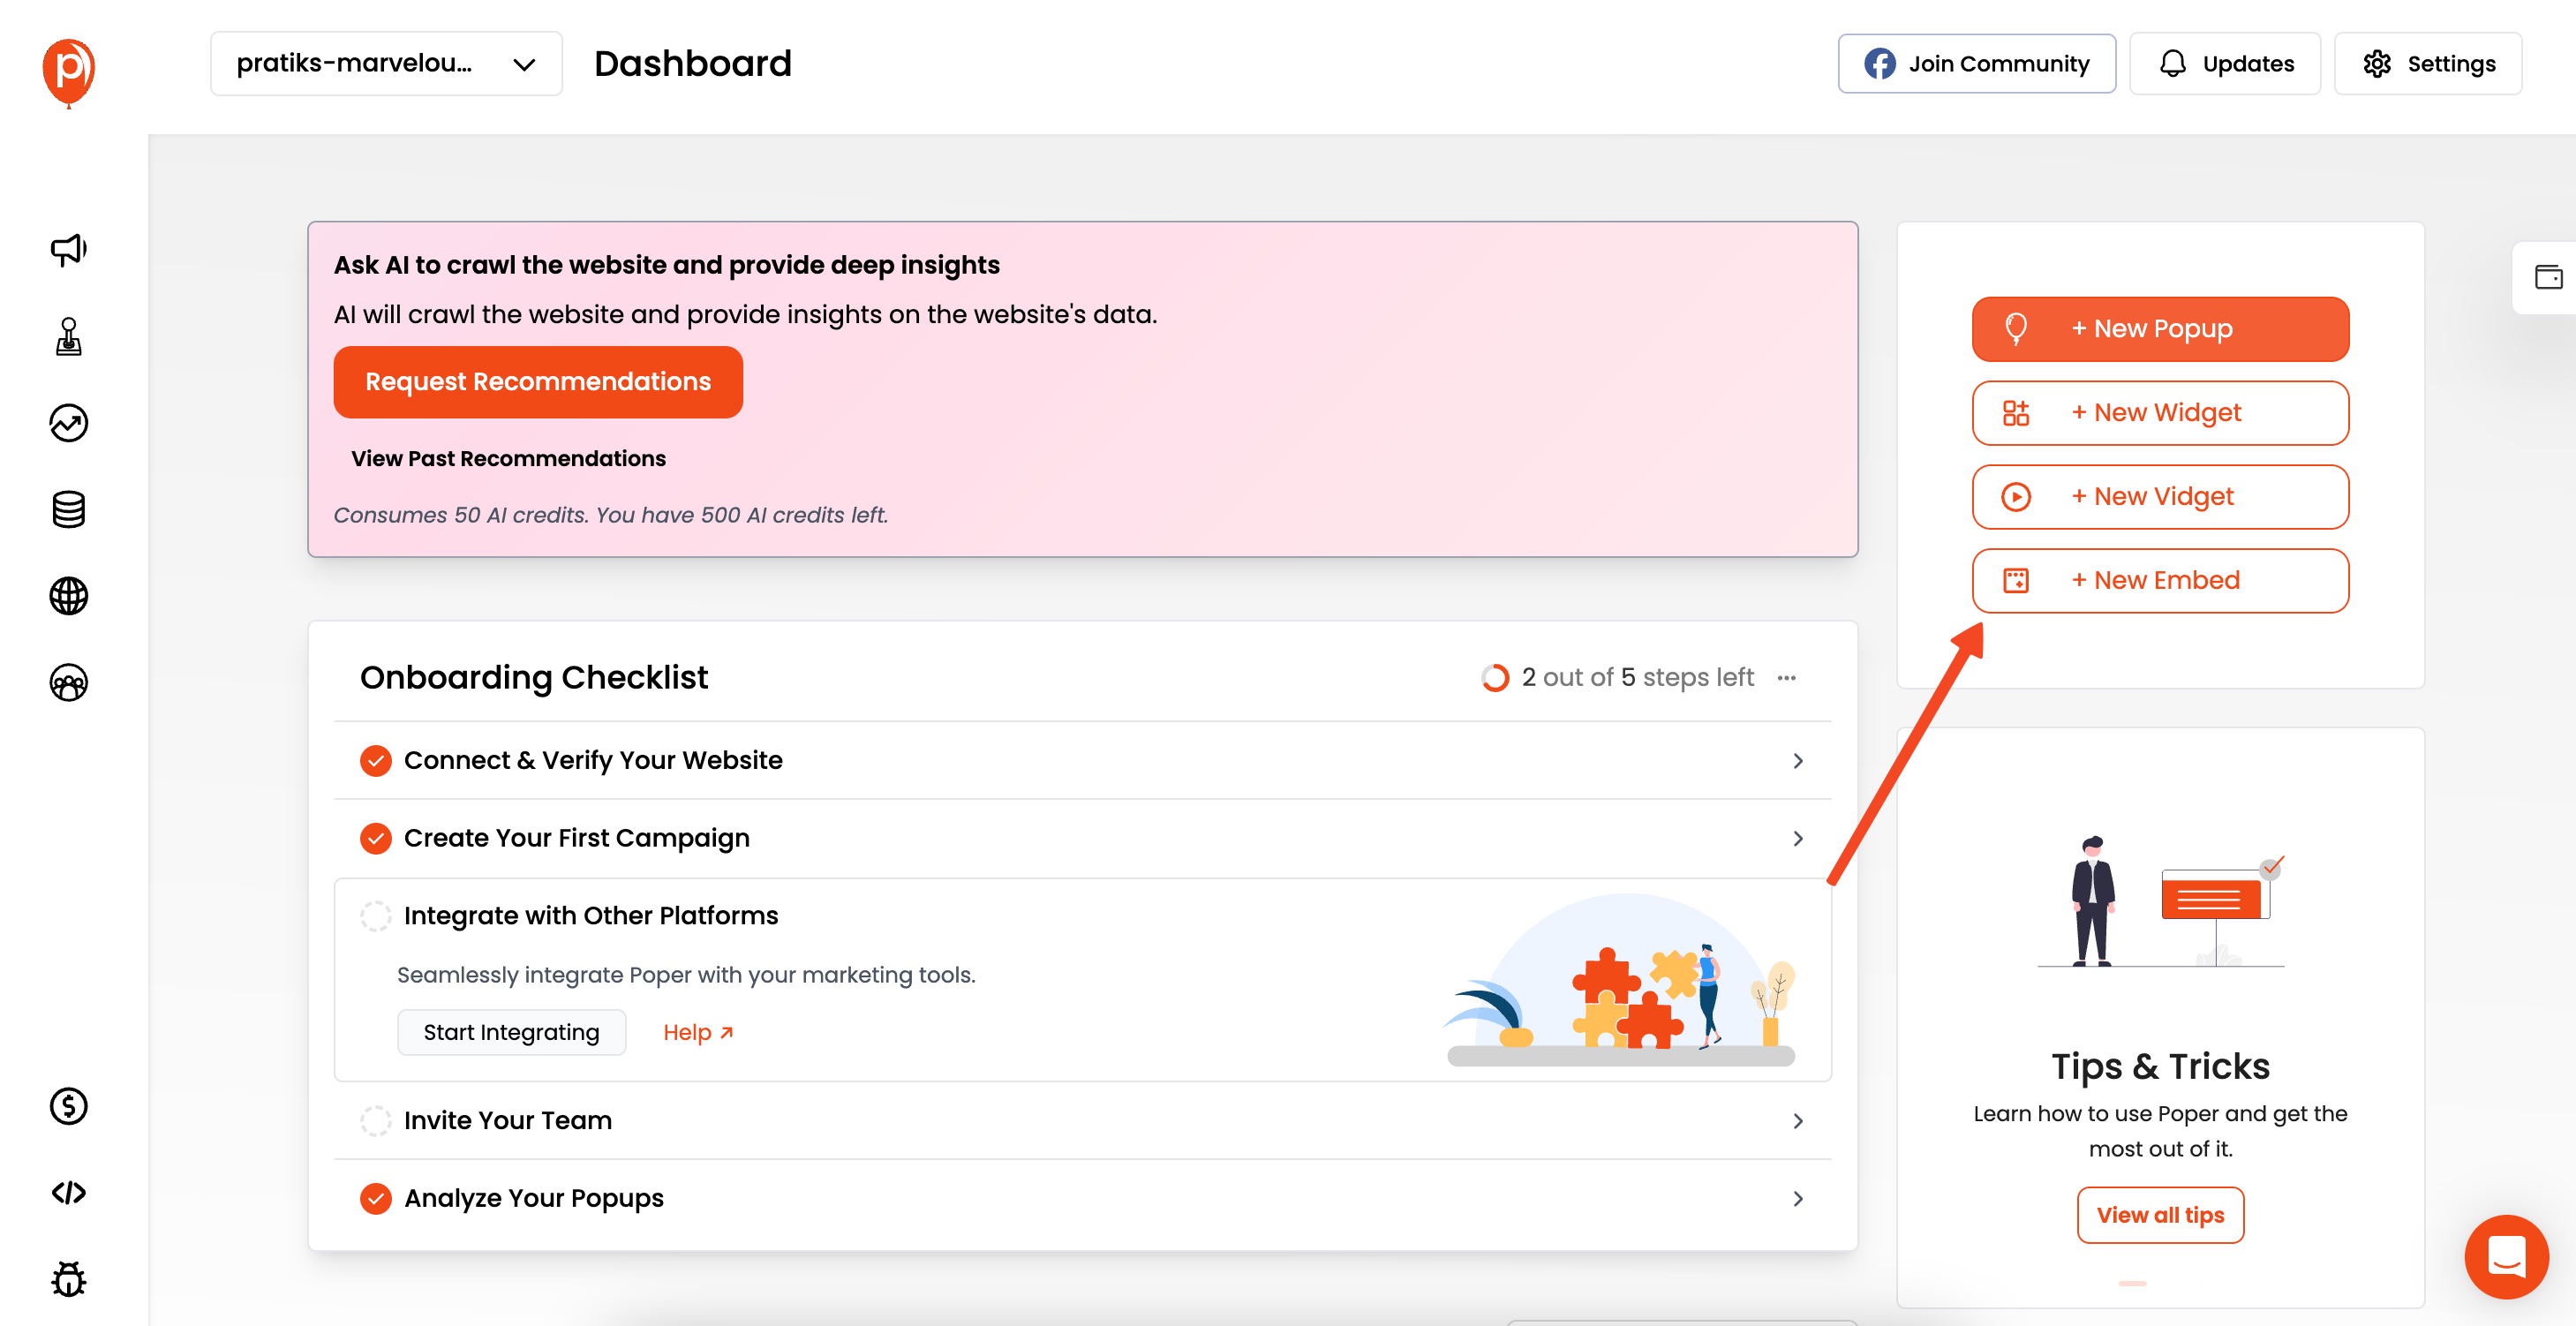
Once you're logged in, add your website domain in the Poper dashboard. This tells Poper where your embeds will live. After that, look for the button to create a new campaign and select the '+ Embed' option. This is where the magic begins! Or you can start with "+ Popup" and then convert Popup to Embed.
Step 3: Select a Newsletter Template
Click the 'Choose from Templates' button. We have a library full of designs ready to go. Use the search bar and type "newsletter" to find options specifically for email signups.
Pick one that visually fits your website's style – this helps it feel like a natural part of your page.
Step 4: Customize Your Embed's Look and Feel
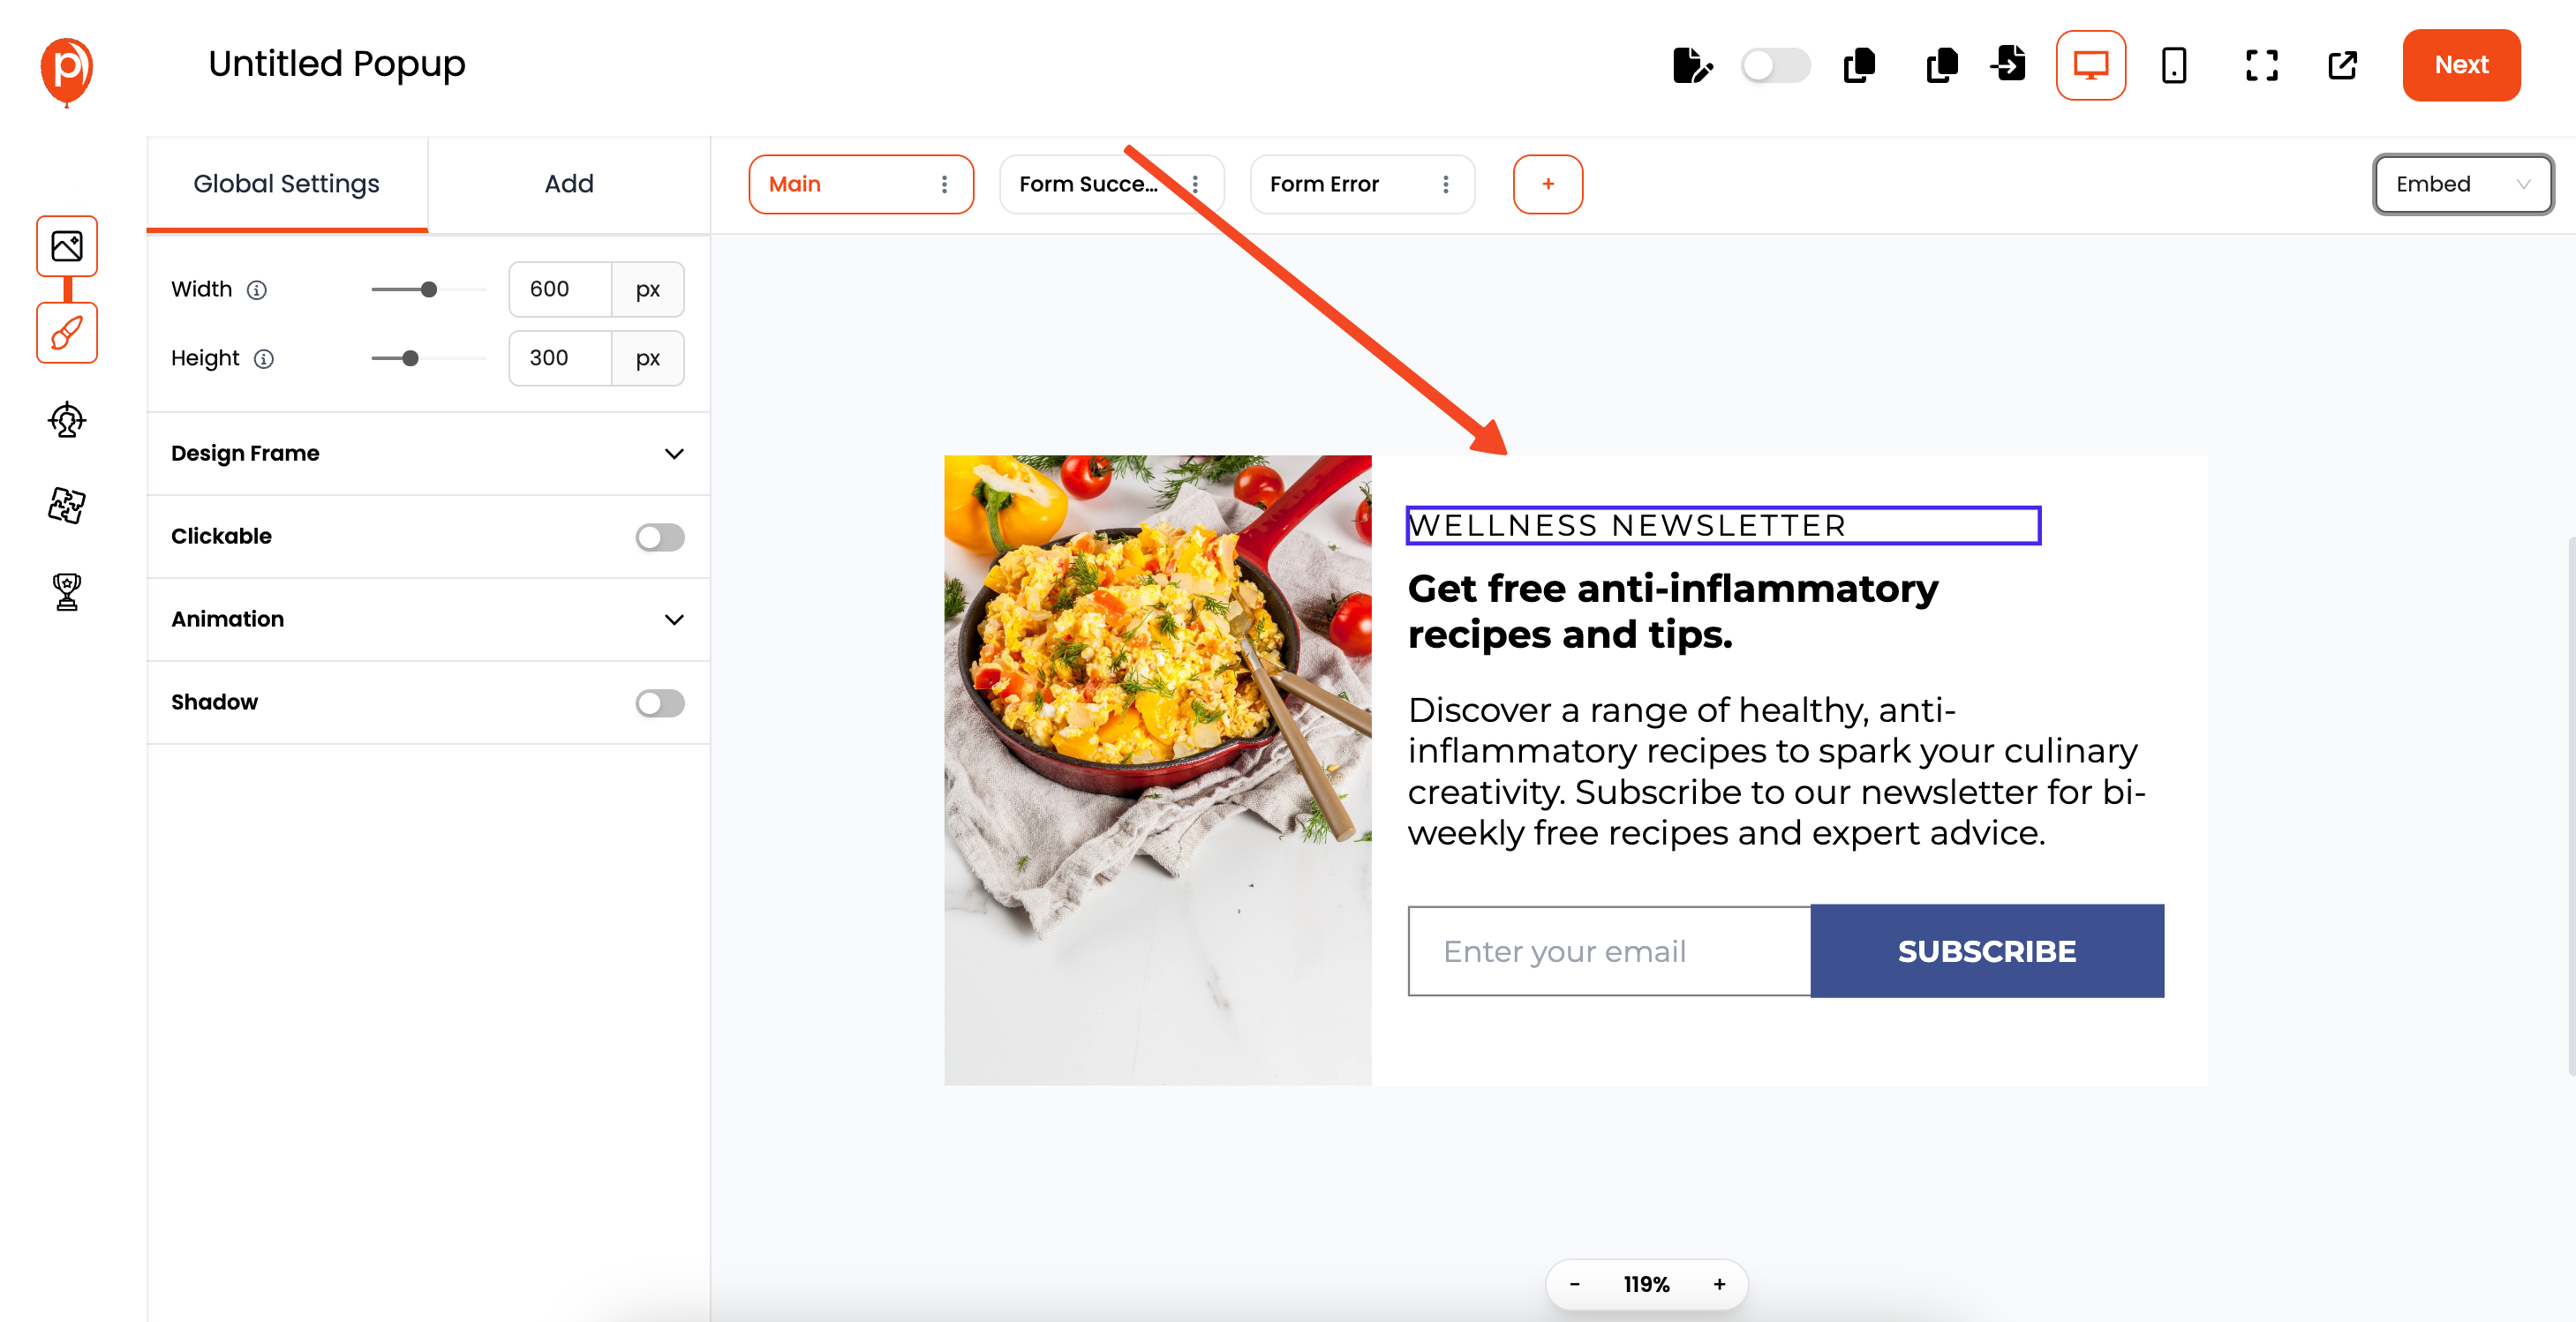
Now you'll be in our embed editor. Here, you can adjust fonts, colors, text, and images to perfectly match your brand.
Take a few minutes to make it look just right. A well-designed embed is much more likely to catch someone's eye.
Step 5: Set Up Your Display Conditions
Click 'Next' to move to the 'Display Conditions' page. This is powerful! You can choose exactly where on your site the embed appears (e.g., only on blog pages) and who sees it (e.g., first-time visitors).
You can also decide its position on the page or use custom code for precise placement. Think about where your audience is most likely to sign up.
Step 6: Connect Your Embed to Mailchimp
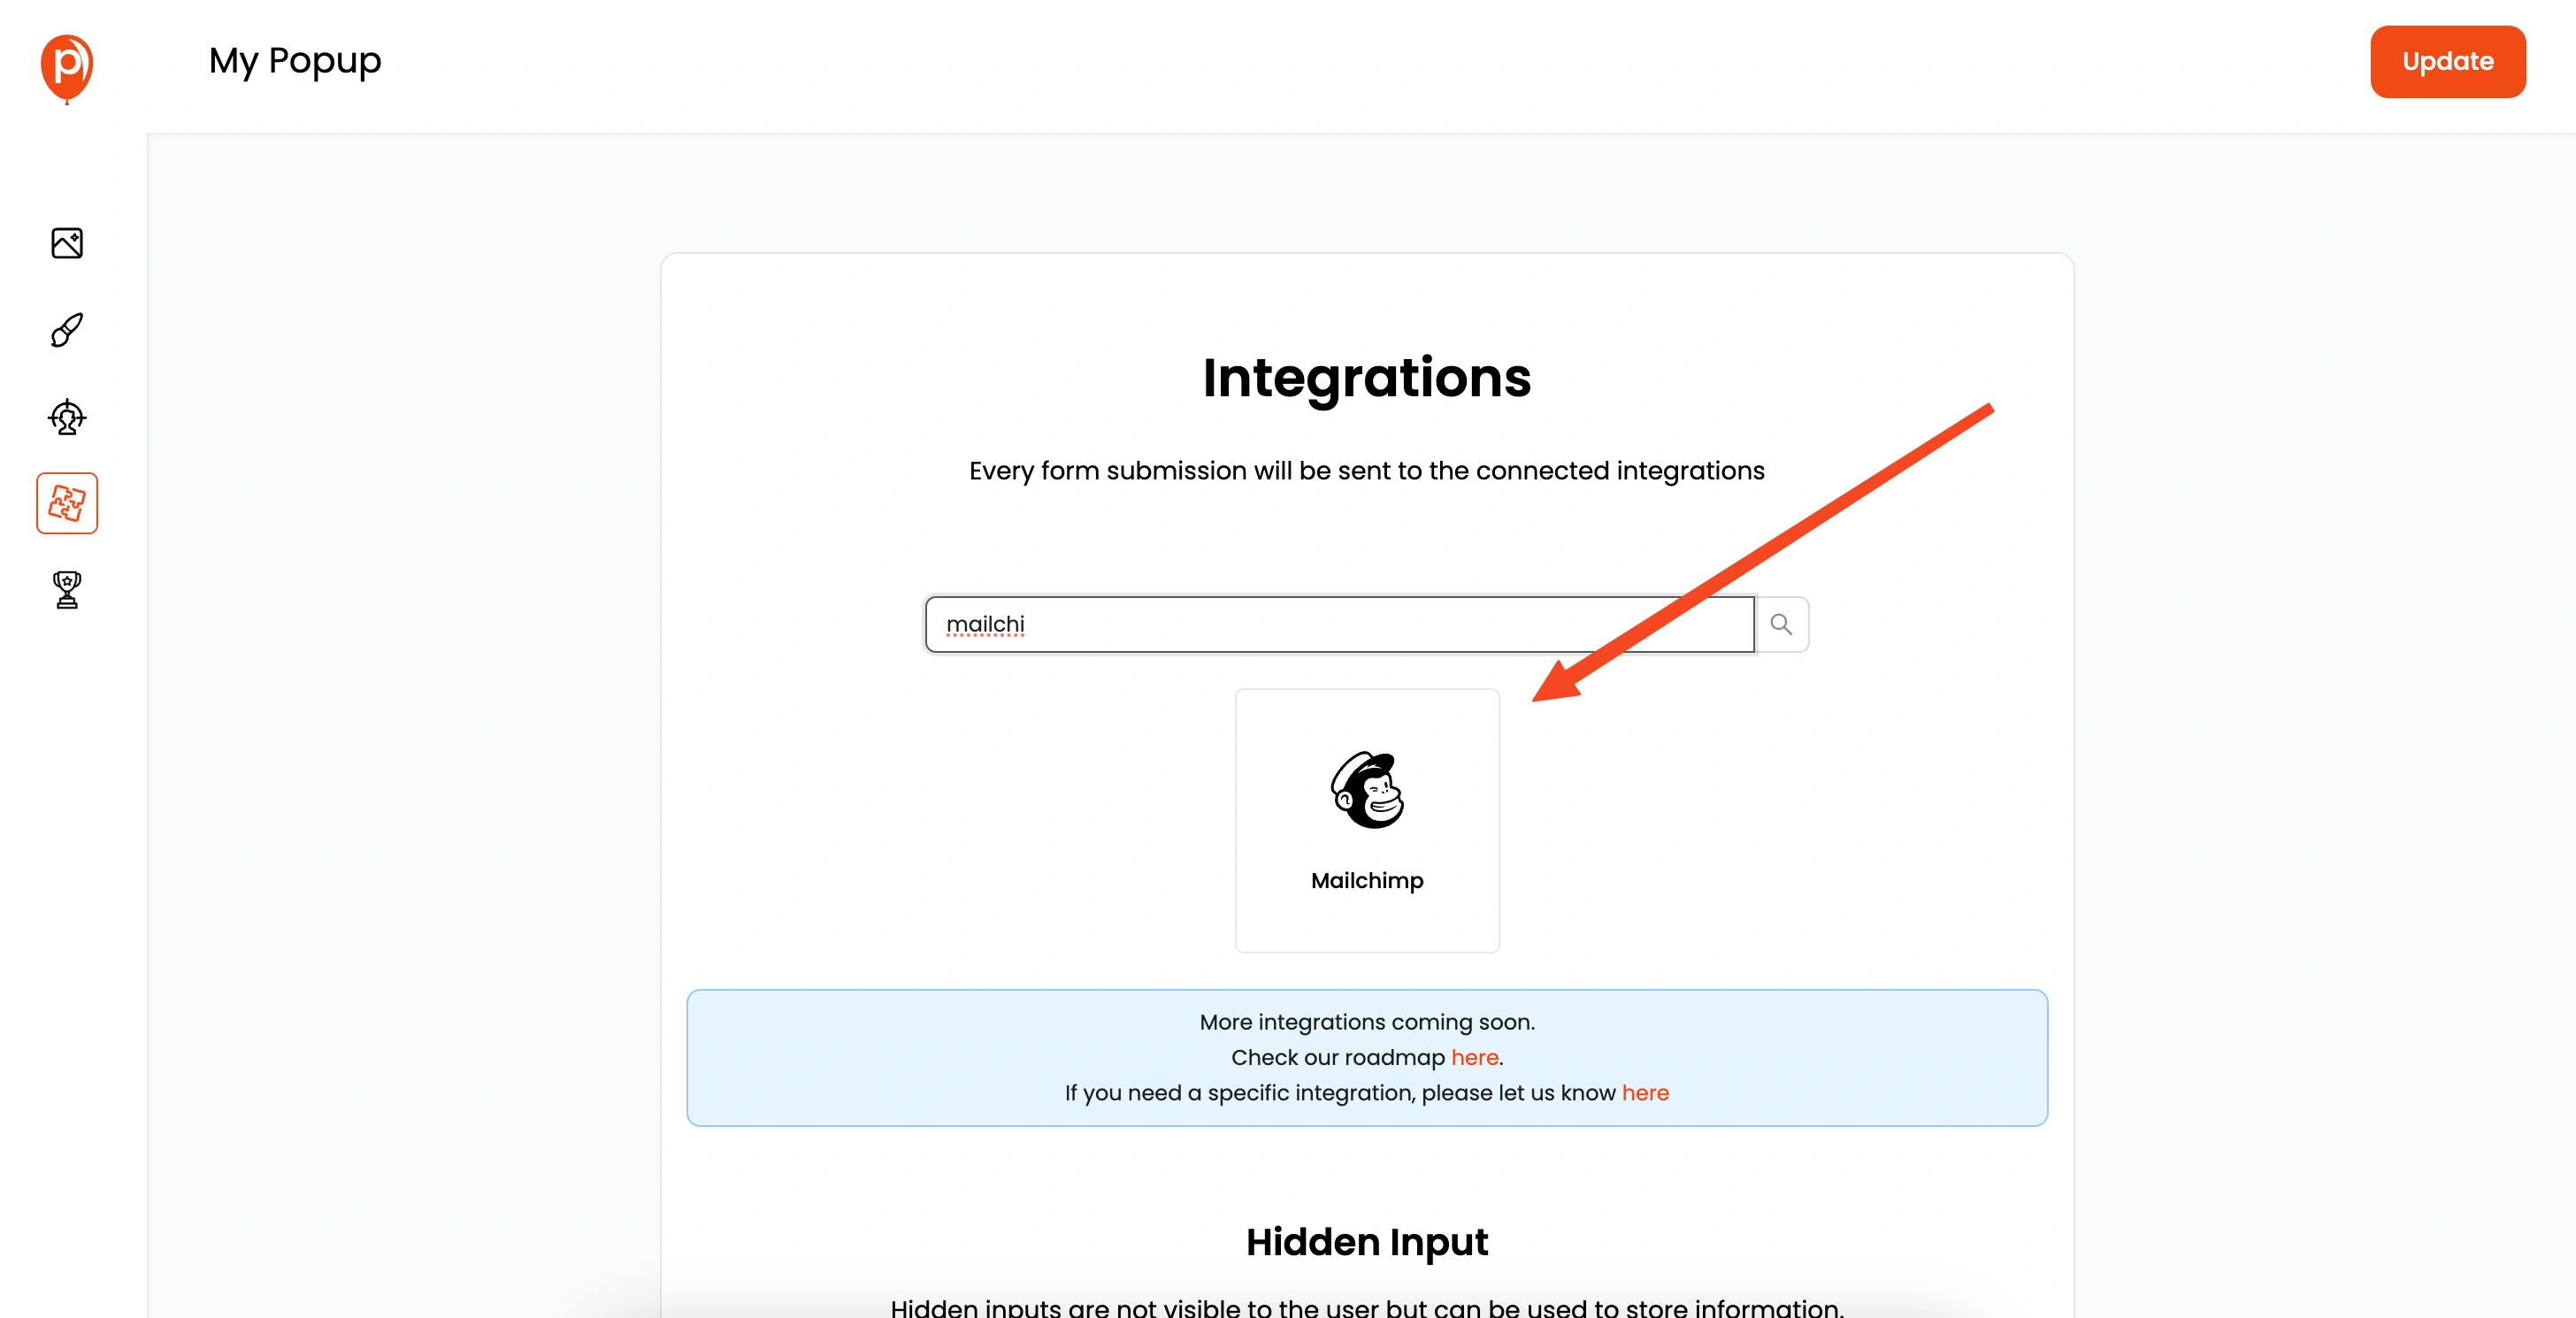
Hit 'Next' again to get to the 'Integrations' section. This is where we link Poper to other tools. Find and select 'Mailchimp' from the list of available integrations.
Step 7: Authenticate Your Mailchimp Account
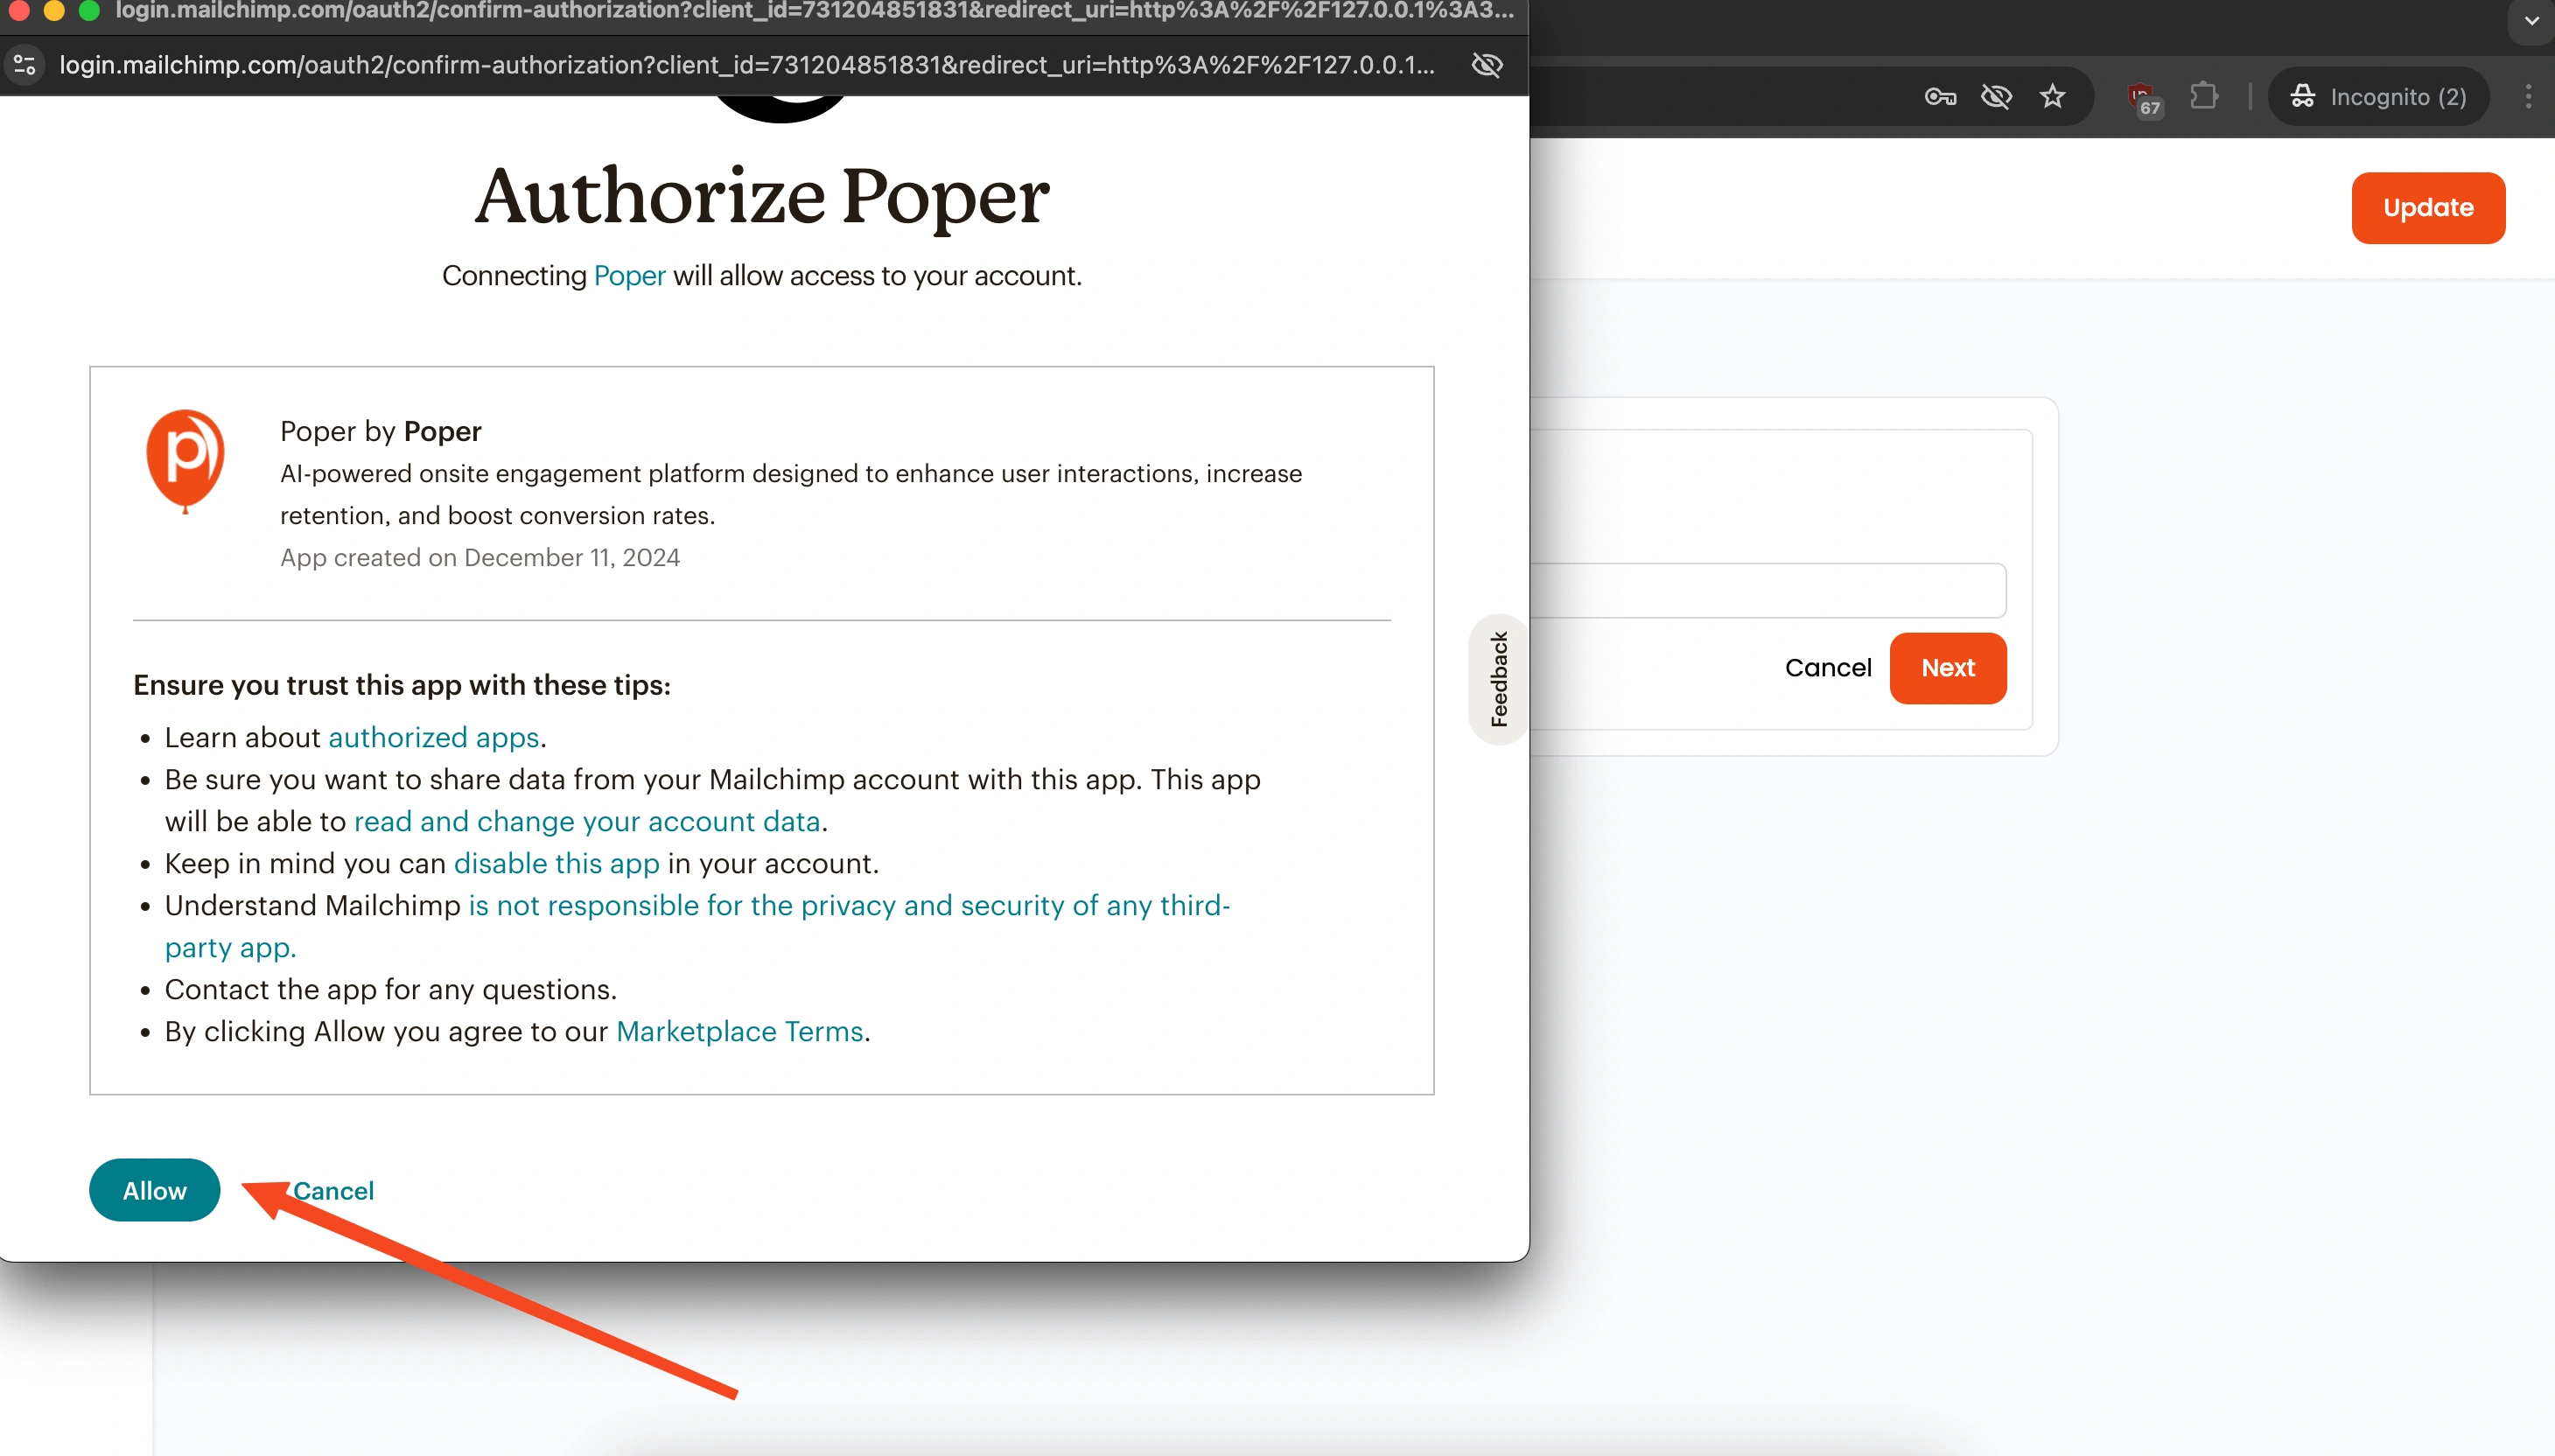
Give your connection a recognizable name (like "My Website Mailchimp") and click 'Next'. Poper will then prompt you to log in to your Mailchimp account securely. This step grants Poper permission to add contacts to your list.
Step 8: Choose Your Mailchimp List and Add Tags
Once connected, you'll need to tell Poper exactly where to send new subscribers. Select the specific Mailchimp audience (list) you want to add contacts to.
You can also add tags here, which is super helpful for segmenting your audience later (e.g., tag them with "Website Embed Signup").
Step 9: Map Your Form Fields to Mailchimp
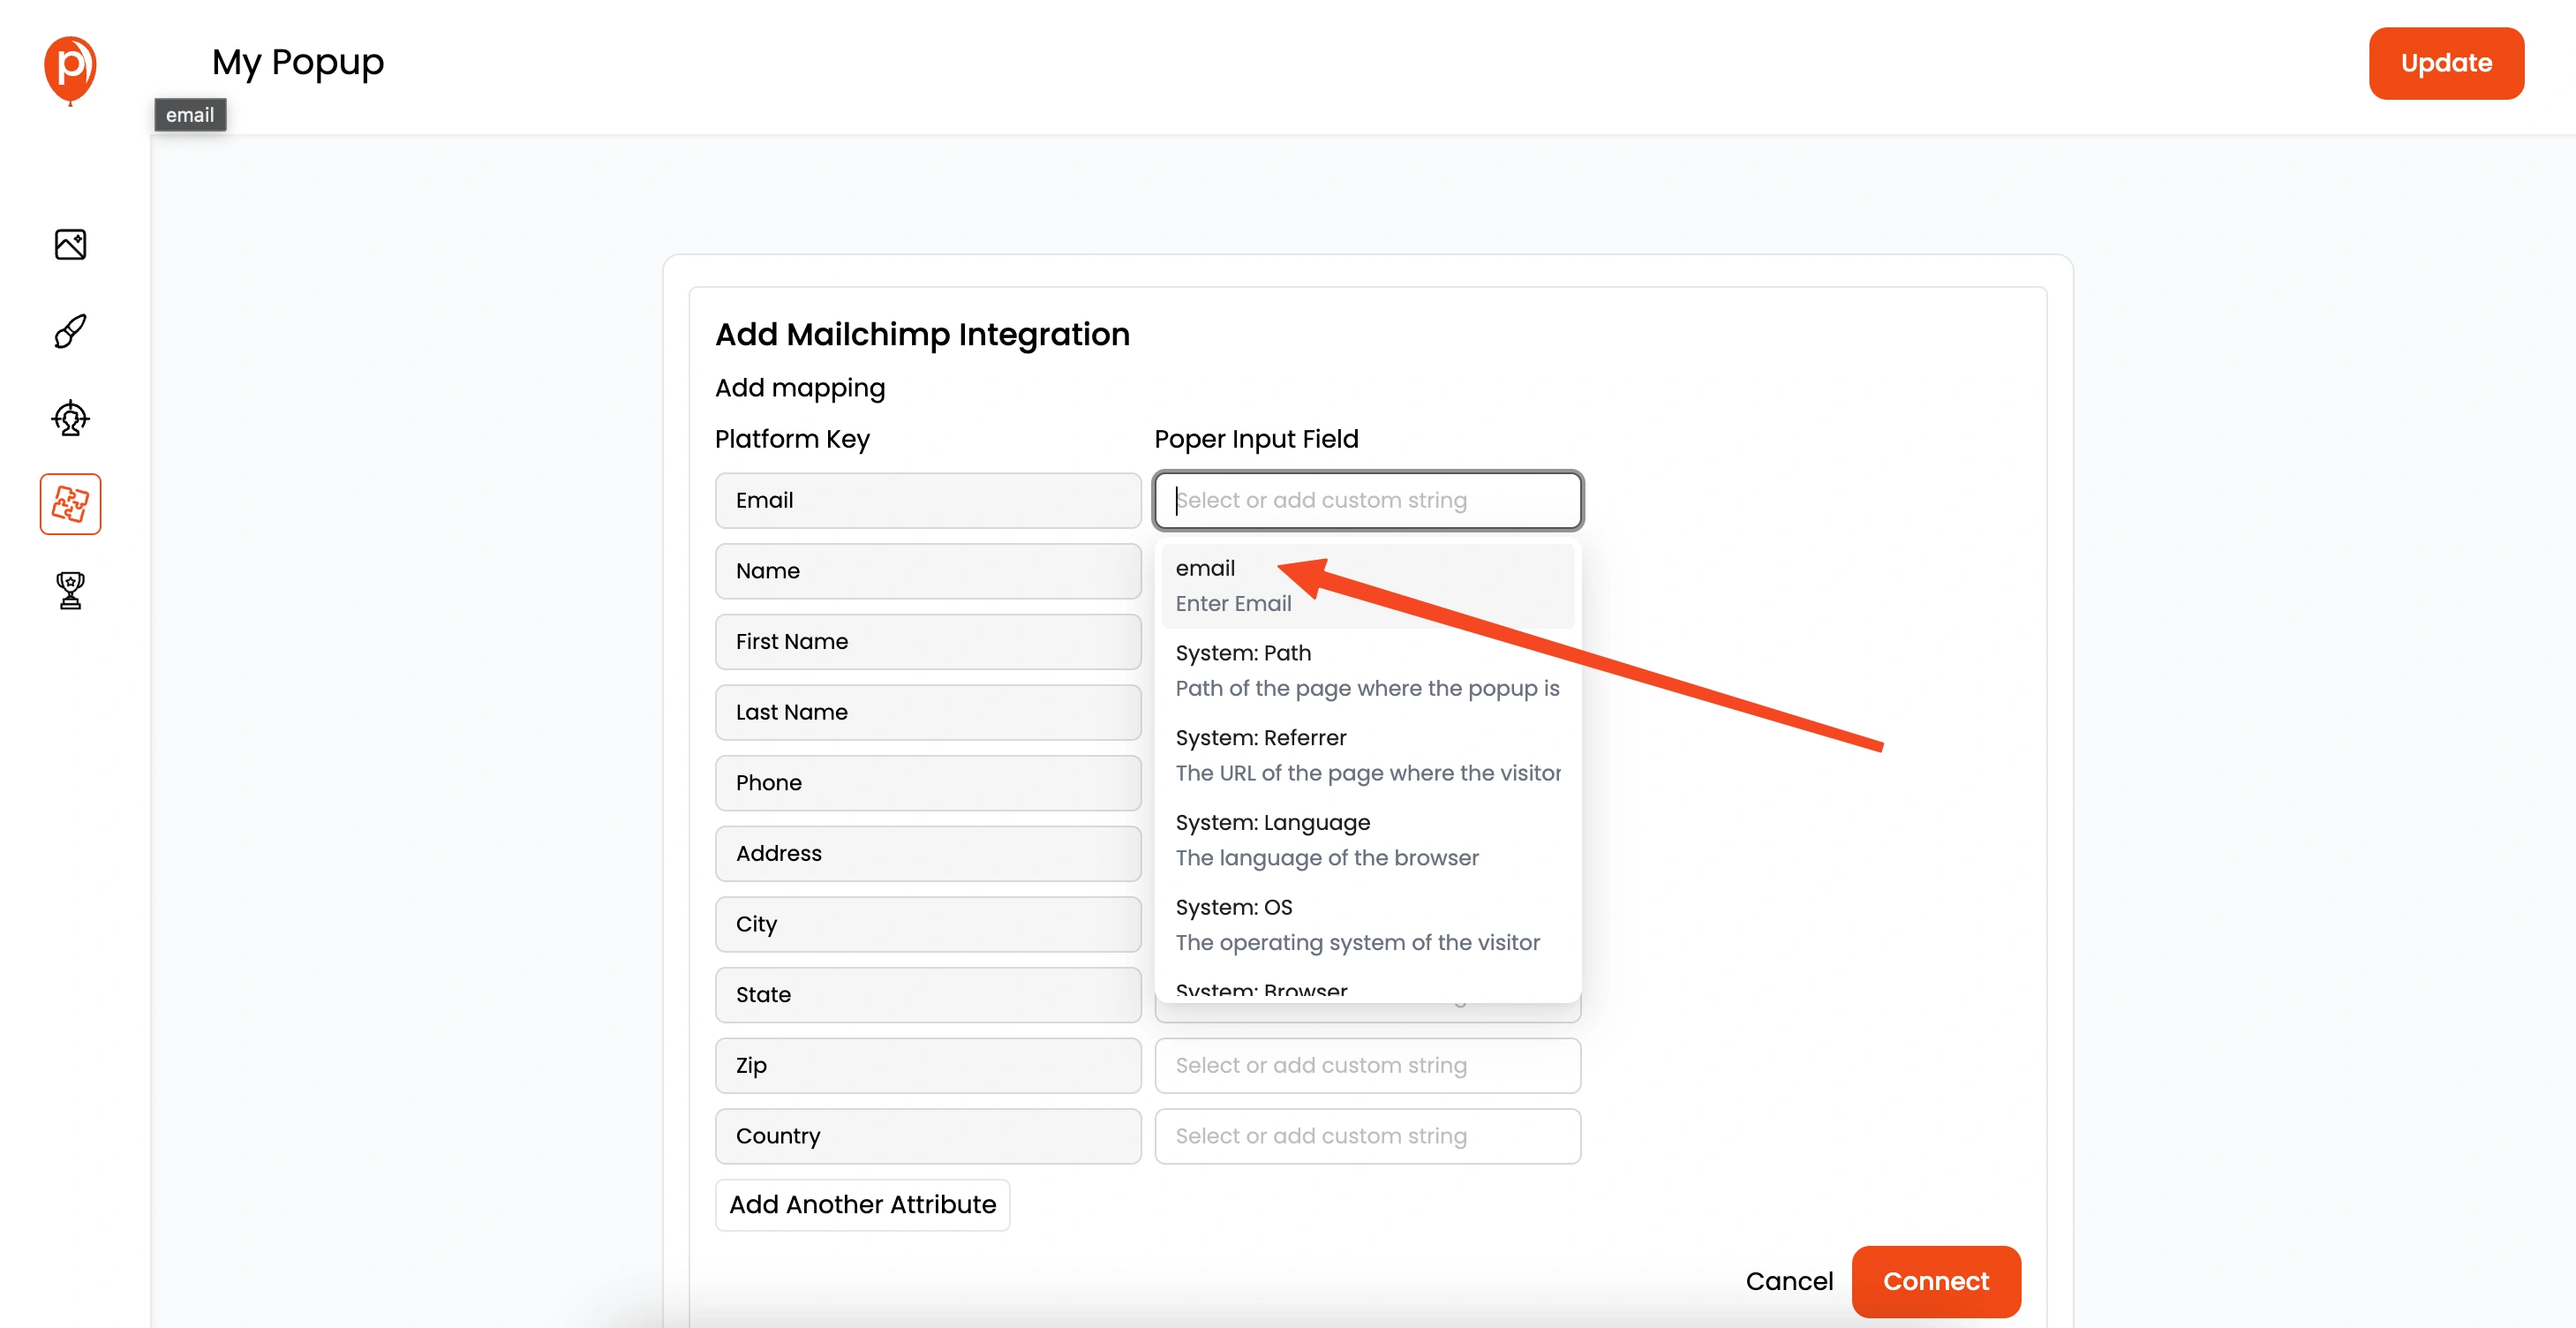
This step is crucial for making sure the data collected (like email address, name, etc.) goes into the correct fields in Mailchimp.
Match the fields from your Poper embed form to the corresponding fields in your Mailchimp audience. It's usually straightforward, like matching 'Email' to 'Email'.
If you need more details on this, check out our dedicated Mailchimp integration guide here: https://support.poper.ai/en/articles/10095484-mailchimp-integration
Step 10: Add the Poper Code to Your Website
Nearly there! Save your integration settings. Now, navigate to the 'Code' or 'Installation' section within your Poper dashboard. You'll find a small snippet of code. Copy this code and paste it into the HTML of your website, usually just before the closing </body> tag. Most website platforms have an easy way to add custom code like this.
That’s it! Once the code is on your site, your Poper embed form will appear according to the display conditions you set. New signups will automatically sync directly into your selected Mailchimp list, complete with any tags you assigned. Happy list building!
Mailchimp Native Form vs. Poper Form: Quick Comparison
| Feature | Mailchimp Native Embed Form | Poper Form Integrated w/ Mailchimp |
| Design Customization | Very Limited | High (Drag & Drop Editor) |
| Form Types | Basic Embed Styles | Popups, Embeds, Widgets, Slide-ins |
| Targeting Rules | None | Advanced (Pages, Device, Geo, etc.) |
| Trigger Options | None (Always Visible) | Advanced (Exit, Scroll, Time, Click) |
| A/B Testing | No | Yes (Within Poper) |
| Integration Method | Copy/Paste HTML per form | Connect via API, Manage in Poper |
| Ease of Styling | Requires CSS knowledge | Easy (Visual Editor) |
| Central Management | No (Edit code per placement) | Yes (Poper Dashboard) |
Why Use Poper for Your Mailchimp Forms?
While Mailchimp's native forms are functional, Poper elevates your list-building strategy:
Superior Design: Create forms that perfectly match your brand identity.
Increased Conversions: Use targeted triggers (like exit-intent popups) to capture visitors at the right moment.
Better Targeting: Show relevant forms only to specific visitor segments or on specific pages.
Variety of Form Types: Go beyond simple embeds with popups, slide-ins, and more.
A/B Testing: Optimize your forms for the best performance.
No-Code Management: Design, target, integrate, and manage all your forms from one dashboard without touching code repeatedly.
Best Practices for Mailchimp Signup Forms
Clear Value Proposition: Tell visitors why they should subscribe (e.g., exclusive content, discounts, updates).
Keep it Simple: Ask only for essential information (Email is key, Name is often useful).
Placement Matters: Embed forms where they are relevant (end of blog posts, footer, dedicated landing page) or use popups strategically.
Mobile-Friendly: Ensure your forms look and work great on all devices (Poper forms are responsive).
Compelling Call-to-Action (CTA): Use clear, action-oriented button text (e.g., "Subscribe Now," "Get My Free Guide").
Set Expectations: Let users know what kind of emails they'll receive and how often.
Conclusion: Supercharge Your Mailchimp List Building
Adding a Mailchimp embed form to your website is essential for list growth. While Mailchimp's native forms offer a basic solution, Poper provides the tools to create visually appealing, high-converting signup forms with advanced targeting and triggering options, all seamlessly integrated with your Mailchimp account.
Stop settling for basic forms. Take control of your design and strategy to capture more leads effectively.
Frequently Asked Questions (FAQs) about Mailchimp Embed Forms
Can I style the native Mailchimp embed form to match my website?
Customizing Mailchimp's native forms beyond the basic options requires significant CSS coding knowledge and can be complex. Using Poper provides a much easier visual drag-and-drop editor to fully customize the form's appearance to match your brand.
If I update my form in Poper, do I need to update the code on my website?
No! That's a major benefit of Poper. Once the main Poper script is installed on your site, you make all form design changes, targeting updates, and integration adjustments within your Poper dashboard. The changes reflect automatically on your site after you publish them in Poper.
Does Poper store the email addresses, or do they go straight to Mailchimp?
When you integrate Poper with Mailchimp, the subscriber data (email, name, etc.) collected through the Poper form is sent directly to your selected Mailchimp audience via the API. Poper may track form submission events for its analytics, but the core contact data resides in Mailchimp.
Can I use Poper to create forms for other email services besides Mailchimp?
Yes! Poper integrates with various popular email marketing services, CRM systems, and tools via direct integrations or platforms like Zapier. Check Poper's integrations list for compatibility with your specific tools.
Is using Poper to create Mailchimp forms free?
Poper offers various pricing plans, often including a free tier with limitations on features or traffic volume. Integrating with Mailchimp might be available on free or paid plans depending on Poper's current offerings. Check their pricing page for details. Using Mailchimp's native embed forms is free as part of your Mailchimp subscription.

